Using Swim Training Aids Correctly: Paddles, Pull Buoys, Fins, Snorkels — A Coach's Guide to Using Tools the Right Way
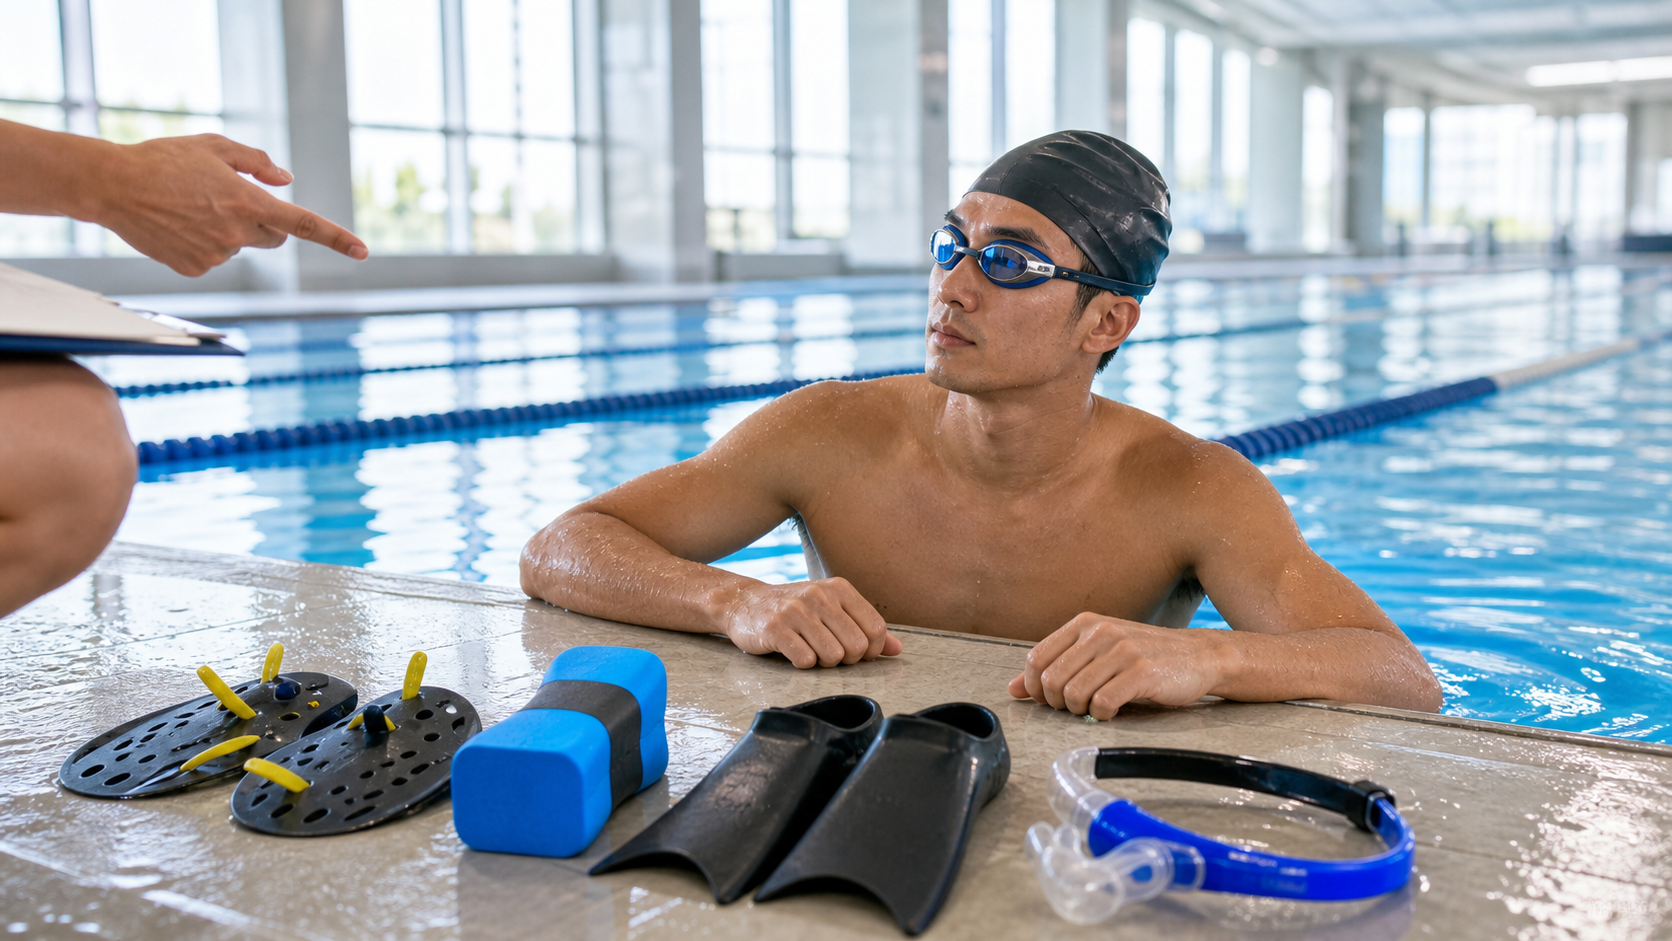
Coach’s Opening: Your Training Bag Hides Four Misunderstood Tools
Over the years of coaching, the two extremes I see most often at poolside are these.
The first is the “bare-bones purist”—they won’t touch any aid, believing that using tools is cheating. The result? Three years of swimming with flawed technique that never gets corrected, and they fall apart the moment they hit open water. The second type is more common—I call them “pull buoy addicts.” These swimmers clip the buoy between their thighs, strap on the paddles, happily knock out 2 km, then go home and tell their wife, “Great session today, felt super fast.” The problem? The day they take the tools off, their pace drops 15 seconds per 100 m, and their stroke looks exactly the same as it did three months ago.
I once coached a student, A-Zhe, preparing for a 113 half-ironman (1.9 km swim). He was a textbook case of the second type. When he first came to me, he proudly claimed he could swim 1:40 per 100 m in the pool. I asked him to pack away the buoy and paddles and swim a single 100 m with no gear—2:05, and his hips started sinking at the 60-meter mark. His face went green. It wasn’t his fault; nobody had taught him: Aids are meant to “expose problems and amplify training stimulus,” not to mask issues and make the numbers look good.
In this article, I want to break down, from a coach’s perspective, the four most common swim aids—hand paddles, pull buoys, fins, and snorkels—one by one. What each one is for, how much of your weekly volume it should occupy, and which misuse patterns will leave you more injured than improved. It’s a long read, but if you’re prepping for Taitung 226, Penghu 113, or any triathlon, I promise this will save you two years of going down the wrong path.
Build the Mindset First: The Three Roles of Aids
Before we break down each tool, let’s establish a mental model. Any swim aid plays only one of three roles in training, and a good coach knows exactly “why I’m using it for this set.”
- Overload: Making a muscle group or movement bear a greater load than bare-bones swimming—e.g., paddles increase the surface area of your pull, fins add resistance to your kick. The goal is overload: building strength and power.
- Isolation: Temporarily removing the work of one body part so you can focus on another. For example, a pull buoy “switches off” your legs so you only train the upper-body pull; a snorkel removes “breathing” from the equation so you can focus on hand path and body roll.
- Feedback: The tool itself amplifies your errors, forcing you to correct them. For instance, if your hand entry angle is wrong with paddles, water “sprays” off the edge of the plate, and your palm instantly feels the imbalance—more effective than a coach yelling “feel the catch!” a hundred times.
The same tool, used correctly, is feedback; used wrongly, it becomes a way to mask flaws. That’s the core of this entire article. A pull buoy can help you isolate the upper body for strength work (good), or it can become an excuse to avoid training your legs and body balance (bad). The difference comes down to “whether you’re aware of what you’re doing.”
Keep this three-role model in mind as we break down each tool.
There’s also a scientific point that’s often overlooked and needs to be stated clearly: Aids change the distribution of “drag” and “buoyancy”—not your body’s actual capability. When you swim faster with a buoy than without, that speed difference isn’t you getting stronger; it’s the tool reducing drag and lifting your bodyline. That sounds obvious, but many athletes psychologically can’t separate “what the tool gives” from “what you actually have,” so they mistake the tool’s dividend for their own ability. Throughout this article, you’ll keep seeing me stress “reconciliation”—using bare-bones swimming to verify the results of an aid-based workout—and this is why. The ultimate goal of training is to internalize the temporary benefits a tool gives you into abilities you can execute with no gear at all.
一、Hand Paddles: Power Amplifiers, and Shoulder Killers
Training Purpose
The principle behind hand paddles is simple: they increase the effective surface area of your hand. With a larger area, each stroke has to push more water, so your lats, deltoids, triceps, and serratus anterior have to work harder. This is straightforward “resistance training in the water.” Research and coaching practice both indicate that paddles, by enlarging the hand’s surface area, force the shoulder, elbow, and back muscles to work harder through the entire pull, thereby building pull strength and power (Your Swim Log).
But the truly undervalued benefit of paddles is technical feedback. When your entry angle is off, your catch is too late, or your pull path deviates, the edge of the plate makes the water churn, and your wrist feels clear instability. This instant tactile feedback is the best tool for correcting a “weak catch.” I often tell my athletes: paddles aren’t for swimming faster—they’re for “feeling the water.”
Common Misuse
Of all the aids, this one has the most severe consequences when misused—because it’s directly tied to swimmer’s shoulder.
Research on paddles and shoulder injury is “conditionally supportive.” On one hand, used correctly, they strengthen the muscles around the shoulder and help build good mechanics; on the other, paddles significantly increase the load on the shoulder joint, and overdoing it fatigues the peri-shoulder muscles faster, raising injury risk (Your Swim Log Ultimate Guide). A systematic review also notes that the evidence linking paddles to shoulder pain is currently “conflicting,” meaning they aren’t inherently injurious—the key is “how you use them” (McKenzie et al., Scandinavian Journal of Medicine & Science in Sports, 2023).
The three most common misuses:
- Paddles too large: Many people buy the biggest plates, thinking more resistance equals more strength. Wrong. The larger the paddle, the greater the torque on the shoulder joint at the catch moment, and the higher the risk of anterior impingement. Beginners should start with a paddle close to palm size, or even slightly smaller.
- Using them for volume and speed: Grinding out long interval sets with paddles, the shoulder repeatedly takes high loads in a fatigued state—that’s the classic script for swimmer’s shoulder.
- Using them with flawed technique: If your pull already has a cross-over or insufficient high-elbow issue, paddles only amplify the damage of those errors. Fix the stroke first, then add the paddles.
Recommended Usage Ratio
My rule for athletes: Paddles should total no more than 15% of the swim volume in any given session, and never be used at the fatigued tail end of a workout. In a 3,000 m session, paddle work should be at most 300–450 m, placed in the early part of the main set while the body is still fresh.
二、Pull Buoy: The Upper-Body Isolation Tool, and the Biggest Source of Self-Deception
Training Purpose
Placing the buoy between your thighs provides buoyancy to lift your lower body. It serves two levels of function.
The first is isolating the upper body. By “turning off” the legs and not kicking, your arms, shoulders, and back must generate all the propulsion. This is pure upper-body strength and pull endurance training (Your Swim Log Buoy Guide). This is especially valuable for triathletes, because we rely on our legs for cycling and running—in the swim leg, we need to learn to “save the legs and rely on the upper body.”
The second level—and the one athletes should understand most—is experiencing what “good horizontal body position” feels like. The buoy lifts the hips and legs near the surface, aligning the body in a straight line and drastically reducing frontal drag. Research indicates that lifting the legs and flattening the body in the water can reduce frontal drag by up to about 80% (SwimGym). Some analyses also estimate that the reason you swim faster with a pull buoy is roughly 30–40% due to reduced drag, with the remainder coming from buoyancy and better body line (Train Daly).
Here’s the key point: The horizontal body line you “feel” with the buoy is exactly the target you should strive to replicate in naked swimming through core engagement and breathing rhythm. Used correctly, the buoy teaches you “how fast and efficient you are when your body is flat”; used incorrectly, you’re just enjoying that 80% drag reduction every day and taking it for granted.
Common Misuses
- Using the buoy for the entire main set: This is the most common misuse. The earlier example of A-Zhe illustrates this. It feels great swimming with the buoy and treating it as “today’s training,” but core stability, lower-body balance, and hip sinking during breathing are all masked by the buoy—you’ll never improve.
- Using the buoy to avoid leg training and kicking: Triathletes often say, “Anyway, I’ll wear a wetsuit in the race, my legs will float, so I don’t need to practice kicking.” Wetsuits do provide buoyancy, but in open water you still need kicking to maintain body line, turn, and stay stable in waves. If you never train kicking, conditions like the swells off Taiwan’s northeast coast will expose you immediately.
- Clamping the buoy too low: Placing it near the knees instead of the upper thighs reduces the lift effect and distorts your body position.
Recommended Usage Ratio
The buoy can make up a relatively high proportion, because it is primarily a strength/technique tool, but I still recommend that pull (including buoy) segments in a single session not exceed 30–40%, and be sure to pair it with paddles or a resistance band to increase upper-body load and prevent it from becoming rest. At least 60% of the remaining session must include full swimming (swim) and pure kicking (kick).
III. Fins: Accelerators for Kicking and Body Line
Training Purpose
Fins are often misunderstood as a tool to “make you swim fast and have fun,” but in professional training they serve three very legitimate purposes.
- Strengthening kick power and ankle flexibility: Fins increase the surface area of the foot, creating more resistance when kicking, which strengthens the hip flexors and thighs; they also “force” your ankles to point downward (plantarflexion), which over time improves the stiff ankle mobility common in many land-based athletes (especially runners). Many triathletes in Taiwan who transition from running or cycling have ankles as stiff as boards—fins are an excellent progressive tool.
- Increasing speed and practicing technique at high velocity: With fins, you swim faster, allowing you to practice stroke tempo, bilateral breathing, and body roll at “near-race or faster” speeds without your form breaking down due to fatigue.
- Assisting with back float and dolphin kick practice: For beginners still building body line, the propulsion from fins makes it easier to maintain a horizontal position—a great tool for building confidence and feel.
Common Misuses
- Using them for long-distance main sets: Swimming 1,500 meters with fins feels great, but your kick tempo is completely different from swimming without them, and the rhythm you develop won’t transfer to racing.
- Using long fins for speed and hurting your knees: Fins that are too long and stiff place extra torque on the knees, especially with improper kicking technique (knee-driven instead of hip-driven). For training, prioritize short training fins, which more closely mimic natural kick rhythm and are kinder to your joints.
- Relying on fins to mask weak kicking: Some people can never generate a decent kick and just rely on fins to get by. Fins should be a “progressive ladder for leg training,” not a “permanent wheelchair.”
Recommended Usage Ratio
Fin segments should make up 15–25% of a single session, mainly in warm-ups, technique drills, and short high-speed intervals. For long-distance main sets, swim without fins as a rule.
IV. Front Snorkel: The Hidden Ace for Technique Correction
Training Purpose
The front snorkel (with the tube extending from the front of the forehead) is the most underrated of the four aids, yet I consider it the highest value-for-money tool for technique correction.
Its core value is: removing “breathing” from the equation. Breathing is the part of freestyle that most easily disrupts your stroke—to get your mouth out of the water, many people lift their head, twist their shoulders, shorten one side of the stroke, and become asymmetrical. With a snorkel, your head can stay neutral the entire time, eyes looking at the pool bottom, allowing you to focus 100% on: catch trajectory, high elbow, body roll, and left-right symmetry.
For triathletes still building technique, I almost always include snorkel drills. It allows athletes to “feel” for the first time that their bilateral strokes are actually asymmetrical—because the interference of breathing is removed, flaws become impossible to hide. This is the “isolation and simplification” role mentioned earlier.
Common Misuses
- Using it to avoid practicing breathing: This is the biggest contradiction. The snorkel is comfortable, and after a while you’ll love the feeling of “not needing to breathe,” resulting in zero breathing practice. There’s no snorkel in a race—you still have to breathe. The snorkel is a temporary tool for correcting technique, not a permanent fixture.
- Ignoring that it does alter body line: The tube in front creates slight drag and a tendency to lift the head. Swimming only with a snorkel long-term can actually develop a habit of slightly lifting your head.
- Using it as an aerobic main set: The snorkel removes breathing limitations, so some people use it for long-distance cardio. That’s fine, but don’t forget that open-water breathing rhythm is critical in racing—you can’t rely on it entirely.
Recommended Usage Ratio
The snorkel is mainly used in drills and technique segments, making up 10–20% of a single session. The focus is on “quality,” not “quantity.”
Purchasing and Maintenance: Making Your Tools Last
Using tools correctly is important, but choosing and maintaining them well is equally important. Here are some practical insights from years of coaching.
Paddles: Choose models with elastic straps that are adjustable. Straps that are too tight restrict blood circulation in the fingers. Look for paddle designs with drainage holes, which allow some water to pass through and reduce the instantaneous impact on the shoulders. Straps are consumables that age and break easily; pool chlorine accelerates rubber degradation. Always rinse with fresh water after use and dry in the shade—do not expose to direct sunlight.
Pull buoy: Mostly made of EVA foam; choose a shape that matches the curvature of your thighs. A buoy loses buoyancy after absorbing water. If you notice it becoming heavier or softer, it’s time to replace it. Rinse and air-dry after use.
Fins: For training, choose short training fins. Silicone fits the foot better than plastic and is less likely to chafe the top of the foot. When trying them on, the heel should fit snugly and toes should not press against the end—too tight causes cramps, too loose causes blisters. Taiwan’s pool water is warm with high chlorine levels; silicone fins must be rinsed after every use or they will harden and crack.
Front snorkel: Only a front-mounted snorkel is suitable for training. Choose one with a purge valve and an adjustable head strap. The silicone mouthpiece accumulates saliva and bacteria; disassemble and rinse after each use, and periodically disinfect with diluted cleaner. This is a hygiene priority.
A well-maintained set of aids can last for years. Conversely, if left unrinsed in a bag, they’ll smell and degrade within a season. Tools are an investment—treat them well.
Quick Reference: Four Training Aids Compared
| Aid | Primary Role | Training Purpose | Recommended Share per Session | Most Dangerous Misuse |
|---|---|---|---|---|
| Paddles | Strength stimulus + corrective feedback | Pulling power, catch feel | ≤ 15% | Paddles too large, overused when fatigued → swimmer’s shoulder |
| Pull buoy | Isolation and simplification | Upper-body strength, bodyline awareness | Pull sets ≤ 30–40% | Wearing it for the entire main set, skipping leg work |
| Fins | Strength stimulus + isolation and simplification | Kicking power, ankle mobility, high-speed technique | 15–25% | Long fins for sprinting injures knees, permanent dependence |
| Snorkel | Isolation and simplification + corrective feedback | Focus on pull, body roll, symmetry | 10–20% | Wearing it to avoid practicing breathing |
Practical Training Plan: Triathlon Swim Example, Three Sessions per Week
Here is a sample plan for an intermediate athlete preparing for a 113 half-ironman, swimming three times per week. Assume a CSS (Critical Swim Speed) of approximately 1:45 per 100 meters. All aids are arranged as “tools” rather than “stars”—you will see that swimming without gear and pure kicking always remain the core of the session.
Session A: Technique Day (Total ~2,800 meters)
| Segment | Content | Aids |
|---|---|---|
| Warm-up | 400 m easy swim + 200 m kick | Short fins may be worn for warm-up kicking |
| Technique | 6 × 100 m drill (single-arm, fingertip drag, 6-3-6) | Snorkel throughout |
| Main set | 8 × 100 m @ CSS+5 sec, 20 sec rest | No gear |
| Strength | 4 × 100 m pull, 20 sec rest | Pull buoy + small paddles |
| Cool-down | 200 m easy swim | No gear |
Session B: Threshold Day (Total ~3,000 meters)
| Segment | Content | Aids |
|---|---|---|
| Warm-up | 300 m swim + 200 m kick + 4×50 build | Short fins for kicking |
| Main set | 5 × 300 m @ CSS, 30 sec rest | No gear |
| Secondary set | 4 × 100 m kick @ moderate-high intensity | Short fins |
| Cool-down | 200 m easy swim | Snorkel (relaxed technique) |
Session C: Muscular Endurance / Open-Water Simulation Day (Total ~2,600 meters)
| Segment | Content | Aids |
|---|---|---|
| Warm-up | 400 m progressive swim | No gear |
| Strength | 6 × 100 m pull @ hard effort, 25 sec rest | Pull buoy + paddles + band |
| Open-water simulation | 3 × 400 m, sighting once every 100 m | No gear, race simulation |
| Cool-down | 200 m easy swim | No gear |
Note the structure of these three days: aids are always sandwiched between no-gear swimming, used to create a specific stimulus or correct a specific element, but the main sets and open-water simulations are always done without gear. This is “tools serving the training, not training serving the tools.”
Common Mistakes and Fixes: Coach’s Field Notes
Mistake 1: Treating Aids as Proof of “Having a Good Day”
On deck: The athlete swims a beautiful pace with a pull buoy and is thrilled.
Fix: Build the habit—after any set with aids, follow it with a set of equal or similar distance without gear to “settle the books.” Impressive numbers with aids don’t count; how much of that you can replicate without gear is your true level.
Mistake 2: Bigger Paddles Are Better
On deck: A new athlete buys the largest paddles on the market.
Fix: Switch to paddles close to the size of your palm. The function of paddles is to “feel the water” and provide “moderate overload,” not to “lift the heaviest weight.” Shoulders are a consumable part—don’t trade them for a moment of gratification.
Mistake 3: Never Training Pure Kicking
On deck: Triathletes think, “The race is won by the upper body anyway,” so they skip all kick sets or rely entirely on fins.
Fix: Pure kicking (without fins) should make up at least 15–20% of weekly volume. Kicking isn’t just propulsion—it’s key to maintaining bodyline and stabilizing the body in waves. The sea conditions off Taiwan’s northeast coast, Penghu, and Taitung are never calm; without a kicking foundation, a wetsuit won’t save you.
Mistake 4: Once the Snorkel Goes On, It Never Comes Off
On deck: The athlete falls in love with the comfort of not breathing, does all drills with the snorkel, and breathing technique stagnates.
Fix: After snorkel drills, immediately follow with a no-gear set requiring bilateral breathing (every 3 strokes), bringing the catch feel you just built back into the real context of breathing.
Mistake 5: Piling All Aids at the End of a Fatigued Session
On deck: After the main set leaves the athlete exhausted, they finish with a “paddles + pull buoy sprint” as a closer.
Fix: High-load aids (especially paddles) belong in the early part of the session when the body is fresh. Fatigue + high load = an injury equation, and this is the most classic combination in the development of swimmer’s shoulder.
Actionable Advice for Athletes at Different Levels
Beginner Triathlete (Still Building Freestyle)
Your first priority at this stage is bodyline and breathing, not strength.
- Primary tools: snorkel + short fins. The snorkel lets you focus on your pull without breathing interruptions; short fins help you maintain bodyline and build confidence.
- Use with caution: paddles. Before your stroke is set, paddles only amplify errors and increase shoulder injury risk. Wait until you can swim 400 meters steadily with a reasonably formed stroke before introducing small paddles.
- Pull buoy: Use it to experience “how effortless a horizontal position feels,” but don’t depend on it. Every time you use the buoy, follow with a no-gear set to replicate that feeling.
Intermediate Athlete (Can Complete Race Distance Steadily, Wants More Speed)
You can begin systematically using aids to create training stimuli.
- Paddles + pull buoy + band combination: This is the classic upper-body strength set, building both power and bodyline. Keep it within 30% of the session.
- Short-fin high-speed intervals: Use fins to push speed faster than CSS and practice stroke stability at high velocity.
- Key point: All main sets and open-water simulations must be done without gear; aids appear only in specific segments.
Advanced / Long-Distance Athlete (226 Ironman, Chasing Results)
Your challenge is maintaining technique and efficiency under fatigue.
- Use aids more sparingly. You don’t lack strength—you lack “long-duration stable stroke economy.”
- Paddle sets should be shorter and more precise, focused on maintaining catch feel rather than grinding out power.
- Extensive no-gear long-distance swimming and open-water practice (sighting, swimming straight, pack swimming) are the main course.
- Special note: long-distance athletes have high training volume and accumulated shoulder load, so paddles require extra caution. Do not push through any signal of shoulder discomfort.
Conclusion: Let Tools Return to Their Place
Back to A-Zhe’s story at the beginning. In the end, we spent four months restructuring his use of training aids: correcting the snorkel for symmetry, using short fins to improve ankle work, using small, precise paddles to train the catch, and using the pull buoy only during the pull segment—everything else was pure swimming to “reconcile the books.” Four months later, his pure swimming 100m time improved from 2:05 to 1:48—not by swimming faster with tools, but because the tools helped him refine his actual ability. That year, he finished the Penghu 113 successfully, and his swim split even beat his target time.
Paddles, pull buoys, fins, and snorkels are all good tools. The problem has never been the tools themselves, but rather “using tools to make the numbers look good, to feel good about yourself, and to avoid facing the flaws you should address.”
Before your next swim, ask yourself one question: “Why am I using this today? Do I want it to expose something, amplify something, or correct something?” If you can answer that, you already understand training better than nine out of ten people in the pool.
Tools serve training, and training serves your goals. Keep this order in mind, and you’ll swim both faster and healthier.
FAQ
Q1: I just want to finish my first triathlon. Do I really need to buy all four types of aids?
No, you don’t need to buy them all at once. If budget is limited, my priority order for first-time triathletes is: snorkel > short fins > pull buoy > paddles. The snorkel and short fins are tools that “help you build correct technique,” making them the most valuable for those still learning freestyle. Paddles are actually the last thing you need, because they require you to already have a solid technical foundation—otherwise, they just amplify errors and increase the risk of shoulder injury. Many pools also have communal aids you can borrow, so try them out first before deciding whether to buy.
Q2: I’ll be wearing a wetsuit in the race, so my legs will float naturally. Do I really need to practice kicking?
This is the most common misconception I hear, and the one I most want to correct. Wetsuits do provide buoyancy that helps prevent your hips from sinking, but kicking in open water serves a purpose far beyond propulsion: it helps you maintain body line, assists with turning around buoys, stabilizes your body in swells, and protects your rhythm in the crowded starting pack. Taiwan’s sea conditions—whether at Northeast Coast, Penghu, or Taitung—are never as calm as a pool. Those who never practice kicking will find that no matter how strong their pull is, they can’t generate power once they hit waves. Please reserve at least 15–20% of your weekly volume for pure kicking.
Q3: What size paddles should I choose?
The principle: smaller is better, especially for beginners. A paddle close to the size of your palm, or even slightly smaller, is more than enough. The training value of paddles lies in “feeling the water’s resistance” and “moderate overload,” not in “lifting the heaviest dumbbell.” Those oversized competition paddles on the market are for athletes whose technique is already highly refined and whose shoulder strength and stability are fully developed. For the average triathlete, small to medium paddles offer the best balance of safety and training effect. If you ever feel any sharp pain or discomfort in your shoulders, take the paddles off immediately—don’t push through it.
Q4: I swim three times a week. How should I distribute my aid-based workouts to avoid overuse?
Refer to the three-day workout structure in this article: give each day a different training focus (technique day, threshold day, muscular endurance day), and spread the aids across different days and different segments to avoid heavy use of the same high-load aid on consecutive days. In particular, I wouldn’t schedule paddles more than twice in the same week, and both sessions should be placed early in the workout when the body is fresh. The core principle is: pure swimming and pure kicking are always the main course; aids are the garnish.
Q5: Will swimming with a snorkel make me worse at breathing?
If you “only” use the snorkel and never practice breathing, then yes, it will. The correct way to use a snorkel is as a “temporary tool for technique correction”—use it to remove the distraction of breathing so you can focus on building a good pull and body roll, then immediately follow with a set of pure swimming with bilateral breathing to bring the feel you just developed back into a realistic context. Doing a snorkel drill without following it up with pure swimming breathing practice is wasted effort. It’s a transitional bridge, not a permanent crutch.
Q6: I’m a triathlete who eats out most of the time. What should I pay attention to for post-workout nutrition?
This isn’t a training-aid question, but students often ask it together. Eating out is convenient in Taiwan. Within 30–60 minutes after a swim workout (especially threshold or long-distance days), I recommend a combination of carbs and protein—for example, an onigiri with unsweetened soy milk, or a tuna egg wrap with soy milk, both of which you can easily grab at a convenience store. Carbs help replenish glycogen, and protein helps with muscle repair. Portions should be adjusted based on training intensity and individual body weight; these are general guidelines, and for personalized nutrition planning, I still recommend consulting a professional dietitian.
This article is educational content and does not replace individual assessment by a physician, physical therapist, or dietitian. If you have old shoulder or knee injuries or persistent pain, please consult a qualified medical professional before adjusting your training.
References
- Your Swim Log — 8 Benefits of Swim Paddles: https://www.yourswimlog.com/benefits-of-swim-paddles/
- Your Swim Log — The Swimmer’s Ultimate Guide to Swim Paddles: https://www.yourswimlog.com/ultimate-guide-swim-paddles/
- Your Swim Log — Pull Buoys: Pros, Cons, and How to Use Them Properly: https://www.yourswimlog.com/pull-buoy/
- McKenzie et al., Shoulder pain and injury risk factors in competitive swimmers: A systematic review, Scandinavian Journal of Medicine & Science in Sports (2023): https://onlinelibrary.wiley.com/doi/10.1111/sms.14454
- SwimGym — Why do I swim faster with a pull buoy?: https://swimgym.com/fast-lane/why-do-i-swim-faster-with-a-pull-buoy
- Train Daly — Pull Buoy Swimming: How to Use It Correctly: https://www.traindaly.com/train-daly/blog/pull-buoy-swimming-how-to-use-it-correctly
Related Reading
- Paddles, Kickboards, and Fins: The Correct Use of Swim Training Aids and the Shoulder Injury Red Line
- The Complete Guide to Swim Aids: How to Choose Buoyancy Shorts, Paddles, and Fins?
- Kickboards and Paddles Serve Different Training Purposes: How to Use Training Aids Correctly
- The Correct Way to Use Resistance Training Aids (Paddles/Resistance Shorts)
西進武嶺 免費訓練分析服務 Intervals | 練不夠還是練過頭?你哪一種類型選手?AI模型告訴你! | 備戰神器 | 公路車 訓練 | CT Yeh
4 年前
訓練台體驗) 2019台北自行車展 三大家 訓練台體驗 Tacx Neo Flux 2 Xepdo Apx Wahoo Kickr
7 年前
單車AI教練!全新 ChatGPT4o 幫你分析訓練成果!排武嶺課表,分析騎車姿勢! 太神了! / 公路車 / CT Yeh / feat. 緯緯
2 年前
多到選擇障礙... 換個單車把帶想一個小時 / BTP / 編織&軟木特有材質超吸睛! / 公路車 / CT Yeh
1 年前
沉浸室內單車練功房開箱! 100吋大畫面,最便宜的花費? 居然還能K歌!? | 公路車 | CT Yeh
3 年前
2026 車錶排行榜!誰是最多車友正在使用?練家子最愛哪款?🏆 (2萬名車友數據) / 公路車 / CT Yeh
5 個月前
單車 重低音 藍芽喇叭 音質實測 SoundBot SB525 Real Sound Test
8 年前
一日北高前的高裝檢 | 北高 360 | 挑戰11小時的裝備 | 一日雙塔 | 補給
6 年前