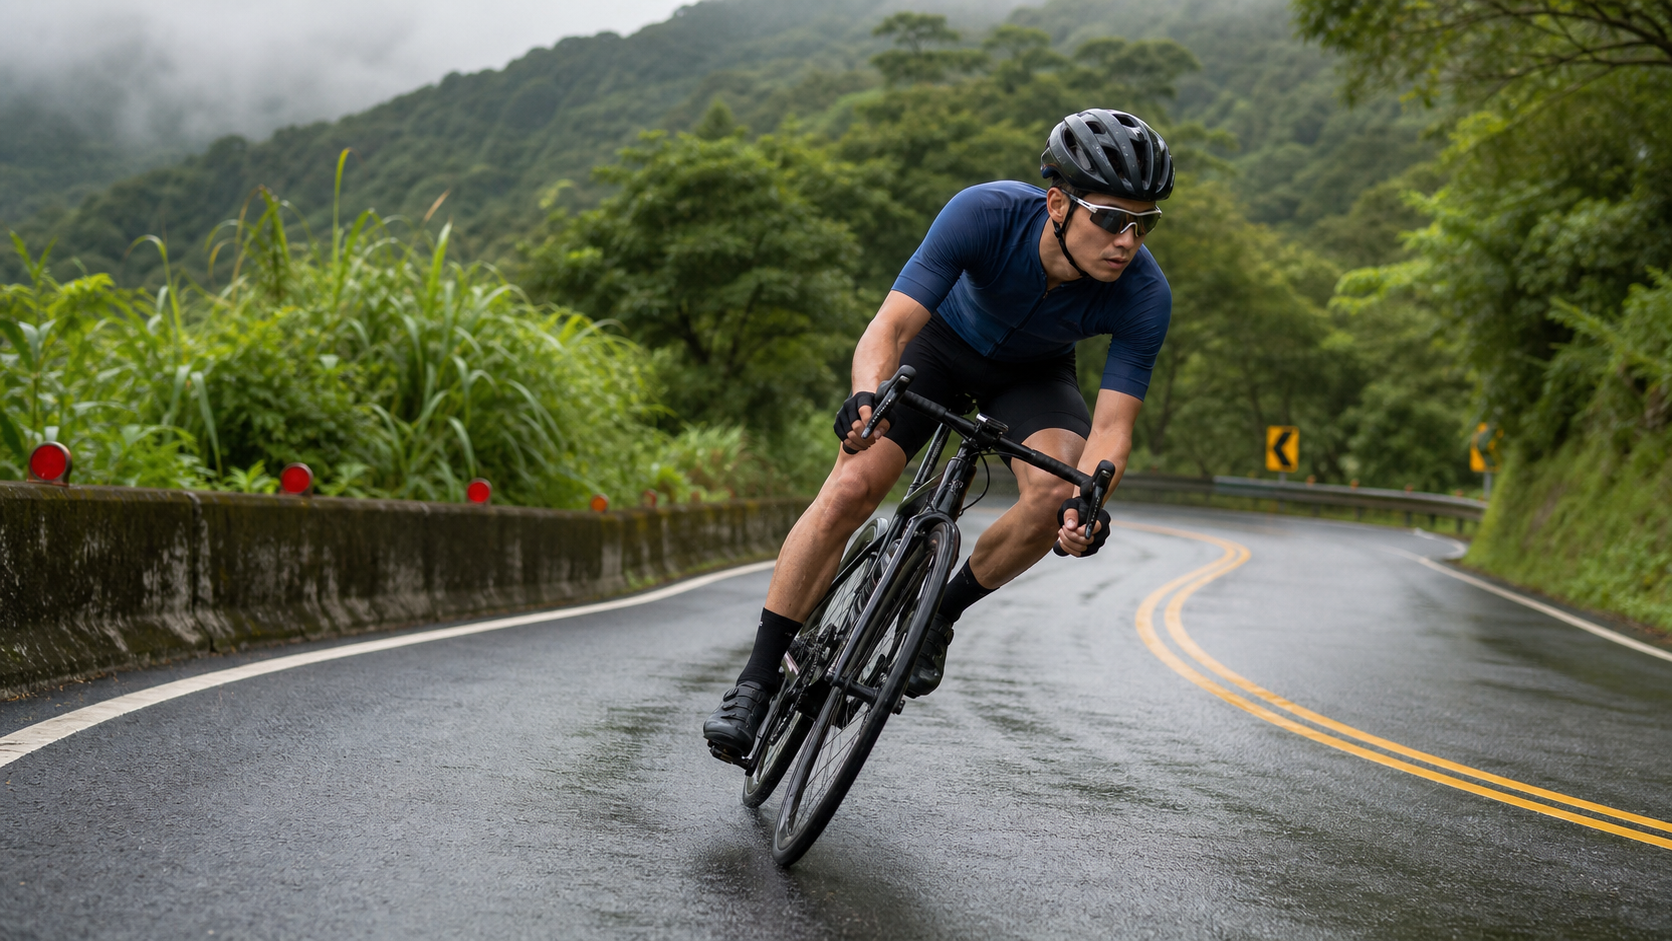
Coach’s Opening: You’re Not Weak—You’re Losing Money in the Corners
Let me start with a scene I’ve encountered repeatedly over the past few years.
There was a student—let’s call him A-Kai—35 years old, an engineer, the kind of dedicated athlete you dream of coaching. In winter, he dutifully followed his power-based training plan, pushing his 20-minute FTP from 230 watts to 268 watts, and even dropped 3 kg of body weight. His numbers were so impressive I wanted to frame his training logs. But when he raced a 113 half-distance event with a long descent that year, he only improved by 4 minutes—and about half of that was the “new bike effect” funded by his entry fee.
I pulled up his GPS track and power file from that race and went through it segment by segment, and found something: his power output and pacing on the climbs were flawless, but the moment he hit a descent or a corner, his speed curve collapsed entirely. On the same downhill section, another racer in his group—whose FTP was 15 watts lower—was nearly 90 seconds faster. 90 seconds. That was what he’d earned with an entire winter of training, losing 3 kg, and gaining 38 watts—and he gave it away for free in a few corners.
This brings me to the core concept I want to discuss today: downhill and cornering are the biggest chunk of “free time” in cycling. It doesn’t require you to build one extra gram of muscle, drink one more energy gel, or buy a ridiculously expensive carbon wheel set. All it takes is technique, nerve, and a process that can be broken down and practiced. And this is precisely the page that’s completely blank in most Taiwanese triathletes’ and cyclists’ training plans.
I’ve coached athletes ranging from first-time finishers to those chasing Kona slots, and I can tell you with full confidence: at the same fitness level, the gap between a rider who can descend and one who can’t can be 1 to 3 minutes in a 113 or standard-distance race—and the training cost is nearly zero. In this article, I’ll explain the physics of cornering, vision, line choice, body position, braking points, and the wet-road adjustments unique to Taiwan, all in one go. Get ready—we’re about to start making money.
Concepts and Scientific Foundations: What’s Actually Happening in a Corner
Riding Straight vs. Cornering: Completely Different Forces
Let’s first build the most fundamental physical intuition. When you ride in a straight line, the main forces acting on you are actually simple: gravity pulls you down, the ground pushes you up, and the two balance out. All you need to do is maintain balance and fight air resistance.
But once you enter a corner, a new player appears: centripetal force. To keep you and the bike from being flung outward while turning, there must be a force pointing toward the inside of the curve, “pulling” you into the turn. The only source of this force is the friction between your tires and the road surface.
This single point dictates everything about descending and cornering. How fast you can take a corner is essentially determined by how much “budget” of tire grip you have, and how you allocate it. This same core logic appears in Physical Cycling’s cornering line analysis and Liv Cycling’s cornering tutorial—the upper limit of cornering speed is calculated by grip, not by bravery.
Grip Is a “Budget”—You Can’t Overspend
This is the most important mental model in this entire article, so please remember it:
Your tire’s grip is a fixed total budget. It has to handle two things at once: turning (lateral) and braking or accelerating (longitudinal). Both draw from the same budget.
In engineering, this is called the “friction circle.” Think of it as a circular budget:
- If you spend the entire budget on braking (hard braking in a straight line), you have nothing left for turning.
- If you spend the entire budget on turning (cornering at extreme lean angles), you have nothing left for braking.
- If you try to turn and brake at the same time, demanding both at once, the total easily exceeds that circle—the moment it does, the tires lose grip, and you slide out.
That’s why every coach and every instructional article says the same thing: finish your braking “before” entering the corner—don’t brake in the middle of it. Because mid-corner, most of your grip budget is already spent on turning; asking for braking grip on top of that is a recipe for blowing the budget. Cycling Weekly’s cornering tutorial puts it bluntly: get your speed sorted before the corner, and once you’re in it, focus purely on turning.
Your Bike Goes Where Your Eyes Go
The second key science is actually at the level of neurology and motor control: bike goes where your eyes go—the bike will follow where you’re looking.
This isn’t mysticism. When humans are in high-speed dynamic balance, we subconsciously steer our body and vehicle toward the focal point of our vision. This principle holds true across motorcycles, race cars, skiing, and even skateboards. When you’re in a corner staring at that loose rock on the ground that scares you, your body will unconsciously steer you toward that rock—this is called “target fixation,” and it’s one of the deadliest traps for beginners.
Conversely, if your eyes look through the corner and lock onto the exit point where you “want to go,” your body will automatically carve out a smooth line for you. That’s why vision technique is the highest-priority element in cornering.
Practical Method 1: Vision—Put Your Eyes 2 to 3 Seconds into the Future
Where Should Your Focus Be
The most typical mistake beginners make on descents is only looking at the ground one to two meters in front of the front wheel. This causes two problems: first, you can’t react to road conditions in time; second, your cornering line becomes ragged and requires constant micro-corrections.
The correct approach is:
- Your visual focus should be at the point you’ll reach 2 to 3 seconds from now. At 40 km/h on a descent, 2 to 3 seconds is roughly 22 to 33 meters ahead.
- Before entering a corner, your eyes should “look through” the turn and lock onto the corner exit. You’re not looking at the entrance of the corner—you’re looking at the exit.
- Your peripheral vision handles real-time road information—potholes, gravel, water patches. You don’t need to stare at them; just catch them in your periphery, while your central focus stays on the distance.
I often tell my students: “Where you put your eyes, the bike can reach; where you leave your eyes, the bike will stay stuck.”
A Vision Drill You Can Practice Immediately
This drill doesn’t require a downhill. Find a quiet neighborhood road or a riverside bike path and you can do it:
- Set up two corners on the ground (or in your imagination).
- Before entering the first corner, force yourself to turn your head and look toward the first corner’s exit.
- Once the front wheel is aimed at the exit, immediately “throw” your eyes to the second corner’s exit.
- The key is your head must turn, and your chin must follow—don’t just move your eyeballs. Vision driven by the head is more stable.
I had A-Kai practice this “eye-throwing” motion for two weeks, and he reported that the biggest change was “corners suddenly became a lot less scary”—because when you’re constantly looking at the exit, your brain always knows “that’s where I’m going next.” Fear comes from the unknown; vision gives you certainty.
Practical Method 2: Line Choice—Outside-Inside-Outside, “Straightening” the Corner
Why Outside-Inside-Outside Is Fastest
Provided there is no oncoming traffic and you have full command of the entire road surface (this point matters a lot on Taiwan’s roads, and I’ll come back to it later), the fastest line through a corner is the classic “outside-inside-outside”:
- Entry: cut in from the outside of the lane.
- Apex: hug the inside of the corner at the apex (the innermost point of the turn).
- Exit: carry the bike back out to the outside.
The logic is simple: this outside-inside-outside line maximizes the “effective radius” of a sharp corner. The larger the corner radius, the higher the speed you can maintain (because less centripetal force is required, and less of your available grip is used up). In effect, you use a smart line to “straighten” a sharp corner into a gentler one.
Apex Timing: Better Late Than Early
A common mistake among beginners is the “early apex”—cutting to the inside too soon. This pushes you “wide” on exit, making it easy to run off the road or drift into the oncoming lane.
The safer and faster approach is the “late apex”: delay your turn-in slightly, so you only kiss the apex after you can see the full exit. This way, by the time you exit, the front wheel is already pointed toward the straight, and you can get back on the power earlier and with more confidence. On descents, a late apex also gives you more time to scan the road, leaving much more room for error if something unexpected appears.
An Important Correction for Taiwan’s Road Conditions
Here I have to slam on the brakes and say something blunt: the “outside-inside-outside” described above only holds on a closed course with no oncoming traffic and full knowledge of the road surface.
Taiwan’s descents—whether it’s Yangmingshan, Fengguizui, the Beiyi Highway, the lower section of the Wuling west approach, or various farm roads—are overwhelmingly open roads, where an oncoming scooter, car, or even a rider going the wrong way can appear at any moment. In this environment:
Never cross out of your own lane just to ride a pretty line. Your cornering line must stay entirely within your side of the road.
Better to lose 3 seconds than to trade your life for those 3 seconds. This isn’t being conservative; it’s being professional. The first rule I teach every athlete is always “get home alive first, then talk about results.” Save the true closed-course outside-inside-outside for race days with full traffic control.
Practical Method 3: Body Position and Braking Points
Body Position: Low, Back, Outside Foot Planted
There are a few key points to descending corner body position:
- Hands in the drops. This lowers your center of gravity, gives you finer control over the front brake, and reduces aerodynamic drag.
- Sit slightly back and low. This is especially important on steep descents, to avoid shifting too much weight forward and overloading the front wheel.
- Outside foot at 6 o’clock, pressing down hard. This is one of the most critical cornering actions. Planting the outside pedal and putting weight through it “presses” the tires into the road, increasing contact patch and grip.
- The inside knee can open slightly toward the apex, like a motorcycle rider, to help guide your center of gravity.
Roadman Cycling’s descending technique guide and BikeTips’ cornering tutorial both emphasize the combination of “outside foot planted + hands in the drops” as the fundamental way to maximize grip.
Braking Points: How to Split Front and Rear
There are two numbers you need to remember about braking:
- Weight shifts forward under deceleration, so the front brake provides roughly 70% of your stopping power, and the rear about 30%. This means you need to learn to “trust the front brake”—many riders in Taiwan are afraid of going over the bars and avoid the front brake, which lengthens stopping distance and actually makes things more dangerous.
- Use both brakes, front-biased. Rear-only braking easily locks up and skids; front-only braking only risks a flip in extreme situations. Normal operation is front brake as the main source, rear brake for stability.
The key principle boils down to one sentence: “Do your braking in a straight line, release the brakes into the corner, and accelerate out.”
Braking Points and Cornering Flow Reference Table
The table below is the “standard procedure” I give my athletes for descending corners. You can print it out and stick it in front of your trainer:
| Stage | Where You Are | Where You Look | Hands / Brakes | Body |
|---|---|---|---|---|
| Approaching the corner | Outside of the lane | Through the corner, lock onto the exit point | Hands in drops, begin progressive braking | Weight pressing down |
| Braking complete | Still outside, near turn-in | Exit point | Brakes released before turn-in | Prepare to lean |
| Turn-in to apex | Moving from outside to inside toward the apex | Keep eyes on the exit point | No braking (or very light feathering) | Outside foot planted, weight on the outside pedal |
| Apex to exit | Hugging the late apex | Straight exit now visible | Hands off brakes, ready to pedal | Bike returning upright |
| Exit acceleration | Carrying from inside to outside | Next focus point | Start applying power | Resume pedaling position |
The soul of this table is one sentence: “Release the brakes before turn-in.” If you can only remember one thing from this article, remember that.
Practical Method 4: Wet-Weather Adjustments—A Required Course for Taiwan Riders
Taiwan is a humid place. In the north, it rains or the road surface is damp for more than half the year, and afternoon thunderstorms in the mountains are a daily occurrence in summer. You can’t only ride on dry days, so cornering in the wet is a required course for Taiwan riders, not an elective.
The Physics of Wet Roads
When the road surface is wet, the coefficient of friction between tire and road drops significantly. Water forms a thin film between the tire and the road, separating the two surfaces and greatly reducing friction. This is clearly explained in Tribonet’s summary of tire friction and myVELO’s wet-riding guide.
Back to our core concept: grip is a budget. Wet conditions slash a large chunk of your total budget. So the cornering speeds and braking forces you could use on dry pavement all need to be discounted in the wet.
Specific Wet-Weather Adjustments
A commonly cited practical reference is: on non-“greasy” wet roads, cornering speed drops to about 70% to 80% of dry conditions. This number gives you a mental anchor, but always err toward the conservative side. Specific adjustments are as follows:
- Cornering speed starts at 70%. If you think “I can take this corner at 45 km/h on dry pavement,” treat it as 32 km/h in the wet.
- Brake earlier, lighter, and over a longer distance. Braking distance lengthens noticeably in the wet, and you want to avoid any lock-up.
- Reduce lean angle. Don’t lay the bike over in the wet. Corner more upright and trade speed for less lean.
- Avoid these “traps” as much as possible: painted road markings, manhole covers, steel plates, fallen leaves, and the first 10 minutes of rain on a dry road (accumulated oil hasn’t been washed away yet—it’s the slickest).
- Be smoother. Braking, steering, and power application all need to be more gradual. Any sudden input in the wet can be the straw that breaks the camel’s back.
Dry vs. Wet Cornering Comparison Table
| Item | Dry Conditions | Wet Conditions Adjustment |
|---|---|---|
| Cornering speed | 100% | About 70–80%, better to go even lower |
| Braking point | Before the corner | Earlier, more progressive |
| Braking force | Front 70/Rear 30 | Lighter overall, avoid locking up |
| Lean angle | Can be more aggressive | Reduce, keep the bike more upright |
| Vision | Corner exit | Corner exit + actively scan for reflective patches on the road (standing water/oil) |
| Things to specifically avoid | Loose gravel and rocks | Painted lines, manhole covers, metal plates, fallen leaves, roads that have just started raining |
I often remind my students: The goal of wet riding isn’t to be “fast,” it’s to “stay out of trouble without being too slow.” A rider who can descend steadily in the wet without crashing will, over the long run, always beat the rider who is occasionally fast but ends up in the hospital every now and then. The cost of injury is far greater than being a few seconds slower.
The Personality of Taiwan’s Local Descending Routes
Technique is universal, but every road has its own “personality.” When I train riders from the north, these are the descending routes we most often work on together, each with its own temperament. Here are my observations for you, so you have a mental picture before you hit the road.
Yangmingshan Area (Yangde Avenue, Balaka, Fengguizui)
Yangmingshan is the main training ground for triathletes and road cyclists in the north. It has many corners, steep slopes, narrow roads, and very heavy holiday traffic—tour buses, motorcycles, cars, and other riders all mixed together. The first lesson for descending here isn’t speed, it’s “anticipation”: anticipating that there might be a car, fallen leaves, or a slow vehicle behind every corner. On the Yangde Avenue descent, pay special attention to road seams and slippery surfaces. Balaka features continuous corners with visibility often blocked by vegetation. Late apexing and the discipline of staying in your own lane are what save lives here.
Beiyi Highway (Nine Bends and Eighteen Turns)
A classic among classics, with dense, continuous corners—an excellent training ground for practicing “corner-to-corner rhythm,” but also an accident hotspot. The core here is the continuity of rhythm and vision—before you’ve even exited one corner, your eyes need to be searching for the exit of the next. Traffic is fast and heavy trucks are common, so open-road discipline must be at its absolute highest.
The Lower Section of the Wuling West Approach
If your goal is a long-distance challenge like the Wuling West Approach, don’t forget that the long descent on the return is the real test of skill and focus. Prolonged descending fatigues your palms, arms, and core, dulling your braking feel. Add in the high-altitude temperature differences, possible afternoon rain, and damp road surfaces, and this section demands a very high combination of skill and physical endurance. On long descents, remember to periodically relax your hands and change your grip position to avoid numb hands causing inaccurate braking.
Taiwan Road Condition Characteristics Comparison
| Road Condition | Why It Matters | Corresponding Adjustment |
|---|---|---|
| Open road, oncoming traffic | Cutting across the center line can cause head-on collisions | Keep your cornering line within your own lane |
| Heavy holiday traffic | Tour buses/motorcycles/slow vehicles mixed together | Anticipate early, conservative speed, keep braking margin |
| Afternoon thunderstorms, damp roads | Grip margin is drastically reduced | Wet conditions: 70% speed, lighter braking |
| Painted lines/manhole covers/metal plates | Extremely slippery when wet | Actively scan, avoid them in your line |
| Mountain fallen leaves/rocks/gravel | Sudden loss of grip | Look far ahead, scan with peripheral vision |
| Long descent hand fatigue | Dulled braking feel | Change grip periodically, relax hands |
No matter which road, my core advice to Taiwanese riders is always the same: These are open roads we ride every day, not closed circuits. You can train your skills to a very high level, but discipline and respect for road conditions will always come before the pursuit of speed.
A More Complete Case Study: Breaking Fear Down into a Process
Besides A-Kai, let me tell you about another student who left a deep impression on me: Xiao-Yun, 42 years old, a mother and triathlete. Her fitness was actually quite good—her swimming and running were both mid-pack in her age group—but descending was her Achilles’ heel. She was so afraid that she would unconsciously keep squeezing the brakes during descents, spending the entire descent on the “edge of stopping,” with her speed dropping to about the same as an easy ride on flat ground.
Her problem wasn’t technique; it was that fear had hijacked her technique. So I didn’t start by teaching her outside-inside-outside or friction circles—that would have just been noise to her at that point. The first thing I did was “break down” her fear of descending:
- I asked her: “What exactly are you afraid of?” She said she was afraid of crashing, losing control, and not being able to stop in time.
- I matched each of those three fears to a trainable skill: fear of crashing → practice low-speed balance and cornering body position; fear of losing control → practice looking far ahead (the feeling of losing control often comes from looking too close); fear of not being able to stop in time → practice braking early and building braking confidence.
Then we used a “familiarity ladder”: first, we practiced body position and vision on a completely flat, closed course until she was comfortable. Then we moved to an extremely gentle, wide, traffic-free descent and rode it repeatedly, with speed entirely under her control, gradually increasing it. The key was that each step had to be practiced until it became “boring” before moving up a rung—when something becomes boring, it means it has become automatic, and fear has no foothold.
Six weeks later, at a hilly sprint triathlon, Xiao-Yun completed the descent without squeezing the brakes the entire way for the first time. She texted me after the race: “Coach, today on the descent I actually had time to look at the scenery.” That message meant more to me than any personal best.
What I want to convey with this case is: For many people, the biggest bottleneck in descending technique is actually mental, not physical. And that mental hurdle can also be overcome with a structured approach, step by step. Courage really is something you can train.
Common Mistakes and Corrections
Having coached so many riders, the mistakes made in descending corners are highly repetitive. I’ve listed the six most common ones below. Check how many you recognize in yourself:
Mistake 1: Still Braking in the Corner
Symptoms: You only realize you’re going too fast once you’re in the corner, so you squeeze the brakes while turning, and the bike pushes outward, feeling out of control.
Correction: Move the entire braking action to before the corner. Use the “late apex” to give yourself more time to judge before entering. Remember the friction circle—the grip margin in the corner should be reserved for turning.
Mistake 2: Target Fixation (Staring at the Hazard)
Symptoms: There’s a rock/pothole on the road, and the more you try to avoid it, the more your bike heads straight for it.
Correction: Force your eyes off the hazard and lock onto the safe path you want to take. Where your eyes go, the bike goes.
Mistake 3: Inside Foot Not Tucked Up, Inside Pedal Scraping
Symptoms: When leaning into a corner, the inside pedal hits the ground, causing instant loss of grip.
Correction: In corners, the inside pedal should be at the 12 o’clock position (raised high), and the outside pedal at 6 o’clock (pressed down). This is muscle memory—it needs to be practiced until you don’t have to think about it.
Mistake 4: Whole Body Stiff, Death-Gripping the Handlebars
Symptoms: The more scared you are, the harder you grip the bars. Your arms lock up, every road vibration transmits directly into your body, and the steering becomes twitchy and nervous.
Correction: Keep your elbows slightly bent, shoulders relaxed, and grip the bars with “firmness” but not “rigidity.” Let the bike have a little freedom underneath you to absorb the road. Relaxation is the gateway to advanced technique; tension will never make you faster.
Mistake 5: Afraid to Use the Front Brake
Symptoms: You only use the rear brake, resulting in long braking distances and frequent rear-wheel skids.
Correction: On a safe, straight, gentle slope, specifically practice “front-brake-dominant” braking to experience the front 70/rear 30 distribution. You’ll find the stopping power is far better, and as long as you shift your weight back accordingly, the risk of going over the bars is actually very low.
Mistake 6: Treating Open Roads Like a Race Track
Symptoms: On mountain roads with oncoming traffic, you cut wide into the opposite lane to set up an outside-inside-outside line, crossing the center line.
Correction: On open roads, always keep your cornering line within your own lane. Safety is always the first priority—results are something you only get to have if you’re alive.
Actionable Advice for Riders of Different Levels
To improve your skills, you need structured practice. Here are three different directions based on your level.
Beginner (First-time triathletes, new to road cycling)
Your primary goal isn’t speed; it’s building correct fundamental movements and a sense of safety.
- Schedule one “low-speed cornering practice” session per week: Find a quiet, large parking lot or closed venue, and repeatedly ride figure-eights at low speed (15–20 km/h), focusing specifically on pressing the outside foot down, raising the inside pedal, and looking at the exit.
- On descents, prioritize stability over speed: Get used to the feeling of riding on the drops and shifting your weight back.
- Always slow down and increase your safety margin in wet conditions, building the instinctive reflex that “wet means slow.”
Advanced (Finished 113, Looking to Improve Your Time)
You have the fundamentals; now it’s time to automate the techniques and increase your speed.
- Add “eye dropping” sight drills, training your focal point to become instinctive.
- Do repeated segment practice on familiar, safe descents: ride the same descent 3–4 times, focusing on improving only one thing each run (first run only on sight, second run only on braking points, third run only on the outside foot).
- Start consciously using the “late apex”, and use a bike computer or power meter to record your split times on the same descent, using the data to see your progress.
Competitive (Podium Finishes, Kona Qualification)
For you, cornering technique is a weapon that can directly translate into race positions.
- Pre-race course reconnaissance is mandatory: if the race has descent sections, you must ride them beforehand, memorizing the road conditions, apexes, and optimal braking points of every corner.
- Only use the full closed outside-inside-outside line on race day with traffic control; during regular training, strictly maintain lane discipline.
- Treat wet cornering as a specific discipline to train: proactively choose rainy days for technical training (on safe sections), giving yourself a dual psychological and technical advantage in wet races. Most competitors panic in the rain; if you don’t, that’s your placing.
Sample Weekly Training Plan for Three Cornering Levels
| Level | Weekly Technical Practice Frequency | Main Content | Practice Environment |
|---|---|---|---|
| Beginner | 1 session, 20–30 minutes | Low-speed figure 8s, basic position | Closed parking lot |
| Advanced | 1–2 sessions, each including 3–4 repeated descents | Sight + braking points + outside foot drills | Familiar, safe descent |
| Competitive | 2+ sessions, including pre-race recon and wet-specific drills | Full process integration + wet training | Course recon + safe rainy sections |
FAQ: Most Common Questions from Students
Q: I’m scared on descents. Is this normal? How do I overcome it?
It’s completely normal; fear is your body’s self-protection. The way to overcome it isn’t to “tell yourself to be brave,” but to turn the unknown into the known through technique and repetitive practice. The core of fear is uncertainty—when your sight technique lets you know “where I’m going next” at all times, and when you’ve ridden the same descent hundreds of times, the fear will naturally subside. Courage is built through practice, not forced.
Q: Will more expensive wheels or tires make me corner faster?
Good tires (especially ones with good grip suitable for wet conditions) do help, but the marginal benefit of technique far outweighs equipment. I’ve seen too many people spend a fortune upgrading wheels while their cornering technique stays stagnant. First, maximize the free techniques, then talk about equipment. Don’t get the order reversed.
Q: What tire pressure is best for cornering?
It depends on your weight, tire width, and road surface; there’s no single standard answer. The general principle is that the modern trend leans towards not running too high—moderately lowering tire pressure increases the contact patch and grip, and also absorbs road vibration better, especially given the varying road quality in Taiwan. It’s recommended to start from the middle of the range suggested by the tire and wheel manufacturers, then fine-tune based on feel. You can lower it slightly for wet or rough surfaces.
Q: Is it faster to pedal or coast on descents?
It depends on the gradient. On steep enough descents, gravity already gives you sufficient speed; then the focus is on aerodynamics and cornering, so coasting, tucking your chest, and making yourself small is actually faster. On gentler descents, moderate pedaling to maintain speed is worthwhile. The key is not to be frantically pedaling when you should be cornering.
Q: Is there a difference between disc brakes and rim brakes when cornering?
Disc brakes are indeed significantly better than rim brakes in braking power and modulation on wet roads, which is a real advantage in Taiwan’s rainy environment. But regardless of brake type, the core principles remain the same: finish braking before the corner, 70% front / 30% rear, release the brakes mid-corner. Equipment is an amplifier; technique is the foundation.
Conclusion: Reclaiming the Time Scattered in the Corners
Let’s return to A-Kai from the beginning. After that race, I didn’t have him push his FTP. Instead, we spent six full weeks with weekly technical training on cornering and descending—low-speed figure 8s, eye dropping, repeated descents, wet-specific drills. His equipment didn’t change at all.
At the next 113 with the same long descent, he was 78 seconds faster on the descent and improved his overall time by over 5 minutes. He also said, “For the first time on that descent, I felt like I was ‘enjoying’ it, not just ‘getting through it.’”
This is the most fascinating part of descending and cornering technique: it’s one of the few things in cycling that costs almost no physical energy but directly translates into better results. You don’t need a stronger heart and lungs, more power, or a more expensive bike. You just need to put your eyes on the future, brake before the corner, press down on the outside foot, and know how to exercise restraint and respect physics on Taiwan’s slippery roads.
Those “free seconds” scattered in every corner have always been there, waiting for you to pick them up. Most people choose to leave them behind and continue burying their heads in power training. But you, having read this, now know how to earn them back, second by second.
Next time you descend, remember this phrase—release the brakes before the corner, and look through the turn to the exit. See you on the road.
This article is for educational purposes and cannot replace individual assessment by a physician, physical therapist, or nutritionist. Descending and cornering are high-risk skills; please practice progressively in safe, legal environments and always wear a helmet and obey traffic laws.
References
- Physical Cycling — Cornering Lines / Strategies
- Liv Cycling — How to Corner on a Road Bike
- Cycling Weekly — Improve your cornering: tackle bends quickly and safely
- Roadman Cycling — How to Descend Faster Cycling
- BikeTips — How to Corner on a Road Bike
- Tribonet — Tire Friction
- myVELO — Road cycling on wet roads: safe riding and tire choice
Related Reading
- The Physics of Descending Technique: Cornering Lines, Weight Transfer, and “Free Time”
- The Complete Guide to Strength Training for Triathletes: Periodization, Squats, Deadlifts, and In-Season Maintenance Doses
- Sleep: The Cheapest Legal Performance Enhancer—How Coaches Help You Steal Back Training Gains
- Speed Advantage in Descending Sections: How to Make Up Climbing Losses on Technical Terrain
靠單車減肥35公斤 心得分享與整理
7 年前
JJSC南台灣單車走春三日行 DAY 1 / 強度 x 美食 x 節慶體驗 / 公路車 CT Yeh
5 個月前
CT 喇低賽) 單車 比賽總是沒照片? 攝影師的觀點大公開 姿勢就是力量! 請加速1.25倍收看
7 年前
單車AI教練!全新 ChatGPT4o 幫你分析訓練成果!排武嶺課表,分析騎車姿勢! 太神了! / 公路車 / CT Yeh / feat. 緯緯
2 年前
台中大雪山 膏王領騎 震到都沒畫面了 公路車
5 年前
ThinkRider 智騎 XXPRO 訓練台,高階機種功能 只要 1/3價格!? 實測功率對比、噪音實測 / 公路車 / CT Yeh
1 年前
高雄綠園道鐵路自行車道 / 外地人能輕鬆駕馭 還是整路崩潰? / 2025 全線開通 春節實地探索一次!(附GPS連結)/ 公路車 / CT Yeh
1 年前
大武山後門26%歡樂陡坡!JJSC南台灣單車行Day2 / 被颱風追著跑 / 公路車 / CT Yeh
2 年前