Indoor Trainer Workout Library: Complete Plans for Winter and Rainy Season (SST/Micro-Bursts/Pyramids + ERG Principles)
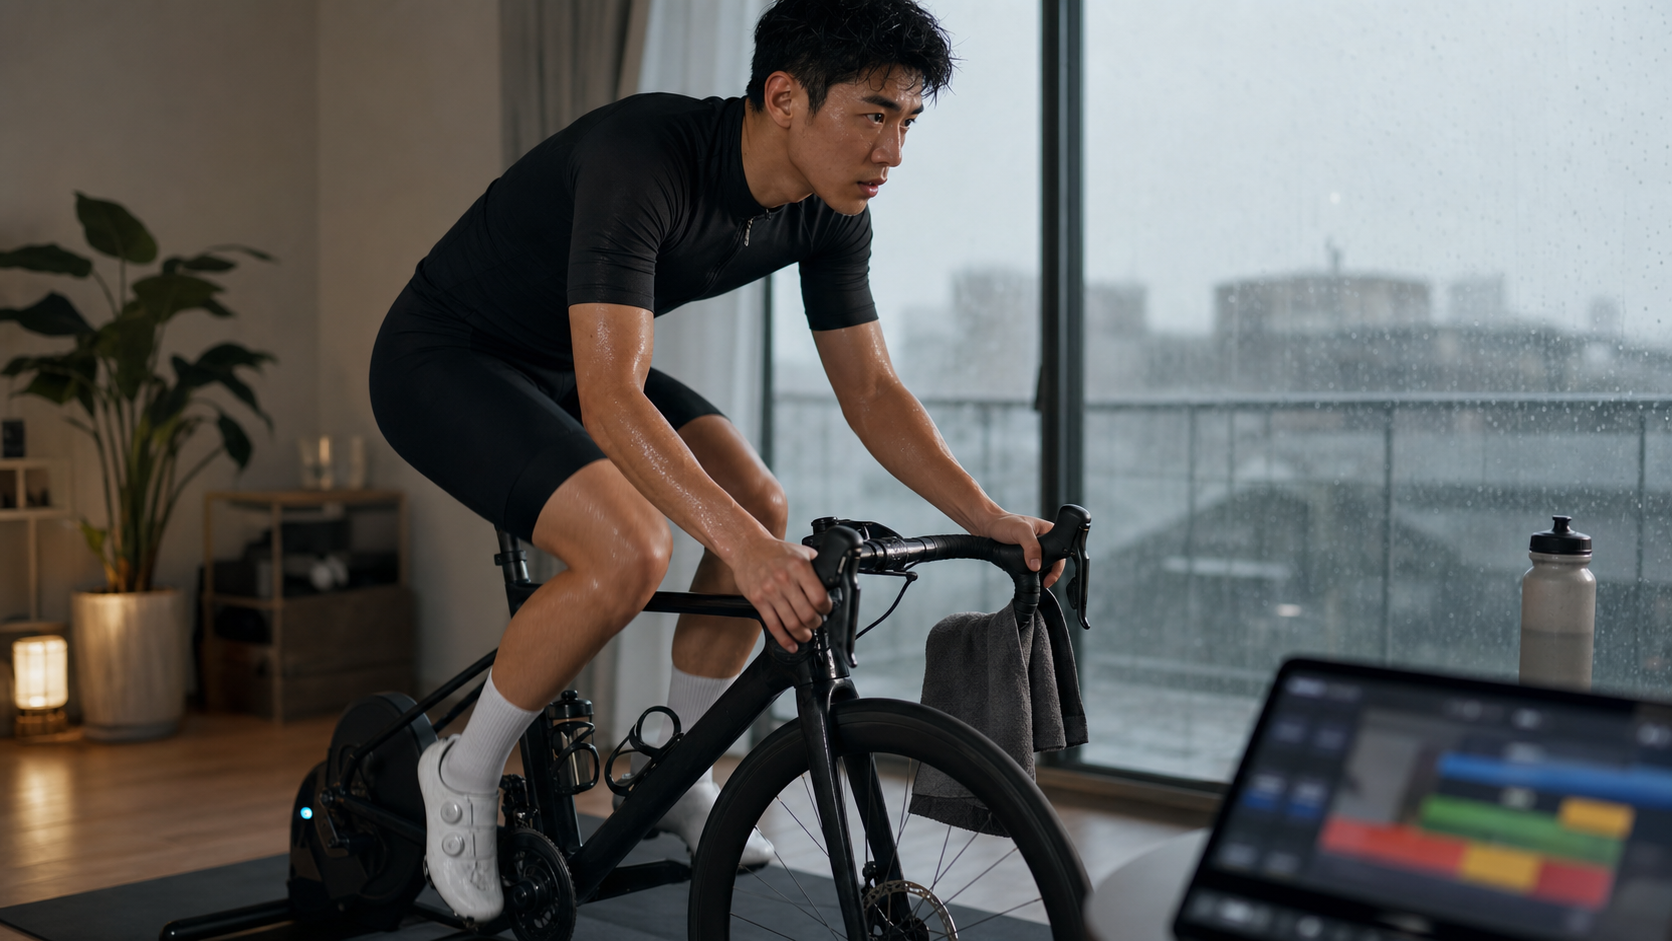
Coach’s Opening: Rainy Season Isn’t Your Enemy—It’s Your Secret Season to Get Stronger
Let me start with a scene I see every winter.
Every November, when the northeast monsoon kicks in, my inbox floods with messages: “Coach, it’s rained for two straight weeks in Taipei—does that mean another blank week for me?” “Coach, the roads up Fengguizui are so wet it’s too dangerous to ride outside, but indoor training is so boring. What should I actually do?”
I’ve coached triathletes and cyclists for nearly fifteen years, from first-time office workers aiming to finish a 51.5 to veterans who’ve earned Kona slots. Over the years, I’ve learned one thing: What separates the best isn’t who rides more in good weather, but who doesn’t stop when the weather turns bad.
Taiwan’s climate is actually quite unforgiving for endurance athletes. The northeast monsoon brings cold, damp conditions to the north in winter; May and June bring plum rains to the central and southern regions; and summer afternoons are plagued by thunderstorms. If you do the math, nearly a third of the year, your outdoor long-distance training is compromised. If you skip training every time it rains, you’re effectively throwing away three to four months of accumulated fitness each year—which is fatal for anyone hoping to set a new PR next year.
Indoor trainers—especially the smart trainers that have become widespread in recent years—flip this disadvantage into an advantage. Indoors, there are no traffic lights, no coasting downhill, no trucks squeezing you, no weather interference. Every watt you set is truly driven into your body. A two-hour indoor SST workout often delivers a more solid training stimulus than three hours outdoors.
In this article, I’m going to lay out the complete indoor workout library I’ve used with my athletes over the years. It covers the correct mindset for using ERG mode on smart trainers, my three most-used classic workouts (Sweet Spot SST, Micro-bursts, and Pyramid), common mistakes and their fixes, and the hardest, least-discussed but most critical piece—the psychological strategies for indoor training.
Treat this as your coach’s manual for winter and rainy season. Bookmark it and follow it.
Concepts and Scientific Foundation: Why Are Indoor Trainers So Efficient?
1. Time Density: Every Watt You Pedal Counts
Outdoor riding is full of “non-training time.” Waiting at red lights, coasting downhill, slowing to avoid cars, getting pulled into erratic pacing by unfamiliar groups. I once laid out one of my athlete’s outdoor power files: a ride he called a “two-and-a-half-hour training session” actually had only about one hour and forty minutes of meaningful pedaling once coasting and stops were removed.
Indoor trainers are different. Once you set a workout, aside from rest between intervals, your body is constantly working against resistance. The same physiological stimulus often takes only 60–70% of the time indoors compared to outdoors. For Taiwanese amateur athletes who have jobs and families, this time efficiency is priceless.
2. Repeatable and Quantifiable: Turning Training from “Feel” into “Numbers”
I want to emphasize this point because it’s the greatest value of smart trainers.
According to Wahoo Fitness and TrainerRoad, smart trainers turn training from a subjective activity into quantifiable science: your output is recorded in real watts, allowing you to precisely target different energy systems—aerobic, anaerobic, and neuromuscular.
What does this mean? It means you can “replicate” a successful workout. If you felt great doing 45 minutes in the Sweet Spot zone last week, you can repeat it watt-for-watt this week, or even add a slight increase. Progress becomes trackable and manageable, not based on guesswork.
3. Understanding the Sweet Spot: The Highest Value-for-Money Training Intensity
The core of the indoor workout library is “Sweet Spot Training” (SST).
According to definitions from coaching organizations like Wattbike and TrainerRoad, the Sweet Spot falls at approximately 88% to 94% of your Functional Threshold Power (FTP). It sits right at the boundary between the top of Zone 3 and the bottom of Zone 4.
Why is it called the “Sweet Spot”? Because it’s the point with the highest value between training stress and recovery cost. It effectively improves aerobic capacity, muscular endurance, and fatigue resistance, delivering physiological adaptations close to Zone 2 but in much less time. At the same time, it doesn’t require the long recovery that threshold or VO2max efforts do. For office-worker athletes who can only train three to four times a week, the Sweet Spot is practically designed for you.
So how do you determine your FTP? If you haven’t done a formal test, you can estimate it by taking the average power from a recent all-out 20-minute effort and multiplying by 0.95. Once you have a smart trainer, you can also run the built-in Ramp Test. All the percentages in this workout library are based on your FTP, so if your FTP is accurate, the workouts are meaningful.
Smart Trainer ERG Mode: First, Learn to “Let the Machine Push You”
Before diving into the workouts, you need to understand ERG mode, because it will completely change how indoor training feels.
What Does ERG Mode Actually Do?
According to BikeRadar and Wahoo: Power equals torque (how hard you push) multiplied by cadence (how fast the pedals turn). ERG mode locks onto a target power and automatically adjusts resistance to match your cadence. If the workout calls for 200 watts and you drop your cadence from 90 rpm to 80 rpm, the trainer automatically increases resistance to keep the power at 200 watts.
This brings a key mindset shift:
In ERG mode, what you watch isn’t power—it’s cadence. The machine handles the power for you.
This is what most beginners struggle with at first. They still think “I need to push hard to hit the target,” but when they push hard, the machine adds resistance, creating a death spiral where they can’t turn the pedals. The correct approach is: maintain a steady target cadence and let the machine lock in the power naturally.
Response Time and the “Spiral of Death”
According to BikeRadar, high-end trainers (like the Wahoo Kickr or Tacx Neo) take about 3 to 5 seconds to reach target power, while standard trainers take 5 to 10 seconds. So when intervals switch, don’t immediately start mashing the pedals—give the machine time to respond.
The so-called “Spiral of Death” is: you’re barely hanging on in a high-intensity interval, your cadence drops below 50 rpm, and the machine, trying to maintain power, cranks up the resistance. This makes it even harder to pedal, your cadence drops further, resistance increases more… until you’re completely stuck. The only way to avoid it is to decisively lower the intensity or briefly stop pedaling before you’re truly about to blow up—not to grit your teeth until you grind to a halt.
ERG vs. Manual Resistance (Level Mode): Which Should You Choose?
| Situation | Recommended Mode | Reason |
|---|---|---|
| Sweet Spot, long threshold intervals | ERG | Stable power, focus on maintaining cadence, no need to constantly watch the screen |
| VO2max, short micro-burst intervals | ERG or manual, depending on trainer response speed | On slow-responding trainers, intervals are too short for resistance to adjust in time |
| All-out sprints, anaerobic bursts | Manual (Level) | Needs instant explosive power; ERG’s resistance logic gets in the way |
| Cool-down after a hard ride | ERG at low watts | Set 100–130W, spin legs easily |
I usually tell my athletes: Use ERG for long, steady workouts; use manual for short, explosive ones. This principle will help you make the right choice 90% of the time.
Practical Workout Library: Three Classic Workouts to Follow
Here are the three workouts I prescribe most often from my library. All intensities are expressed as percentages of FTP so you can plug in your own numbers. Let’s assume an athlete with an FTP of 200 watts—I’ll convert to actual watts in parentheses to give you a clearer picture.
Workout 1: Sweet Spot SST—The Foundation of Winter Base
This is the winter staple. The goal is to build aerobic base and muscular endurance, accumulating training volume without blowing yourself up.
Beginner Version (Total ~60 minutes)
| Phase | Time | Intensity (%FTP) | Conversion (FTP=200W) | Cadence |
|---|---|---|---|---|
| Warm-up | 10 min | 50→65% progressive | 100→130W | 90 rpm |
| SST Set 1 | 12 min | 88–90% | 176–180W | 85–90 rpm |
| Recovery | 5 min | 55% | 110W | 90 rpm |
| SST Set 2 | 12 min | 88–90% | 176–180W | 85–90 rpm |
| Recovery | 5 min | 55% | 110W | 90 rpm |
| SST Set 3 | 12 min | 88–90% | 176–180W | 85–90 rpm |
| Cool-down | 4 min | 45% | 90W | Easy |
Advanced Version (Total ~90 minutes): Extend the three 12-minute sets into 3×20 minutes @ 90–93% FTP, with 8 minutes of recovery between sets. This is the classic Sweet Spot feast. For athletes preparing for Taiwan’s King of the Mountain (KOM) challenge at Wuling, I have them do this workout once or twice a week in the 12 weeks before the season to build the sustained power output needed for long climbs.
Coach’s Note: The key to SST is “boring but steady.” Heart rate typically falls at 80–88% of your max HR (for most people around 145–165 bpm, but individual variation is large—use your own zones). If you’re gasping for air and can’t speak after the first set, the intensity is set too high, and your FTP is probably overestimated.
Workout 2: Micro-bursts—Stimulating Your Ceiling to Break Plateaus
If you only do Sweet Spot, you’ll eventually hit a plateau. That’s when I add micro-bursts to stimulate the VO2max and anaerobic systems, raising your “ceiling.”
The logic of micro-bursts: alternate very short high-intensity surges (15 seconds) with equally short recoveries (15 seconds), allowing you to accumulate far more “total high-intensity time” than continuous VO2max intervals, while the perceived suffering is actually more manageable.
Micro-burst Workout (Total ~55 minutes)
- Warm-up 10 minutes, progressive from 65% FTP, including a few short accelerations
- Main set: 3 blocks, each structured as follows:
- 15 seconds @ 120% FTP (FTP=200W → 240W)
- 15 seconds @ 50% FTP (100W)
- Repeat this cycle 10 times (equals 5 minutes per block)
- Full recovery 5 minutes @ 50% FTP between blocks
- Cool-down 5 minutes
This workout can be done in ERG mode on fast-responding high-end trainers, but if your trainer switches slowly (more than 5 seconds), a large chunk of the 15-second burst will be eaten up. I recommend switching to manual resistance and using your cadence to drive the surges.
I had a student in his 40s who could only manage Sweet Spot workouts and had been stuck at the same FTP number for nearly six months. I added micro-bursts once a week, and after six weeks, his retest showed his FTP had jumped about 8%. He was shocked himself. A plateau often just means you’re missing this ingredient.
Workout 3: Pyramid—Training All Zones in One Session
The beauty of the pyramid workout is that it climbs from moderate-low intensity to high intensity and back down in a single session, like climbing a mountain and walking back down. It trains muscular endurance, threshold, and power all at once—a great “one-stop” choice when time is limited.
Pyramid Workout (Total ~75 minutes)
| Phase | Time | Intensity | Description |
|---|---|---|---|
| Warm-up | 12 min | 50→70% | Slowly wake up the body |
| Climb Segment 1 | 8 min | 85% | Sweet Spot lower edge warm-up |
| Climb Segment 2 | 6 min | 95% | Approaching threshold |
| Summit | 4 min | 105–110% | VO2max, the most painful part of the session |
| Descent Segment 2 | 6 min | 95% | Back to threshold |
| Descent Segment 3 | 8 min | 85% | Sweet Spot to finish |
| Recovery | 3 min | 55% | Catch your breath |
| Cool-down | 8 min | 45% | Easy leg spinning |
Note the 105–110% for those 4 minutes at the “summit”—that’s the most painful part of the session, and where progress happens. Push through it, and the descent segments afterward will feel “easier”—that’s because you’ve crossed your threshold and come back.
How to Fit These Three Workouts into a Week?
Using a Taiwanese office-worker athlete who can train 3–4 times a week as an example, here’s how I typically schedule it:
| Day | Workout | Focus |
|---|---|---|
| Tuesday | Sweet Spot SST Beginner/Advanced | Build aerobic base |
| Thursday | Micro-bursts or Pyramid (alternating weekly) | Stimulate your ceiling |
| Saturday | Long Zone 2 (outdoors if weather permits) | Extend the aerobic engine |
| Sunday | Sweet Spot SST or complete rest | Depends on fatigue |
Hard workouts should be separated by at least one recovery day or rest day—this matters more than adding another session. Without adequate recovery, even the best workout plan is useless.
Advanced Variations: Getting Creative with Your Workouts
After training for a while, the same workouts get boring, and your body adapts. Here are a few variations I commonly use to turn the workout library from just three menus into an endlessly expandable system.
- Sweet Spot Over-Under: Change a 20-minute Sweet Spot block into a cycle of “2 minutes @ 95% + 1 minute @ 105%.” Oscillating above and below threshold simulates the surging pace changes of a real climb when riders ahead pull away. This is my secret weapon for helping Wuling-bound athletes learn to “hold onto the changes in pace.”
- Extended Micro-bursts: Change 15/15 to “30 seconds @ 115% + 30 seconds @ 50%,” doing 8 reps per set. The longer burst duration tests your willpower more, suitable for intermediate athletes who’ve mastered the basic micro-bursts.
- Double-Peak Pyramid: Do the summit twice, with a Sweet Spot breather at 85% in between. It’s like climbing two mountains in one session—more time-efficient but also harder. Make sure your recovery status is good before attempting it.
- Reverse Pyramid: Start at high intensity and work down. Attack VO2max when you’re freshest. Good for athletes who want to specifically raise their ceiling, but it has a higher technical bar—not recommended for beginners.
Remember one principle: Variation is for stimulating adaptation, not for looking fancy. Every variation should have a clear training purpose behind it; otherwise, you’re just finding a new way to exhaust yourself.
Equipment and Environment Setup: Building a Solid Foundation for Indoor Training
Many people only think about “what workout should I do” and overlook equipment and environment setup. I can say with confidence: with the same workout, the difference in training quality between a well-set-up environment and a poor one is enormous. This section helps you build that foundation.
Trainer Calibration
If you’re using a wheel-on trainer, it’s best to do a spindown calibration before every ride to ensure accurate power numbers. Direct-drive trainers are usually much more stable, but regular calibration is still recommended. If your power numbers are inaccurate, all your FTP percentages are meaningless, and workout precision goes to zero. This is the most overlooked factor that quietly undermines training quality.
Cooling and Hydration: The #1 Challenge Indoors in Taiwan
Taiwan’s indoor environment is humid and hot, making heat dissipation one of the biggest enemies of indoor training. Here are my non-negotiable requirements for every athlete:
| Item | Recommended Setup | Description |
|---|---|---|
| Fan | At least one large industrial fan | Point it at your upper body; cooling determines whether you can hold power in the later stages |
| Hydration | 500–750 ml per hour | You sweat more indoors than outdoors; dehydration spikes heart rate and drops power |
| Towel | Drape it over the handlebars to catch sweat | Sweat dripping into the trainer or slide rails accelerates corrosion |
| Mat | Trainer-specific mat | Absorbs vibration, protects against sweat, shields the floor, and reduces noise for neighbors |
| Electrolytes | Add electrolyte tablets for sessions over 90 minutes | Heavy sweating depletes sodium; plain water alone can lead to hyponatremia |
Posture and Cadence Sensors
Training indoors for long periods can cause your posture to deteriorate and your upper body to tense up. I recommend standing up and pedaling for a few strokes periodically, and relaxing your shoulders and neck. If your trainer or power meter provides cadence and left/right leg balance data, this is a rare observation opportunity you don’t get outdoors—many people only discover significant left/right imbalances when training indoors, which then leads to adjustments.
Real-World Case Study: An Office Worker’s Winter Transformation
Let me share a real scenario (I’ve adjusted the athlete’s background, but the training logic and results are real).
Ming, 38, a tech engineer and father of two. When he came to me, he was frustrated: “Coach, I stop training every winter, and the next spring I nearly die riding up Yangmingshan. I feel like I’m stuck in an endless loop.”
His problem was classic—it wasn’t a lack of effort; it was that he completely shut down when the weather turned bad. The first thing I did wasn’t to give him a harder workout—it was to move his trainer from the balcony into the living room, install an industrial fan, and sign him up for a cycling race the following March as a goal. First solve the “willingness to get on the trainer” problem, then talk about what to train.
For the workout plan, for the first four weeks I only gave him the Sweet Spot beginner version, twice a week, with one simple goal: build the habit. Starting in week five, I added micro-bursts and extended his Saturday Zone 2. He barely missed a single session all winter due to rain.
Twelve weeks later, his FTP had improved from 195 watts to about 215 watts—roughly a 10% gain. More importantly, his mindset had shifted. He told me: “I never knew rainy days could be this productive. I’m not afraid of winter anymore.” At that race in March, he set a new personal record.
The key point I want to emphasize from this case: 80% of indoor training success comes from “consistency,” and only 20% comes from “how amazing the workout is.” No matter how perfect the plan, if you don’t get on the trainer, it’s all zero.
Common Mistakes and Fixes: Pitfalls I’ve Seen in My Athletes
Mistake 1: FTP Set Too High, Every Session Becomes a Grind
This is the #1 problem. Many people like to set a flattering FTP number, and as a result, every Sweet Spot session turns into a near-threshold grind. After two weeks, they’re overtrained or sick.
Fix: Indoor trainers have poorer ventilation and heat dissipation than outdoor riding, so the same power feels harder. I usually recommend athletes set their indoor FTP about 5% more conservative than their outdoor test result. Better to complete workouts comfortably and gradually increase than to be on the edge of failure every session.
Mistake 2: No Fan, Turning Yourself into a Stew
Taiwan’s indoor environment is humid and hot. Without a strong fan, your core temperature spikes, heart rate gets pushed up by the heat, power drops, and training quality collapses.
Fix: A big fan is a necessity for indoor training, not an accessory. Point it at your body—ideally one at your upper body and one at your legs. Also prepare at least one or two bottles of water; during a 90-minute session, you’ll often sweat more indoors than outdoors.
Mistake 3: Trying to Muscle Through ERG Mode
The “Spiral of Death” mentioned earlier. Beginners in high-intensity intervals desperately try to “beat the machine,” and the harder they push, the more stuck they get.
Fix: Remember the mantra—watch cadence, not power. Maintain your target cadence and let the machine handle the power. When you’re about to blow up, decisively lower the intensity or briefly stop pedaling. Don’t grind until you’re completely stuck and have to restart.
Mistake 4: No Fueling at All, Doing Long Sessions on an Empty Stomach
Indoor Sweet Spot sessions over 90 minutes burn a significant amount of energy—it’s common to burn 500–800 kcal in one session (depending on body weight and intensity). Training on an empty stomach often leads to fading in the later stages and a mental breakdown.
Fix: For sessions over 75 minutes, take in some easily digestible carbohydrates mid-session (sports drinks, bananas, or energy gels all work). Taiwan’s convenience stores make this easy—grab a banana and a sports drink before you head out.
Mistake 5: Only Training Indoors, Never Going Outside
Indoor trainers are efficient, but there are things they can’t train: real-road handling, descending and cornering, reading road conditions, and pack riding positioning. Pure indoor athletes often suffer on technical sections in outdoor races.
Fix: When weather permits, schedule outdoor sessions, especially during race preparation. Indoors is the engine for base and intensity; outdoors is the vehicle that puts that engine into a real race. They complement each other—it’s not an either/or choice.
The Hardest Part of Indoor Training: Psychological Strategies
Honestly, the biggest enemy of indoor training isn’t intensity—it’s boredom. How many people buy an expensive trainer, use it for three months, and then turn it into a clothes rack? This section gives you practical psychological weapons.
1. Break the Workout into “Small Chunks”
The human brain collapses when faced with “60 more minutes to pedal,” but it can handle “just hold on for these 4 minutes and then you recover.” This is why interval workouts are psychologically easier to endure than continuous suffering—they naturally break the pain into small pieces. Even for continuous SST, you can mentally split a 20-minute block into “four 5-minute chunks” and digest them one at a time.
2. Use Virtual Platforms and Communities
Virtual riding platforms like Zwift turn indoor training into a game with maps, other riders, and group ride events. Join an online group ride, and two hours can pass without you noticing. There are also many cycling communities in Taiwan that organize online group training sessions. Find your online team, and the loneliness drops significantly.
3. Audio-Visual Stimulation: TV Shows, Music, Race Broadcasts
Low-intensity Zone 2 long sessions pair well with an episode of a TV show or a cycling race broadcast. For high-intensity intervals, I recommend music with a strong beat—when the drum hits on a 15-second micro-burst, your body automatically wants to follow the rhythm. When I coach, I even curate playlists for athletes so the explosive intervals land on the chorus.
4. Ritual and Environment
Set up your trainer in a fixed spot, position the fan, prepare the towel and water bottles—create a “startup ritual.” When the environment is ready, your body automatically enters training mode, reducing the mental friction of “should I or shouldn’t I train” every time. Lower the barrier to starting, and you’ll train longer.
5. Give Yourself a Concrete Goal
Indoor training without a goal is the easiest to abandon. Sign up for a race next spring—whether it’s Taiwan’s KOM Challenge, a local cycling race, or a triathlon—when every winter session connects to a clear finish-line image, the suffering has meaning.
Actionable Advice for Athletes of Different Levels
Beginner Athletes (Just bought a trainer, FTP not yet stable)
- Spend the first two weeks familiarizing yourself with ERG mode and cadence control; don’t rush into intensity
- Make the Sweet Spot beginner version (3×12 minutes) your main workout, twice a week is enough
- Focus on “consistently completing sessions each week”—building the habit matters more than chasing numbers
- Definitely install a fan and have water ready; make the environment comfortable
Intermediate Athletes (Have a clear FTP, want to break through plateaus)
- Use the Sweet Spot advanced version (3×20 minutes) as your base, 1–2 times per week
- Add micro-bursts or pyramid once a week to stimulate your ceiling
- Retest your FTP every 6–8 weeks to verify progress with data
- Start combining “indoor intensity + weekend outdoor long rides”
Advanced / Race-Prep Athletes (Have a specific race goal)
- Adjust workout proportions based on race characteristics: for long climbs like Wuling, prioritize Sweet Spot and long threshold intervals; for criteriums or short-distance races, increase the proportion of micro-bursts and VO2max work
- Use the indoor trainer to build base and intensity in the 12 weeks before the season; the closer to race day, the more outdoor race-specific practice
- Manage recovery strictly: the ratio of hard days to recovery days, sleep, and nutrition all matter equally
- Use power files for post-race analysis, turning every indoor data point into the basis for the next workout plan
FAQ: The Questions Athletes Ask Me Most
Q1: Why don’t my indoor and outdoor power numbers match?
This is extremely common. There are many reasons: trainer calibration hasn’t been done, poor indoor heat dissipation makes the same power feel harder, fixed posture lacks the momentum assistance of outdoor riding, or even inherent differences between power meters. I recommend treating indoor and outdoor as two separate systems, each with its own FTP and zones, rather than forcing the numbers to match. Indoor FTP is usually slightly lower than outdoor—that’s normal.
Q2: How many times a week should I train indoors to see results?
For most office-worker athletes, 2 to 3 structured workouts per week will bring noticeable progress, provided each session is completed with full effort and recovery is adequate. Rather than cramming in five sessions a week and ending up overtrained, three solid sessions with sufficient recovery is better. Quality always beats quantity.
Q3: Do I need cycling shoes and a power meter for indoor training?
Smart trainers usually have built-in power measurement, so an external power meter isn’t necessary. Cycling shoes, however, are strongly recommended—pedaling efficiency, the pull-up motion, and long-duration comfort all improve. At minimum, get a dedicated pair of indoor cycling shoes; don’t grind away in regular sneakers.
Q4: What should I do if my knees hurt during long indoor sessions?
First, check your bike fit—saddle height, fore/aft position, and cleat angle. Indoors, because your position is fixed and there’s no terrain variation, any small fit issue gets amplified. If pain persists after adjustments, stop and seek professional help. Don’t push through it. Pain is your body’s warning signal, not a test of willpower.
Q5: Can I prepare for Wuling or long-distance races using only an indoor trainer?
Base and intensity can be built very well indoors, but long-distance races also involve fueling rhythm, descending technique, tolerance for long periods in the saddle, and mental endurance—all of which require real-world accumulation. The ideal approach is indoor for the foundation, outdoor for validation. The closer to race day, the more outdoor practice you need.
Q6: Do I need to cool down after indoor training?
Yes. Even indoors, after a hard session, spend 5 to 8 minutes spinning at low intensity to help clear metabolic byproducts and bring your heart rate back down. Don’t just stop and grab your phone the moment high intensity ends—give your body a gradual cooldown process.
Conclusion: Make the Rainy Season Your Secret Weapon
Back to those messages at the beginning. Every year, I reply to athletes the same way: “Don’t use the rain as an excuse—treat it as a gift. While others stop because of the weather, you’re accumulating watt after watt on the trainer. When the spring racing season opens, the gap will show.”
The indoor trainer isn’t a substitute for outdoor riding—it’s a more precise, more efficient training tool that isn’t at the mercy of the weather. The workout library in your hands now—ERG essentials, Sweet Spot SST, micro-bursts, pyramid, plus a full set of psychological strategies—is enough to carry you through the entire winter and plum rain season.
All that’s left is to get on the trainer. Tonight, set up the fan, turn on your trainer, and start with the Sweet Spot beginner version. Three months from now, you’ll thank the version of yourself who was willing to sweat on rainy days.
See you on the race course this spring.
This article is educational content and does not replace individual assessment by a physician, physical therapist, or nutritionist. Before starting any new training program, please consult a qualified medical professional if you have cardiovascular or other health concerns.
References
- Wattbike — What is Sweet Spot Training: https://wattbike.com/blogs/training-programmes/sweet-spot-cycling-training-zones
- TrainerRoad — What Is Sweet Spot Training: https://www.trainerroad.com/blog/sweet-spot-training-everything-you-need-to-know/
- BikeRadar — ERG mode explained: https://www.bikeradar.com/advice/fitness-and-training/erg-mode
- Wahoo Fitness — A Guide to using ERG mode: https://support.wahoofitness.com/hc/en-us/articles/4402565516946-A-Guide-to-using-ERG-mode
- Wahoo Fitness — Indoor Cycling Tips for Training in ERG Mode: https://www.wahoofitness.com/blog/indoor-cycling-tips-for-training-in-erg-mode/
- TrainerRoad — Erg Mode Explained: https://support.trainerroad.com/hc/en-us/articles/201869764-Erg-Mode-Explained
Related Reading
- Indoor Alternative Training Plans for Typhoon Season: Making Bad Weather No Excuse
- Adapting to Taiwan’s Climate: Training Strategy Adjustments for Summer Heat and Winter Northeast Monsoon
- Rainy Season Training Strategies: Maintaining Training Quality and Safety in Monsoon Conditions
- 6-Week Indoor Trainer Quick-Result Plan: Maximizing Time for Office Workers
一日北高前的西濱集訓 | 跟著11小時軍團 | 300W踩不動的大逆風 | 輪車破風差幾瓦?
6 年前
西進武嶺 免費訓練分析服務 Intervals | 練不夠還是練過頭?你哪一種類型選手?AI模型告訴你! | 備戰神器 | 公路車 訓練 | CT Yeh
4 年前
水金九不厭五分 10度寒流冷到不願停!feat. 卡卡 / 公路車 / CT Yeh
6 個月前
實景訓練台) 彰化經典百K 高強度喵團 90分鐘 跟著一起練功 2019 Indoor workout Changhua Classic 100 Taiwan
7 年前
沉浸室內單車練功房開箱! 100吋大畫面,最便宜的花費? 居然還能K歌!? | 公路車 | CT Yeh
3 年前
一日北高前的高裝檢 | 北高 360 | 挑戰11小時的裝備 | 一日雙塔 | 補給
6 年前
#公路車 #西進武嶺 配速配瓦實驗 坡度分析 四小時內攻略 建大盃 NeverStop #西進武嶺攻略
6 年前
TBA 北高360 逆風爆熱再送空汙 苦行挑戰賽全記錄 4K沈浸式臨空畫質| 公路車 | CT Yeh
3 年前