Bench Press and Upper Body Pushing: A Complete Coach's Guide to Training the Push Series Correctly, Steadily, and in Balance
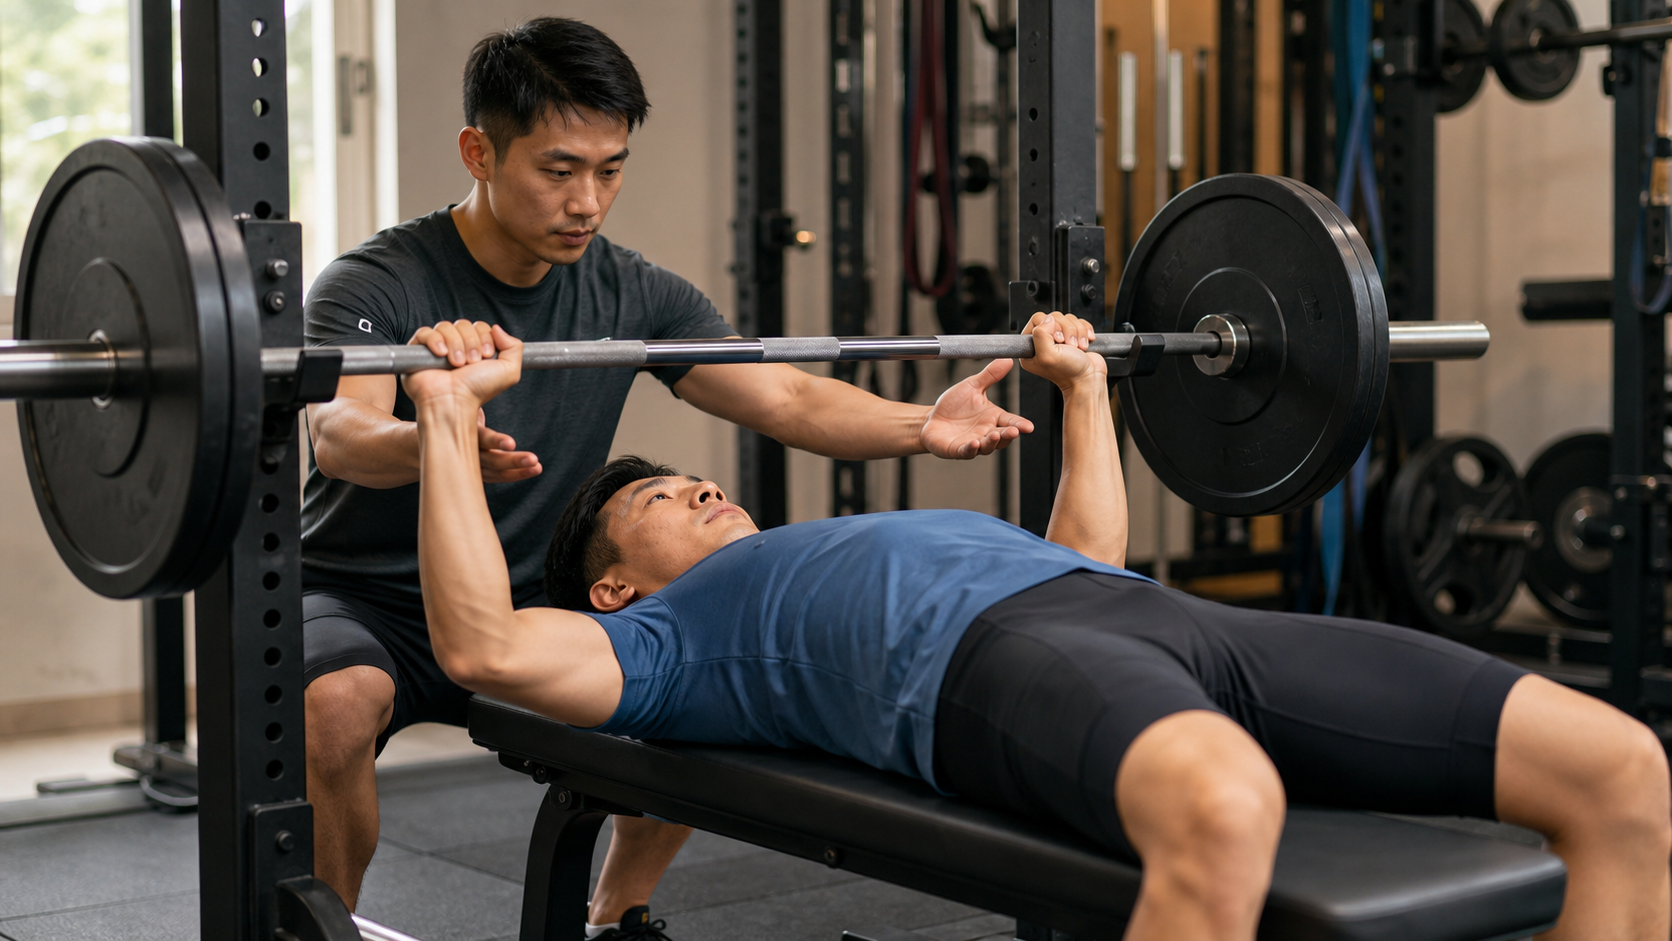
It Starts with a Trainee with a “Catching” Shoulder
I’ll never forget a trainee named A-Kai from a few years back. He was in his early thirties, worked in Hsinchu Science Park, loved cycling on weekends, and also wanted to build some muscle, so he started bench pressing obsessively. Six months later, he proudly told me he’d broken 100 kg on the bench, but his next sentence was: “Coach, lately my shoulder catches when I raise my arm, and it aches when I roll over on it in my sleep at night.”
I had him do a few reps of bench press with just the empty bar on the spot, and the problem was obvious at a glance: his shoulder blades weren’t retracted at all, his shoulders were shrugged forward, his elbows flared out almost to ninety degrees from his body, and the bar crashed down to the highest point on his chest before he muscled it back up. He wasn’t training his pectorals—he was using the front ligaments of his shoulder joint as a rubber band. Worse, he only trained pushing and almost never pulled, so his front-to-back strength was severely imbalanced, and his shoulder blades were being pulled out of alignment by the anterior muscles.
In this article, I want to lay out clearly, in one go, the pitfalls I’ve seen, the injuries I’ve witnessed, and what actually works across fifteen years of coaching trainees at all levels—from office workers who’d never held a bar to advanced lifters chasing 100 or 120 kg—in the “push series.” Bench press isn’t just “lying down and pushing the bar up.” It involves scapular stability, push-pull balance, joint health, and the rhythm of long-term progress. Once you understand this, you’ll find that not only does your pressing strength improve, but your shoulders become more durable.
Bottom line up front: Whether your bench press is good or not has never been about how much you lift, but about how you press and whether you’ve trained your back to match. Strong without injury—that’s a press you can train for a lifetime.
Concepts and Scientific Foundation: What the Push Series Is Actually Training
The Three Main Players in Upper-Body Pushing
Many people think bench press is just chest training, but “pushing” is actually the result of a whole team working together. The primary muscles involved in upper-body pushing include:
- Pectoralis Major: The main driver of horizontal adduction and pressing.
- Anterior Deltoid: Shoulder flexion and forward pressing.
- Triceps: Elbow extension, locking out the end of the movement.
- Serratus Anterior / Trapezius: Responsible for scapular stability and positioning—foundation-level players.
- Rotator Cuff: Supraspinatus, infraspinatus, teres minor, and subscapularis, responsible for keeping the humeral head firmly seated in the joint socket.
The last two groups are what I want to emphasize most here. The rotator cuff and scapular stabilizers aren’t the “main pressers,” but they’re the “bodyguards.” According to sports medicine literature, if the scapula can maintain a position of retraction and depression during the bench press, the shoulder joint sits in a more stable, safer mechanical position, which can reduce the risk of rotator cuff impingement (see references at the end). Conversely, if the scapula wobbles, shrugs, or tilts forward, the humeral head tends to drift upward and forward, chronically wearing down the anterior structures of the shoulder joint.
I often use an analogy to help trainees understand: the pecs and triceps are like the engine—lots of horsepower. But the rotator cuff and scapular stabilizers are the “wheel alignment” and “chassis.” No matter how strong your engine is, if the alignment is off, the car still shakes and damages parts. Many people train the engine hard (pressing heavy weight) while completely ignoring the chassis (stabilizers), and the result is stalled strength and shoulder injuries. Take care of the foundation, and your “engine” can perform—and last. That’s also why, when I work with advanced trainees, I place even more emphasis on these “unremarkable” small muscles.
The Spectrum of Push Series Movements
“Upper-body pushing” isn’t just the bench press. I usually break it down into several categories so trainees understand which angle they’re training:
| Movement Category | Representative Exercises | Primary Stimulus Angle | Suitable For |
|---|---|---|---|
| Horizontal Push (Flat) | Barbell bench press, dumbbell bench press, push-ups | Mid-chest, anterior deltoid, triceps | Almost everyone |
| Incline Push | Incline bench press, incline dumbbell press | Upper chest, anterior deltoid | Those wanting more upper-chest fullness |
| Decline Push | Decline bench press, dips | Lower chest, triceps | Advanced lifters, those targeting lower-chest definition |
| Vertical Push (Overhead) | Overhead press, dumbbell shoulder press, push-up variations | Entire deltoid, triceps, upper trapezius | Requires attention to shoulder mobility |
| Bodyweight Push | Push-ups, dips | Comprehensive, high core involvement | Beginners, home training |
I often tell trainees not to lock themselves into just the barbell bench press. A balanced push series should include a combination of different angles and different tools (barbell, dumbbell, bodyweight), so that the chest, shoulders, and triceps get comprehensive stimulation, and the shoulder joint doesn’t suffer from repeated wear at a single angle.
Push-Ups: The Underrated King of the Push Series
Many people think push-ups are “for beginners only”—that’s a huge misconception. Push-ups are a closed-chain movement where the scapulae can move freely and the core must engage throughout. They’re generally friendlier to the shoulders than the barbell bench press, and through variations, they can range from extremely easy all the way to making even strong men tremble. I’ve organized the push-up progression ladder into a table so people at different levels can find their starting point:
| Difficulty | Variation | Suitable For | Target Reps |
|---|---|---|---|
| Beginner | Wall push-ups | Complete beginners, late-stage shoulder rehab | 12–15 reps |
| Novice | Incline push-ups (hands on bench/table) | General beginners | 10–15 reps |
| Standard | Standard push-ups | Those with some foundation | 10–20 reps |
| Advanced | Decline (feet elevated), diamond push-ups | Advanced lifters, those targeting triceps | 8–15 reps |
| Elite | One-arm / explosive (clap) push-ups | Advanced athletes, those pursuing power | Low reps, high quality |
I often have trainees who train at home without equipment, or who are traveling, use this table to keep their push series training uninterrupted. Many people in Taiwan live in apartments without space for equipment; push-ups plus a resistance band is a complete home push series solution.
Why “Push-Pull Balance” Is the Golden Rule
This is the thing I watch most closely when coaching trainees. The human body is a system of tension balance. If the front (chest, anterior deltoid) is trained heavily, the back (upper back, posterior deltoid, rotator cuff) must keep up, or the scapulae will be pulled forward by the anterior muscles, creating rounded shoulders and a hunched posture, narrowing the space for the shoulder joint, and inviting impingement and pain.
A-Kai was a textbook case—his push-to-pull ratio was close to five to zero. My principle for generally healthy adults is: for every set of pushing volume, you need at least an equal amount, ideally slightly more, of pulling to balance it. For Taiwanese office workers who already have a tendency toward rounded shoulders or sit at a desk all day, I recommend a pull-to-push ratio of 1.5:1 to 2:1, to first pay back the debt to the back and rotator cuff.
To help you understand concretely what “balance” looks like, I’ve organized a pairing table of pushes and their corresponding pulls. You can treat it as a menu, ensuring that every pushing angle has a corresponding pull to offset it:
| Push Movement (Front) | Corresponding Pull (Back) | What It Balances |
|---|---|---|
| Barbell / dumbbell bench press | Barbell row, seated row | Chest vs. mid-back, scapular retractors |
| Incline press | Reverse row, face pull | Anterior vs. posterior deltoid |
| Overhead press | Pull-ups, lat pulldown | Upper trapezius vs. latissimus dorsi |
| Dips | Straight-arm pulldown, rear delt work | Lower chest vs. posterior deltoid |
| Any push | External rotation, W-Y-T bodyweight movements | Rotator cuff and scapular stabilizers |
I often remind trainees of a very intuitive self-check: if you stand relaxed in front of a mirror and your palms face backward with your thumbs rotating inward, it means your shoulders have already been pulled into internal rotation and rounded by your push training. At that point, the answer isn’t to add more bench press—it’s to add the pulls from the right column above.
Practical Methods: Getting Every Detail of the Bench Press Right
The Five Bench Press Checkpoints
When coaching trainees, I use five cues to help them build correct bench press form. These five points are established in order, and none can be skipped:
- Feet planted, hips on the bench: Both feet firmly on the floor, creating tension from the feet through the back (leg drive). Hips stay on the bench the entire time—don’t let them rise to cheat the movement into a pseudo-decline press.
- Scapular retraction and depression: Before lying down, “squeeze back and press down” with the shoulder blades, imagining tucking both scapulae into your back pockets. This step builds the stable foundation.
- Moderate upper-back arch: Not an exaggerated competitive arch, but a natural maintenance of neutral lumbar spine with a slight upper-back arch, lifting the chest, shortening the range of motion, and protecting the shoulders.
- Grip width and elbow angle: Grip slightly wider than shoulder width. On the descent, elbows should be at roughly 45 to 75 degrees from the torso—do not flare to 90 degrees. Literature indicates that excessive elbow abduction and overly wide grips increase shoulder joint load and injury risk.
- Bar path and touch point: The bar lowers to around the nipple line or slightly below. Wrists stay neutral, directly above the forearms. On the way up, the bar travels in a slightly diagonal curve back to above the shoulder joint.
Breathing and Core
I require trainees to use “abdominal bracing” (a gentler version of the Valsalva maneuver) during the bench press: take a full breath before lowering, brace the core to create intra-abdominal pressure, stabilizing the entire torso as a platform to press from, then exhale during the press or after passing the sticking point. This significantly improves stability and force transfer.
Medical reminder: If you have high blood pressure, cardiovascular disease, or a relevant medical history, the Valsalva maneuver can cause a temporary sharp rise in blood pressure. Be sure to consult a physician first, use a more conservative breathing approach and lighter loads, and never push yourself recklessly. Diabetics with retinopathy or autonomic neuropathy should also avoid high-intensity breath-holding and should arrange exercise under individualized guidance from their medical team.
Warm-Up: The Critical Five Minutes Most People Skip
I’ve almost never seen self-trained trainees who warm up actively and properly. Everyone rushes to load up weight the moment they hit the gym—that’s a breeding ground for shoulder injuries. I require all trainees to spend at least five to ten minutes on the following three-stage warm-up before working sets:
- Whole-body warm-up: Three to five minutes of brisk walking or an elliptical, raising core body temperature and slightly elevating heart rate (usually to a comfortable range of about 100–110 bpm is enough). Taiwan’s winters are damp and cold, and the body is stiffer, so this segment should be extended.
- Shoulder mobility: Arm circles, wall angels, and band pull-aparts, 15–20 reps each, to wake up the scapulae and rotator cuff.
- Progressive warm-up sets: Before working weight, do one ascending set each with the empty bar, 40%, 60%, and 80%, allowing the nervous system and joints to gradually adapt to the day’s load.
These few minutes may seem like a waste, but they’re actually the most cost-effective “insurance premium” I know. Skipping these five minutes can cost you three months of rehab.
How to Set Training Variables
Based on the direction of the ACSM’s 2026 updated resistance training guidelines, I’ve organized the common variables into a table for you. The values here are ranges; adjust them to your individual situation:
| Training Goal | Recommended Intensity (%1RM) | Reps | Weekly Sets per Muscle Group | Frequency |
|---|---|---|---|---|
| Hypertrophy (muscle gain) | ~60–80% | 8–15 reps | ~10+ sets | ≥ 2× per week |
| Maximal strength | ~70–90%+ | 3–6 reps | Lower volume, high intensity | 2–3× per week |
| Muscular endurance | ~40–60% | 15–20+ reps | Moderate to high volume | 2–3× per week |
| Beginner adaptation | ~50–65% | 8–12 reps | Start low, progress gradually | 2–3× per week |
The new guidelines carry an important conceptual update: hypertrophy doesn’t only occur in a narrow “hypertrophy zone.” As long as effort is sufficient (close to failure), loads from lower to higher can all produce muscle growth. But if the goal is “maximal strength,” the evidence still supports using higher loads of roughly 70% 1RM and above. In other words—to get stronger (force) you need heavy weight, but to get bigger (muscle mass) you have more flexibility; you don’t need to grind heavy weights every session.
This is good news for many Taiwanese office-worker trainees: you don’t have to chase a PR every session. Put the weight at moderate loads, take each set seriously to near failure, and you’ll still build muscle while dramatically reducing the risk of joint injury.
Tempo and Control: The Variable Beyond Weight
Trainees often ask me: “Same weight, same reps—why does it feel like others get more out of it?” The answer is often in tempo. Many people bench press with a “fast down, fast up,” bouncing the bar off their chest with momentum, so the muscles are actually under tension for very little time. I require them to slow down the eccentric (lowering) phase, lengthening the time under tension, and both the mind-muscle connection and quality improve dramatically.
A common tempo notation uses four numbers, representing “eccentric—bottom pause—concentric—top pause” in seconds. Here are a few practical examples:
| Tempo Notation | Meaning | Purpose |
|---|---|---|
| 2-0-1-0 | Lower in 2 seconds, press up immediately | Default tempo for general hypertrophy |
| 3-1-1-0 | Lower in 3 seconds, pause 1 second at bottom | Reinforces control, eliminates chest-bouncing habit |
| 1-0-X-0 | Lower in 1 second, explosive press | Advanced lifters developing strength and speed |
For trainees who love bouncing the bar or lose control on the descent, I almost always prescribe “3-1-1-0” for a period to force them to learn control. Once the movement is clean, they can return to a more normal tempo and add weight. Learn control first, then talk about weight—never reverse the order.
A Practical Push Series Day Template
Here’s an example push day I designed for an intermediate trainee who “can train three times a week and wants to balance chest, shoulders, and triceps with shoulder health.” Note that the last two items are deliberately arranged for balance and maintenance:
| Order | Exercise | Sets × Reps | Notes |
|---|---|---|---|
| 1 | Barbell flat bench press | 4 × 6–8 | Main lift, higher intensity |
| 2 | Incline dumbbell bench press | 3 × 10–12 | Targets upper chest; dumbbells address bilateral balance |
| 3 | Seated dumbbell shoulder press | 3 × 10–12 | Vertical push, deltoids |
| 4 | Dips or push-ups | 3 × 2 reps shy of failure | Bodyweight, lower chest and triceps |
| 5 | Face Pull | 3 × 15 | Balance movement, posterior deltoid and rotator cuff |
| 6 | External rotation (band/cable) | 2 × 15 | Rotator cuff maintenance, cool-down |
The spirit of this template: the first four items build the pressing strength, and the last two train the shoulder’s “bodyguards.” Many people only do the first four and end up in a rehab clinic six months later.
Four-Week Progression: From “Can Press” to “Presses Steadily”
A single-day template isn’t enough—training is a continuous process. I like to use four weeks as a mini-cycle, letting trainees progress gradually within the same template rather than randomly adding weight each session. Here’s a four-week progression example I set up for a trainee who had just stabilized his bench press with a flat bench 1RM of about 60 kg (using the flat bench press as the main lift):
| Week | Main Lift Intensity | Sets × Reps | Rate of Perceived Exertion (RPE) | Focus for the Week |
|---|---|---|---|---|
| Week 1 | ~65% (39 kg) | 4 × 8 | 6–7 | Rebuild technique, feel scapular stability |
| Week 2 | ~70% (42 kg) | 4 × 6 | 7–8 | Slightly increase load, maintain bar path |
| Week 3 | ~75% (45 kg) | 5 × 5 | 8 | Challenge intensity, leave 2 reps in reserve |
| Week 4 (Deload) | ~55% (33 kg) | 3 × 8 | 5–6 | Active recovery, let joints breathe |
The key is the deload week in week four. Many people think training means going heavier every week, but the body needs periodic rest to supercompensate and truly get stronger. I often tell trainees: “Progress happens during recovery, not in the moment you grit your teeth and grind out a rep.” Building in a deload week means you’ll actually press heavier and get injured less over the long run.
RPE (Rate of Perceived Exertion, on a 1–10 scale) is a very practical self-regulation tool. Taiwan’s weather, sleep, and work stress all affect your state. Rather than stubbornly sticking to fixed weights, learn to use RPE: if you’re feeling off today and the same weight feels especially heavy (high RPE), back off a bit; if you feel great, follow the plan. That’s far smarter than blindly chasing numbers.
Common Errors and Corrections
Having coached so many trainees, bench press errors are actually highly repetitive. I’ve listed the most common ones in a comparison table so you can check yourself:
| Common Error | What Happens | Correction |
|---|---|---|
| Scapulae not retracted, shoulders shrugged forward | Shoulder instability, rotator cuff impingement, anterior shoulder pain | Retract and depress scapulae before lying down, maintain throughout |
| Elbows flared near 90 degrees | High stress on anterior shoulder, increased injury risk | Bring elbows to 45–75 degrees, forearms perpendicular to floor |
| Grip too wide | Increased shoulder load, shorter range of motion | Slightly wider than shoulder width, find your most comfortable grip |
| Only training push, no pull | Push-pull imbalance, rounded shoulders, scapular misalignment | Pull volume at least equal to push; more for desk workers |
| Bouncing off chest, lowering too fast | Momentum, loss of control, impact on chest and shoulders | Lower under control in 2–3 seconds, touch chest lightly, then press |
| Wrist bent backward | Wrist pain, lost force transfer | Grip the bar deep, wrists neutral directly above forearms |
| Only heavy weight, ignoring technique | Compensatory patterns, chronic wear | Get the movement clean first; the weight will follow |
A Special Note: “Does Shoulder Pain Mean I Should Stop Pressing?”
Not necessarily—but you need to distinguish the situation. If it’s muscle soreness (DOMS) the day after training, that’s a normal training response and will resolve in a few days. But if you experience sharp, stabbing pain, weakness, or a fixed pain point in the front/deep part of the shoulder during the lift itself, that’s usually a warning sign from the joint or rotator cuff, and you shouldn’t push through it.
My handling principle: first regress (switch to more shoulder-friendly variations like dumbbells, floor presses, or push-ups, and reduce weight), and increase rotator cuff and scapular stability training. If pain persists after two to three weeks of rest and regression, or is accompanied by significant weakness, be sure to see an orthopedic or rehab physician for evaluation. Taiwan’s National Health Insurance makes it easy to see a doctor—don’t play doctor with yourself and drag it out until it becomes a chronic tendinopathy.
I want to clarify a boundary here: this article discusses general training technique and maintenance, not self-diagnosis or treatment of shoulder injuries. Sharp pain, night pain severe enough to disrupt sleep, obvious arm weakness where you can’t lift it, or a catching/clicking sensation with pain—these are all signs you should see a doctor. Leave it to professional orthopedic surgeons, rehab physicians, or physical therapists to evaluate; they’ll arrange tests and rehabilitation based on your individual situation. No article can replace that.
Three Beginner Movements for Rotator Cuff and Scapular Maintenance
Prevention is better than cure. Almost every one of my trainees has these three movements in their cool-down routine. They take less than ten minutes but dramatically extend the “service life” of your shoulders:
| Movement | Key Points | Recommended Dose |
|---|---|---|
| Band external rotation | Elbow tucked at side, forearm rotates outward, feel the rear shoulder working | 2–3 sets × 15 reps, light resistance |
| Face Pull | Pull cable toward face, elbows high, external rotation at the end | 3 sets × 15 reps |
| Push-up plus | At the top of a push-up, push further to protract the scapulae | 2–3 sets × 12 reps |
The common principle for these movements: light weight, slow tempo, chasing feel rather than load. The rotator cuff is a delicate stabilizer—the harder you try to train it with heavy weight, the more likely you are to injure it. Treat it as maintenance, not competition.
Actionable Advice for Readers at Different Levels
Complete Beginners (Not Yet Comfortable with a Bar)
Don’t rush to lie down on the bench. I have beginners spend two to four weeks building the foundation:
- Start with push-ups: Kneeling or wall push-ups are fine. First learn “scapular stability + core bracing” in a push.
- Build the push-pull habit: From day one, also schedule rowing-type pulls so imbalance never starts in the first place.
- Light weight, higher reps: 50–65% intensity, 8–12 reps, to establish the neural and movement patterns first.
- Full-body training 2–3× per week, giving the body adequate recovery.
- Seek stability before progress: In the first few weeks, don’t rush to watch the weight numbers. Turn “scapulae retracted, elbows not flaring, controlled descent” into habits you can do without thinking—that’s the most valuable investment.
The phrase I say most often to beginners: “The time you spend now cleaning up your technique is saving yourself the money and time of rehab three years from now.” Many people rush to add weight in the first three months, then start hurting here and there in month four—haste makes waste. Taiwanese people are generally busy with work and time is precious, which is exactly why you should build the foundation correctly the first time and avoid going backward.
Intermediate (Bench Press Already Stable)
- Add angle variations: Rotate between flat, incline, and vertical presses to avoid repeated wear at a single angle.
- Introduce periodization: Don’t grind heavy every session. Use a “heavy—moderate—light” approach to intensity, giving joints a breather.
- Audit your push-pull ratio: Honestly track your total weekly sets of pushing and pulling, and make up the pulling volume.
- Add rotator cuff maintenance: Face pulls and external rotations as a fixed part of your cool-down.
- Start logging your training: Write down your weight, reps, and RPE each session. That’s how you know whether you’re truly progressing or spinning your wheels. A phone note or a simple training app works—the key is consistent logging and a monthly review.
- Check your recovery quality: The most common bottleneck for intermediates isn’t the program—it’s insufficient sleep, inadequate protein, or training too frequently without recovery. Fix recovery first, and progress often returns.
Advanced (Chasing 100 kg, 120 kg)
- Higher technical standards: Leg drive, upper-back arch, and bar path must all be stable and repeatable—that’s the prerequisite for pressing heavier.
- Prioritize recovery: Sleep, protein intake (a common recommended range for general adults is about 1.6–2.2 g per kg of body weight per day), and deload weeks are non-negotiable.
- Use accessory movements to address weaknesses: Wherever your sticking point is, target it specifically (e.g., weak triceps → close-grip bench press; weak chest → dumbbell flyes).
- Regularly assess shoulder status: Those chasing heavy weights need to treat rotator cuff and scapular stability as an “investment,” not an “extra.”
Practical Tips for Taiwan
- Climate and warm-up: Taiwan’s summers are hot and humid, winters damp and cold. On cold days, be sure to extend your warm-up so the shoulder joint and rotator cuff are warmed up before loading weight.
- Protein for those who eat out: Convenience store tea eggs, unsweetened soy milk, chicken breast, and tuna onigiri are all convenient protein sources. Don’t let protein intake get too low on training days. One tea egg has about 7 g of protein and roughly 70–80 kcal—a great supplement.
- Venue options: Most community sports centers and chain gyms have bench press racks and dumbbells. At home, push-ups and resistance bands can keep your push series training uninterrupted.
- Medical resources: For persistent shoulder pain, Taiwan’s orthopedic, rehab, and sports medicine clinics are all easily accessible. With NHI coverage, the barrier to seeing a doctor is low—don’t delay.
- Commuting and training times: Many Taiwanese office workers can only train in the evening or early morning. If training in the early morning, the body is stiffer, so warm up more thoroughly. If training late after work, be careful not to force heavy weights out of fatigue—better to reduce volume and execute the movements well.
One-Minute Self-Check: Is Your Push Series Healthy?
Before training, use this table for a quick self-assessment. If you check any box, it’s time to adjust:
| Check Item | Do You Have This? | If So, What to Do |
|---|---|---|
| Push volume far exceeds pull | 12 sets of push per week, only 3 of pull | Add pulls; get pull ≥ push first |
| Anterior shoulder pain during bench press | It’s pain, not soreness, and the location is fixed | Regress + seek medical evaluation |
| Clearly rounded shoulders when standing relaxed | Palms face backward, shoulders roll forward | Add face pulls and back work |
| Never do rotator cuff maintenance | Just want to leave quickly after training | Add external rotations and face pulls |
| Going for max weight every session | No heavy/light cycling | Introduce a deload week |
I often print this table for trainees to stick on their gym bag. Training is a lifelong pursuit—spending one minute on a self-check beats spending three months in rehab after an injury.
FAQ
Q: Do you have to bench 100 kg to be considered strong?
Absolutely not. Bench press weight is related to body size, body weight, and leverage. The key is steady progress without injury. Someone who can cleanly bench 60 kg with healthy shoulders is far ahead of someone who grinds out 100 kg but has shoulder pain every day.
Q: Dumbbell bench press or barbell bench press—which should I choose?
Both are good, each with advantages. The barbell lets you press heavier and progress weight more easily; dumbbells offer a greater range of motion, address bilateral balance, and are generally friendlier to the shoulders. I often have trainees use both.
Q: How many times a week should I train chest?
For most people, spreading chest (push) volume across 2 sessions per week is usually more efficient than cramming it into 1 day, and recovery is better too.
Q: Will bench pressing turn women into bodybuilders?
No. Women have far lower testosterone than men, so muscle gain is limited under normal training and diet. Bench pressing will only make the upper body more toned and stronger, and it can improve posture.
Q: Will training push make my neck and shoulders tighter from cycling?
If you only train push and not pull, yes, it can worsen rounded shoulders and neck/shoulder tightness. But if you balance push and pull properly and add rotator cuff maintenance, it can actually improve the upper-back weakness caused by long hours in a cycling aero position. For cycling enthusiasts, balanced upper-body push-pull development makes you more durable in long aero positions and less prone to neck and shoulder fatigue—that’s a very practical benefit.
Q: I don’t have a bench press rack. How do I train push at home?
Push-ups are the best home push series movement, and the variations are more numerous than you’d imagine: kneeling reduces difficulty, incline (hands elevated) reduces difficulty, decline (feet elevated) and diamond push-ups increase difficulty. Pair that with a resistance band for external rotations and face pulls, and you can train the push series and shoulder maintenance completely at home—no gym required.
Q: How long until I see bench press progress?
For beginners, because neural adaptation is fast, the most noticeable progress usually comes in the first two to three months, and you might add a little weight every week or two. After that, progress slows, which is normal. At that point, progress comes from periodization, recovery, and nutrition—not brute force. Don’t compare yourself to others; compare yourself to where you were three months ago.
Q: Should I stretch before training?
Before training, do “dynamic” warm-ups (mobility movements, warm-up sets) rather than prolonged static stretching. Prolonged static stretching is better placed after training or at a separate time. Warming up the joints and waking up the nervous system before training matters more than stretching.
Q: Do I have to train to failure?
Not necessarily, and for beginners I generally don’t recommend going to failure on every set. Leaving 1–3 reps in reserve (RIR 1–3) still produces excellent training results while maintaining movement quality and reducing injury risk. Training to failure is a tool advanced lifters use occasionally, not a standard for every set.
Conclusion: Make the Push a Capability That Lasts a Lifetime
Back to A-Kai’s story. I had him cut his bench press weight by a third, rebuild scapular stability, and add plenty of pulling and rotator cuff work. Three months later, his shoulder no longer caught, and his bench press not only returned but quietly surpassed his previous high—and this time, he was pressing steadily and easily.
That’s the core message I want to convey: training the push series isn’t about chasing a single weight number, but about the ability to progress long-term, pain-free, and sustainably. Get the technique right, stabilize the scapulae, and balance push and pull—you’ll find that strength and health can coexist. The bench press isn’t a sprint; it’s a road you can walk for a very, very long time.
Next time you lie down on the bench, ask yourself three questions first: Are my shoulder blades retracted? Are my elbows not flared wide? Has my pulling this week kept up with my pushing? Answer those three well, and you’re already ahead of most people in the gym.
Finally, to everyone working hard out there: there’s no shortcut in training, but there is a right path. Build solid technique, take care of recovery, and balance push and pull—time will give you honest returns. Don’t rush, don’t compare, don’t push through pain—take it one step at a time. Your shoulders will stay with you, and your strength will follow. May you train strong and healthy. See you at the gym, and may your next bench press be steadier and easier, turning the push series into a lifelong asset.
This article is educational content and cannot replace individual diagnosis and treatment advice from a physician, physical therapist, or nutritionist. If you have shoulder joint pain, chronic conditions, or special health circumstances, please consult a professional before training.
References
- ACSM 2026 Resistance Training Guidelines Update: https://acsm.org/resistance-training-guidelines-update-2026/
- Effects of Bench Press Technique Variations on Shoulder Joint Load and Injury Risk (Frontiers in Physiology): https://www.frontiersin.org/journals/physiology/articles/10.3389/fphys.2024.1393235/full
- Causes and Prevention of Shoulder Pain in the Bench Press (Physical Therapy and Sports Performance Perspective): https://sustainptperformance.com/shoulder-pain-bench-press/
Related Reading
- The Complete Guide to Overhead Pressing and Overhead Training: Mobility Prerequisites and Safety Discipline Before Raising Your Arms Overhead
- Upper-Body Push-Pull Balance for Basketball: Stable Shooting, Strong Boxing Out, and Healthy Shoulders
- The Complete Pull-Up Guide: Pull Series Movements, Progressions and Regressions, and a Coach’s Practical Notes for Solid Back Development
- The Complete Guide to Shoulder Pain: Swimmer’s Shoulder and Rotator Cuff Impingement, from Strengthening to Avoiding Aggravation
CT 喇低賽) 武嶺牽車 才是王道 西進牽車四小時內秘訣 攝手位置 如何判斷 防抽筋小秘訣
7 年前
一日北高/長距離團騎 常見問題補充篇 / 組團或跟團的眉角 / 壯車友容易被瘦車友慢性拉爆 / 原來屁股痛可能是這個原因...? / 風場配速法 / 公路車 / CT Yeh
2 年前
西進武嶺 免費訓練分析服務 Intervals | 練不夠還是練過頭?你哪一種類型選手?AI模型告訴你! | 備戰神器 | 公路車 訓練 | CT Yeh
4 年前
昇陽SYB車隊 & Fuji 菁英選手們的趣味經驗分享,長知識了!市民車友必看~ 一路被拉爆後才給問 | 戀戀197 武嶺 凸台經驗分享 | 公路車 | CT Yeh
4 年前
再一組! 全碳幅條 碟煞/無內胎輪組 開箱! 到底好騎嗎? UNAAS X40 | 公路車 | CT Yeh
4 年前
CT趣訪 西進武嶺 2小時組 EP2 全村的希望 蔣緯緯! 訓練菜單&技巧公開 |公路車 |CT Yeh
4 年前
大禹嶺 到 武嶺牌樓 全程前後實況錄影 | 北進武嶺 | 東進武嶺 | KOM | 訓練台 | 坡度分析 | Taiwan KOM Last 10 km HARD | 公路車
6 年前
訓練台體驗) 2019台北自行車展 三大家 訓練台體驗 Tacx Neo Flux 2 Xepdo Apx Wahoo Kickr
7 年前