The Complete Guide to Overhead Pressing and Overhead Training: Mobility Prerequisites and Safety Discipline Before You Raise Your Arms Overhead
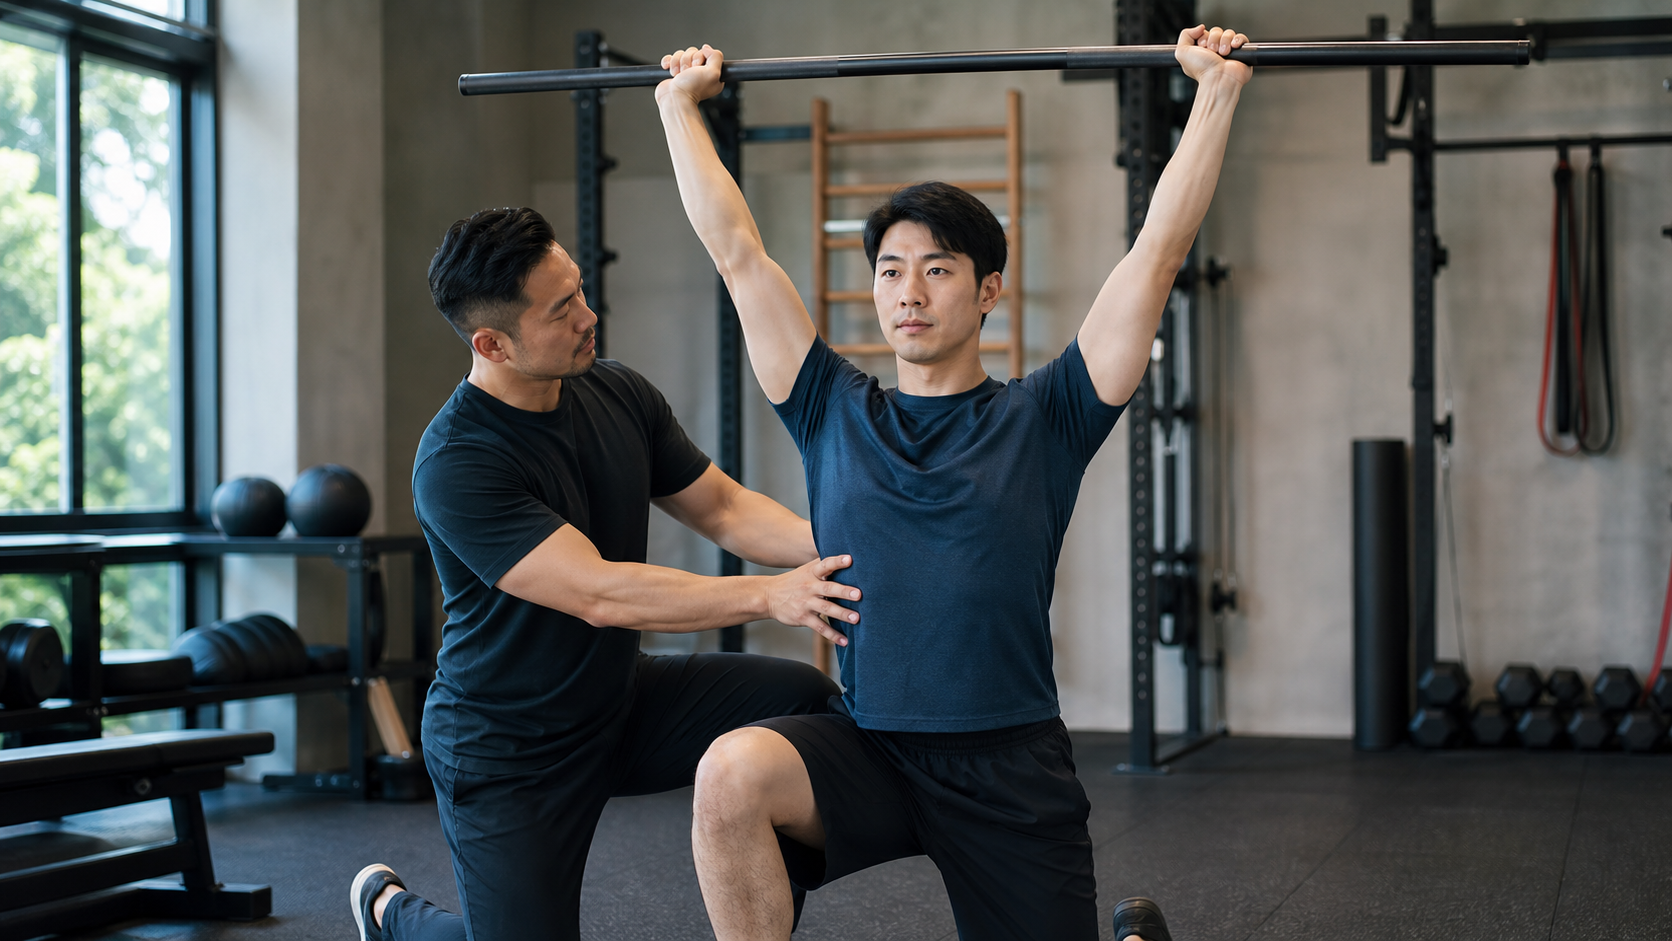
Starting with a Client Who Was Stuck for Six Months
I still remember that engineer client who worked in the Hsinchu Science Park—let’s call him A-Hong. When he came to see me, his opening line was: “Coach, my shoulder hurts when I press weight, but if I don’t press, my upper chest never seems to grow.” I asked him to demonstrate a set of overhead presses with an empty bar on the spot. Halfway through the rep, I could already see the problem: his ribs were jutting forward, his lumbar spine was hyperextending, and the bar never actually traveled to directly above his head—it stopped in front of his forehead. He thought his “shoulders weren’t strong enough,” but the real issue was that he didn’t have the mobility to raise his arms overhead at all, so his body had no choice but to compensate with his lower back.
In fifteen years of coaching, I’ve seen this scenario hundreds of times. The overhead press (also commonly called the shoulder press, standing press, or Military Press) is the upper-body exercise with the highest mobility prerequisites—and the one most easily overlooked. Many people treat it as a simple “lift the weight overhead” movement, ignoring the fact that before your arms even touch the weight, the scapulae, thoracic spine, and shoulder joint must already have negotiated a complex collaboration.
In this article, I want to lay out overhead training comprehensively: why it demands so much mobility, what’s actually happening in the body, how to assess whether you’re ready, how to structure your programming in practice, how to fix common errors, and where different levels of trainees should start. This is a long read, because this topic genuinely deserves a thorough treatment. If you’re primarily a cyclist or runner and think, “I’m not a powerlifter, why would I train overhead presses,” I especially want you to keep reading—a well-trained overhead press offers real benefits for your upper-body posture and torso stability during long hours in the saddle.
Concepts and Scientific Foundations: What Happens to the Body When You Raise Your Arms Overhead
Overhead Isn’t Just About the “Shoulder” Joint
Let’s first bust the biggest myth: raising your arms overhead is never solely the job of the shoulder joint (the glenohumeral joint). It’s a kinetic chain made up of the shoulder joint + scapulae + thoracic spine, and none of them can be skipped. In sports science, there’s a concept called “scapulohumeral rhythm,” which describes how the scapulae must rotate in sync as the arms rise—the two move together like partners in a duet.
According to an observational study on overhead mobility, to achieve a functional overhead position, the scapulae need to upwardly rotate approximately 60 degrees; simultaneously, full bilateral shoulder flexion requires thoracic extension up to around the T6 segment. In other words, if your thoracic spine is stiff and your scapulae can’t rotate up, then even if your shoulder joint itself is very loose, your arms still won’t reach truly overhead—so the body borrows mobility from elsewhere, most commonly by hyperextending the lumbar spine (just like my client A-Hong).
The study also noted that to determine whether someone can successfully complete an overhead movement, glenohumeral flexion and abduction need to reach a threshold of approximately 83 degrees, while external rotation needs roughly half or more of the contralateral side. These numbers aren’t meant for you to measure obsessively with a goniometer, but to establish a concept: overhead pressing is a compound capability requiring multiple joints and multiple angles to align simultaneously.
Why Insufficient Mobility Leads to Injury
When scapular upward rotation is insufficient, or the timing of rotation is too slow, the humeral head (the head of the upper arm bone) can compress the space between itself and the acromion (the bony projection on the outer scapula) as it rises. Inside that space lie the rotator cuff tendons and bursa. When they repeatedly rub and get pinched in an inadequate space over time, that’s one source of what we commonly call “impingement.” This is also why some people develop a dull ache in the front-upper shoulder after pressing for a while, or feel a catch at certain angles when raising the arm.
I want to emphasize this point: Pain doesn’t equal “you’re not strong enough”—often it means “your mobility or motor control isn’t in place.” Forcing more weight on top of that only worsens the impingement. The correct order is always to fix mobility and motor control first, then talk about load.
The Upper Trapezius Shouldn’t Have to Carry the Load Alone
A common dysfunction seen in clinical and training settings is “scapular dyskinesis”—meaning the scapulae’s movement pattern is disrupted. Typical presentations include: insufficient upward rotation, excessive anterior tilting, or shrugging before rotation even begins. Behind these patterns is often a result of weak lower trapezius and serratus anterior, paired with overactive upper trapezius and levator scapulae.
In plain terms: many people shrug first when raising their arms, using the upper traps to yank the scapulae upward instead of letting them “upwardly rotate” properly. This is also why preparation for overhead training often isn’t about training the deltoids—it’s about waking up the serratus anterior and lower traps first.
Should You Use the Valsalva Maneuver?
The overhead press is a movement requiring high torso stability, and many people use the “valsalva maneuver”—holding their breath—at the moment of pressing to brace the core and stabilize the spine. For healthy individuals with no cardiovascular concerns, brief breath-holding with heavy loads is a common and justified practice—it raises intra-abdominal pressure, making the torso act more like a solid pillar.
But there’s an important safety caveat here: the moment of breath-holding causes a temporary spike in blood pressure. If you have hypertension, heart disease, or any cardiovascular condition, excessive or prolonged breath-holding can carry risk. For those individuals, I strongly recommend: consult your physician first, use lighter weights, keep your breathing smooth between reps, and don’t hold your breath for extended periods just to chase heavy numbers. Safety always matters more than squeezing out a few more kilograms. This isn’t meant to scare you—it’s so you can train for the long haul and stay healthy.
Why Endurance Athletes Should Train It Even More
Many cyclists and runners treat overhead training as “bodybuilder stuff” and skip it, which is a real shame. During long hours of riding, your torso has to fight gravity and stabilize your upper body. If the postural muscles of the scapulae and upper back are weak, your position will collapse in the later stages of a ride, leading to neck and shoulder soreness, and even compromised breathing efficiency. Overhead training works precisely this entire “torso—scapulae—upper back” stabilization chain. It won’t make you bulky, but it will help you maintain an efficient, injury-sparing position in the latter stages of long-distance efforts. For anyone chasing 100 km-plus endurance rides or full marathons, this is a tangible advantage.
Practical Methods: From Assessment to Programming
Step One: Run Three Self-Assessments
Before adding any weight, I always have clients pass three checkpoints. You can test these yourself at home or in the gym.
Test One: Wall Arm Raise (Wall-Slide Test)
Stand with your back against a wall—head, upper back, and glutes touching—keeping a natural arch in your lower back with just enough space for a hand to pass through. With arms straight and palms facing away, slowly raise them overhead. Watch for two things: whether your arms can stay close to the wall and reach beside your ears without your ribs jutting forward or your lower back arching off. If the moment you raise your arms, your ribs pop out and your lower back leaves the wall, you’re lacking thoracic extension and shoulder flexion mobility—not strength.
Test Two: Supine Overhead Test
Lie on your back with knees bent, lower back flat on the floor, and arms straight reaching overhead toward the floor. If your arms rest easily on the floor without needing your lower back to arch, your overhead mobility is largely sufficient. If your arms hover in the air, or you have to arch your back to touch the floor, that’s a sign of insufficient mobility.
Test Three: Thoracic Rotation and Extension
In a quadruped position, place one hand behind your head and rotate your chest open toward the ceiling. Compare left and right sides to see if one side is noticeably stuck. Thoracic stiffness is a common affliction among Taiwan’s desk-bound office workers—long hours at computers and forward-leaning cycling postures both train the thoracic spine into a habitual hunch.
The table below lays out the assessment items, what to look for, and the priority direction for correction when you fail:
| Assessment Item | Key Observation | Common Signs of Failure | Priority Direction |
|---|---|---|---|
| Wall Arm Raise | Whether arms can stay on the wall to ear level | Ribs jutting forward, lower back arching | Thoracic extension + lat stretch |
| Supine Overhead | Whether hands can touch the floor without arching the back | Arms hovering, needing back arch to compensate | Shoulder flexion mobility + core control |
| Thoracic Rotation | Whether left-right chest opening is symmetrical | One side noticeably stuck, limited range | Thoracic rotation mobilization |
| Scapular Control | Whether you shrug before raising the arms | Early shrugging, upper trap dominance | Serratus anterior + lower trap activation |
If you fail two or more of these three assessments, my advice is blunt: hold off on the standing barbell overhead press for now. Spend four to six weeks building up mobility and scapular control, then add load afterward—you’ll progress faster and safer.
Step 2: Warm-Up and Mobility Preparation
I usually have my athletes spend 8 to 10 minutes on the following overhead preparation routine on each upper-body training day. This isn’t an optional ritual—it’s the key to genuinely improving the quality of your pressing that day.
- Thoracic Spine Extension (Foam Roller or Rolled Towel): Lie on a foam roller and perform small-range extensions along the mid-thoracic spine, 10 to 15 reps.
- Latissimus Dorsi and Teres Major Stretch: From a kneeling position with hands on a bench or box, sit your hips back and feel the stretch from the armpit down the side of your body. Hold for 30 seconds x 2.
- Serratus Anterior Activation (Wall Slide / Serratus Wall Slide): Face a wall with your forearms against it, push your shoulder blades forward, then slide them upward. 10 to 12 reps. This movement helps you “find” the feeling of upward rotation in your shoulder blades.
- Scapular Plane Raise: Using light dumbbells or a resistance band, raise your arms in a plane 30 degrees in front of your body. Focus on feeling the shoulder blades rotate along, rather than shrugging.
- Light Overhead Hold: Press an empty barbell or light dumbbells to the top and hold for 10 seconds, finding the position where your ribs are down, your core is braced, and your shoulder blades are stable.
Step 3: Overhead Press Technique Key Points
When it’s time to actually press, I constantly watch these details in my athletes:
- Starting Position: The barbell rests on the collarbone and the upper chest, elbows slightly in front and below the bar, forearms as vertical as possible. Grip width slightly wider than shoulder-width.
- Torso: Pull the ribs down, don’t let them flare out. Brace the glutes and abs together to form a stable “cylinder.” This is the most critical point for preventing lumbar compensation.
- Bar Path: The bar should travel in a nearly straight line, finishing directly over the top of the head (slightly behind the ears). To keep the bar path straight, the head must pull back slightly as the bar passes the face, then return. This is why some describe the overhead press as “dodging your face, then poking your head through a window.”
- Top Position: At the top, elbows locked out, shoulder blades rotating upward, and a “slight” shrug is normal and necessary (this is called a scapular shrug—it’s to complete the upward rotation of the shoulder blades, not a forced shrug).
- Breathing: Inhale and brace your core before pressing (Valsalva), exhale at the top. If you have any blood pressure-related conditions, consult your doctor first—this will be reminded again in the compliance section later.
Step 4: Training Programs for Different Stages
Below are three sample programs. Please note that weights, sets, and reps should be adjusted to your individual situation; the percentages and rep ranges here are general guidelines, not meant to be copied exactly.
| Stage | Primary Goal | Exercise Selection | Sets x Reps | Intensity Range | Weekly Frequency |
|---|---|---|---|---|---|
| Foundation Phase (0-6 weeks) | Mobility + Movement Control | Dumbbell Shoulder Press, Seated Press, Band Overhead Press | 3 x 10-12 | Light (approx. 50-60% perceived effort) | 2 times |
| Development Phase (6-16 weeks) | Strength + Hypertrophy | Standing Barbell Press, Dumbbell Press, Landmine Press | 4 x 6-10 | Moderate (approx. 65-80%) | 2 times |
| Advanced Phase (16+ weeks) | Maximal Strength | Barbell Overhead Press, Push Press | 4-5 x 3-6 | Higher (approx. 80-90%) | 1-2 times |
Here’s a pairing logic I often use: The overhead press is a “vertical push,” so it needs to be balanced with “vertical pulls” (like pull-ups or lat pulldowns). Many people only push and never pull for the upper body, which chronically pulls the shoulder blades forward, making posture more rounded over time. In a healthy upper-body weekly program, the volume of vertical pushes and vertical pulls should be close to 1:1, or even slightly more pulling than pushing.
A Comparison of the Overhead Movement Family
The overhead press isn’t just the standing barbell version. Depending on mobility and needs, I help athletes choose different variations:
| Movement | Mobility Requirement | Shoulder Blade/Thoracic Spine Friendliness | Suitable For |
|---|---|---|---|
| Standing Barbell Overhead Press | High | More Demanding | Advanced lifters with adequate mobility |
| Seated Dumbbell Press | Medium-High | Medium | Those wanting to build strength but with weaker core control |
| Landmine Overhead Press | Medium | High (diagonal path is less impingement-prone) | Those with limited shoulder mobility, in a rehab transition phase |
| Single-Arm Dumbbell Press | Medium | High | Those wanting to improve left-right imbalances |
| Push Press | High | Medium | Those wanting to break through heavier weights and can use leg drive |
I especially recommend the Landmine Overhead Press to those with temporarily insufficient mobility or past shoulder discomfort. Because its pressing path is diagonally forward and upward, it doesn’t require the arms to be fully vertical overhead, making it more impingement-friendly. It’s an excellent “transitional bridge.”
Don’t Overlook These “Supporting Cast” Accessory Movements
Many people think the shoulders are built solely by pressing, but what truly keeps your overhead training healthy and sustainable is a group of often-overlooked supporting players. These movements stabilize the shoulder blades and strengthen the posterior chain—they’re key to preventing impingement and rounded shoulders. The table below organizes the accessory movements I most commonly prescribe to my athletes:
| Accessory Movement | Primary Target | Benefit to Overhead Training | Recommended Dosage |
|---|---|---|---|
| Face Pull | Rear Delts, Lower Traps, Rotator Cuff | Balances the front side, improves rounded shoulders | 3 x 15-20 |
| Wall Serratus Push | Serratus Anterior | Improves upward rotation of the shoulder blade | 2-3 x 12-15 |
| Y-T-W Prone Raises | Mid/Lower Traps, Rear Delts | Activates neglected posterior muscles | 2 x 10-12 |
| Side-Lying External Rotation | Rotator Cuff (External Rotators) | Stabilizes the humeral head, prevents impingement | 3 x 12-15 (light) |
| Farmer’s Carry (Overhead Version) | Full-body stability + Scapular stability | Trains overhead stability under load | 3 trips x 20 meters |
These movements don’t require heavy weights; the focus is on “mind-muscle connection” and “control.” I often tell my athletes that the press is the facade, but these supporting players are the foundation holding it up. Face pulls in particular—I almost always include them in every athlete’s program because they are incredibly helpful for the rounded shoulders and forward posture so common in Taiwan.
Progression and Deloading: Don’t Let Fatigue Silently Accumulate
Progress in overhead training isn’t about blindly adding weight every week. The shoulder is a relatively fragile joint prone to fatigue accumulation. I typically guide athletes with the following rhythm:
- Progressive Overload: Every week or every two weeks, as long as movement quality doesn’t decline, slightly increase the weight (e.g., 1 to 2.5 kg each time) or add one or two reps.
- Deload Week: Every 4 to 6 weeks, reduce both intensity and volume by about 30-40%, giving the body—especially the joints and connective tissue—a chance to catch up on recovery.
- Listen to the Signals: If for two or three consecutive sessions the same weight feels unusually heavy, your shoulders feel achy/dull, or you’re sleeping poorly, these are often signs of excessive fatigue. It’s time to proactively deload rather than push through.
Remember, muscles recover quickly, but tendons and ligaments—these connective tissues—recover more slowly. Many overhead training injuries occur because “strength progresses too fast, but the tissues haven’t caught up.” Going slower actually gets you further in the long run.
Common Mistakes and Corrections
In my years of coaching, the mistakes in overhead training are highly repetitive. I’ve compiled the most common ones below, along with how to identify them and how to fix them.
Mistake 1: Compensating for Lack of Mobility with the Lumbar Spine
This was Ahong’s problem. The signs are rib flaring and excessive lower-back arching during the press, with the bar not reaching directly overhead. Over time, this puts excessive stress on the lumbar spine, and the shoulders don’t get truly trained either.
Correction: First, go back and address mobility (thoracic spine, lats, shoulder flexion). Temporarily switch to seated presses or the Landmine press, and remind yourself on every rep to “keep the ribs down, squeeze the glutes.” I often have athletes record their training sets on video to review themselves—many people immediately understand the issue when they see their own arched lower back.
Mistake 2: Shrugging Before Rotating
As soon as the arms go up, the upper traps jump in and shrug the shoulders up to the ears, while the shoulder blades fail to rotate upward properly. This is a classic case of the serratus anterior and lower traps slacking off, while the upper traps take over.
Correction: Strengthen serratus anterior activation (wall pushes, protraction at the top of a push-up) and lower trap training. During the press, remind yourself to “let the shoulder blades rotate first; save the shrug for the very top.”
Mistake 3: Elbows Flaring Out, Forearms Not Vertical
At the start, your elbows flare out to the sides and your forearms aren’t vertical to the floor, reducing force transfer efficiency and putting extra stress on the front of the shoulders.
Fix: Narrow your grip slightly, tuck your elbows in a bit at the start, and keep your forearms as vertical as possible. Imagine “pushing the weight straight up from directly beneath your palms.”
Mistake 4: Ignoring Vertical Pulls, Only Pushing
As mentioned earlier, this is a major culprit behind postural decline. If you only push and never pull, your shoulders will progressively roll forward and become more rounded.
Fix: Make sure your weekly vertical pulling volume is at least equal to your vertical pushing volume. Pull-ups, lat pulldowns, and face pulls are all your friends here.
Mistake 5: Pushing Through Pain
This is the most dangerous one. Some people think “pain means it’s working,” mistaking the sharp pinch of shoulder impingement for training soreness. These are completely different: training soreness is the dull ache in the muscles the next day, while impingement pain is a sharp, catching sensation at a specific angle in the moment.
Fix: If you feel sharp joint pain at a specific angle, stop immediately, reduce the load, and go back to a mobility phase. If the pain lasts more than two to three weeks, or is accompanied by weakness or night pain, be sure to see a rehabilitation or orthopedic doctor for evaluation. Taiwan’s NHI makes it easy to see a doctor—don’t put it off.
Here’s a quick reference table of these five mistakes to remind yourself before training:
| Mistake | What You’ll See / Feel | Immediate Correction |
|---|---|---|
| Lumbar Compensation | Ribs flaring, lower back arching, bar not directly overhead | Tuck ribs, squeeze glutes, switch to seated or Landmine press |
| Early Shrugging | Shoulders shrug up to ears as soon as you lift | Activate serratus anterior, shrug only at the top |
| Elbows Flaring Out | Forearms not vertical, front shoulder tension | Narrow grip, tuck elbows slightly |
| Only Pushing, No Pulling | Rounded shoulders, posture leaning forward | Add vertical pulls, volume ≥ vertical pushes |
| Pushing Through Pain | Sharp catching pain at a specific angle | Stop immediately, reduce load, see a doctor if needed |
Practical Tips for the Taiwan Context
Taiwan’s training environment has a few local characteristics I’d like to highlight.
Sedentary Lifestyle and Stiff Thoracic Spine: Many engineers from Hsinchu Science Park and Neihu work at computers for eight to ten hours a day, plus adopt a forward-leaning posture on weekend rides. Their thoracic spine extension is almost always below par. This means for most Taiwanese office workers, the first task in overhead training isn’t strength—it’s thoracic mobility. Don’t skip the warm-up.
Humid, Hot Climate and Hydration: Taiwan’s summers are often muggy, even in indoor gyms. If the air conditioning isn’t strong enough, overhead movements—which require bracing your core and holding your breath—can easily make you dizzy. I recommend drinking water every 15 to 20 minutes during training, totaling about 500 to 1000 ml per session (adjust based on sweat loss). When sweating heavily, consider a drink with electrolytes.
Eating Out and Protein Intake: To progress on overhead presses, your muscles need enough protein for recovery. Eating out is convenient in Taiwan, but protein intake is often insufficient while carbs are excessive. A general guideline is that regular resistance trainees should consume about 1.4 to 2.0 grams of protein per kilogram of body weight daily. For a 70 kg person, that’s roughly 100 to 140 grams per day. Adding an egg to your braised dish, an extra serving of meat to your bento, or grabbing tea eggs or unsweetened soy milk from the convenience store are simple ways to supplement. These are general nutritional principles; consult a dietitian for individual needs.
Healthcare Access: Rehabilitation and orthopedic clinics are widespread in Taiwan. If you develop shoulder issues from training, don’t just search online and try to fix it yourself. Physical therapists can provide more detailed movement assessments and manual therapy, and NHI coverage is relatively affordable. Seeing a professional when you have a problem is far more effective than stubbornly stretching at home.
Three Real Cases, Three Different Solutions
Principles alone can feel abstract, so I’ve picked three clients I’ve coached (names changed, details slightly adjusted) to show you that even when the issue is “something’s wrong with my overhead press,” the approach can vary greatly.
Case 1: The Sedentary Engineer Who Couldn’t Press Overhead
This is A-Hong from the beginning. His problem was purely insufficient mobility, plus an inability to brace his ribs with his core. I didn’t have him touch a barbell at first. For the first two weeks, his training days were all thoracic spine foam rolling, lat stretches, wall serratus anterior pushes, and “dead bugs” to train rib depression and core control. In week three, I switched him to Landmine overhead presses, because the angled path was more forgiving for his current mobility. By week six, he could finally do a wall slide with his arms overhead, hands against the wall, and lower back flat—only then did I return him to seated dumbbell presses. The key takeaway from this case: pay off the debt (mobility) first, then invest (in strength). There’s no rushing it.
Case 2: The Experienced Lifter Stuck on a Weight
Another client, Xiao K, had been training for three years and was stuck on the same standing press weight for six months. His mobility was fine; the problem was “too few vertical pulls” and “poor fatigue management.” His program had far more pushing than pulling, leaving his front delts tight and his rear delts weak. On top of that, he trained to failure every session and rarely took a deload week. I did two things: increased his weekly vertical pulling volume to slightly exceed his pushing, and added a deload week every four weeks (reducing both intensity and volume by about 40%). Three months later, he broke through his plateau and also improved his rounded shoulders. What he lacked was never more effort—it was smarter balance and recovery.
Case 3: The Runner with a Shoulder Impingement History and Mental Block
The third client is a marathon runner, A-May, who had a bout of shoulder impingement two years ago. Though it healed, she would subconsciously tense up and hesitate to push hard whenever she raised her arms overhead. Her mobility was actually fine; what really needed addressing was “confidence” and “progressive loading within a pain-free range.” We started with pain-free overhead movements using resistance bands, working only within a completely pain-free range, adding a small amount of resistance every two weeks, and recording everything on video so she could see that her form was actually stable. It took about two months before she felt comfortable doing light dumbbell overhead presses again. This case reminded me: the memory of pain affects movement patterns. Sometimes you need to address the mind as well as the body. This is also why I always recommend anyone with a clear injury history get evaluated by a physical therapist before starting.
FAQ
Here are the questions I get asked most often about overhead training, answered all at once.
Q1: Do I have to do overhead presses standing? Is seated weaker?
No. Standing presses require more core and full-body stability, making them better for overall force production. Seated presses fix your torso against a backrest, allowing you to focus more on the shoulder muscles and are also better for those whose core control isn’t stable yet. Neither is inherently superior—it depends on your goals and abilities. Many advanced lifters do both.
Q2: My shoulder “clicks” when I press, but it doesn’t hurt. Is that a problem?
Painless joint sounds (medically often called crepitus) usually don’t indicate injury; they’re often just normal phenomena like gas bubbles in the joint or tendons gliding. The key is whether it hurts, or is accompanied by weakness or catching. If it’s just a sound with no pain or functional limitation, you can usually keep an eye on it. If pain accompanies it, treat it as a warning sign.
Q3: How long until I see progress?
Improvements in movement quality come quickly—within a few weeks, you’ll usually feel much smoother. Strength progress varies by individual. Beginners often see steady gains in the first few months after establishing proper form. More experienced lifters progress slower and need periodization. Don’t compare yourself to others; compare yourself to where you were three months ago.
Q4: How many times a week should I train shoulders?
For most people, 2 direct overhead sessions per week, plus indirect shoulder work from other pushing and pulling movements, is plenty. More frequency isn’t always better—recovery matters just as much. The shoulder is a joint that accumulates fatigue easily. Prioritize quality over quantity to avoid overtraining it.
Q5: Will overhead pressing make women’s shoulders bulky and manly?
No. Building noticeable muscle size requires long-term, high-volume, high-intensity training with adequate nutrition. At typical training frequencies, overhead work gives women better shoulder lines, better posture, and improved upper body strength—not exaggerated size. You can let go of that worry.
Q6: Can I really skip the warm-up? I’m short on time.
The warm-up for overhead training is more crucial than for most movements—because it heavily depends on mobility. Going heavy with cold joints carries the highest risk of impingement. If you’re truly pressed for time, at least do thoracic spine extensions, serratus anterior pushes, and a few sets with an empty bar. That takes less than five minutes and buys you movement quality and safety for the entire session—a great trade-off.
Actionable Advice for Different Experience Levels
If You’re a Complete Beginner
Don’t touch standing barbell overhead presses yet. Spend four to six weeks, twice a week, doing seated dumbbell presses combined with a mobility warm-up. Use a weight light enough that you have full control and every rep is pain-free. The goal at this stage is to teach your body the correct overhead pattern. When in doubt, err on the side of too light, not too heavy.
If You’re an Intermediate with Some Foundation
First, honestly complete the three assessments above. If you pass all of them, congratulations—you can move on to a progressive training plan, doing standing barbell overhead presses twice a week with gradual weight increases. If you don’t pass all of them, spend a few weeks filling the gaps first—don’t let mobility limitations compromise your shoulder health. Remember the vertical push-pull balance.
If You’re Advanced or Chasing Heavier Weights
You probably don’t have mobility issues at this point, so the focus should be on periodization and recovery. After setting up your maximal strength phase (3–6 reps), watch out for cumulative shoulder fatigue and schedule deload weeks as needed. The Push Press is a great tool for breaking through plateaus, but make sure your technique is solid first. While chasing heavier weights, don’t forget to periodically check whether your overhead mobility has quietly regressed.
If You’re Primarily a Cyclist or Runner (Endurance Athlete)
You might ask: “Why should I do this?” My answer is—overhead training builds your trunk stability and upper-back postural muscles. During long rides or runs, the more stable your trunk, the less likely you are to collapse, and the more energy you save. You don’t need to chase heavy weights. One to two sessions of light-to-moderate overhead training per week (paired with vertical pulling) can effectively improve your upper-body posture and tolerance during prolonged exercise. Treat it as an investment, not a burden.
A Four-Week Beginner Program You Can Follow Directly
Here’s a concrete four-week beginner program, suitable for beginners to intermediates who have passed the assessments and want to formally get started. Two overhead training days per week, with at least two days of rest in between.
| Week | Main Movement | Sets x Reps | Accessory Work | Notes |
|---|---|---|---|---|
| Week 1 | Seated Dumbbell Press | 3 x 12 | Face Pulls 3x15, Serratus Punch 2x12 | Light weight, focus on bar path |
| Week 2 | Seated Dumbbell Press | 3 x 10 | Pull-ups/Lat Pulldowns 3x8, Face Pulls 3x15 | Slight weight increase |
| Week 3 | Standing Barbell Overhead Press | 4 x 8 | Single-Arm Dumbbell Press 3x10, Face Pulls 3x15 | Start transitioning to standing |
| Week 4 | Standing Barbell Overhead Press | 4 x 6 | Pull-ups 3x8, Landmine Press 3x10 | Slight weight increase, monitor shoulder feel |
After completing the four weeks, redo the three assessments and record your changes. You’ll find that when mobility and control are in place, strength gains almost happen naturally.
Conclusion: Raising Your Hands Overhead Is an Ability That Deserves Respect
Writing this, I want to return to the engineer trainee, A-Hong, from the beginning. We spent about six weeks—no barbell at first—focusing on his thoracic spine, lats, and serratus anterior, then gradually worked from seated presses back to standing. In the eighth week, he messaged me: “Coach, today the press felt completely pain-free in my shoulder, and the bar almost seemed to find its own path straight overhead.” At that moment, it wasn’t about how much stronger he had become—it was that his body had finally earned the ability to perform the movement, rather than forcing its way through one it wasn’t ready for.
The overhead press is an honest movement. Whether your thoracic spine is stiff, your scapular control is good, or your core is stable—it will tell you all of it. So instead of rushing to add weight, build the foundation first. Mobility, movement control, vertical push-pull balance, and listening to pain signals—get these right, and your overhead training will be both safe and productive. Slow and steady wins the race.
This article is for educational purposes only and does not replace individual diagnosis or treatment advice from a physician, physical therapist, or nutritionist. If you have a history of shoulder injury, joint disease, high blood pressure, heart disease, or other chronic conditions, please consult a qualified medical professional for an individualized assessment before starting or modifying any training program.
References
- Defining the glenohumeral range of motion required for overhead shoulder mobility: an observational study (PMC): https://pmc.ncbi.nlm.nih.gov/articles/PMC11393552/
- The Scapula and Thoracic Spine: A Classic Love Story To Improve Your Overhead Position (Juggernaut Training Systems): https://www.jtsstrength.com/the-scapula-and-thoracic-spine-a-classic-love-story-to-improve-your-overhead-position/
- Overhead Athlete Thoracic Spine and Scapula Assessment and Treatment (Physiopedia): https://www.physio-pedia.com/Overhead_Athlete_Thoracic_Spine_and_Scapula_Assessment_and_Treatment
Related Reading
- Bench Press and Upper-Body Pushing: A Complete Coach’s Guide to Training the Push Series Correctly, Stably, and in Balance
- Basketball Upper-Body Push-Pull Balance: Stable Shooting, Strong Boxing Out, and Injury-Free Shoulders
- The Complete Guide to Shoulder Pain: Swimmer’s Shoulder and Rotator Cuff Impingement—A Coach’s Guide from Strengthening to Avoiding Aggravation
- The Complete Pull-Up Guide: A Coach’s Practical Handbook for Pulling Movements, Progressions and Regressions, and Solid Back Development
一日北高/長距離團騎 常見問題補充篇 / 組團或跟團的眉角 / 壯車友容易被瘦車友慢性拉爆 / 原來屁股痛可能是這個原因...? / 風場配速法 / 公路車 / CT Yeh
2 年前
抖肩舞 台灣x日本交流版 (台灣 vs 前橋) 赤城山登山賽 coincidance
8 年前
西進武嶺 免費訓練分析服務 Intervals | 練不夠還是練過頭?你哪一種類型選手?AI模型告訴你! | 備戰神器 | 公路車 訓練 | CT Yeh
4 年前
戰略) Zwift Race 如何咬在第一集團 如何評估自己要開多少推力 (請開1.5倍速看)
7 年前
CT 喇低賽) 武嶺牽車 才是王道 西進牽車四小時內秘訣 攝手位置 如何判斷 防抽筋小秘訣
7 年前
Never Stop 西進武嶺 前後雙機 完整全程錄影 訓練台 實境
8 年前
一日北高常見問題大集合 | 攻略 | 路線 | 訓練 | 補給 | 自行車 單車 | 一日雙城 | 雙塔 | TWB北高360 | 屁股痛
6 年前
實錄) 車隊中 攝影師 是如何用感情拍片的呢? 單車 移動攝影 攝影師的視角 米粉坡 手持 DJI OSMO POCKET Ft. Team Neko
7 年前