Rokko Driveway Complete Guide: Segment Pacing, Gear Ratios, and Steep Wall Strategy for a 4.7 km Climb at 8.8% Average Grade
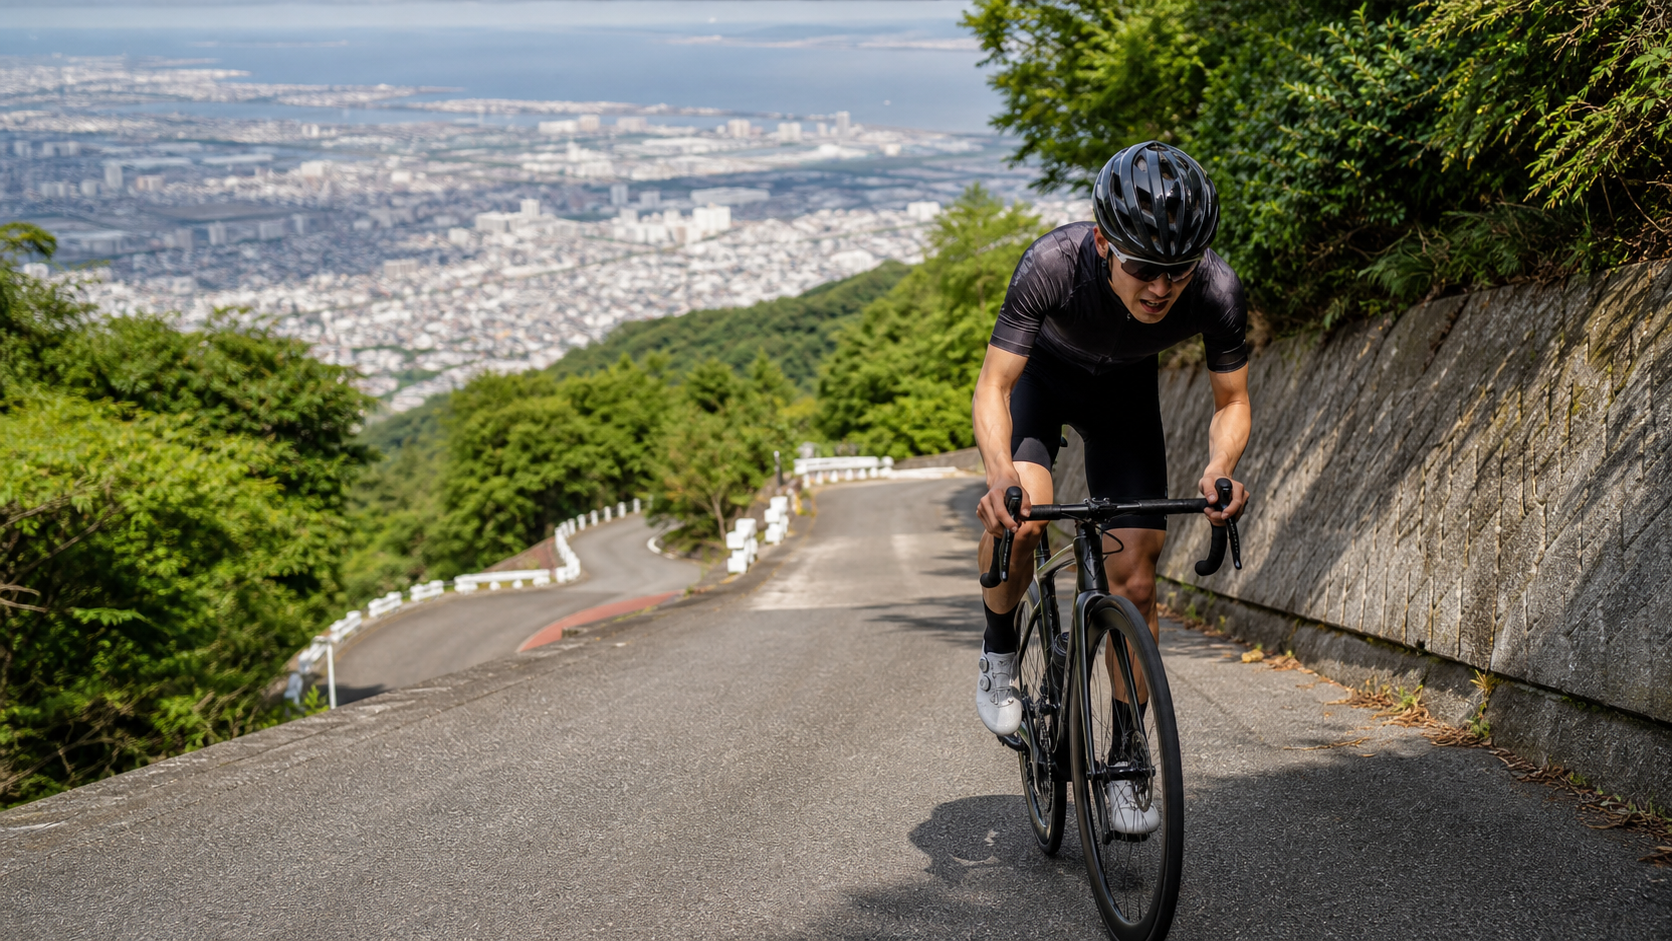
Table Rokko Driveway is the most classic frontal battleground among the “Rokko Mountain Range” in the minds of Kansai cyclists. It climbs from the foot of the mountain in Nada Ward, Kobe, all the way to the main ridge of Mount Rokko—4.7 km (4,703 meters) in length, 414 meters of total elevation gain, and an average gradient of 8.8%—these numbers alone spell out its character clearly: short, steep, no respite, a pure high-intensity short-distance climb.
If you’re familiar with climbs in Taiwan, here’s an analogy: it’s significantly steeper than Fengguizui, yet only about half its length; its density is closer to “the nine-bends-and-eighteen-turns section of the Beiyi Highway” stripped of its flats, leaving only the hardest core, served to you from start to finish. 4.7 km sounds short, but when the average gradient hits 8.8%, those 4.7 km will be the stretch your legs remember longest that day.
This is a pure strategy guide. We’ll lay out the data, break down the segment, and explain gear ratios and fueling to the point where you can execute it directly—an engineer’s perspective, no scenery talk, only how to ride it to completion, and ride it well.
1. Read the Data First: What an 8.8% Average Gradient Really Means
Set the right mental expectation first. An 8.8% average gradient is a brutal number, because it’s an “average.”
If a road’s average gradient is 8.8%, it usually means: the easier sections are around 6–7%, and the steep parts will spike to 12%, even 15% or more. Table Rokko is exactly that—according to local climb data, the early section is mostly 7–10% with some undulations; in the final third, the gradient clearly ramps up, with 12% as the norm and localized sections hitting 16–17% walls.
| Item | Data | Interpretation |
|---|---|---|
| Distance | 4.7 km | Short climb, a one-breath race |
| Total elevation gain | 414 m | Equivalent to climbing 130 floors consecutively |
| Average gradient | 8.8% | High intensity, almost no respite throughout |
| Estimated steepest section | 15–17% | Concentrated in the final third |
| Category | Category 3 | Short distance but hard gradient |
Translated into feel: For a rider weighing 70 kg, roughly 78 kg with bike, climbing an 8.8% gradient at 10 km/h requires about 190 watts of sustained output just to fight gravity, excluding rolling and air resistance. That means for the entire ~25–30 minutes (depending on ability), you’ll be holding an intensity where “speaking breaks your breathing.” This is an FTP-test-grade climb.
Key concept: On an 8.8% average gradient, pacing tolerance is extremely low. Spend an extra 20 watts in the early section, and the later section will collect the debt with “legs too dead to turn the pedals.”
2. The Trap at the Start: The Real Challenge Comes Before the Climb
This is the most overlooked point about Table Rokko, and the one that deserves mention first.
The official timing start of Table Rokko (around the intersection below the New Rokko Bridge) already sits at roughly 320 meters above sea level. The problem is—to reach this start, you first have to survive an even nastier climb. The road approaching the start from central Kobe features localized 17–20% ramps, and they’re not short.
In other words, many first-timers have already drained their legs on the approach road before the “official Table Rokko” even begins.
Execution advice:
- Treat the “approach section to the start” as an independent warm-up and expenditure phase—deliberately ride slow, deliberately keep intensity low, spin up slowly in your easiest gear.
- Upon reaching the timing start, find a safe flat spot (an intersection or open area), stop, let your heart rate drop 20–30 beats, breathe deeply for a minute, then officially begin.
- Never carry the fatigue from the approach into the official climb—that’s the most common first DNF setup for beginners.
3. Segment Strategy: Break the 4.7 km into Three Parts
I split the entire road into three functional segments, each with a different mission.
Segment 1 (0–1.8 km): Entry and Anchoring, 7–9% Gradient
After the official start, the gradient immediately enters the 7–9% working range. The sole mission of this segment is “anchoring your rhythm.”
- Pacing: Use the intensity you can “hold for 30 minutes” as the ceiling, and err on the side of 5% less. Feeling easy early on is correct; feeling just right means you’re going too fast.
- Cadence: Target 70–80 rpm. Rokko’s gradient will force your cadence down; you should proactively downshift to protect cadence rather than muscling the big ring.
- Mindset: Every time you overreach your breathing rhythm in this segment, the later part will repay it double. Save your ambition for the final 1 km.
Segment 2 (1.8–3.2 km): Mid-Section Grind, 8–11% Gradient
The middle section is where the gradient starts getting “rude”—8–11% appears repeatedly, and the inside of corners often hides even steeper pitches.
- Cornering line: On Japanese mountain roads, the inside of corners is steeper. If no traffic is coming, take a wide outside arc to reduce the instantaneous gradient; always check front and rear safety first.
- Rhythm management: When you hit a brief easing (e.g., corner exits), don’t immediately surge—use it to let your heart rate catch a breath. These are among the few spots where you can “actively recover.”
- Fueling timing: This is the best place on the entire climb to drink water and take a bite of energy—because the later section is too steep for you to have time to let go of the bars.
Segment 3 (3.2–4.7 km): The Final Steep Wall, 12–17% Gradient
This is the soul of Table Rokko, and the reason it’s remembered. In the final third, the gradient holds at 12% as the norm, with localized 16–17% sections.
- Gear ratio: This segment is the exam for your pre-ride gear preparation. If your gearing is insufficient, you’ll be forced to grind at extremely low cadence, sharply increasing risk to knees and lower back.
- Out of saddle vs. seated: On 15%+ walls, moderately stand and sprint for 10–20 seconds to switch muscle groups and relieve the sit bones, then sit back down; but don’t sprint the whole way—it will blow up your heart rate.
- Vision: Keep your eyes on the road 10–15 meters ahead, not looking up to see how much remains—the latter only destroys your willpower.
- Finishing: The finish is around the Tenjinyama intersection area. The final 200 meters are often a pure contest of willpower—remember to save one breath.
4. Gear Ratios and Equipment: This Road Has No Room for “Hero Gearing”
On a road with an 8.8% average gradient and localized 17% sections, gear choice isn’t a comfort issue—it’s a question of whether you can finish.
Recommended gearing (by ability):
| Rider Level | Chainring | Cassette | Notes |
|---|---|---|---|
| Advanced / Racing | 50/34 | 11-30 or 11-32 | Requires a solid FTP; still recommend a 32T as a safety net |
| General Enthusiast | 50/34 | 11-34 | Most recommended; the 34T is a lifesaver on the final steep wall |
| Beginner / Conservative | 46/30 or GRX | 11-36 | Best solution for those wanting an easy finish and knee protection |
Equipment notes:
- Wheels: For a short climb, don’t chase aero—lightweight climbing rims make a bigger difference; slightly lower tire pressure based on road conditions, prioritizing grip.
- Brakes: Most of the descent comes after the finish; check disc brakes or well-conditioned rim brakes beforehand; on long descents, watch for overheating rims/discs.
- Pedals: Confirm cleats aren’t excessively worn—if you can’t unclip in time on a steep wall, the risk of a low-speed crash is high.
5. Nutrition and Hydration Strategy: No Bareback Riding Even on Short Climbs
Although 4.7 km is short, since it is often one segment of a full day of multi-route Rokko riding, nutrition should be planned on a “full-day” basis.
- Hydration: Drink up before setting off. Summer in Kobe is humid and hot, and a single ascent of Omote Rokko produces a surprising amount of sweat—carry at least one large bottle (750ml) or more.
- Energy: 15–20 minutes before the climb, take in an easily absorbed carbohydrate (energy gel or banana) so it takes effect right at the steep wall section.
- Refueling points on the mountain: There are tourist facilities and shops on Mt. Rokko, but their operating hours vary by season. Do not count on refilling water on the mountain—fill up completely at the bottom.
6. Weather and Seasons: The Four-Season Nuances of the Kansai Mountains
- Spring (Apr–May): The most comfortable climbing season, with pleasant temperatures and fresh greenery in the mountains.
- Summer (Jun–Aug): Hot and humid at the base, with sweat pouring during the climb; but noticeably cooler on the mountain—mind the temperature difference and hydration. Afternoon thunderstorms are common in the mountains.
- Autumn (Oct–Nov): Cool and dry, peak fall foliage season on Mt. Rokko—one of the most comfortable climbing windows.
- Winter (Dec–Feb): The mountain may freeze, with slippery roads or even snow. Beginners are not advised to attempt in winter—the descent risk is high.
- Common to all seasons: Temperature swings are large in the mountains. Always carry a lightweight windbreaker—hypothermia on a long descent sets in faster than you think.
7. Common Mistakes and DNF Risk Checklist
- Blowing up before the start: Ignoring the 17–20% steep pitch on the approach segment, your legs are dead before the official climb even begins.—Solution: deliberately ride slow on the approach.
- Pacing too hard in the early section: Fooled by the 7–9% early grades into thinking you feel great, only to hit zero on the steep wall later.—Solution: hold back 5% of intensity in the early section.
- Gearing too heavy: Going up with only an 11-28, unable to turn the pedals on the 17% wall and forced to dismount.—Solution: at least a 32T, conservatively a 34T.
- Insufficient hydration: Assuming a short route needs no drinking, then dehydrating and cramping in hot, humid weather.—Solution: fill up at the bottom.
- Riding the descent recklessly: Finally making it to the top, then getting chilled or losing control in corners on the way down.—Solution: put on a windbreaker, control your speed, don’t overheat.
8. Target Time References by Rider Level
The following are reference completion times for the approximately 4.7 km, 414 m climb from the official timing start to Chōgatsutsuji (actual times vary with daily conditions, body weight, and weather):
| Rider Level | Reference Time | Average Speed | Corresponding Intensity Concept |
|---|---|---|---|
| Competitive | 18–22 min | approx. 13–15 km/h | Near full FTP output |
| Advanced | 23–28 min | approx. 10–12 km/h | Above tempo, can speak in short phrases |
| General enthusiast | 29–35 min | approx. 8–10 km/h | Steady, upper-end aerobic |
| Beginner finisher | 36–45 min | approx. 6–8 km/h | Primary goal: “never dismount” |
One sentence for first-time challengers: Omote Rokko isn’t about who’s fastest—it’s about who hasn’t dismounted on the final 1.5 km steep wall. Save every bit of ambition from the early section and spend it only at that 17% wall—you’ll thank yourself for riding with restraint.
Route data: 4.7 km distance, 414 m total elevation gain, 8.8% average gradient (Strava segment), located in Nada-ku, Kobe, Hyogo Prefecture—the classic frontal ascent of the Rokko mountain range.
9. Omote Rokko’s Position Among the “Four Faces of Rokko”
Mt. Rokko is a mountain that can be climbed from four directions. What Kansai riders call the “Four Faces of Rokko” refers to the four main routes: Sakasegawa, Omote Rokko, Nishi Rokko, and Ura Rokko. To truly understand Omote Rokko, you need to compare it within this family.
| Route | Character | One-Line Positioning |
|---|---|---|
| Sakasegawa | Most classic, most mainstream | The “signature” of Rokko climbing; most riders’ first route |
| Omote Rokko | Short and steep, good views | The purest short-distance heavy climb, with beautiful pavement |
| Nishi Rokko | Relatively gentler, longer distance | The choice when you want an easier ride or more distance |
| Ura Rokko | Even gradient, tree-lined, connects to Arima | The northern endurance line, linking to the hot spring town |
Omote Rokko’s uniqueness lies in this: among the four faces, it is the most brutal per unit distance. Sakasegawa is classic, but its gradient distribution is relatively even; Omote Rokko condenses the difficulty into just 4.7 km, and especially that steep wall in the latter section is the place among all four routes that can drain your legs in an instant. At the same time, because it faces Kobe Port directly and the pavement is well maintained, its views and ride quality are also among the best of the four.
Advanced play: Many hardcore riders take on the “multi-face Rokko in one day”—climbing Mt. Rokko several times from different directions in a single day, stringing all four faces into a self-inflicted endurance feast. If you want to try this, Omote Rokko is usually scheduled early while energy is still sufficient, because its steep wall won’t allow you to force your way through in a fatigued state.
10. Real-World Scenario Simulation: One Complete Omote Rokko Summit Attempt
Let’s string together all the segments, pacing, and gearing from earlier into one complete real-world script, so you can rehearse it in your mind first.
Before departure: At the convenience store at the bottom, fill up a large bottle of water, eat a banana, confirm your gearing includes at least a 32T, and tuck a windbreaker into your back pocket. Spend five minutes on dynamic warm-up to get your knees and hips moving.
Approach segment: Heading toward the New Rokko Bridge, when you hit that 17–20% steep pitch, shift to your easiest gear, sit steady, and spin slowly, repeating to yourself, “This isn’t the official climb yet—I’m just warming up.” Before reaching the timing start, find a safe spot to let your heart rate settle.
Segment 1 (0–1.8 km): Official start. Deliberately hold intensity at “can still speak in short phrases.” Glance at your computer and remind yourself not to overspeed. Feeling easy here is correct.
Segment 2 (1.8–3.2 km): The gradient starts getting serious. Take wide arcs on corners, and use the brief flatter spots to let your heart rate catch its breath. Take your last big drink of water and one more gel here—because you won’t have a free hand for a while.
Segment 3 (3.2–4.7 km): Here comes the steep wall. Shift to the 34T, keep cadence above 60, and fix your eyes 10 meters ahead. Every time the gradient surges past 15%+, stand and sprint for 15 seconds to switch muscle groups, then sit back down. Only one thought in your mind: “One more corner.”
The finish: The Chōgatsutsuji intersection appears and the gradient eases. You cross the line, unclip, and gasp for air. Congratulations—you just rode the most brutal 4.7 km of the Four Faces of Rokko in the smartest way possible.
After summiting: Immediately put on your windbreaker, let the sweat dry gradually, drink and refuel, check your brakes, and prepare for the descent. Don’t rush down—let your body recover from the high intensity first.
11. Customized Advice for Different Rider Groups
- For first-time challengers: Set your goal as “no dismounting the entire way,” not any specific time. Ride as slow as you need in the early section, and save all your strength for that final wall. Bring enough gearing and enough water—you’ll make it.
- For veterans chasing a PB: The key to an Omote Rokko PB lies in “energy conservation on the approach” and “not cracking on Segment 3.” The more you save on the approach, the more capital you have for the official timed section; whether you can hold your power on the final steep wall determines your result. Ride the route once without pressure to familiarize yourself, then go all out on the second attempt.
- For gravel / commuter bike riders: Omote Rokko’s pavement is good and the distance is short, making it actually well suited for non-competitive riders as a goal of “conquering Kobe’s backyard mountain.” Use a lighter gear, a more relaxed mindset, and grind up slowly—the night view at the summit is the best reward.
- For group ride leaders: This road is steep and short, so group rides easily string out. Agree on a summit meeting point in advance, let everyone climb at their own pace—stronger riders needn’t wait on the steep wall, and weaker riders needn’t be dragged into blowing up.
12. Using Omote Rokko as a Training Ground: A Method for Improvement
Omote Rokko is short, steep, and repeatable—in fact, it’s a nearly perfect climbing training ground. If you live in Kansai or have the chance to visit repeatedly, you can make it the core of a systematic training program.
Using Mount Rokko (Omote Rokko) to Test FTP and Track Progress
The official timed section of Omote Rokko is approximately 4.7 kilometers with 414 meters of climbing. A full-effort ascent typically takes between 18 and 35 minutes, making it an ideal duration for a “climbing-specific threshold test.” The method is simple:
- Warm up thoroughly (including an easy ride up the approach section).
- Ride all-out from the timing start to the summit, recording your time and (if available) average power.
- Re-test every four to six weeks under similar weather and condition.
- Comparing the reduction in time and the increase in power is the most honest report card of your climbing ability.
Because the route and gradient are fixed, Omote Rokko can clearly quantify “whether you’ve actually gotten stronger.” This holds more reference value than collecting a bunch of data on different routes—fewer variables mean higher comparability.
Repeats to Build Muscular Endurance
To quickly improve climbing muscular endurance and fatigue resistance, “repeats” are a highly efficient method: climb Omote Rokko, descend easily back to the start, and climb again, repeating this two to four times. Each repetition will leave you more fatigued, and that’s precisely the point of the training—forcing your body to maintain output under fatigue, simulating the latter stages of a long-distance race. This training is tough, but progress comes fast.
Low-Cadence Training for the Steep Wall
The 15–17% steep wall near the end of Omote Rokko is perfect for practicing “low-cadence, high-torque” riding. Deliberately shift one to two gears harder than usual and grind through the steep section at a low cadence of 50–60 rpm to effectively strengthen the muscular power needed for climbing. However, this training places significant stress on the knees, so be sure to warm up thoroughly, ride within your limits, and stop immediately if you feel any knee discomfort.
Combine these three methods, and a 4.7-kilometer short climb can support an entire climbing training program that steadily makes you stronger. This is another reason Omote Rokko is repeatedly visited by Kobe cyclists—it’s not just a scenic view, but also a strict and fair coach.
13. How to Get There and Itinerary Planning (For Cyclists Traveling from Afar)
If you’re a cyclist flying in specifically from Taiwan or elsewhere to take on Rokko, planning your itinerary and transportation is equally important.
Gateway Access: Kobe itself is well-connected, with easy links to Kansai International Airport, Osaka, and Kyoto. Most cyclists base themselves in Kobe city center, renting a road bike or bringing their own in a travel bag. The approach section from the city to Omote Rokko isn’t far, making it well-suited for a day trip.
Renting vs. Bringing Your Bike: If you’d rather not transport your own bike over a long distance, Kobe and Osaka both have quality road bike rental shops offering bikes equipped with electronic shifting, disc brakes, and lightweight climbing wheelsets. Be sure to confirm in advance that you can get a climbing gear ratio of “at least 32T or larger”—this is a must-have for Rokko’s steep wall.
Suggested One-Day Itinerary:
- Depart from Kobe city center in the early morning to avoid traffic and the midday heat and humidity.
- Ride at an easy pace to the Omote Rokko approach section, refueling along the way.
- Summit Omote Rokko, then rest, refuel, and take photos at the top.
- Depending on your energy, descend via Ura Rokko to Arima Onsen for a soak, or carefully descend the same way back to the city.
- In the evening, dine by Kobe Harbor, looking back at the mountain you climbed during the day.
Gear Checklist Reminder: Climbing gear ratio (at least 32T), windbreaker, plenty of water bottles, energy supplies, phone and power bank, basic repair tools and spare tubes, and health/travel insurance information. Mountain signals can be unreliable, so let someone know your route and estimated time before you depart.
Mindset Reminder: You are a guest traveling from afar, and this mountain is Kobe’s home mountain. Ride with respect—don’t ride against traffic, don’t block the road, yield to pedestrians and hikers, and carry your trash down. Let every Taiwanese cyclist leave a good impression.
14. Conclusion: 4.7 Kilometers, a Condensed Climbing Lesson
Putting it all together, Omote Rokko is a road like this: 4.7 kilometers, 414 meters, 8.8% average gradient—short, yet it condenses all the essentials of climbing within it—the trap before the start teaches you “effort management,” the steady middle section teaches you “pace discipline,” the final steep wall teaches you “willpower and gear ratio,” and the night view at the summit is the reward for those who persevere.
It’s suitable as your first climb in Japan, and equally suitable as a training ground to refine yourself repeatedly; it suits competitive cyclists going all-out for a time trial, and also beginners slowly grinding with the goal of “not putting a foot down.” No matter who you are or at what speed you ascend, these 4.7 kilometers will honestly reflect every bit of effort you put in.
Keep this guide in mind, bring enough gear ratio and supplies, hold back your ambition in the early sections, and save that final 17% wall for the version of yourself that still has a breath left—then, go ride it. The Kobe at the summit will thank your perseverance with a view of the entire city.
Appendix: Omote Rokko Quick Checklist
Before you depart, spend a minute reviewing this table—it can help you avoid ninety percent of beginner mistakes:
| Check Item | Standard | Why It Matters |
|---|---|---|
| Largest rear cassette cog | ≥ 32T (34T to be conservative) | The lifeline for the 17% steep wall in the final section |
| Water | ≥ 750ml, more on hot, humid days | Refilling on the mountain is unreliable |
| Energy supplies | At least 1–2 servings of easily absorbed carbs | Refuel before steep sections to avoid bonking |
| Windbreaker | Carry with you | Prevents hypothermia at the summit and on descents |
| Brake condition | Check brake pads and cables | Safety on steep descents |
| Tire pressure | Slightly lower than usual, prioritize grip | Grip for steep starts and cornering |
| Weather | Check before departure, avoid icy conditions | High risk of ice on the mountain in winter |
| Itinerary notification | Let companions know your route and time | Insurance against unreliable mountain signals |
Make this table a ritual before every trip up Rokko. Once your preparation is complete, the rest is up to your legs and willpower. Omote Rokko will not let down a cyclist who is well-prepared, knows how to pace, and climbs with respect. Ride beautifully, summit safely, and descend safely.
Finally, one detail many overlook: the cool-down and recovery after descending. After completing a high-intensity climb, your muscles have accumulated a large amount of metabolic waste. If you stop and sit still immediately after finishing, soreness will often hit you twice as hard the next day. After descending back to flat ground, recommend spinning gently for ten to fifteen minutes at the easiest gear and very low intensity to let your heart rate and blood flow come down smoothly, helping your body clear waste. After getting home, replenish carbohydrates and protein, do moderate lower-body stretching, and get plenty of sleep—these “post-ride” tasks are just as important as the “during-ride” ones. Do your recovery well, and you’ll be able to meet your next date with Rokko faster and healthier. Climbing is a lifelong pursuit—treat your body well, and it will carry you up mountains for longer and farther.
Related Reading
- Ura Rokko Guide: 7.7 km at 6.5% Average Gradient—Endurance Pacing, Gear Ratios, and Using 100-Meter Distance Markers
- Lileng Return Leg Practical Guide: Pacing and Gear Ratio Breakdown for the 7% River Valley Steep Climb on Provincial Highway 8
- Riding Omote Rokko: A 4.7-Kilometer Conversation Behind Kobe Harbor with a Century-Old Famous Mountain
- Mount Tsukuba Guide: Pacing, Gear Ratios, and Training Guide for the 6 km, 6.3% Average Gradient Climbing Mecca
西進武嶺 8000名單車友數據分析 PART1 | 從新手到高手數量/瓦數/推力比/FTP推力比/功率計使用率 大解析 | 公路車 | CTYeh
5 年前
台北闊瀨陡坡 騎旅 / 日本單車雜誌編輯車友臨時加入!/ 髮香才是最強的 / feat. 北迴歸線小隊 / 公路車 CT Yeh
6 個月前
半日 小台灣 極限單車路線挑戰實錄
7 年前
西進武嶺各路段 前8000名 大數據分析 配速攻略/功率/心律/推力比/維持率/踏頻/踏瓦比/牽車率 大公開 | 建大盃 NeverStop 可參考 | 公路車 | CT Yeh
5 年前
4K單車實境) 舊陽金P字道 第1P 仰德大道至小油坑 誤跟武嶺神人們 被拉爆爽飛天 Taiwan Cycling Climb Route Recommend
7 年前
風櫃嘴時間 預測西進武嶺時間?13000名車友統計數據分析告訴你 !
5 年前
單車 梅山36灣 坡度介紹 路段介紹 空拍 (相關遊記影片,請參考說明或我的頻道喔,歡迎訂閱)
6 年前
大武山後門26%歡樂陡坡!JJSC南台灣單車行Day2 / 被颱風追著跑 / 公路車 / CT Yeh
2 年前