Rokko Mountain North Face Guide: 7.7 km at 6.5% Average Grade — Endurance Pacing, Gear Ratios, and Using the 100-Meter Distance Markers
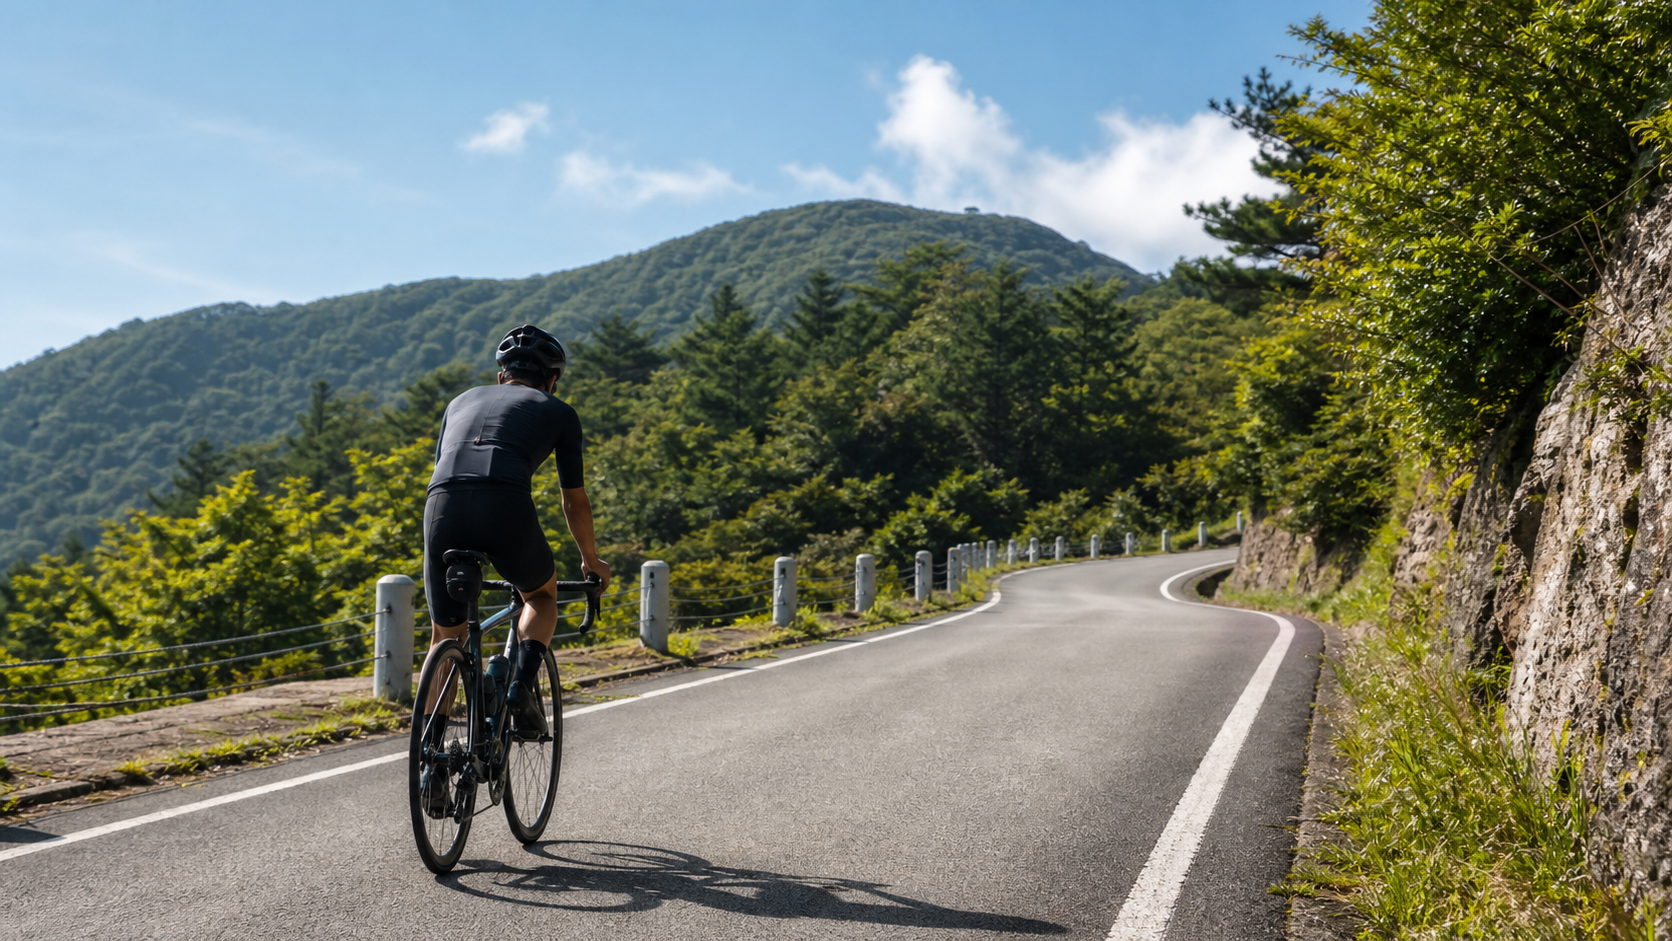
If Omote Rokko is the “short but fierce” steep wall on the front side of Mount Rokko, then Ura Rokko is the “long and steady” endurance line on its back side. Starting from the Arimaguchi area, it climbs all the way to the Kinenhidai on the Rokko mountain ridge — a total of 7.7 km (7,714 meters) with 506 meters of elevation gain and an average grade of 6.5%. This is a textbook “tempo climb”: the grade isn’t extreme, but it’s long enough and even enough to force you to grind it out with steady power.
For comparison with Taiwan routes, Ura Rokko’s character is like “the Yangjin Highway section toward Zhuzihu” stretched out, with the grade smoothed into a more uniform profile — no leg-breaking steep walls, but no easy flat sections to slack off on either. It’s just one steady, unrelenting endurance effort after another. It’s also one of the most popular climbs on the northern side of the Rokko mountain group, and many riders incorporate it into a full-day endurance ride rather than treating it as a standalone time trial.
This is a pure guide — we break down the 7.7 km pacing, gearing, nutrition, and risks item by item.
1. Reading the Numbers: The “Endurance” Nature of a 6.5% Average Grade
Let’s look at the numbers first, then talk strategy.
| Item | Data | Interpretation |
|---|---|---|
| Distance | 7.7 km | Medium-long distance, endurance-dominated |
| Total elevation gain | 506 meters | Equivalent to climbing 165 floors continuously |
| Average grade | 6.5% | Moderately hard, but relatively even |
| Estimated steepest section | ~12% | Occurs locally, not throughout |
| Category | Category 3 | Difficulty spread out over distance |
What a 6.5% average grade means: This is a “sustainable” grade. For most trained riders, 6.5% falls within the range where you can maintain a steady output for 30–45 minutes. This also determines the core strategy for Ura Rokko — it’s not about “surviving a steep wall” but about “distributing your power evenly and not letting yourself fall apart in the middle section.”
Ura Rokko’s grade is relatively consistent, with no obvious recovery sections. This actually makes pacing harder — because there’s no flat stretch to catch your breath. If you go over your power target in the early section, there’s nowhere to recover later.
Key concept: An even-grade route tests your “pacing discipline” more than a steep-wall route. A steep wall forces you to dismount; an even grade quietly cooks you.
2. One Major Feature of the Route: Distance Markers Every 100 Meters
Ura Rokko has a design that’s extremely friendly to pacing — along the Ura Rokko Driveway section, there are remaining-distance markers every 100 meters, counted back from the intersection in front of the Kinenhidai at the finish.
This is a powerful tool for executing your pacing plan:
- You can use the distance markers to divide the 7.7 km into clear segments, checking your power/heart rate/breathing at each marker.
- Psychologically, watching the remaining distance tick down one marker at a time steadies your willpower far better than climbing blind.
- Recommended strategy: Treat “entering the distance-marker zone” as the signal to formally enter your rhythm zone. Before that, ride conservatively; after that, start executing your plan.
3. Section-by-Section Strategy: Dividing the 7.7 km into Four Parts
Section 1 (0–2 km): Start and Warm-Up, Grade 5–7%
Starting from the Arimaguchi area, the grade is mainly 5–7%.
- Pacing: You must hold back on this section. The biggest mistake on an even-grade route is getting excited and going too fast at the start. Use “still barely able to breathe through your nose alone” as your upper intensity limit.
- Cadence: Maintain 80–85 rpm to let your body settle into an aerobic rhythm.
- Mindset: Treat this section as a long warm-up, letting your heart rate rise in steps rather than spiking it all at once.
Section 2 (2–4.5 km): Core Rhythm Zone, Grade 6–8%
This is the longest and most discipline-demanding section of the entire climb, with a steady 6–8% grade.
- Power management: If you have a power meter, lock your output below your “sweet spot” (approximately 88–94% of FTP). When in doubt, err on the low side.
- Breathing rhythm: Establish a fixed breathing-pedaling cadence (e.g., two pedal strokes per inhale, two per exhale). If the rhythm breaks, that’s a signal you’re going too hard — back off immediately.
- Forest section: This section is mostly in the shade, relatively cool in summer, and a great place to grind out steady power.
Section 3 (4.5–6.5 km): Local Steeper Pitches, Grade 8–12%
Approaching the upper section, the route gets steeper, with local pitches reaching 12%.
- Response: This is the only place where you need to “actively add a bit of effort,” but don’t overreact. Downshift to maintain cadence and let the grade naturally raise your output — don’t muscle the big ring and blow up your heart rate.
- Using the distance markers: Make good use of the 100-meter countdown markers, breaking the steep section into small goals of “just one more marker.”
Section 4 (6.5–7.7 km): Closing to Kinenhidai, Grade Settles Back
Near the end, approaching the intersection in front of Kinenhidai, the grade mostly settles back down.
- Finishing: If you paced the earlier sections well, you should still have something left here. You can pick up the pace slightly as conditions allow and close with a clean rhythm.
- Finish: Kinenhidai is a landmark on the Rokko ridge — arriving means you’re done. Be sure to watch for traffic and pedestrians at the intersection.
4. Gearing and Equipment Recommendations
Ura Rokko’s grade is more even, so the gearing pressure is lighter than on Omote Rokko. However, because the distance is long, it’s still wise to leave yourself plenty of margin.
| Rider Level | Chainring | Cassette | Notes |
|---|---|---|---|
| Advanced / Racing | 50/34 | 11-28 or 11-30 | Can handle the even grade; bring a 30T as insurance |
| General Enthusiast | 50/34 | 11-32 | Most recommended; protects cadence over the long distance |
| Beginner / Conservative | 50/34 or 46/30 | 11-34 | For those who want to grind it out comfortably and protect their knees |
Equipment essentials:
- Wheels: For a long, even climb, lightweight rims make the biggest difference; aero needs are low on this route.
- Nutrition setup: For a long distance, carry full water bottles and have easily accessible food on the bike.
- Descent preparation: The descent from Kinenhidai toward the Arima Onsen side or other routes is a long downhill — make sure your brakes and windbreaker are ready.
5. Nutrition and Hydration Strategy
With 7.7 km plus the fact that it’s often incorporated into a full-day endurance ride, plan your nutrition on a “half-day or more” basis.
- Hydration: Fill up at least one large bottle (750 ml) before starting. There are resupply options near the Arima Onsen area at the start, but water points in the mountains are limited once you leave.
- Energy: Take one serving of carbohydrates before starting, and refuel once during the core rhythm zone (Section 2) to avoid fading in the later stages.
- The temptation of the onsen resupply point: The start/finish is near Arima Onsen, which is perfect for scheduling food, resupply, and a soak into your itinerary. But note that after soaking, your muscles relax and your body temperature changes — don’t immediately ride hard.
6. Weather and Seasonal Considerations
- Spring (April–May): Pleasant weather, fresh greenery in the mountains — the best climbing season.
- Summer (June–August): Hot and humid at the base, but Ura Rokko has plenty of shade and faces north, making it relatively cool. The Ura Rokko Driveway is lined with large numbers of hydrangeas (ajisai), and June’s rainy season is exactly when they bloom — a special charm. Watch for afternoon thunderstorms.
- Autumn (October–November): Cool, dry, and the fall foliage season — excellent conditions.
- Winter (December–February): The mountain may have ice and snow; the north-facing side is colder and shaded — beginners should avoid winter attempts.
- General: Temperature differences are large in the mountains. Always carry a windbreaker for the long descent to prevent hypothermia.
7. Common Mistakes and DNF Risks
- Going too fast in the early section: Fooled by the gentle 5–7% start, you discover your legs are already spent by the core rhythm zone. — Solution: deliberately hold back for the first 2 km.
- Ignoring the hidden toll of an even grade: Thinking it’s easy because there’s no steep wall, you get slowly cooked by the continuous 6–8%. — Solution: manage the entire climb by power/breathing rhythm.
- Insufficient hydration: Long distance plus heat and humidity leads to dehydration and cramping. — Solution: fill up at the start, refuel midway.
- Riding hard right after an onsen soak: The hot springs at the start/finish are too tempting; climbing or descending immediately after soaking leaves your muscles in poor condition and prone to injury. — Solution: schedule the soak for after all riding is completely finished.
8. Reference Finish Times for Different Rider Levels
The following are reference completion times for the approximately 7.7 km, 506-meter climb from Arimaguchi to Kinenhidai:
| Rider Level | Reference Time | Average Speed | Intensity Concept |
|---|---|---|---|
| Racing | 26–30 min | ~15–17 km/h | Near the upper edge of sweet spot |
| Advanced | 31–38 min | ~12–14 km/h | Steady sweet spot |
| General Enthusiast | 39–48 min | ~10–12 km/h | Steady aerobic |
| Beginner Finishing | 49–60 min | ~8–9 km/h | Goal is to not dismount |
A word to challengers: Ura Rokko won’t scare you with a steep wall. It will test your discipline with 7.7 km of even grade. Put away your early ambition, follow the 100-meter markers up one by one — you’ll find that steady is the fastest way on this road.
Route data: 7.7 km distance, 506 meters total elevation gain, 6.5% average grade (Strava segment), Kobe City, Hyogo Prefecture — a classic endurance climb on the north side of Mount Rokko.
9. Ura Rokko’s Place Among the “Four Faces of Rokko”
To truly understand Ura Rokko, you need to place it within the Rokko mountain route family. Kansai riders often speak of the “Four Faces of Rokko” — Sakasegawa, Omote Rokko, Nishi Rokko, and Ura Rokko — each with its own character. Ura Rokko is the most “northern” and the most “lengthy” of the four.
| Route | Character | One-Line Positioning |
|---|---|---|
| Sakasegawa | The classic mainstream | Rokko’s signature route; most riders’ first |
| Omote Rokko | Short and steep, great views | The purest short-distance heavy climb |
| Nishi Rokko | Relatively gentle, long distance | The choice for an easy long-distance ride |
| Ura Rokko | Even grade, shaded, connects to Arima | The northern endurance line linking to the hot spring town |
Ura Rokko’s uniqueness lies in this: unlike Omote Rokko, which condenses difficulty into a steep wall, it flattens and stretches the difficulty out, turning it into a long-term test of “pacing discipline.” It’s also the only one of the four faces that seamlessly connects to Arima Onsen — which makes it the ideal vehicle for the classic Japanese ride-and-soak combination. If Omote Rokko gives you “exhilaration,” Ura Rokko gives you “endurance.”
Advanced play: When hardcore riders take on the “multiple faces of Rokko in one day” challenge, they often schedule Ura Rokko for the latter part — because its even grade can still be ground out steadily even under fatigue, unlike Omote Rokko’s steep wall which tolerates no trace of tiredness. Finishing with Ura Rokko, then rewarding yourself with an onsen soak in Arima, is what many veterans consider the perfect ending to a one-day Rokko epic.
10. Real-World Scenario Simulation: One Complete Ura Rokko Ascent
Let’s string together the sections, pacing, and gearing into a complete real-world script so you can rehearse it in your mind.
Before departure: Fill up one large bottle of water at the Arima Onsen area or the last resupply point before the climb, eat some easily absorbed carbohydrates, confirm your cassette has at least a 32T, and stuff a windbreaker into your jersey pocket. Do a few minutes of dynamic warm-up.
Section 1 (0–2 km): Start from the Arimaguchi area, grade 5–7%. Deliberately hold back, using “still barely able to breathe through your nose alone” as your upper limit. Tell yourself this is a long warm-up, not a sprint.
Section 2 (2–4.5 km): Enter the core rhythm zone, grade 6–8%. This is the longest and most discipline-demanding section. Establish a fixed breathing-pedaling rhythm and lock your output below sweet spot. Watch the 100-meter markers and check at each one whether you’re over target.
Section 3 (4.5–6.5 km): Local steep pitches up to 12%. This is the only place you need to actively add a bit of effort. Downshift to protect your cadence — don’t muscle the big ring and blow up your heart rate. Use the distance markers to count down, breaking the steep section into “just one more marker.”
Section 4 (6.5–7.7 km): Close to Kinenhidai, grade settles back. If you paced the earlier sections well, you should still have something left — you can finish with a clean acceleration as conditions allow.
After summiting: Arrive at Kinenhidai, put on your windbreaker, refuel and rest. Then you can choose to descend toward the Arima side for an onsen soak, or explore other viewpoints along the ridge. Either way, don’t forget to let your body recover from the climb before descending.
11. Customized Advice for Different Rider Groups
- For first-time challengers: Ura Rokko is actually friendlier to beginners than Omote Rokko — no intimidating steep walls. Set your goal as “follow the distance markers and climb steadily, one by one.” Go as slow as you need in the early section. You’ll find that steady is the fastest way on this road.
- For riders wanting to build endurance: Ura Rokko’s 7.7 km of even grade is an excellent venue for training “sweet spot endurance.” Locking in at 88–94% of FTP for the entire climb is a high-quality climbing endurance session.
- For those wanting a relaxed ride-tour: Treat Ura Rokko as a beautiful means to reach Arima Onsen. Grind up with the easiest gear and the most leisurely mindset; in June you’ll have seas of hydrangeas as company. Rest briefly at the top, then descend for an onsen soak — that’s a perfectly rounded Japanese ride-tour day.
- For group ride leaders: Ura Rokko’s even grade means the group won’t split apart as dramatically as on Omote Rokko, making it suitable as the climbing segment of a group endurance ride. Agree on Kinenhidai as the regroup point and let everyone cruise at their own pace.
12. Using Ura Rokko as a Training Ground: A Golden Textbook for Sweet Spot and Aerobic Endurance
Ura Rokko’s 6.5% even grade and 7.7 km length make it nearly perfect material for climbing endurance training.
Sweet Spot Intervals
Sweet spot refers to 88–94% of FTP — the training intensity with the “highest return on investment”: hard enough to effectively raise your threshold, yet not so hard that you can’t sustain it. Ura Rokko’s core rhythm zone (Section 2) has an even grade with few interruptions, letting you lock your power steadily at sweet spot and cruise all the way to the top. Each ascent is one high-quality sweet spot interval.
Aerobic Base (Zone 2) Long Rides
If your goal is to build your aerobic engine, you can also deliberately climb Ura Rokko at “conversational intensity” as part of a Zone 2 long ride. The even grade lets you hold your heart rate steadily in the aerobic zone, unlike a steep wall that forces intermittent spikes. This kind of “low-intensity, long-duration” accumulation is the foundation of all long-climb capability.
Pacing Discipline Training with the Distance Markers
Ura Rokko’s 100-meter markers are a natural pacing coach. You can deliberately practice “maintaining the same power/breathing rhythm for every 500-meter block,” cultivating fine control over intensity. This pacing discipline translates directly into your ability to “not blow up” in actual races.
Combine these methods, and Ura Rokko transforms from a scenic climb into a patient coach that helps you hone your endurance engine.
13. Descent and Transfers: Route Planning from Kinenhidai to Arima
Reaching Kinenhidai isn’t the end. How to descend safely and smartly and continue your itinerary is equally part of this route.
Descent option one: Return the same way to Arima. From Kinenhidai, descend back along the Ura Rokko Driveway to return to the Arima Onsen side. This descent has well-maintained pavement, and the 100-meter markers help you track progress, but you must control your speed throughout — a climb that feels even and easy on the way up means continuous gravitational acceleration on the way down. Don’t let up on the brakes.
Descent option two: Connect to the ridge and explore other routes. Riders with energy to spare can explore other viewpoints along the Rokko ridge from Kinenhidai, or even connect to Omote Rokko or Nishi Rokko for the descent, stringing the day into a full Rokko loop. This option extends the distance and adds elevation gain, suitable for experienced, energetic riders.
The rhythm of connecting to an onsen soak: Regardless of which descent you choose, if you plan to finish at Arima Onsen, it’s recommended that after descending to the hot spring area, you let your body cool down for ten minutes and rehydrate before entering the bath. Going straight from high-intensity exercise into a hot bath causes rapid vasodilation that can lead to dizziness and discomfort. Let your heart rate settle first — then the onsen’s healing will be a pleasure rather than a burden.
Equipment reminder: The north-facing Ura Rokko descent is windy and cold. Put on your windbreaker before descending. If you’ll be riding away after your soak, remember that the onsen relaxes your muscles and changes your body temperature — let your body “wake up” again before setting off. Don’t start hammering the moment you leave the bathhouse.
14. Conclusion: Endurance Is Ura Rokko’s Virtue
Pulling it all together, Ura Rokko is a road like this: 7.7 km, 506 meters, 6.5% average grade. No intimidating steep walls, yet it tests your pacing discipline with a long, even grade. No sweeping harbor views like Omote Rokko, but it offers the cool of deep forest, the rain of hydrangeas, and the healing of a thousand-year-old hot spring.
It suits being a golden textbook for endurance training, a beautiful means to reach Arima Onsen, and a quiet time for those who want to climb alone and converse with themselves. It doesn’t show off, yet it’s deeply enduring; it doesn’t push you, yet you won’t want it to end.
Bring enough gearing and supplies, put away your early ambition, and follow the 100-meter markers up one by one — when you reach Kinenhidai and then descend to soak in that reddish-brown gold spring, you’ll understand that going around to the back of the mountain to climb this “Ura” road was a decision well worth making. May you ride with composure, soak with comfort, and safely savor every bit of endurance on this northern line.
15. Nutrition and Hydration Details: The “Eating and Drinking” You Can’t Overlook on a Long Climb
With Ura Rokko’s 7.7 km plus its frequent inclusion in full-day endurance rides, plan your nutrition on a “half-day or more” basis. Let’s spell out the details.
Timed carbohydrate intake: The biggest fear on a long climb is “hitting the wall” (glycogen depletion). It’s recommended to consume 30–60 grams of carbohydrates per hour — energy gels, energy bars, bananas, or yokan all work. The key is “timed and measured, small amounts frequently” rather than binge-eating only when hungry. Ura Rokko’s core rhythm zone (Section 2) is the best place for regular refueling because the grade is even and you have the spare capacity to take one hand off the bars to eat.
Fluids and electrolytes: Generally, replenish 500–750 ml per hour, more in hot and humid weather. Long climbs cause heavy sweating; replenishing only water without electrolytes can lead to cramping and hyponatremia. In summer or when sweating heavily, add electrolyte tablets to your water or drink sports drinks to replace the sodium and potassium lost through sweat. Although Ura Rokko has shade and is cooler, don’t neglect hydration in summer.
Making good use of the Arima resupply point: The start/finish is near Arima Onsen, which has abundant dining and shops — perfect for scheduling meals, supplies, and an onsen soak into your itinerary. But remember one principle: schedule the soak for after all riding is completely finished. After soaking, your muscles relax and your body temperature changes. If you immediately head out to climb or descend, your body isn’t in ideal condition, and the risk of injury rises.
A practical Ura Rokko nutrition schedule:
| Timing | Content | Purpose |
|---|---|---|
| 30 minutes before starting | One banana or energy bar | Quickly available energy |
| Section 2 core zone | Energy gel + big sip of water | Maintain blood sugar, hydrate proactively |
| Before the local steep section | Another serving of carbohydrates | Let it take effect during the steep section |
| At the summit, Kinenhidai | Water, salty food | Recovery, sodium replacement |
| After the entire ride | Full meal in Arima + onsen soak | Complete recovery |
16. Weather Judgment and Safety Bottom Lines
Finally, a few words on safety. Although Ura Rokko’s grade is friendly, it is still a mountain area several hundred meters in elevation — weather and road condition judgment can’t be taken lightly.
The north-facing, shaded Ura Rokko has significantly lower winter temperatures than the sunny side, and a higher chance of icy roads. If riding in winter, be sure to check road conditions in advance. Once the mountain freezes, descending is nearly gambling with your life — at times like that, decisively abandoning the ride and rescheduling is what a truly mature rider does. In summer, afternoon thunderstorms are common in the mountains. Check the weather before departure, and if thunder roars, don’t linger in open areas or at high points.
Remember, the mountain will always be there, but you only have one life. Any wise retreat of “I’m not feeling right today, so I won’t push it” is more valuable than forcing through out of stubbornness. Put safety ahead of results and pride — this is the first rule every mountain rider should engrave in their heart.
Appendix: Ura Rokko Quick Checklist
| Check Item | Standard | Why It Matters |
|---|---|---|
| Largest cassette cog | ≥ 32T | For local steep sections and protecting cadence over long distance |
| Water volume | ≥ 750ml | Limited resupply points in the mountains |
| Energy supplies | Timed and measured, 30–60g carbs per hour | Prevents hitting the wall on long climbs |
| Windbreaker | Carry with you | North-facing descent is windy and cold |
| Distance markers | Recognize they count back from Kinenhidai | Pacing and psychological anchor |
| Weather | Check before departure; check for ice in winter | North-facing shaded side has high ice risk |
| Onsen timing | Schedule after all riding is completely finished | Avoid injury from riding hard after soaking |
Ride Ura Rokko as a complete experience: climb steadily, admire the flowers, soak well, and savor slowly. This road behind the mountain deserves to be traveled with the most composed mindset.
17. Itinerary Tips for Riders Coming from Afar
If you’re a rider who has flown in specifically to challenge Rokko, Ura Rokko fits perfectly into the classic “Rokko + Arima Onsen” combination itinerary. Kobe city is convenient for transportation and works well as a base. If you don’t want to bring your own bike, there are rental shops in both Kobe and Osaka — be sure to confirm in advance that you can rent a bike with at least a 32T climbing gear.
A suggested one-day route: depart from Kobe city in the early morning to avoid traffic and the midday heat, climb Omote Rokko or Sakasegawa to the ridge first, then descend Ura Rokko to Arima Onsen. After soaking and eating, descend carefully back to the city. This way, you experience the character of two faces of Rokko in a single day and finish with a thousand-year-old hot spring — the most classic and satisfying arrangement.
In terms of equipment, besides climbing gearing, don’t forget a windbreaker (the north-facing descent is cold), plenty of water bottles, energy supplies, basic repair tools and spare tubes, and a heart willing to slow down and savor the experience. Last and most importantly — you are a guest from afar. Rokko is Kobe’s home mountain, and Arima is a hot spring town with a thousand-year history. Please ride and soak with respect: yield to pedestrians and hikers, observe onsen etiquette, and carry your trash down the mountain. May every Taiwanese rider who visits here become a welcome guest. May you reap a long and profound day on this road behind the mountain.
Related Reading
- Omote Rokko Driveway Complete Guide: 4.7 km at 8.8% Average Grade — Section Pacing, Gearing, and Steep Wall Strategy
- Lileng Return Leg Practical Guide: Pacing and Gearing Breakdown for the Provincial Highway 8 7% River Valley Steep Climb
- Zhu Lu Shan Practical Guide: 6.89 km, 546.2 m Elevation Gain, 7.9% Average Grade — Are You Ready for This Hardman Long Climb in the Wulai Mountains
- Luchang Steep Climb Practical Guide: Full Analysis of the 4.09 km, 9.6% Average Grade Ultimate Challenge
西進武嶺 8000名單車友數據分析 PART1 | 從新手到高手數量/瓦數/推力比/FTP推力比/功率計使用率 大解析 | 公路車 | CTYeh
5 年前
台北闊瀨陡坡 騎旅 / 日本單車雜誌編輯車友臨時加入!/ 髮香才是最強的 / feat. 北迴歸線小隊 / 公路車 CT Yeh
6 個月前
半日 小台灣 極限單車路線挑戰實錄
7 年前
#公路車 #西進武嶺 配速配瓦實驗 坡度分析 四小時內攻略 建大盃 NeverStop #西進武嶺攻略
6 年前
萬年峽谷! 30% 超激陡坡 里佳部落DAY2 還是很硬! | 公路車 | CT Yeh
3 年前
大禹嶺 到 武嶺牌樓 全程前後實況錄影 | 北進武嶺 | 東進武嶺 | KOM | 訓練台 | 坡度分析 | Taiwan KOM Last 10 km HARD | 公路車
6 年前
單車 梅山36灣 坡度介紹 路段介紹 空拍 (相關遊記影片,請參考說明或我的頻道喔,歡迎訂閱)
6 年前
西進武嶺各路段 前8000名 大數據分析 配速攻略/功率/心律/推力比/維持率/踏頻/踏瓦比/牽車率 大公開 | 建大盃 NeverStop 可參考 | 公路車 | CT Yeh
5 年前