Fuji Subaru Line Race Strategy: 24 km with 1,210 m of Climbing, the Purest Test of Your Aerobic Threshold
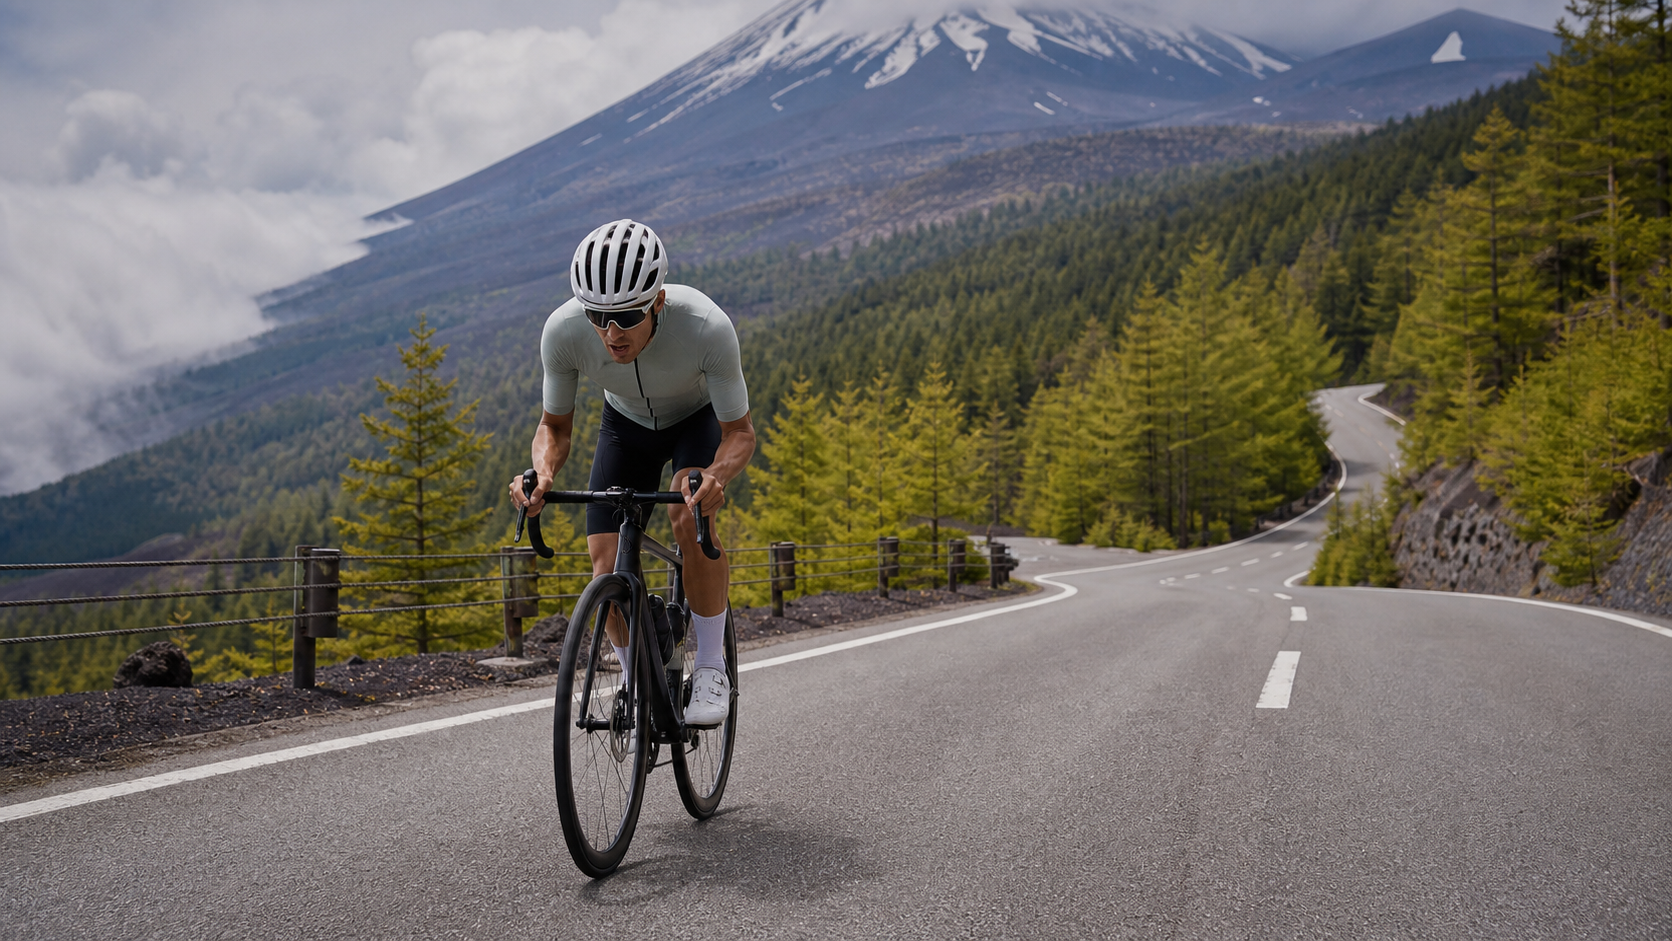
The Fuji Subaru Line (Fuji-san Gogome Climbing Road) is a sacred site for cycling climbers across Japan. This paved road, which pushes cyclists from the outskirts of Fujiyoshida City up to the mountainside of Mount Fuji, is not just a stretch of road—it’s a precise, almost ruthless test for your aerobic engine. When I first laid out its real data on my screen, what came to mind wasn’t “what a beautiful view,” but “this is a pure physics problem.”
Let’s Lay Out the Data First
Before starting any guide, I’m in the habit of quantifying the route’s skeleton. Below are the most critical sets of numbers for this route, and they form the entire basis for pacing, gear selection, and estimated finish time.
| Item | Value | Notes |
|---|---|---|
| Total Distance | Approx. 24.03 km | Based on the popular Strava segment |
| Race Timing Segment Distance | Approx. 24 km | Measured from the “Tainai” intersection on the Fujiyoshida side |
| Total Elevation Gain | Approx. 1,210.6 m | Based on the Strava segment |
| Race Version Elevation Gain | Approx. 1,255 m | Start elevation approx. 1,062 m → Finish at Gogome approx. 2,300 m |
| Average Gradient | Approx. 5.0% | Average over the entire segment |
| Maximum Gradient | Approx. 7.8% | Local steep sections, not sustained for long periods |
| Start Elevation | Approx. 1,062 m | Tainai intersection on the Fujiyoshida side |
| Finish Elevation | Approx. 2,300 m | Fuji Subaru Line Fifth Station (Gogome) |
Let’s do a quick mental calculation first. Climbing 1,210 m over 24 km means that for every kilometer you move forward, you rise an average of about 50 meters; converted to the whole route, that’s twenty-four continuous kilometers with no real descent to catch your breath. For a rider used to Taiwan’s Wuling, Tataka, or Fengguizui, this average gradient actually “looks quite gentle”—just 5%. Who hasn’t ridden the 8% or 10% grades on the latter half of Wuling? But this is precisely the most dangerous illusion of the Fuji Subaru Line.
What makes this road truly brutal isn’t how steep it is, but the fact that there’s almost nowhere for your heart rate to come down. It’s a treadmill that locks you at threshold intensity and then turns for over an hour straight.
Why “5% Average” Is Harder Than You Think
In the world of climbing, the “variability” of a gradient often determines the level of suffering more than its “absolute value.” On a route like Wuling, where the gradient fluctuates wildly between steep and gentle, the steep sections are punishing, but every flatter section and every false flat is a golden window for your heart rate to drop and lactate to clear. You can actively shift down, relax, and get your breathing back under control on the easier sections, then brace for the next steep pitch.
The Fuji Subaru Line is the exact opposite. Its gradient is extremely linear, with most sections falling within a narrow band of 4% to 6%. What does this mean? It means your power output, heart rate, and breathing rhythm will be pinned to an almost constant intensity for over an hour straight. There are no steep sections forcing you out of the saddle to sprint, and no easy sections allowing you to slack off and recover. This is the most naked interrogation of your aerobic threshold (FTP / lactate threshold).
I often tell my teammates: this Fuji route doesn’t test your explosive power; it tests “how long you can sustain a steady output at an intensity just below your threshold.” Any greed, any mistake that lets your heart rate spike above threshold, will be paid back with interest in the latter half.
Section-by-Section Guide: Breaking 24 km into Five Chapters
I break the entire route into five psychological and physiological phases based on gradient characteristics and altitude-related oxygen deprivation. Please note that the official race version starts from the “Tainai” intersection, and the following sections are described primarily based on the feel of the race version.
Section 1 (0–5 km): The False Warm-Up Zone, Where Mistakes Are Most Likely
The gradient near the start is relatively gentle, the pavement is wide and smooth, and the adrenaline right after the start will make you feel unbelievably easy. This is the biggest trap of the entire route. Nine out of ten riders will “feel great” here and unconsciously push their power beyond their planned values.
My advice is very clear: for the first 5 km, deliberately hold back to 90% to 95% of your target race power. If you have a power meter, set an upper limit and actively ease off the moment you exceed it; if you only have a heart rate monitor, keep your heart rate 5 to 8 beats below your threshold heart rate. Maintain a high-cadence range of 80 to 90 rpm, using a “light gear, fast spin” approach to keep your muscles in aerobic metabolism—don’t grind slowly in a big gear. You’ll be slightly ahead of your planned time in this section; that’s normal. Resist the urge to go faster.
Section 2 (5–12 km): The Rhythm Zone in the Forest, Where the Race Truly Begins
After entering this section, the route is embraced by temperate broadleaf forests, with dense walls of trees on both sides, and the gradient stabilizes around 5%. This is the core zone for “finding your rhythm” in the race. By now, you should have your heart rate stabilized in your target zone, breathing rhythmically, coordinating a nose-and-mouth breathing pattern with your pedaling.
In terms of pacing strategy, this section should be “boring to the extreme.” The ideal state is a power curve as flat as a straight line, with fluctuations no greater than 5%. Cornering or changes in scenery should not cause your power to spike or plummet. You can ease your cadence slightly to 75 to 85 rpm, but maintain a “smooth, circular pedal stroke” to avoid dead spots and hesitation. Your fueling rhythm should also be established here: take small sips of water every 15 to 20 minutes, and consume carbohydrates (energy gels or sports drinks) every 30 to 40 minutes.
Section 3 (12–18 km): The Psychological Black Hole of the Middle Section
In my opinion, this is the section that tests your willpower the most in the entire race. By now, you’ve been riding for nearly an hour, fatigue is accumulating in your muscles, and the altitude is gradually climbing past 1,800 m and pushing toward 2,000 m, where the oxygen content in the air becomes noticeably thinner. You’ll find that maintaining the same power requires your heart rate to creep higher, and your breathing becomes more labored than at sea level.
This is a normal physiological phenomenon—at high altitude, blood oxygen saturation drops, and the body must compensate with faster breathing and a higher heart rate. At this point, do not try to maintain the power numbers you trained with at sea level or low altitude. Instead, pace yourself using “rate of perceived exertion (RPE)” and “breathing rhythm.” Allow your power to drop 3% to 5% from your plan. This isn’t a step backward; it’s smartly adapting to the environment. Mentally, break these 6 km into three smaller 2 km goals and digest them one by one. Don’t think about how far the finish line still is.
Section 4 (18–22 km): The Dual Pressure of the Treeline and Oxygen Deprivation
Past this point, you’ll clearly notice a change in vegetation—broadleaf forests gradually give way to coniferous forests, trees become shorter and sparser, and the views begin to open up. This is a sign that the “tree line” is approaching, meaning you’ve climbed to a considerable altitude. By now, the elevation is near or exceeding 2,100 m, and the effects of hypoxia enter a clearly noticeable range.
Physiologically, you may feel a dull headache, cold fingertips, and slowed thinking—these are all mild symptoms of high-altitude exposure. The pacing principle for this section is “never overexert yourself.” Use your remaining energy reserves to hold a steady intensity you’re confident you can maintain to the finish. If the gradient steepens locally (sections approaching 7% to 7.8%), shift down and increase your cadence rather than grinding a big gear and spiking your heart rate.
Section 5 (22–24 km): The Trade-Off of the Final Sprint
In the final 2 km, the parking lot and buildings of the Fifth Station begin to appear in view. At this point, you’ll be tempted to go all out, but I want to remind you: sprinting at full effort at 2,300 m of altitude comes with a much higher recovery cost than at sea level. If your goal is simply to finish or set a personal record, wrap up this last section at an intensity “just slightly above your plan” and save the scenery for yourself to savor. If you’re fighting for a placing, then only release your remaining power in the final 500 m, provided you’re certain you won’t blow up.
Gearing and Equipment: How to Set Up for This Climb
Because the Fuji Subaru Line has a linear gradient with no super-steep sections, the need for “absolutely light” gearing is theoretically less extreme than on some of Taiwan’s steeper routes. However, this is a long sustained-threshold effort, and the core logic behind gear selection is “maintaining high cadence and avoiding premature muscle fatigue.”
| Rider Type | Recommended Chainrings | Recommended Cassette | Notes |
|---|---|---|---|
| Competitive / Lightweight, high power-to-weight ratio | 50/34 standard compact | 11-30T or 11-32T | Light enough gears to maintain cadence without wasting top-end range |
| General advanced enthusiast | 50/34 compact | 11-32T or 11-34T | Plenty of bailout gears for the middle section, protects the knees |
| Finish-oriented / Heavier riders | 48/32 or 46/30 | 11-34T or even lighter | Better to have gears too light than to grind a big gear at altitude |
Core principle: better to be over-geared on the light side than to be forced into a big gear at altitude and blow your heart rate through the roof. Keeping your cadence above 75 rpm is the key to preserving your legs for the final stretch. As for wheels, this is a pure climb—no need for aero deep-section rims. A lightweight set of shallow-to-mid-profile climbing wheels will make accelerating and shifting easier; but don’t sacrifice braking confidence and handling for weight savings, because you’ll need them on the descent.
For tires and pressure: the road surface is good, so you can run slightly lower pressure than you would on the flats for rolling comfort and grip. Don’t forget to pack a windbreaker or a lightweight windproof jacket—this is one of the most important gear reminders in this entire article, and the reasons will be detailed in the weather section below.
Nutrition and Hydration: An Endurance Battle of Over an Hour
Based on most amateur riders finishing in roughly 1.5 to 2.5 hours, this is a true endurance event, and your fueling strategy will directly affect your performance in the second half.
- Fluids: Take small sips every 15 to 20 minutes; don’t wait until you feel thirsty. When climbing, it’s easy to forget to drink because you’re focused, so set a reminder on your bike computer. Carry one to two bottles, and consider adding electrolytes to one of them.
- Carbohydrates: Prolonged threshold output depletes glycogen quickly. Aim for about 30 to 60 grams of carbs every 30 to 45 minutes, in the form of energy gels, bars, or concentrated sports drinks. Eat a proper meal 1 to 2 hours before the start so your glycogen stores are fully loaded.
- Altitude-specific considerations: The higher you go, the more blood flow to the gut is reduced, and overly thick or hard-to-digest fuel can cause discomfort. Stick to products you’ve already validated in training and that your stomach tolerates—race day is not the time to experiment.
Weather and Season: The Most Underrated Variable
The official event (Mt. Fuji Hill Climb) is typically held in early summer, around June, and the timing is well chosen: the weather at the base is relatively stable, and the humid heat of midsummer hasn’t arrived yet. But even so, the most underestimated—and most dangerous—variable on this route is the enormous temperature difference between the bottom and the top.
Imagine this: at the start at 1,000 meters, it might be warm enough to make you sweat slightly; but when you reach the Fifth Station at 2,300 meters, the temperature can drop by more than 10°C. Add in the fact that you’re soaked in sweat and there’s often strong wind at altitude, and the wind chill will be extremely low. For every 1,000 meters of elevation gain, the temperature drops roughly 6°C—that’s an iron rule.
Every year, the riders who most need medical attention or have to withdraw early are often not those who couldn’t pedal anymore, but those who suffered hypothermia at the finish line, or made handling mistakes on the descent due to cold and fatigue.
So please remember this: no matter how hot it is on the way up, always stuff a windproof jacket in your back pocket. The first thing you do at the finish is not take photos—it’s put on warm layers immediately. If the descent is open to riders, be sure to wear gloves, zip up, and control your speed, because a long high-speed descent will continuously drain your core temperature. Also, mountain weather is changeable—always check the summit forecast and visibility before you start. Heavy fog or rain dramatically increases the risk.
Common Mistakes and DNF Risks
Based on years of observation and personal experience, the reasons riders most often fail to finish (DNF, Did Not Finish) or perform far below expectations on this route can almost all be categorized as follows:
- Starting too fast: Pushing too hard in the first 5 kilometers of “fake warm-up” is the number one cause of failure. It feels great early on, but you pay for it with interest later.
- Ignoring pacing adjustments at altitude: Clinging to power numbers from sea-level training and refusing to lower your target in the oxygen-deprived zone leads to uncontrolled heart rate, cramping, and even mild altitude sickness.
- Broken fueling rhythm: Forgetting to hydrate and eat on schedule because you’re focused on climbing. By the time you feel hungry or thirsty, it’s often too late, and you “hit the wall” in the second half.
- Insufficient gear preparation: No warm clothing, leading to hypothermia at the finish or on the descent; or gearing that’s too heavy, forcing you to grind until your legs cramp at altitude.
- Mental collapse: If you don’t break the “psychological black hole” of the middle section into smaller goals in advance, the endless gradient of the monotonous forest section can easily crush your will.
Target Time Table for Different Rider Levels
The following table is based on a race-timed segment of approximately 24 kilometers with about 1,255 meters of climbing, providing a rough reference for self-assessment. Actual results will vary significantly based on weight, power-to-weight ratio, weather on the day, and physical condition—use it only for pacing planning.
| Rider Level | Reference Finish Time | Approximate Power-to-Weight Ratio | Pacing Advice |
|---|---|---|---|
| Top amateur / Semi-pro | Within ~1 hr 10 min | 5.0 W/kg or above | Near-threshold the entire way; requires extremely stable altitude tolerance |
| Strong veteran | ~1 hr 10 min – 1 hr 30 min | ~4.0–5.0 W/kg | Conservative early, hold threshold in the middle and late sections |
| Advanced enthusiast | ~1 hr 30 min – 1 hr 50 min | ~3.2–4.0 W/kg | Steady aerobic effort; absolutely no early surge |
| General finish-oriented | ~1 hr 50 min – 2 hr 30 min | ~2.5–3.2 W/kg | Primary goal: “don’t stop, finish steadily” |
| First-time challenger / Experience group | 2 hr 30 min or more | Below 2.5 W/kg | Rest is allowed; pace yourself and enjoy the experience |
Training Preparation Advice
If you decide to take this route seriously, your pre-race training should focus on “sustained threshold endurance” rather than “short bursts of power.” Here are a few directions:
- Long threshold intervals: For example, 2 sets of 20 minutes or 3 sets of 15 minutes at threshold intensity, simulating the long, steady output required on Fuji.
- Climbing specificity: Find a climb with a steady gradient that you can ride continuously for 40 minutes or more, and practice “flattening out your power output.”
- Cadence strength: Practice maintaining a cadence above 75 rpm while climbing—this will protect your muscles from fatiguing too early in the later stages.
- If possible, do some altitude or hypoxia adaptation: Even if you can’t get to real altitude, arriving at the venue a few days early can give your body a preliminary adaptation.
Conclusion: A Journey of Conversation with Yourself
The Fuji Subaru Line has earned its reputation as one of the most respected climbs in Japan—and indeed all of Asia—precisely because it strips away all the flashy variables and reduces climbing to its essence: can your aerobic engine sustain a near-limit intensity, steadily and without falling apart, for over an hour?
It doesn’t reward greed. It doesn’t reward stubbornness. It only rewards riders who know how to listen to their bodies, pace precisely, and accumulate patiently. When you finally pedal your way to the Fifth Station at 2,300 meters and look back at the forest you just crossed, you’ll understand: this route teaches you far more than how to ride a bike—it teaches you how to coexist with yourself through prolonged suffering. May every pedal stroke you take be exactly right.
Advanced Pacing Model: Breaking Down the Climb with the “Three-Zone Power Method”
If you already have a power meter and are familiar with your FTP (Functional Threshold Power), I’d like to offer you a more refined pacing model that lets you ride this road like an engineer. I’ve divided the entire climb into three power zones based on altitude and oxygen availability.
| Altitude Zone | Suggested Power (% of FTP) | Cadence Suggestion | Physiological Rationale |
|---|---|---|---|
| Start to approx. 1,600m | 88%–92% of FTP | 80–90 rpm | Air is still plentiful, muscles are fresh, but you must suppress the urge to push hard |
| Approx. 1,600m to 2,000m | 85%–90% of FTP | 78–85 rpm | Hypoxia begins to appear; proactively ease power slightly to keep heart rate stable |
| Approx. 2,000m to 2,300m | 80%–88% of FTP | 75–82 rpm | Hypoxia is pronounced; switch to perceived-effort pacing to avoid blowing up |
The core philosophy of this model is “power decreases with altitude, but perceived exertion remains constant.” Many people crack at high altitude precisely because they stubbornly cling to their low-altitude power numbers, only to find that the same wattage in an oxygen-deprived environment yields far higher heart rates and faster lactate accumulation. Smart riders let their power curve gently slope downward with altitude, while keeping their subjective effort (RPE) at a steady “hard but manageable” level from start to finish.
If you don’t have a power meter, this logic still applies: use your “breathing” as your dashboard. Maintain a breathing intensity throughout that allows you to “speak short sentences, but not hold a long conversation.” The moment you find you can’t even get out short sentences, it means you’re pushing too hard—back off immediately.
On Mental Warfare: Techniques for “Outsourcing” the Pain
When climbing for over an hour, physical pain is only half the battle; the other half is mental attrition. Here are a few psychological techniques I’ve tested and found effective, to help you get through that “mental black hole” in the middle section:
- Fragment the distance: Don’t stare at soul-crushing numbers like “15 kilometers to go.” Break it into digestible mini-tasks like “just hold on 10 more minutes, then take a gel.” The human brain excels at completing short-term goals, not at confronting distant finish lines.
- Anchor your rhythm: Find a steady breathing and pedaling cadence to serve as your “anchor.” When intrusive thoughts surge or pain intensifies, pull your attention back to this rhythm. It’s akin to a form of mindfulness meditation on the bike.
- Borrow from the environment: Shift your attention to the ever-changing forest scenery, the light filtering through, the distant birdsong. When your brain is occupied by external beauty, it has no room to amplify the body’s pain signals.
- Rehearse the success scene: In the most painful moments, vividly imagine yourself reaching the Fifth Station, wrapping on a jacket, and looking back over the forest. This anticipation of an “impending reward” can effectively hold together a will that’s about to crumble.
One-Week Pre-Race Body Management Checklist
No matter how good your training has been, if you mess up the week before the race, it can all be for nothing. Here’s a streamlined pre-race checklist:
- Taper: Five to seven days before the race, dramatically reduce training volume, but retain a small amount of high-intensity stimulus. This lets your body stay sharp while fully flushing out fatigue and replenishing glycogen.
- Prioritize sleep: The quality of sleep two nights before the race often matters more than the night before (because you’re usually too nervous to sleep well the night prior). Adjust your sleep schedule several days in advance.
- Carbohydrate loading: One to two days before the race, moderately increase your carbohydrate intake to top off muscle and liver glycogen stores. This is critical for sustained threshold output.
- Equipment inspection: Thoroughly check your bike before the race—shifting, brakes, tires, chain, bolt torque. Any small issue can be magnified into a disaster on a climb.
- Acclimatize early: If your schedule allows, arrive a day or two early to give your body initial adaptation to the altitude, climate, and time zone.
- Nothing new on race day: All nutrition, equipment, and even breakfast on race day must be things you’ve validated in training. Race day is absolutely not the time to experiment.
Descent Safety: The Overlooked Second Half of the Journey
Most guides focus entirely on the “way up,” overlooking the fact that the descent actually carries higher accident risk. If the event allows self-paced descents, or if you’re riding on your own, please treat this section with extreme caution.
First, the biggest enemy is “hypothermia.” You’re drenched in sweat from the climb, temperatures plummet at the high-altitude finish, and then you face prolonged high-speed cold wind on the descent—your core temperature will drop rapidly. So before descending, be sure to: put on warm and windproof clothing, wear gloves, and zip up everything.
Second is “bike handling.” After over an hour of high-intensity climbing, your muscles are fatigued, your reactions are slower, and your judgment is impaired—yet you now face a descent that demands intense focus. Be sure to: control your speed at all times, brake well before corners, leave ample braking distance, and keep your hands on the brake levers at all times. Remember, you’ve already completed the hardest climb; there is absolutely no reason to show off on the way down. Getting safely back to the bottom is the true finish line of this journey.
Weight, Power, and the Brutal Math of This Road
Climbing is fundamentally a war against gravity, and in that war, “power-to-weight ratio (W/kg)” is the only currency. In this section, I want to show you, in the most straightforward way possible, the enormous impact weight has on this road.
On flat terrain, aerodynamic drag is the primary enemy, and weight is relatively secondary. But once the gradient kicks up—and holds for over an hour—the dominant force you’re fighting becomes the gravitational work required to lift the entire system of you and your bike. This means that at the same absolute power output, the lighter rider climbs faster and more efficiently.
Here’s a concrete example: Two riders can both sustain 250 watts. One weighs 60 kg, the other 75 kg. The former has a power-to-weight ratio of approximately 4.17 W/kg; the latter, approximately 3.33 W/kg. On a long climb like Fuji, this gap gets mercilessly amplified—the lighter rider might easily arrive ten-plus minutes ahead.
This is not to suggest you pursue extreme weight loss for the sake of results (over-dieting will instead cost you muscle, health, and power). Rather, it’s to help you understand a practical truth: if you want to perform better on this pure climbing route, “optimizing body composition within a healthy range” and “increasing absolute power” are two equally important paths. Systematically bringing body fat into a reasonable range over a season while steadily building threshold power training will be far more effective than last-minute crash measures before the race.
A Condensed Pre-Ride Checklist
To make sure you don’t miss any critical element before you head out, here’s a quick-reference checklist condensing the key points of this entire article:
- Route homework: Confirm road access status, the start/finish of your event version, and the day’s summit weather and visibility forecast.
- Body condition: Taper complete, well-rested, glycogen stores full, no colds or physical discomfort.
- Gearing and equipment: Set up sufficiently light gearing based on your ability—when in doubt, go lighter rather than heavier.
- Warmth and wind protection: Make sure your rear pockets hold a windproof jacket and gloves, ready for the cold at the summit and on the descent.
- Nutrition plan: Calculate your water and carbohydrate intake timing, using only products validated in training.
- Pacing discipline: Remember the three iron rules—“conservative early on, decrease power with altitude, never overreach.”
- Safety awareness: Treat descent handling and hypothermia risk as seriously as your climbing performance.
Save this checklist to your phone and go through it item by item before you depart. Thorough preparation is precisely what separates enjoying this sacred mountain journey from ending it in misery.
Related Reading
- Fuji Skyline Guide: The 26km Epic to Fuji’s Highest Rideable Point, the Fifth Station at 2,400m
- Fuji Azami Line Steep-Climb Guide: Survival Guide for Japan’s Steepest Climb with the Lightest Gearing
- Riding to the Highest Reachable Point on Fuji: Fuji Skyline, Hoei Crater, and a Long Cloud-Level Journey Through the Forest Belt
- Pilgrimage Beneath the Towering Wall: Fuji Azami Line, Subashiri Trailhead, and a Test of Will on a Brutal Climb
半日 小台灣 極限單車路線挑戰實錄
7 年前
富士山KOM 賽事篇 VLOG!/ 小野田出沒!/ 完整路段分析 / 武嶺要騎多快才能拿環?/ 台灣選手 第20回Mt.富士ヒルクライム 参加!/ 公路車 / CT Yeh
2 年前
全段數據 2024富士山登山賽 ((銅環)) 請開字幕! /全程解說版 4K高畫質/ feat. 樂華演城旭 / 公路車 / CT Yeh / 第20回Mt.富士ヒルクライム
2 年前
台北闊瀨陡坡 騎旅 / 日本單車雜誌編輯車友臨時加入!/ 髮香才是最強的 / feat. 北迴歸線小隊 / 公路車 CT Yeh
6 個月前
2025 乘鞍岳登山賽 比賽全紀錄篇 / 完整路線攻略介紹 / 日本版武嶺 公路最高點 / 高山空拍絕景 / 明年會開團! / 公路車 / CT Yeh
10 個月前
2024富士山KOM!兩萬人規模參賽!報到篇 / 台灣車友擠爆機場/超震撼會場!/ 公路車 / CT Yeh
2 年前
2025 乘鞍 KOM 登山賽挑戰實錄 / 日本公路最高 ! 賽前探路篇 / 比富士山厲害,無敵絕景!/ 40週年 / 中文YT首發 / 公路車 / CT Yeh #乘鞍ヒルクライム
10 個月前
雨戰! 西進武嶺員工旅遊 加料 各路段大數據分析 | 同事端出5公斤的公路車來挑戰!? EP1
4 年前