Mount Gassan Park Line Climbing Guide: Real-World Data Analysis of a Short, Steep 4.84km Climb at 7.8% Average Gradient
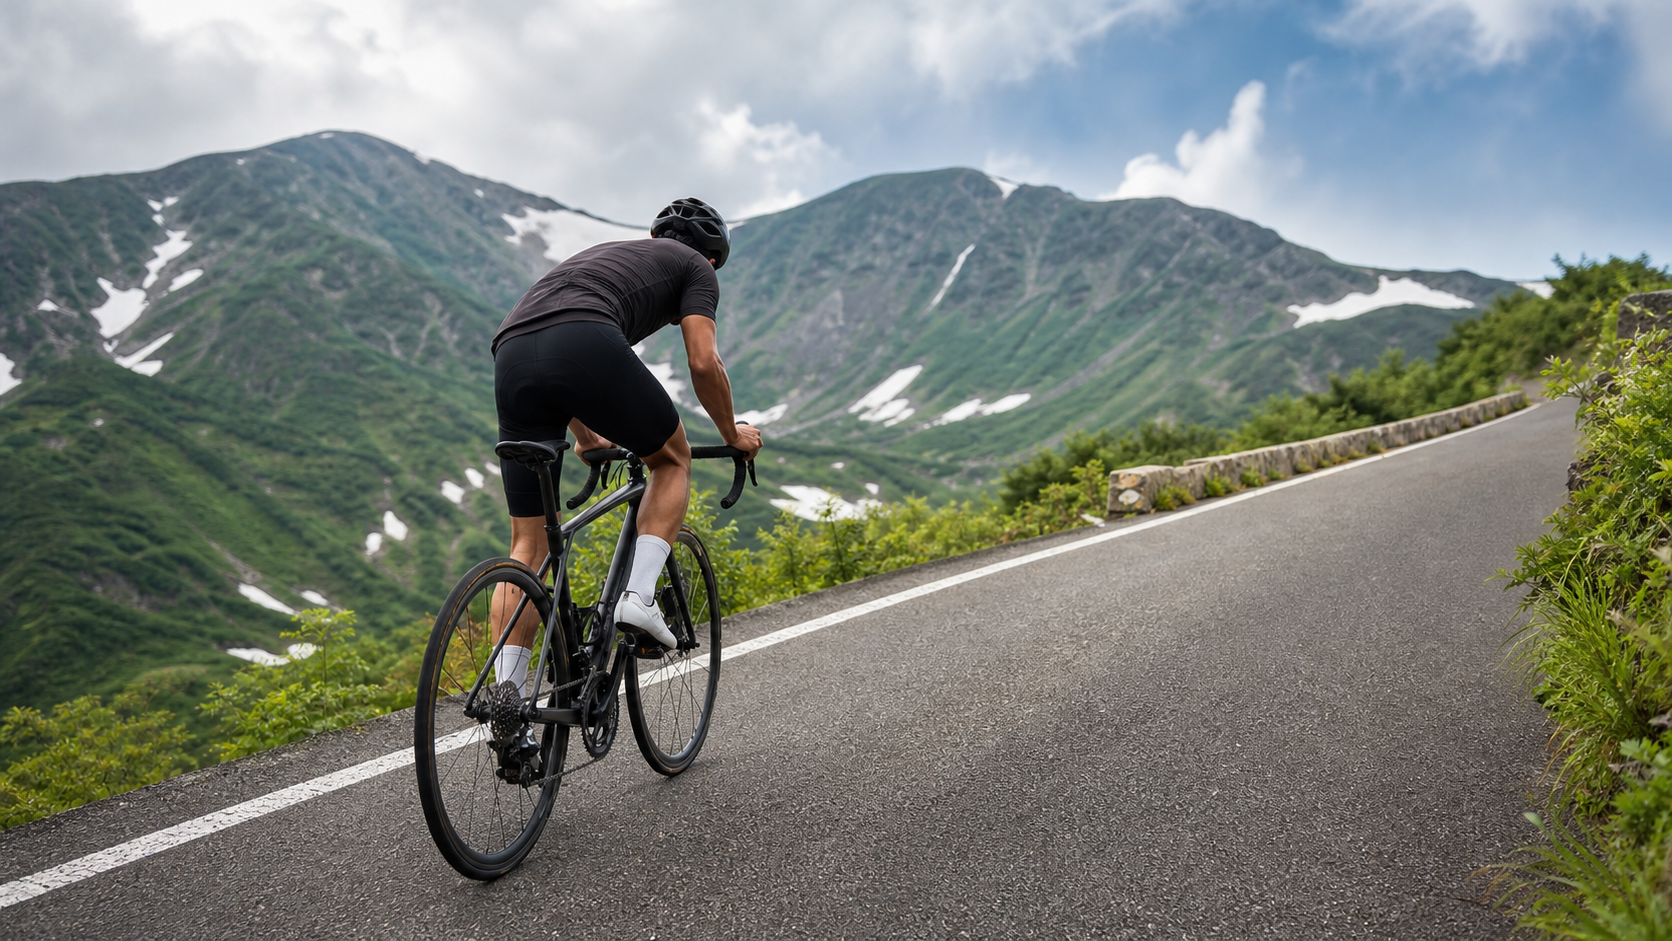
The Mt. Gassan Park Line is a short but brutal climb in Yamagata Prefecture in Japan’s Tohoku region. According to real-world data from the Strava segment, the road stretches approximately 4.84 km with a total elevation gain of about 377.9 meters, translating to a punishing average gradient of 7.8%. The numbers alone might not seem alarming, but the moment you put your wheels on the pavement, you’ll understand how this 4.84 km relentlessly pushes your heart rate and gear ratio to the limit—there’s no obvious flat section to catch your breath; it’s almost a steady, unbroken push upward toward the Gassan (がっさん, elevation 1,984 m) Obanazawa direction.
Short, steep climbs are the most honest. They don’t test your endurance reserves and fueling strategy like a 100 km epic; instead, they act like a mirror, revealing your power-to-weight ratio, gear selection, and pedaling efficiency in stark clarity. The Mt. Gassan Park Line is exactly such a road—one that honestly reflects the results of your training.
This article approaches the climb from an engineering and data perspective, breaking down these 4.84 km, 378 meters of elevation gain, and 7.8% average gradient. We’ll analyze the gradient changes section by section, discuss which gear ratios to use, how to pace yourself, how to manage your cadence, how to prepare for fueling and weather, and provide realistic target times for riders of different levels. This isn’t a lyrical “scenery is beautiful, come ride it” piece; it’s a practical guidebook you can take with you on the road.
1. Let’s Clarify the Numbers First: How Hard Is a 7.8% Average Gradient Really?
Before we start planning, let the numbers speak. Many people see “4.84 km” and instinctively think, “That’s less than 5 km, it’ll be quick,” but the difficulty of a climb is never determined by distance alone—it’s the product of distance and gradient—that is, the total vertical height you have to overcome.
| Item | Value | Explanation |
|---|---|---|
| Segment Distance | Approx. 4.84 km | Equivalent to about 10 minutes of cruising on flat ground |
| Total Elevation Gain | Approx. 377.9 meters | Close to the vertical height of a 120-story building |
| Average Gradient | Approx. 7.8% | For every 100 meters forward, you rise 7.8 meters |
| Target Mountain Area | Mt. Gassan Obanazawa direction | Mt. Gassan main peak elevation 1,984 meters |
What does a 7.8% average gradient feel like? If you’re familiar with climbs in Taiwan, here’s a comparison: certain sections of Balaka Road on Yangmingshan, some steep parts of the Beiyi Highway, or the final hard kilometers of Wuling all fall roughly in the 7% to 9% range. In other words, these 4.84 km of the Mt. Gassan Park Line are like taking the hardest stretch of Wuling and having you repeat it from start to finish, with almost no gentle section in between to “coast and catch your breath.”
More critically, consider the term “average gradient.” A 7.8% average means the actual road surface certainly has sections steeper than 7.8%—possibly 10%, 12%, or even momentarily steeper on inside corners. The average is the result of averaging all the steep sections with the relatively flatter ones, so when planning your gear ratios, you absolutely cannot prepare only for 7.8%—you need to prepare for the “peak gradient.” This is the first reason many beginners “blow up” on short, steep climbs: they choose gears based on the average gradient, then hit a 12% inside corner and watch their cadence plummet to single digits while their muscles instantly flood with lactate.
Use Vertical Ascent Rate (VAM) to Estimate Your Fitness Level
Engineering-minded riders use VAM (Velocità Ascensionale Media, average vertical ascent rate, in meters per hour) to measure climbing performance. The formula is simple:
VAM = Total elevation gain in meters ÷ Time spent climbing in hours
Suppose you take 30 minutes to complete this climb (378 meters of gain), VAM = 378 ÷ 0.5 = 756 meters/hour, which is roughly the level of a serious amateur rider. If you take 24 minutes (0.4 hours), VAM = 945 meters/hour, which is already quite strong. Top amateur riders can approach or even exceed a VAM of 1,000 on this kind of gradient. Conversely, if it takes you 45 minutes, VAM = 504, meaning you have significant room for improvement on climbs—this isn’t a bad thing; it gives you a clear training target.
Keep VAM in mind, and the next time you repeat this climb, you’ll know exactly how much you’ve improved, rather than relying on the vague feeling of “today felt a bit easier.”
2. Section-by-Section Strategy: Break the 4.84 km into Four Segments
Although the entire segment is only 4.84 km, I recommend treating it as four distinct sections for pacing and mental management. The biggest mistake on short, steep climbs is “going all out from the start,” because the lactate accumulated from an early surge will come back to haunt you with double the pain in the later stages.
Section 1 (0 ~ 1.2 km): Warm Up, Don’t Surge—Keep Power Below Threshold
This first kilometer is where you need the most “restraint” for the entire climb. Adrenaline will make you want to push hard, but remember: you’re facing a climb that’s hard from start to finish, and every bit of energy saved in the early section becomes capital for the later part.
- Power Target: Keep your power between 85% ~ 90% of your FTP (Functional Threshold Power). If you have a power meter, this is where it earns its keep.
- Heart Rate Control: Let your heart rate rise gradually toward your aerobic ceiling; don’t spike it to max heart rate from the get-go.
- Pedaling Feel: Your breathing should be at a level where “you can speak short sentences but not hold a conversation.” If you’re gasping for air in the first kilometer, you’re pacing too fast—back off immediately.
The core philosophy of this section: Better to feel like you’re “going a bit too easy” than to burn all your matches at the start.
Section 2 (1.2 ~ 2.8 km): Settle into Steady Output, Establish Rhythm
Past the warm-up section, your body enters a stable state. Now the goal is to establish a sustainable rhythm. This section typically features more continuous gradient changes and is where you’ll start to feel the “kickback” of that 7.8% average.
- Cadence: Try to maintain 70 ~ 85 rpm. Cadence naturally drops on steep climbs, but make a conscious effort to avoid falling below 60 rpm—once cadence gets too low, you’re pedaling with “high torque, low RPM,” which rapidly depletes muscle glycogen and accumulates lactate.
- Pacing Principle: Use “constant effort” rather than “constant speed.” Speed will naturally slow on steeper sections; don’t violently increase output to maintain speed. Keeping power as steady as possible is the most efficient strategy.
- Upper Body Relaxation: Relax your shoulders, keep elbows slightly bent, and don’t death-grip the handlebars. A tense upper body wastes precious oxygen.
Section 3 (2.8 ~ 4.0 km): The Toughest Mental Barrier
This section is often where the peak gradient appears and where willpower is most likely to crumble. You’ve ridden more than half the distance, but your body is starting to protest, and the road ahead looks endless. This is the critical battleground for switching between “standing” and “seated” pedaling.
- Stand/Seat Switching: When the gradient suddenly steepens (e.g., inside corners exceeding 10%), briefly stand and grind, using your body weight to push down, alternating the load between your glutes and thigh muscles. However, standing raises heart rate and oxygen consumption—keep each standing effort to 15 ~ 30 seconds, and sit back down immediately once the steep section passes to recover your rhythm.
- Visual Management: Don’t keep staring at the summit in the distance; it will only break you mentally. Keep your eyes on the road surface 10 ~ 20 meters ahead and “eat” it one bite at a time.
- Breathing Rhythm: Use deep, regular diaphragmatic breathing, letting your breathing rhythm drive your pedaling rhythm. This can effectively stabilize your output during painful stretches.
Section 4 (4.0 ~ 4.84 km): The Finish—Pour Out Everything You Have Left
These final 800-plus meters are where you can start “spending” your remaining energy. If you paced correctly earlier, you should have some reserve to push the output higher and boost your VAM.
- Progressive Increase: Gradually ramp up from threshold power, pushing harder as you approach the finish. The ideal scenario is crossing the line just as you run out of gas.
- Gear Utilization: If you notice the final section is slightly less steep, shift to a slightly harder gear and trade cadence for better finish time.
- Mental Reward: Tell yourself, “Less than 1 km to go.” This is the beauty of short, steep climbs—the suffering has a definite endpoint.
3. Gearing and Equipment: Compact Crankset with a Large Cassette Isn’t Optional—It’s Mandatory
If only one sentence could be taken from this guide, it would be: When facing a short, steep climb with a 7.8% average gradient, gear selection matters more than your fitness. Many riders actually have decent fitness but are forced to grind at extremely low cadence on steep sections because their gearing is too heavy, causing their muscles to fail before their cardiovascular system.
Front Chainring: Prioritize a Compact Crankset
- Compact Crankset (50/34T): This is the gold standard for climbing. The 34T small ring provides a sufficiently light starting gear and is the baseline for tackling this kind of steep climb.
- Standard Crankset (53/39T): Unless you’re a lightweight rider with an exceptionally high power-to-weight ratio, a standard crankset on a 7.8% average gradient will be extremely taxing. Not recommended.
- Smaller Gravel or MTB Chainrings: If you’re treating this as part of a longer tour and prioritize a comfortable finish, a smaller front ring gives you ample reserve.
Rear Cassette: Err on the Larger Side
Paired with a compact crankset, the largest cog on the rear cassette should be at least 28T, ideally 30T or 32T. Taking a 34T front ring paired with a 32T rear cog as an example, this gives a “climbing ratio” close to 1:1, allowing you to maintain a cadence above 60 rpm even on the steepest sections, shifting the burden from your muscles back to your cardiovascular system.
| Rider Type | Recommended Front Chainring | Recommended Max Rear Cog | Notes |
|---|---|---|---|
| Advanced/Competitive | 50/34T Compact | 28T ~ 30T | Chasing results, high power-to-weight ratio |
| General Fitness | 50/34T Compact | 30T ~ 32T | Comfortable finish, keeping reserve |
| Leisurely Touring | Smaller front ring or Gravel | 32T and above | Treating the climb as a journey, not racing the clock |
Other Equipment Details
- Wheels: For this kind of short climb, weight matters more than aerodynamics. Low-profile, lightweight climbing wheels make every acceleration feel easier.
- Tire Pressure: Mountain roads aren’t always smooth. Don’t inflate tires to maximum pressure; slightly lower pressure improves grip and comfort and reduces power loss from vibration.
- Cycling Shoes and Pedals: Ensure your cleats are in good condition. On steep climbs, if you need to stop, a clean, decisive unclip can prevent an awkward “slow-speed fall.”
4. Fueling and Hydration: Don’t Overlook It Even on a Short Climb
Some might think, “It’s only 4.84 km, do I really need to fuel?” If you’re just attacking this segment solo, a sip of water is indeed enough. But the true value of the Mt. Gassan Park Line lies in it being part of the route toward Mt. Gassan Obanazawa and the broader Dewa Sanzan pilgrimage circuit. When you incorporate it into a half-day to full-day ride plan, fueling becomes critical.
- Before the Climb: Consume carbohydrates 30 ~ 45 minutes before the start to ensure your body has enough glycogen to burn. Don’t hit a steep climb on an empty stomach.
- During the Climb: The short climb itself doesn’t require eating while riding, but be sure to take small sips of water. Mountain areas—whether dry and cold or humid and hot—accelerate dehydration, and dehydration directly reduces your power output.
- After the Climb: If you plan to continue touring or descend to connect to other routes after reaching the summit, take advantage of the 30-minute golden fueling window to replenish carbohydrates and electrolytes.
- Local Fueling: The mountain area offers local wild vegetable dishes and seasonal snacks. These light, easily digestible options work well as energy replenishment during a rest stop. Please check specific shops and operating hours on-site; it’s advisable to confirm before your trip.
5. Weather and Seasons: Respect the Mountain’s Temperament
Mt. Gassan is the main peak of the Dewa Sanzan, standing at nearly 2,000 meters. Mountain weather changes extremely rapidly, and this is a variable you absolutely cannot ignore when planning your trip.
- Residual Snow and Summer Skiing: Mt. Gassan is famous for “summer skiing,” a rare phenomenon in Japan, which also speaks to how long the snow season lasts here. Even in early summer, residual snow may remain at higher elevations—be mentally prepared for low temperatures and slippery conditions.
- Cable Car Season: The Obanazawa entrance has a summer-only cable car, generally operating between summer and autumn. Exact operating dates vary slightly each year, so be sure to check the current year’s announcements before your trip. Don’t base your itinerary on the assumption that the cable car will be running.
- Temperature Differences and Clothing: The temperature difference between the base and the summit can be enormous. Climbing generates body heat that makes you want to shed layers, but once you stop or descend, your perceived temperature drops rapidly. Be sure to carry a lightweight windbreaker—in mountain areas, this is life-saving gear.
- Best Season: Summer to early autumn is the relatively stable riding window. By then, residual snow has receded, alpine plants are in bloom, and both road conditions and weather are more favorable. Avoid the rainy season and typhoon season, and try to avoid the afternoon hours when clouds and rain tend to form. Starting early is always the golden rule for mountain riding.
6. Common Mistakes and DNF Risks: Short Climbs Can Also Make You Quit
Don’t let the short distance lull you into complacency. Here are the most common mistakes on short, steep climbs that lead to DNF (Did Not Finish) or an embarrassing dismount and walk:
- Gearing Too Heavy: As mentioned, this is the number one killer. Prepare your gearing before you start climbing; don’t regret it halfway up.
- Pacing Too Fast Early On: The surge driven by adrenaline will cause a complete collapse in Section 3. Constant effort with a conservative start is the iron rule.
- Grinding at Too Low a Cadence: Sustained grinding below 60 rpm will make your knees and thighs surrender before your cardiovascular system, and can even cause injury.
- Ignoring Hydration: Short climbs can also cause dehydration, especially in dry, cold, or humid mountain conditions. Take small, frequent sips; don’t wait until you’re thirsty.
- Underestimating the Weather: Not bringing a windbreaker, seeing clear skies at the base and letting your guard down, then hitting low temperatures or fog at the summit.
- Equipment Failure: Not checking your shifting, brakes, and tire pressure before departure. A chain skip or drop on a steep climb is at best frustrating, at worst dangerous.
7. Target Time Table for Riders of Different Levels
Below are reference completion times for this 4.84 km, 378-meter climb. Treat them as training targets, not sources of pressure.
| Rider Level | Reference Completion Time | Corresponding VAM (m/hour) | Notes |
|---|---|---|---|
| Beginner (Entry-level fitness) | 40 ~ 50 minutes | Approx. 450 ~ 570 | Goal is to finish without dismounting; use the lightest gears |
| Intermediate (Regular training) | 30 ~ 38 minutes | Approx. 600 ~ 760 | Can maintain a steady rhythm; pacing is the key to improvement |
| Advanced (Competitive-oriented) | 24 ~ 29 minutes | Approx. 780 ~ 945 | High power-to-weight ratio, chasing PRs and results |
| Elite (Top amateur) | Under 24 minutes | 950 and above | Masterful stand/seat switching, near-threshold output throughout |
How to use this table? Ride the climb once, calculate your time and VAM, and find your position in the table. Then set a goal to “move up one level,” for example, from Intermediate toward Advanced. Use repeated climb training (see below) to shorten your time, and return to test yourself every few weeks, using data to verify your progress.
Turn the Mt. Gassan Park Line into Your Training Ground: A Repeat Climb Workout
Precisely because this segment is short and has a uniform gradient, it’s an excellent interval training venue. Here’s a recommended repeat climb workout:
- Warm-up: Ride easily on flat or gentle roads at the base for 15 minutes to get your body and cardiovascular system ready.
- Main Set: Climb this segment at threshold power (near FTP), then descend slowly back to the start to recover. Repeat 3 ~ 5 times. Record time and VAM for each rep.
- Advanced Variation: In the later reps, deliberately practice “stand/seat switching,” or do brief high-output sprints at the steep points in Section 3 to simulate handling peak gradients in real-world conditions.
- Cool-down: Ride easily for 10 ~ 15 minutes to let your heart rate gradually come down, aiding recovery.
Incorporate this route into a longer Mt. Gassan circuit or a Dewa Sanzan pilgrimage route, and you’ll get a ride that combines training intensity with cultural depth. The pain of climbing is temporary, but the sense of accomplishment from standing on the slope near the clouds and looking back over the Shonai Plain will stay in your riding memories for a long, long time.
8. Power-to-Weight Ratio: The Ultimate Deciding Factor on Short, Steep Climbs
If you had to pick a “single number” to predict your performance on a short, steep climb like the Mt. Gassan Park Line, it would undoubtedly be the power-to-weight ratio (W/kg)—that is, the power you can sustain divided by your body weight.
On flat roads, aerodynamic drag is the main enemy, and absolute power and aero position matter more. But on a 7.8% gradient, you’re primarily fighting gravity, and gravity acts on the total weight of “you + bike.” At this point, how fast you can climb depends almost entirely on “how many watts you can produce per kilogram of body weight.”
Use W/kg to Estimate Your Finish Time
Here’s a rough but practical reference. Assuming a fixed total weight of rider plus gear, on a 7.8% average gradient, threshold power-to-weight ratio roughly corresponds to the following performance:
| Threshold Power-to-Weight Ratio | Category | Feel on This Climb |
|---|---|---|
| Below 2.0 W/kg | Entry-level fitness | Requires the lightest gears to grind steadily; the key is not dismounting |
| 2.5 ~ 3.0 W/kg | Regular training amateur | Can maintain rhythm; with proper pacing, can ride it well |
| 3.5 ~ 4.0 W/kg | Advanced competitive | Climbs with ease; can chase personal bests |
| 4.5 W/kg and above | Elite amateur | This steep climb is just a high-intensity interval for you |
This table tells us two things: First, to go faster on steep climbs, besides increasing power, “losing weight” is equally effective—every kilogram you shed directly translates to climbing speed (of course, this means healthy weight management, not extreme dieting). Second, training your threshold power (FTP) is the most fundamental way to improve climbing ability. And a stable steep climb like the Mt. Gassan Park Line is an excellent venue for training FTP.
Why Steep Climbs Most Honestly Reflect True Ability
On gentle slopes or flat roads, riders who are light but lack power can “hide their weaknesses” through coasting, drafting, and aero positions. But on a 7.8% steep climb, all these tricks fail—you can’t coast (the moment you stop pedaling, you slow down), and you can’t effectively draft (wind resistance is no longer the main factor). All you can rely on is your own legs and lungs. This is why seasoned riders often say, “Steep climbs reveal the truth.” The Mt. Gassan Park Line is exactly such a mirror, exposing your true ability with nowhere to hide.
9. Fitting the Mt. Gassan Park Line into a Larger Riding Blueprint
As emphasized repeatedly, the true value of these 4.84 km lies in being part of a grander riding plan. Here are a few approaches for connecting routes, to help you plan your own Mt. Gassan circuit.
Approach 1: The Climbing Centerpiece of a Dewa Sanzan Pilgrimage
Set this steep climb toward Mt. Gassan Obanazawa as the physical climax of your entire Dewa Sanzan pilgrimage. In the earlier stages, you can first explore lower-elevation areas to warm up, treating this hard climb as the “king mountain” of your journey. After reaching the summit, wind down gradually. This arrangement gives your energy curve a clear rise and fall, and places the toughest challenge in the window when you’re in your best condition.
Approach 2: Extended Climbing Chain Training
If your goal is pure climbing training, you can link the Mt. Gassan Park Line with other surrounding climbs to design a “climbing sampler” route. Switching between climbs of different gradients and lengths comprehensively stimulates your climbing ability—short, steep climbs train anaerobic power and strength; long, gentle climbs train aerobic capacity and endurance. In this setup, the Mt. Gassan Park Line plays the role of “high-intensity short intervals.”
Approach 3: A Highlight in a Long-Distance Tour
For riders who prefer long-distance touring, this steep climb can be a landmark highlight within a 100 km mountain expedition. In this case, you don’t need to chase a PR here; instead, treat it as a geographic and spiritual landmark of the entire journey—ride to it, conquer it, and then continue your long journey with the satisfaction of having summited a sacred mountain’s slope.
Whichever approach you choose, the key lies in “advance planning.” Mountain riding has many variables. Think through your route, fueling points, bailout options, and weather forecast beforehand, and you’ll be able to enjoy the ride itself with peace of mind.
10. Pre-Ride Checklist: Don’t Let Small Oversights Ruin an Expedition
Finally, let’s wrap up this guide with a practical pre-ride checklist. In mountain riding, the devil is in the details.
Bike Check:
- Shifting system operates smoothly, especially ensuring the lightest climbing gear engages properly
- Front and rear brakes function correctly (this is life-saving on the descent)
- Tire pressure is appropriate; tires have no cuts or signs of aging
- Pedals and cleats are clean and engage/disengage smoothly
- Chain is clean and lubricated to avoid skipping or dropping on steep sections
Personal Gear:
- Lightweight windbreaker (essential in mountain areas for warmth at the summit and on descents)
- Sufficient water and carbohydrate fuel
- Phone and power bank (for communication and navigation in mountain areas)
- Basic repair tools and spare tubes (rescue is difficult in mountain areas)
- Appropriate gloves and eyewear
Information Confirmation:
- Mountain weather forecast for the day and the following day
- Current year’s operating information for summer-only facilities like the cable car (don’t base your itinerary on assumptions)
- Road conditions and possible road closure information
- Locations of fueling points and rest areas
Run through this checklist, and you’ll have mitigated most of the unexpected risks before you even depart.
Conclusion: Conquer with Data, Approach with Reverence
The Mt. Gassan Park Line—these 4.84 km, 378 meters of elevation gain, 7.8% average gradient—is an honest and pure climbing challenge. It doesn’t intimidate with distance; instead, it uses a relentless, steady steepness to force you to get your gearing, pacing, pedaling, and mental management all right. Prepare a compact crankset and a large cassette, make power-to-weight ratio your long-term training goal, start conservatively and finish with everything you have, respect the mountain weather, and do your pre-ride checks—and you’ll ride this hard climb beautifully.
And when you conquer it, don’t forget to look up and take in your surroundings—you’re standing on the slopes of a sacred mountain with over 1,400 years of religious history. This mountain has witnessed the white-robed figures of countless ascetic practitioners and once caught the poetic eye of Basho. Your power numbers, your finish time, your VAM—these are all quantifiable achievements. But standing on the slope near the clouds, feeling the weight and stillness of this mountain, that experience is something no data can measure. This is the unique charm of the Mt. Gassan Park Line as both a training ground and a pilgrimage road. Conquer it with data, approach it with reverence, and you’ll bring back a riding memory that enriches both body and mind.
Related Reading
- Complete Guide to Hyogo Rokko Driveway: Section-by-Section Pacing, Gearing, and Wall Strategy for a 4.7 km, 8.8% Average Gradient Climb
- Guguan Climb Guide: A 4.4 km, 11.7% Average Pure Steep Climb Refining Textbook
- Koyasan Guide: Complete Endurance Pacing, Gearing, and Fueling Guide for a 17.4 km, 4.4% Long Climb
- Luchang Steep Climb Practical Guide: Full Analysis of the Ultimate Challenge on a 4.09 km, 9.6% Average Gradient
台北闊瀨陡坡 騎旅 / 日本單車雜誌編輯車友臨時加入!/ 髮香才是最強的 / feat. 北迴歸線小隊 / 公路車 CT Yeh
6 個月前
半日 小台灣 極限單車路線挑戰實錄
7 年前
單車 梅山36灣 坡度介紹 路段介紹 空拍 (相關遊記影片,請參考說明或我的頻道喔,歡迎訂閱)
6 年前
4K單車實境) 舊陽金P字道 第1P 仰德大道至小油坑 誤跟武嶺神人們 被拉爆爽飛天 Taiwan Cycling Climb Route Recommend
7 年前
爬坡ITT實境)台中 魔王 松鼠坡 首航 6:12 大肚山 大三元 科福路
8 年前
公路車 爬坡 破PR 紀錄 小技巧 分享
6 年前
風櫃嘴時間 預測西進武嶺時間?13000名車友統計數據分析告訴你 !
5 年前
2019 夏季KOM 5小 完賽心得 準備攻略 東進武嶺 夏季登山王之路 Taiwan KOM Challenge
7 年前