Norikura Hill Climb Guide: Full Breakdown of Pacing and Gear for Climbing Japan's Highest Paved Road at 2,720 Meters
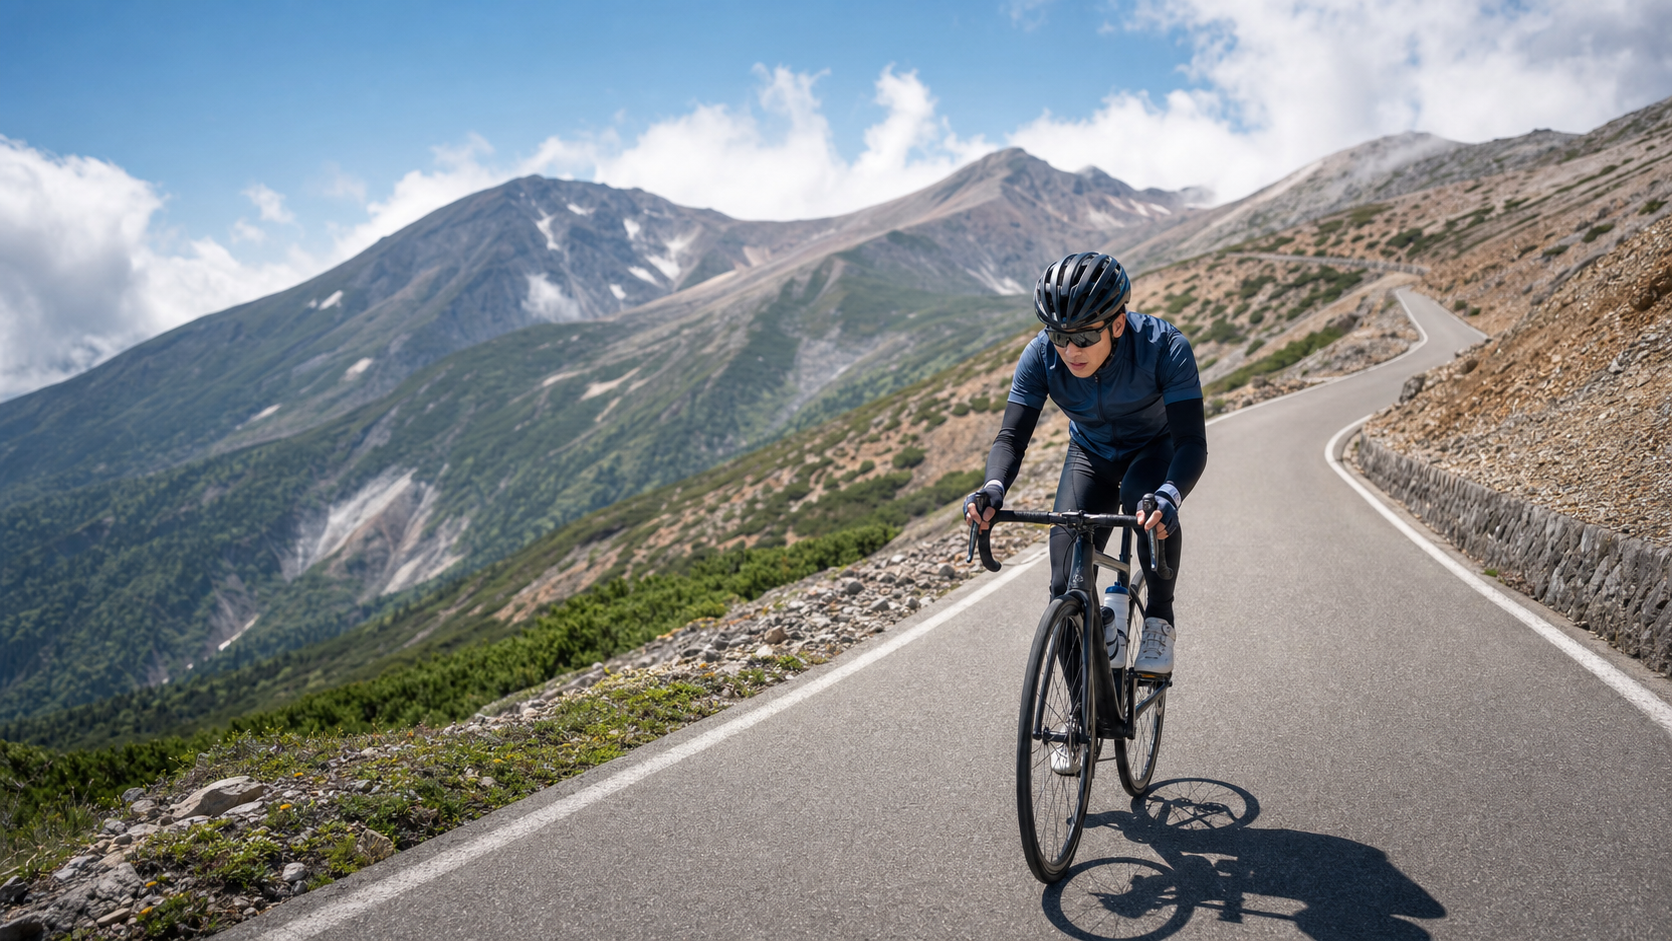
Mount Norikura, the highest endpoint on Japan’s paved roads. At 2,720 meters above sea level, Norikura-daira (畳平) is the highest point in Japan that cyclists can legally reach by bike. For Taiwanese riders, this is a classic Japanese climb worth adding to your “bucket list.” In this guide, we’ll break it down completely from an engineer’s perspective.
1. Route Overview: Let’s Lay Out the Numbers First
The Mount Norikura Hill Climb (乗鞍ヒルクライム) uses the Norikura Echo Line (乗鞍エコーライン), a sacred route for Japanese climbing enthusiasts. Before you start planning, let’s get a clear picture of the route’s actual data:
| Item | Data |
|---|---|
| Total Length | Approx. 20.5 km (19,770 meters) |
| Total Elevation Gain | Approx. 1,250 meters (1,250.5 meters) |
| Average Gradient | 6.9% |
| Start Elevation | Approx. 1,460 meters (Norikura Tourist Center) |
| Finish Elevation | Approx. 2,720 meters (Norikura-daira, Prefectural Border Gate) |
| Location | Matsumoto City, Nagano Prefecture |
| Open Season | Approx. July to end of October (depending on snow and road conditions) |
Looking at just the “6.9% average gradient,” you might think, “Isn’t that about the same as some suburban hills in Taiwan?” But Norikura’s difficulty isn’t in the ferocity of any single gradient—it’s in three things you’ll almost never encounter on Taiwanese climbs: first, the entire 20 km offers almost no flat sections to catch your breath, with gradients that are gentle yet relentless; second, the 2,720-meter finish elevation brings altitude-induced hypoxia; third, this road is only open a few months a year, and the weather can change on a dime.
To put it in terms Taiwanese riders know well: the elevation gain on this route (1,250 meters) is roughly equivalent to climbing from Renzhiguan on Provincial Highway 7A all the way up to Cingjing, but from start to finish, there isn’t a single section of easy gradient or descent where you can let off the pedals, and in the second half, you’re fighting in air with noticeably reduced oxygen. That’s the real difficulty of Norikura.
Let’s understand that 6.9% average gradient from another angle: it means for every kilometer you advance, you climb nearly 70 meters; over 20 kilometers, the accumulated vertical height is roughly the height of a 400-story building. And these 20 kilometers offer no “fake flats” to slack off on—it’s a disciplined climb that charges you tolls from start to finish. Any mindset of “let me just surge ahead first and see what happens” will be mercilessly settled on Norikura.
2. Why “Altitude” Is the Biggest Variable on This Route
From the start at the Norikura Tourist Center at 1,460 meters, all the way up to Norikura-daira at 2,720 meters, you’ll spend extended time in the thin-air zone above 2,000 meters in the second half. For the vast majority of Taiwanese riders who live at low elevation and usually train along the coast or on suburban hills, this is an entirely new sensation.
The impact of high altitude on cycling performance has a physiological basis. For roughly every 1,000 meters of elevation gain, the partial pressure of oxygen in the air drops significantly, and your VO₂max gets compressed accordingly. Roughly speaking, above 2,500 meters, riders who haven’t acclimatized to altitude may see their aerobic output drop by 10%–15% or even more. This creates a highly counterintuitive phenomenon:
- Your legs actually still have strength—your muscles aren’t at their limit;
- But you just can’t catch your breath, your heart rate inexplicably spikes, and your rating of perceived exertion (RPE) shoots straight up;
- Your heart rate ceiling actually drops instead, because your body is oxygen-deprived, you simply can’t push to the max heart rate you’d reach at sea level.
This is the tax of altitude. Once you recognize this, your entire pacing strategy needs to be redesigned around it—which is why the segment-by-segment guide below deliberately revises the power targets downward for the latter half.
Another point worth mentioning is “altitude acclimatization.” The truly rigorous approach is to arrive in Matsumoto or the Norikura Highlands area a few days before the challenge, giving your body time to make initial adaptations to altitude (increasing red blood cell oxygen-carrying capacity, adjusting breathing patterns). Even just arriving a day or two early, staying active at mid-elevation, and sleeping well can help your performance the next day. Conversely, if you fly in from sea level the night before, sleep poorly, and head up the mountain with jet lag, your tolerance to hypoxia will be worse and your performance will suffer significantly. This is why I keep emphasizing: the outcome on Norikura is often decided before you even take your first pedal stroke.
3. Segment-by-Segment Strategy: Breaking the 20 km into Four Sections
Norikura is not a route you can conquer “in one all-out push.” With 20 kilometers and 1,250 meters of climbing, if your pacing goes off the rails, the high altitude in the second half will exact a heavy toll. I recommend managing it by splitting it into four sections.
Segment 1 (0–5 km): The Pacing-Defining Section Through the Forest
After departing from the Norikura Tourist Center, the early section winds through forest roads, with gradients mostly falling between 6%–7%—a relatively “well-behaved” climb. The task in this section is not to attack, but to set the tone.
The engineering approach is: cruise at 75%–80% of your FTP, keeping your heart rate at the upper edge of the aerobic zone (roughly 82%–85% of max heart rate). In this section, you’ll think, “This feels so easy—shouldn’t I go a bit faster?”—resist the urge. Norikura’s pain is deferred; every ounce of energy you save in Segment 1 will be repaid to you twofold above 2,300 meters.
A practical self-check: in this section, you should still be able to “speak in full sentences.” If you’re already gasping so hard you can only utter single words, you’re going too fast—shift down immediately and slow down.
Segment 2 (5–11 km): From Mitsumototaki to the Switchback Zone
Past the Mitsumototaki (三本滝) area, the route enters a continuous series of switchback climbs. The gradient variation increases slightly here, with a few sections approaching 8%. This is also the boundary for private vehicle restrictions—during the control period, regular cars can only drive up to Mitsumototaki, and beyond that only shuttle buses, taxis, and permitted vehicles are allowed, so the road surface is relatively clear and you don’t need to worry too much about cars suddenly appearing from behind.
For pacing strategy, maintain 78%–82% of FTP in this section. Don’t aggressively accelerate out of corners; roll through with a steady pedaling rhythm (cadence recommended at 75–85 rpm). A common mistake Taiwanese riders make is “wanting to sprint out of every corner they see”—on a 20-kilometer long climb, these scattered bursts will quickly drain your glycogen stores. Remember: a long climb is a game of “steady output,” not a game of “interval sprints.”
Segment 3 (11–16 km): Breaking Through the Treeline, Altitude Starts to Bite
Around this elevation, you’ll gradually emerge from the forest and break through the tree line. The view suddenly opens up, with distant ridgelines and volcanic landscapes laid out before you—but it’s also from here that altitude officially becomes your opponent.
By now you’re above 2,200 meters, and the oxygen content in the air has dropped noticeably. You’ll find your heart rate won’t climb (because your body is oxygen-deprived and your VO₂max is compressed), yet your perceived exertion rises sharply. In this section, actively revise your power target downward to 72%–78% of FTP, and switch to pacing by “breathing rhythm” rather than “heart rate”: find an intensity where you can maintain deep, long breaths—better to go slow than to break.
This is also where the mind is most likely to crumble. The open view should be inspiring, but when you see “how much road is still winding along the mountainside,” many people get crushed by that sense of “I can see it but I’ll never finish it.” The countermeasure: don’t look at the distance—only look at the 20 meters in front of you. Break the goal down to the smallest unit—the next corner, the next utility pole, the next pedal stroke.
Segment 4 (16–20.5 km): The Final Sprint to Norikura-daira
In the final 4 kilometers, the gradient stubbornly holds at 6%–7%, but by now your body has been fighting at high altitude for a long time. This section is purely a game of willpower. I recommend saving your last energy gel to consume just before the 16-kilometer mark, so it can take effect during this final stretch.
When you see the Norikura-daira parking lot and the Prefectural Border Gate—congratulations, you’ve ridden to the highest point a bicycle can reach in Japan. But don’t get so lost in celebration that you forget yourself, because the real challenge is actually just beginning: you have to ride safely back down.
4. Gearing and Equipment: Don’t Use Your Taiwan Logic on Norikura
The most common mistake Taiwanese riders make is approaching Norikura with the same equipment logic they use for “climbing local hills.” Here are a few key differences worth explaining one by one.
Go with lighter gearing. Facing 20 km of continuous climbing combined with high-altitude oxygen deprivation, I strongly recommend a rear cassette with at least a 32T, or even 34T, low gear. If your crankset is a compact (50/34T) paired with an 11–34T cassette, it will give you a precious “escape gear” in the latter stages at altitude. Remember one principle: on Norikura, maintaining your pedaling rhythm (cadence) is far more important than grinding a big gear. Grinding at a low cadence will cause lactic acid to build up in your muscles faster, and in an oxygen-deprived environment, that is fatal. If your bike still has a traditional 52/36T crankset with an 11–28T cassette, I strongly suggest swapping in a larger cassette before you leave.
Staying warm is a safety issue, not a comfort issue. This is the point most Taiwanese riders overlook. The start at Norikura Tourist Center might be a comfortable 20°C or so, but the finish at Tateyama at 2,720 meters could be in single digits, and with a full sweat from climbing and strong winds on the mountain, the risk of hypothermia on the descent is very real. Be sure to carry: a packable windbreaker, full-finger gloves, and even thin leg warmers. You’ll find them cumbersome on the climb, but you’ll thank yourself on the descent. The experienced approach is: after reaching the summit, while resting, dry off your sweat, change into a dry base layer or put on your jacket, and then start descending.
Wheels and brakes. A 20 km long descent is a severe test for your braking system. Riders on disc brakes can be relatively at ease; rim brake riders must brake in sections with intermittent application, avoiding continuous heavy braking that can overheat the rim (carbon rims risk blowouts under sustained heavy braking on long descents). On the descent, use a rhythm of “brake in sections, slow down before corners, release out of corners,” rather than dragging the brakes the whole way.
Other small items. UV radiation is intense at altitude, so sunglasses and sunscreen are essential; resupply points on the mountain are limited, so bring your own food, spare tubes, and CO₂ cartridges/pump.
5. Nutrition and Hydration: The Hidden Toll of Altitude
There’s an easily overlooked trap in high-altitude riding: you will dehydrate faster than you think. The air is dry, your breathing is rapid, and the amount of fluid lost through your respiratory tract is far greater than at sea level.
The nutrition principles are summarized below:
- Fluids: Carry at least two bottles—one with plain water, one with electrolyte drink. Take a sip proactively every 15–20 minutes; don’t wait until you’re thirsty—at dry altitude, by the time you feel thirsty, you’re usually already mildly dehydrated.
- Calories: At this intensity, your body burns roughly 60–90 grams of carbohydrates per hour. I recommend taking an energy gel or food every 30–40 minutes, aiming for a total of at least 60 grams of carbs per hour.
- Timing: Don’t concentrate your fueling in the latter stages. At high altitude in the later part, blood flow to your gut is reduced and digestion slows; forcing down gels then is a recipe for nausea. Front-load your nutrition and eat regularly during the first 12 km while you still feel comfortable.
- Electrolytes: With altitude and prolonged sweating, sodium and potassium loss is significant. Besides sports drinks, carrying a few electrolyte tablets or salt candies can effectively prevent late-stage cramping.
6. Weather and Season: This Road Is Only Open a Few Months a Year
Because of its extreme altitude, the Norikura Echo Line is only passable from summer to early autumn (roughly July to the end of October, depending on road conditions and snow). This is the first hard constraint when planning your trip—this is not a road you can ride whenever you feel like it. Be sure to check the official website before departure for the year’s opening dates and current road conditions.
Mountain weather changes in an instant. It can be clear and sunny at the base in the early morning, and by the time you reach 2,500 meters, you could be surrounded by clouds and fog, or even hit by cold rain. This is why warm clothing is “mandatory” rather than “optional.” The ideal time to attempt it is an early summer morning: starting early lets you avoid the common afternoon thunderstorms and cloud cover, and also gives you the clearest visibility and the most spectacular sea of clouds.
Seasonally, midsummer (July–August) offers the most stable road conditions and the peak of alpine flowers; early autumn (late September to October) brings a chance of high-altitude autumn foliage, but temperatures are lower and the risk of hypothermia is higher, so you’ll need to step up your cold-weather gear.
7. Common Mistakes and DNF Risks
Drawing on riders’ experience tackling overseas alpine climbs, the most common trouble spots on Norikura are the following:
- Pacing too fast in the early section: Fooled by the “easy” first 5 km, you burn your matches early and blow up at altitude in the latter half. This is the most common failure mode, bar none.
- Underestimating altitude sickness: Headache, nausea, unusual breathlessness, and tingling fingers are all signs of mild altitude sickness. If symptoms are obvious, stop and rest—don’t push through. Your body’s ability to acclimatize varies from person to person and has nothing to do with your fitness at sea level.
- Insufficient warmth leading to hypothermia on the descent: Getting to the top is only half the challenge; riding down safely is what truly counts as finishing. Hypothermia will make your fingers stiff and reduce your bike handling, which is extremely dangerous on a long descent.
- Grinding too heavy a gear: Using your sea-level big gears to grind up the climb will destroy your knees and muscles faster under oxygen deprivation, and it also increases injury risk.
- Poor fueling rhythm: Not eating in the early stages and then cramming food in later, only to have your gut shut down and make you nauseous at altitude.
Avoid these five pitfalls and your chances of finishing increase dramatically.
8. Advanced: Digitizing Your Pacing with a Power Meter
If you have a power meter, Norikura is one of the best routes for pacing by “numbers” rather than “feel,” because it’s long and pure enough that your feel can easily be deceived by altitude in the latter stages. Here’s a practical power-pacing framework (based on your sea-level FTP):
| Segment | Distance | Target Power (%FTP) | Target Cadence | Mindset |
|---|---|---|---|---|
| Settling-in | 0–5 km | 75–80% | 80–90 rpm | Hold back; can speak full sentences |
| Switchback | 5–11 km | 78–82% | 75–85 rpm | Roll evenly; no surging |
| Treeline | 11–16 km | 72–78% | 70–80 rpm | Focus on breathing; deliberately back off |
| Final Push | 16–20.5 km | 70–76% | By feel | Hold on with willpower |
Notice something? As altitude increases, your target power goes down. This goes against many people’s instinct to “push hard in the final stretch,” but that’s exactly the essence of high-altitude pacing: in an oxygen-deprived environment, the sustainable power your body can produce is naturally lower, and trying to maintain your sea-level power numbers will only cause you to blow up early. The smart approach is to acknowledge the limits of altitude and let your power naturally decline with the terrain and elevation.
Another useful metric is “Normalized Power (NP) and Variability Index (VI).” Norikura is a long climb, and the ideal way to ride it is to keep your VI as close to 1.0 as possible—meaning your output is as steady as possible. If you finish and find your VI is high (e.g., above 1.08), it means you rode too “surge-y,” alternating fast and slow, which is very inefficient on a long climb. Next time, remind yourself: be smooth, be smoother.
No power meter? No problem. Use your “breathing” as your power meter: in the early section you can speak full sentences, in the middle only short phrases, and in the latter stages only single words—if you can only manage single words in the early section, you’re riding too hard. Slow down immediately.
9. The Underrated Challenge: A Detailed Guide to Safe Descending
Many guides only talk about “how to climb up,” but overlook where Norikura truly hides its danger—a continuous 20 km descent. Every year in high-mountain climbing events, more accidents happen on the descent than on the climb. Here are the key points for safe descending:
- “Reset” your body before descending: Don’t rush into the descent right after reaching the summit. Take five to ten minutes to wipe off sweat, rehydrate, eat something, and put on a windbreaker and full-finger gloves. Let your heart rate drop and let your body switch from “drenched in sweat” mode to “staying warm” mode.
- Brake with “pulsing” rather than “squeezing and holding”: Brake before entering a corner, release through the apex, and pulse the brakes as needed after exiting. Continuously holding the brakes will overheat the rims (rim brakes) or rotors (disc brakes)—the former even carries a risk of blowouts.
- Keep your center of gravity low and look far ahead: On descents, lower your body weight, keep your elbows slightly bent to absorb shocks, and look toward the corner exit rather than the road right in front of you.
- Your fingers get clumsy at altitude: Cold temperatures combined with prolonged gripping will gradually stiffen your fingers and slow your reactions. This is why full-finger gloves are “safety gear”—they keep your fingers responsive when you need precise brake control the most.
- Be conservative around large vehicles or buses: Shuttle buses operate on Mount Norikura. When you encounter them on narrow corners, be sure to slow down, move to the side, and never fight them for the line.
Remember the old saying: Climbing up is a multiple-choice question; riding down safely is a mandatory one. Finishing is defined by returning safely to the start, not just reaching the summit.
10. Target Times for Riders of Different Levels
The following are reference completion times for riders of different levels (for pacing planning only; actual times are heavily influenced by the day’s weather, physical condition, and altitude acclimatization):
| Rider Level | Reference Completion Time | Corresponding Strategy |
|---|---|---|
| Competitive (FTP 4.5+ W/kg) | 65–80 minutes | Hold just under threshold the whole way; maintain power even at altitude in the latter half |
| Advanced (FTP 3.5–4.5 W/kg) | 80–100 minutes | Conservative early, steady in the middle, and hold on without blowing up late |
| Finisher (FTP 2.5–3.5 W/kg) | 100–130 minutes | Goal is “no dismount, no DNF”; pace must be extremely conservative |
It’s important to emphasize: these times are rough estimates that “already account for altitude.” If you have zero experience riding at altitude, set your goal conservatively on your first attempt, and put “finishing safely and descending safely” ahead of “setting a personal record.”
There’s also a question Taiwanese riders often ask: “I can climb Wuling on flatland, so Norikura should be no problem, right?” The answer is—not necessarily. Although Wuling is higher in elevation (3,275 m), Taiwanese riders typically climb continuously from a lower elevation, giving the body a longer buffer to adapt. Norikura, on the other hand, has a summit of only 2,720 m, but you’re tackling it in a foreign place, in a short time, without altitude acclimatization—plus jet lag and travel fatigue. The perceived difficulty may be higher than the numbers suggest. So even if you’re a Wuling regular, on your first Norikura ride, swallow your pride and pace conservatively.
11. Pre-Ride Checklist
The night before departure, going through this checklist will help eliminate ninety percent of mishaps:
- [ ] Bike: rear cassette 32T or larger, brake system check, tire pressure and tire condition confirmed
- [ ] Warmth: windbreaker, full-finger gloves, leg warmers (depending on season)
- [ ] Fuel: two bottles of water (one with electrolytes), solid snacks, energy gels, electrolyte tablets
- [ ] Safety: spare tube/tubeless repair kit, CO₂ or pump, phone, basic first-aid supplies
- [ ] Information: confirm the road opening dates for the year, check the day’s weather forecast, and tell your companions your route
- [ ] Body: get enough sleep, no alcohol the day before, and eat a carb-heavy breakfast that morning
12. Quick Q&A
Q: How early should I arrive? A: Ideally, arrive in Matsumoto or Norikura Kogen at least one to two days in advance to give your body an initial buffer for altitude and jet lag, then attempt it the next morning. Flying in and riding the same day usually doesn’t go well.
Q: Do I need a power meter? A: Not required, but strongly recommended. Norikura is too long and too pure—it’s easy for the altitude to fool you in the latter half. A power meter helps you maintain pacing discipline. Without one, use your breathing rhythm as a substitute indicator.
Q: Fat tires or narrow tires? A: This is a paved road, so 25c to 28c road tires are more than sufficient. The key point is not to pump the pressure too high—there are occasional debris and potholes on the road, and slightly lower pressure improves comfort and grip.
Q: Do I need a climbing bike or a lightweight bike? A: A lighter bike certainly helps (over 1,250 m of climbing, every kilogram saved is a blessing), but what matters more is having a light enough gear ratio and having your body and pacing dialed in. A well-tuned general road bike far outperforms a high-end bike with the wrong setup.
Q: What if the weather turns bad? A: Mountain weather can change in an instant. If the summit is too foggy, visibility is too poor, or a cold rain starts, make the decisive call to abandon the summit or turn back early. The mountain will always be there; safety is a hundred times more important than finishing.
13. Conclusion: Respect the Altitude, Respect the Distance
No matter what kind of rider you are, the first lesson Norikura teaches everyone is always: respect the altitude, respect the distance. This is not a road that can be conquered by brute force alone, but a long campaign requiring precise pacing, equipment management, and patience. It will honestly reflect whether your preparation is sufficient—whether your gearing is right, whether your nutrition is planned ahead, whether you can hold your pace, and whether you have enough warmth. Do your homework, and this sacred mountain will reward you with scenery you’ll never forget; show up unprepared, and it will give you a lesson without mercy.
When you stand at Chabo, looking down at the sea of clouds beneath your feet and the ridgeline of the Northern Alps in the distance, you’ll understand—every one of those 1,250 meters of climbing was worth it. When you’re ready, go meet Japan’s highest paved road. May you climb with composure, descend in safety, and return home with stories to tell.
Related Reading
- Japan Alps Mount Norikura: Japan’s Highest Paved Road Climb at 2,716 m
- The Sacred Mountain That Awakens Only in Summer: A Ride Up Mount Norikura, a Conversation at 2,720 m in the Clouds
- The Challenge Toward the Sky: Mount Norikura Cycling Hill Climb—The Ultimate Pilgrimage to Japan’s Highest Paved Point
- Japan’s Only “Zero-Car” Pilgrimage Road: Mount Norikura, the Sky Road You Must Conquer on Foot
2025 乘鞍 KOM 登山賽挑戰實錄 / 日本公路最高 ! 賽前探路篇 / 比富士山厲害,無敵絕景!/ 40週年 / 中文YT首發 / 公路車 / CT Yeh #乘鞍ヒルクライム
10 個月前
2025 乘鞍岳登山賽 比賽全紀錄篇 / 完整路線攻略介紹 / 日本版武嶺 公路最高點 / 高山空拍絕景 / 明年會開團! / 公路車 / CT Yeh
10 個月前
日本公路最高登山賽,台灣首位YT挑戰實錄,乘鞍登山賽40週年,賽前篇完整版,請到我的YT收看 #公路車 #cycling
10 個月前
太平山單車員工旅遊 | 這樣玩CP值最高!| 公路車
5 年前
台北闊瀨陡坡 騎旅 / 日本單車雜誌編輯車友臨時加入!/ 髮香才是最強的 / feat. 北迴歸線小隊 / 公路車 CT Yeh
6 個月前
#北橫 + #北進武嶺 最硬的員工旅遊 EP1 | #公路車 #拉拉山 | 明池 | 武嶺 | 武陵農場 | 雲海 | Taiwan Cycling Route Wulin
6 年前
半日 小台灣 極限單車路線挑戰實錄
7 年前
日本島波海道 EP1 / 五大絕景路線之一! / 私房溫泉 x 豪華單車客棧 / 今治 to 大三島 / 公路車 / CT Yeh
2 年前