Table Tsukuba Guide: Pacing, Gear Ratios, and Training Tips for the 6 km, 6.3% Average Grade Climbing Mecca
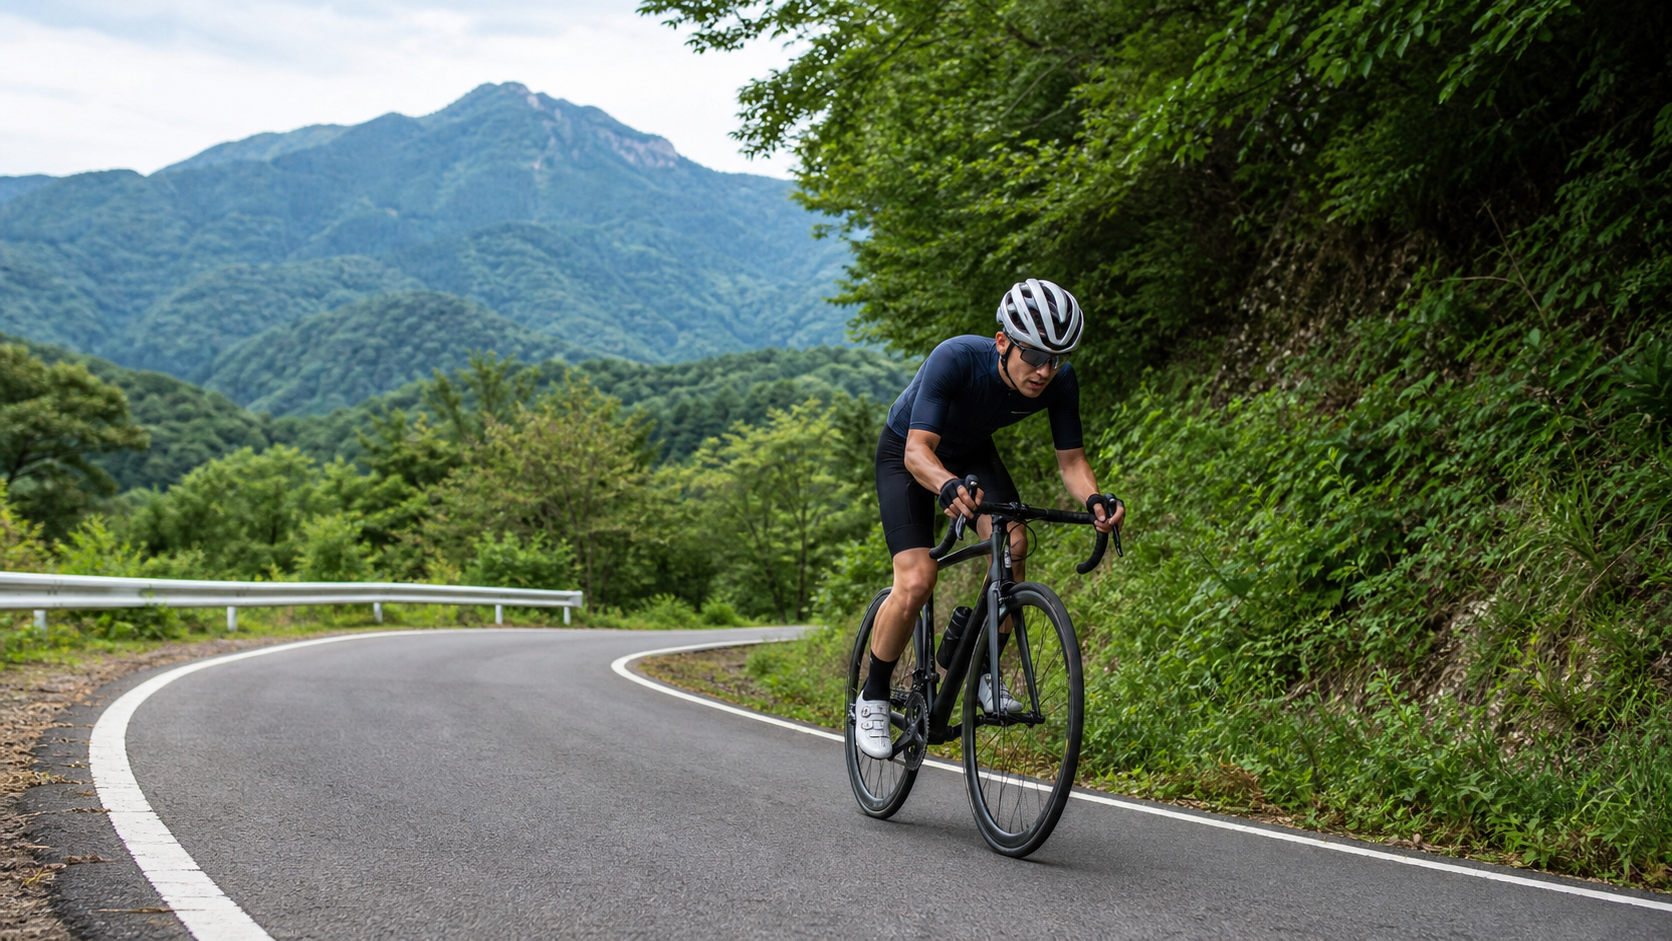
Omote Tsukuba (Tsukuba Omote) is located in Tsukuba City, Ibaraki Prefecture, and is one of the most famous “climbing meccas” among cyclists in the Greater Tokyo area. The route data this guide breaks down is straightforward: 6.0 km total length, approximately 399 meters of elevation gain, 6.3% average grade. This is the climbing route from the front approach (Omotesando) direction of Omote Tsukuba, and it’s the standard benchmark that countless Kanto cyclists return to week after week to set times, build fitness, and verify their training progress.
Mount Tsukuba itself is a rare standalone twin-peak mountain on the Kanto Plain: Mount Nantai at 871 meters and Mount Nyotai at 877 meters. Since ancient times, the saying “Fuji in the west, Tsukuba in the east” has paired it with Mount Fuji as a symbol of the Kanto region. For cyclists, its most appealing qualities are “close to Tokyo, just the right grade, and varied routes”—these three conditions combined make it a natural gym for climbing practice in the capital region.
This is a guide article, so we’ll take an engineer’s approach and break down this 6.0 km, 6.3% exam question by question: how to pace each segment, how to choose gearing, whether to bring supplies, where the common mistakes are, and how to set target times for different ability levels. The culture and scenery are left for another article.
1. Understanding the Data First: 6.0 km / 6.3% Is a “Good Training” Climb
An average grade of 6.3% is a very “sweet” number. It’s not as brutal as the 10%+ steep climbs, but it’s certainly not gentle enough to let you slack off. The characteristic of this grade is: it falls right in the zone where most amateur riders can “keep pedaling steadily while really feeling the effort.”
Let’s build a sense of it with a simple calculation. On a 6.3% grade, for every 100 meters of horizontal distance, you rise about 6.3 meters. The full 6.0 km accumulates roughly 399 meters of climbing—in the climbing world, this height difference is “short but solid”—not long enough to test your supply endurance, yet sufficient to give your threshold capacity a complete workout.
Precisely because it’s “short, steady, and repeatable,” Omote Tsukuba has become a climbing mecca: you can repeat it two or three times in a single day for intervals, or use it as a fixed benchmark, testing yourself once a month to observe your improvement curve. This “quantifiable, repeatable” nature is invaluable for riders seeking systematic improvement.
The table below compares Omote Tsukuba with several classic climbs in the surrounding area to help you establish a reference frame for the region:
| Route | Distance | Average Grade | Characteristics |
|---|---|---|---|
| Omote Tsukuba (this article’s focus) | Approx. 6.0 km | Approx. 6.3% | Omotesando direction, steady sustained climb |
| Fudo-toge | Approx. 3.8 km | Approx. 7% | Shorter and steeper, classic climbing entrance |
| Kaze-gaeri-toge (front side) | Approx. 7.8 km | Approx. 6.3% | Longer, similar grade to Omote Tsukuba |
Omote Tsukuba isn’t a climb that makes you pale at the thought—it’s one that makes you “more addicted the more you train on it.” Its value isn’t in conquering it once, but in returning again and again, using it as a yardstick to measure your progress.
2. Segment-by-Segment Strategy: Splitting the 6.0 km into Three Parts for Pacing
Although Omote Tsukuba’s grade is steady without much dramatic variation, the most effective approach for setting a good time—or completing it steadily for the first time—is still segment pacing. I’ll split it into three parts.
Segment 1 (0–2 km): Establish Your Rhythm, Resist the Urge to Start Fast
The start is where mistakes happen most easily. The grade on Omote Tsukuba’s early section goes straight into the working zone, and many people get carried away by fellow riders at the start, or get fooled by their fresh legs, opening at an intensity far beyond what’s sustainable.
Pacing principle: Deliberately hold the first segment below your target intensity. If you have a power meter, control it at 85–90% of FTP; if you only have a heart rate monitor, maintain a level where you can still breathe through your nose and speak short sentences. The task of these 2 km is to “find the rhythm that can carry you all the way to the top today,” not to show off in the moment. Remember: starting too fast on Omote Tsukuba’s early section is the most common cause of blowing up.
Segment 2 (2–4.5 km): The Core Sustained Phase, Mechanically Holding Steady
The middle section is where you lock in your rhythm and enter “cruise mode.” There are no shortcuts here—it’s about fixed gearing, fixed cadence, steady breathing, turning your body into a stable power-producing engine.
The key here is cadence. Aim to maintain a smooth range of 75–85 rpm. If cadence drops below 60, it means your gear is too heavy or you’re starting to fatigue—time to consider shifting to an easier gear or easing off slightly. This middle section of Omote Tsukuba determines the bulk of your total time; whether you can “hold steady without cracking” here is the dividing line between a good and a mediocre result.
Segment 3 (4.5–6.0 km): The Finish, Squeezing Out the Remaining Throttle
The final kilometer-plus is where you verify whether your earlier pacing was correct. If the first two segments were managed well, you should still have something left here to push the intensity up and sprint across the line; if you blew up earlier, this is the survival stretch where you just hold on and don’t put a foot down.
Judgment criteria: If you can maintain a steady cadence and your heart rate hasn’t spiraled out of control, boldly add pressure and finish strong; once cadence collapses and you’re gasping beyond control, fall back to a survival pace and just get it done. Omote Tsukuba is excellent for practicing “negative splits” (faster second half than first), which is part of its value as a training ground.
3. Gearing and Equipment: How to Set Up for a 6.3% Climb
A 6.3% grade doesn’t demand gearing as extreme as a 10% wall, but whether your setup is smooth directly affects how comfortably you can maintain your ideal cadence.
Gearing Reference Framework
| Rider Type | Suggested Front/Rear Gearing | Notes |
|---|---|---|
| Advanced, strong climber | Front 34/50T × Rear ~28T | Capable of maintaining high cadence with relatively heavier gearing |
| General amateur, moderate fitness | Front 34T × Rear 30–32T | Mainstream safe choice, ample cadence flexibility |
| Climbing novice, wants an easy finish | Front 34T × Rear 32–34T | Better to spin faster; sit and spin your way up |
The principle is the same as all climbs: when in doubt, go lighter. Although Omote Tsukuba isn’t particularly steep, if you plan to do multiple repeats in a day for intervals, keeping your gearing lighter lets you maintain smooth cadence even when fatigued later on, avoiding knee injuries from grinding at low cadence with high torque.
Key Equipment Checklist
- Wheels: For pure climbing practice, don’t obsess over deep-section wheels; lightweight climbing wheels or standard aluminum rims are perfectly suited for repeated climbs.
- Tire pressure: Moderate rather than extremely high, balancing grip and comfort—especially if the road surface has leaves or moisture.
- Brake check: There’s a descent after the summit; check brake feel and tire condition before departing.
- Clothing: There’s a temperature difference between the summit and the base, plus wind chill on the descent after summiting; carrying a packable windbreaker is a safe bet.
- Computer/Power meter: Since you’re using this as a training benchmark, recording data is essential—leave every run with comparable results.
4. Nutrition and Hydration: Don’t Let Your Guard Down Even on a Short Climb
A single ascent of Omote Tsukuba is 6 km; if you’re only climbing once, nutrition needs are minimal. But precisely because it’s a “training climb,” many people come to do multiple repeats, making your nutrition strategy even more important.
- Single ascent challenge: One bottle of water is sufficient; top up with some easily digestible carbs before departing.
- Multiple repeats for intervals: This is the key point. Repeated climbing depletes glycogen quickly; during the descent rest between repeats, remember to take small sips of water and, if needed, a bit of energy gel or banana—don’t wait until you’re completely out of energy to eat.
- Electrolytes: In warm seasons, repeated climbing with heavy sweating means plain water alone can lead to cramping; remember to add electrolytes.
- Refueling on the descent: After each summit, don’t rush into the descent—take a sip of water and catch your breath first, allowing your body to recover slightly before descending, which also improves focus and safety on the way down.
5. Weather, Seasons, and Accessibility
One of Omote Tsukuba’s biggest advantages is accessibility. It’s quite close to Tokyo, making it a climbing spot Kanto cyclists can visit “on a whim,” which is the core reason for its enduring popularity.
- Spring: Pleasant weather and fresh mountain greenery make it the most comfortable climbing season, with the most cyclists.
- Summer: The plains are muggy, but higher elevations are relatively cooler; be sure to guard against afternoon thunderstorms and slippery descents.
- Autumn: Foliage season offers spectacular views, but temperatures drop quickly; the risk of hypothermia on the descent after summiting rises, so don’t skimp on warm layers.
- Winter: The mountain area may freeze and get cold; assess local conditions carefully before heading out.
Omote Tsukuba’s “convenience” is its most undervalued asset. When a good climb is within easy reach, your training frequency naturally increases—and frequency is the most honest source of progress.
6. Common Mistakes and DNF Traps
Even on a “good training” climb like Omote Tsukuba, there are pitfalls to avoid. Checking each one can help you ride every run more cleanly.
- Starting too fast in the early section: The grade on Omote Tsukuba’s early section goes straight into the working zone; getting carried along by companions or pushing too hard yourself is the classic cause of blowing up.
- Keeping gearing too heavy: Reluctant to shift to an easier gear, causing cadence to drop into low-cadence, high-torque territory—leading to knee injuries and a collapse in the later stages.
- Only drinking plain water: Repeated climbing with heavy sweating but only plain water makes cramping almost inevitable.
- Neglecting descent risk: Putting all your focus on the climb, then relaxing and fatiguing after the summit, makes accidents more likely on the descent. Climbing practice isn’t just about going up; coming down safely is equally part of the lesson.
- Training without records is wasted effort: If you treat it as a training ground but don’t record power, heart rate, or time, you’re throwing away its greatest value—being “quantifiable.”
7. Target Times for Riders of Different Levels
The beauty of Omote Tsukuba as a training benchmark is that it quantifies your effort into a number you can compare month to month. Below are rough self-comparison reference ranges for this 6.0 km, ~399 m elevation gain route—not hard standards; adjust according to your own condition:
| Level | Omote Tsukuba Reference Finish Time | Corresponding Training Status |
|---|---|---|
| Novice aiming to finish | Approx. 35+ minutes | Goal is to not put a foot down and reach the summit steadily |
| Amateur with regular training | Approx. 25–35 minutes | Can pace steadily, gearing chosen correctly |
| Advanced climbing enthusiast | Approx. 20–25 minutes | Good FTP, can hold near threshold throughout |
| Competitive-level rider | Approx. under 20 minutes | Excellent power-to-weight ratio, experienced |
If it’s your first time, make “finding a rhythm that carries you all the way to the top” your only goal—don’t worry about time. Once you’re familiar with this climb, it will become your most loyal training partner—every few seconds of improvement is a tangible reward for your effort.
8. Pre-Ride Checklist
Let’s wrap up with a concise checklist. Whether you’re coming for your first completion or doing repeated interval repeats, run through it before departing:
- Gearing check: Can your easiest gear maintain 75 rpm or above on a 6.3% grade? If doing multiple repeats, keep it lighter.
- Tire pressure and condition: Slightly lower pressure; check for cuts or foreign objects.
- Brake system: Think about the descent after the summit; confirm brakes are working properly first.
- Supplies ready: One bottle for a single ascent; for multiple interval repeats, have enough energy and electrolytes.
- Warm layer: A packable windbreaker to handle summit temperature differences and descent wind chill.
- Pacing plan: Mentally split the route into three segments and decide your heart rate/power ceiling for each.
- Data recording: Turn on your computer/power meter so every run leaves comparable results.
Omote Tsukuba isn’t a climb you “check off” with one brute-force effort; it’s a training ground worth returning to again and again, slowly refined with discipline and data. Hold your pacing, dial in your gearing, record your data—this 6.0 km, 6.3% Kanto climbing mecca will honestly tell you, through month-by-month shrinking times: you really are getting stronger.
9. Treating the Whole Mountain as a Gym: Combined Training with Omote, Ura, and the Passes
What truly makes Omote Tsukuba remarkable isn’t how hard its single route is, but that the entire Mount Tsukuba it sits on provides a “multi-route, combinable” complete climbing system. Knowing how to combine the surrounding climbs will yield far better training results than just grinding out a single route.
Let’s categorize the area’s classic routes by “personality” so you can choose based on your training goals:
| Route | Distance | Avg. Grade | Training Role |
|---|---|---|---|
| Fudo-toge | Approx. 3.8 km | Approx. 7% | Short and steep, ideal for high-intensity threshold/anaerobic intervals |
| Omote Tsukuba | Approx. 6.0 km | Approx. 6.3% | Mid-distance steady climb, ideal for threshold cruising |
| Kaze-gaeri-toge (front side) | Approx. 7.8 km | Approx. 6.3% | Longer, ideal for sustained tempo endurance |
Suggested combined training plans:
- For explosive power and threshold: Repeatedly do Fudo-toge. It’s short, steep, and quick to repeat; doing several intervals in a day is a powerful tool for raising high-intensity tolerance.
- For steady cruising: Focus on Omote Tsukuba, practicing the ability to “hold near threshold without cracking” while observing segment consistency on each run.
- For sustained tempo: Take on Kaze-gaeri-toge, treating it as a long segment simulating a real climbing race, practicing maintaining pace and mental focus over time.
- Comprehensive big menu: In a single day, string together Fudo-toge and Omote Tsukuba to simulate the fatigue scenario of “consecutive multi-segment climbs”—especially valuable for those targeting longer climbing races.
A good climbing mountain isn’t one with just a single hard route; it’s one with a full set of options varying in difficulty and character, letting you mix and match according to the day’s training goals. Mount Tsukuba is the best open-air gym for Kanto cyclists.
10. The Science of Repeated Climbing: Designing Interval Training
Since Omote Tsukuba’s greatest value is “repeatability,” it’s worth making “repeated climbing” a bit more scientific. Randomly grinding out a few runs versus doing planned intervals produces vastly different training effects.
The core of interval training is the alternation between ‘high-intensity work segments’ and ‘recovery segments.’ On Omote Tsukuba, one climb is a natural work segment, and the descent back to the start is the recovery segment. What you need to do is consciously control the intensity and ratio of these two phases.
Using threshold intervals as an example, a rough workout might look like this:
- Warm-up: Before departing, ride easily on flat roads for 15 to 20 minutes to gradually bring your cardiovascular system and muscles up to speed. Never sprint from the base of the climb.
- Work segment: Climb Omote Tsukuba once, holding intensity near threshold (with a power meter, roughly 95–105% of FTP; without one, use the feel of “painful but sustainable, unable to talk easily”).
- Recovery segment: Descend back to the start, spinning easily and breathing deeply to bring your heart rate down; recover fully before starting the next repeat.
- Repeat: Based on your condition, repeat 2 to 4 times, watching for fatigue signals. Better to do one fewer repeat than to push through in a broken state and risk injury.
- Cool-down: After finishing, ride easily on flat roads for a while to help your body recover.
Key reminder: The benefit of interval training comes from “quality,” not “quantity.” Rather than forcing two extra slow, exhausting climbs in a half-broken state, do three clean, well-paced climbs instead. Record data from every run and observe whether your segment times, average power, and average heart rate are improving—that’s the correct way to use Omote Tsukuba as a training ground.
11. Descending Technique: The Other Half of the Lesson After Summiting
Many people train climbing diligently but neglect descending. In fact, on a route like Omote Tsukuba where you descend back down the same or a different way after climbing, descent safety and technique are an inseparable half of training.
- Shift weight back, lower your body: On descents, shift your center of gravity slightly back and lower, improving stability and grip—especially prepare before corners.
- Brake early, avoid hard braking in corners: Reduce speed to a safe range on the straight before entering a corner; avoid sudden hard braking mid-corner to prevent losing grip and sliding. Coordinate front and rear brakes with a pulsing action—far safer than grabbing a handful.
- Outside pedal down, eyes on the exit: When cornering, push the outside pedal to the bottom and press your weight onto the outside leg to increase grip; look toward the corner exit rather than the ground right in front of you—the bike will naturally follow your gaze.
- Watch road conditions and temperature differences: Mountain descents may encounter leaves, moisture, and gravel, plus wind chill at speed; after summiting, don’t forget to put on your warm layer before descending to avoid hypothermia dulling your handling.
Don’t forget: Training hard to strengthen your legs, only to crash on the descent, is the worst trade-off. Treating the descent as equally important as the climb is the complete training mindset of a mature rider.
12. Frequently Asked Questions (Q&A)
Finally, let’s address a few of the most common questions from newcomers in one go.
Q: I’m a beginner; what should I pay attention to on my first visit to Omote Tsukuba?
A: Set your goal as “don’t put a foot down, find a rhythm that carries you to the top,” and completely ignore time. Keep your gearing lighter and hold back in the early section—that gives you the highest chance of finishing.
Q: Do I absolutely need a power meter to train?
A: Not necessarily. A power meter is the most precise, but heart rate or pure feel can train effectively too. The key is “consciously controlling intensity” and “leaving comparable records”—tools are just means.
Q: How many repeats are appropriate in a day?
A: It varies by individual. The key is quality over quantity; typically 2 to 4 clean climbs far outweigh a pile of broken, forced repeats. When you feel clearly exhausted or your form deteriorates, it’s time to stop.
Q: What’s the difference between Omote Tsukuba, Fudo-toge, and Kaze-gaeri-toge, and which should I climb first?
A: Fudo-toge is short and steep (approx. 3.8 km, 7%), suited for high intensity; Omote Tsukuba is mid-distance and steady (6 km, 6.3%), suited for cruising; Kaze-gaeri-toge is longer (front side approx. 7.8 km), suited for endurance. Beginners are advised to start with Omote Tsukuba to build a steady pacing sense, then add the other two based on training goals.
Q: Does this route have special equipment requirements?
A: No hard requirements. A standard road bike with a light enough gear is more than sufficient. Rather than obsessing over equipment, invest your budget and energy in “light gearing” and “consistent training”—the returns are more tangible.
13. Conclusion: Make It Your “Yardstick of Progress”
What makes Omote Tsukuba a Kanto climbing mecca has never been a terrifying grade, but that rare sense of “just right”—just close enough, just challenging enough, just repeatable enough. These three “just rights” combined make it the most honest “yardstick of progress.”
You don’t need to conquer it in one go; what you need is to return again and again, using it to measure how many seconds faster you are this month than last, how much stronger this season than the previous one. Hold your pacing, dial in your gearing, record the data from every run, and then patiently let time give you the answer. When one day you find yourself easily matching a time you’d have killed for six months ago, you’ll understand: what Omote Tsukuba truly teaches you isn’t how to climb a mountain, but how to use discipline and patience to carve yourself, bit by bit, into something stronger.
14. Advanced Power Pacing: Breaking the 6.3% Climb Down to the Watt Level
If you already have a power meter and want to treat Omote Tsukuba as a precise training exam, this section offers a more refined approach to power pacing.
First, understand a core concept: on a steady grade, the ‘stability’ of power matters more than its ‘height.’ Many people’s power curves on climbs look like an ECG—spiking and dipping—surging early, fading mid-climb, struggling at the end. This sawtooth output is far less efficient than a smooth, straight line. Omote Tsukuba’s steady grade makes it the perfect textbook for practicing “stable output.”
Using a rider with a hypothetical FTP as an example, a single ascent of Omote Tsukuba could be paced like this:
| Segment | Distance | Power Target (% FTP) | Approach |
|---|---|---|---|
| Early | 0–2 km | 88–92% | Deliberately restrained, establish rhythm |
| Middle | 2–4.5 km | 93–98% | Mechanical cruising, steady without drifting |
| Finish | 4.5–6 km | 98–105% | If you have something left, gradually push and sprint across |
The spirit of this table is to push your overall average power as close to threshold as possible, while achieving the “negative split” mentioned earlier through a “slightly conservative early, slightly aggressive late” distribution. The negative split is the golden rule for good results because it ensures you haven’t overdrawn in the early stages, saving your best state for the finish where you need it most.
Additionally, after each climb, review two advanced metrics: first, the “ratio of Normalized Power (NP) to Average Power”—the closer to 1, the smoother your output; second, “segment time consistency”—the closer your early and late segment times, or even faster late, the more mature your pacing. Track these data points long-term, and you’ll see yourself becoming a better pacer month by month.
15. Fitting Omote Tsukuba into Your Annual Training Plan
Finally, let’s discuss how to intelligently embed a training ground like Omote Tsukuba into your annual training rhythm, rather than just casually riding it whenever you have free time.
- Base phase: Focus on low-intensity, long-duration endurance riding to build your aerobic foundation. During this phase, visits to Omote Tsukuba should emphasize “steady completion and pacing feel,” not chasing times.
- Build phase: Add structured climbing intervals. Here, Omote Tsukuba and the surrounding Fudo-toge and Kaze-gaeri-toge become your natural interval venue—repeated climbing to raise threshold and high-intensity tolerance.
- Peak phase: If you have a target race, use Omote Tsukuba or Kaze-gaeri-toge to simulate race intensity with a few high-quality “race-like” climbs while fine-tuning your pacing strategy.
- Recovery phase: After races or when fatigue accumulates, lower climbing intensity and use easy riding to help recovery—don’t let the obsession with “must set a time” lead to overtraining.
One principle running through the entire year: make Omote Tsukuba your ‘fixed benchmark test.’ Every so often (e.g., monthly), pick a good day, go all out on one run, and record the result. This periodic benchmark test will, like a health checkup report, honestly tell you whether your training is working and whether you’re heading in the right direction. Accumulated over time, these data points become the most precious record of your growth as a cyclist.
Related Reading
- Rokko Driveway Complete Guide: Segment Pacing, Gearing, and Steep Wall Strategy for 4.7 km at 8.8% Average Grade
- Yabitsu-toge Practical Guide: Segment Pacing and Gearing Breakdown for 11.5 km with 642 m of Climbing
- Nikko Irohazaka Practical Guide: Segment Pacing and Gearing Breakdown for 7.1 km with 394 m of Climbing
- Mount Ibuki South Side Practical Guide: Segment Pacing and Gearing Breakdown for 6.2 km with 612 m of Climbing
爬坡ITT實境)台中 魔王 松鼠坡 首航 6:12 大肚山 大三元 科福路
8 年前
日本自助單車旅,茨城絕景路線/ 新手也可以體驗 / 4K空拍絕景 / 機票省錢大法 / 單車友善旅館 / 國家級霞之浦180K自行車道 / feat. 緯緯 / CT Yeh
1 年前
台北闊瀨陡坡 騎旅 / 日本單車雜誌編輯車友臨時加入!/ 髮香才是最強的 / feat. 北迴歸線小隊 / 公路車 CT Yeh
6 個月前
半日 小台灣 極限單車路線挑戰實錄
7 年前
#公路車 #西進武嶺 配速配瓦實驗 坡度分析 四小時內攻略 建大盃 NeverStop #西進武嶺攻略
6 年前
2026 車錶排行榜!誰是最多車友正在使用?練家子最愛哪款?🏆 (2萬名車友數據) / 公路車 / CT Yeh
5 個月前
單車 一日北高 ( 雙城 ) 肥宅雙人瘋狂行 紀錄片 REACTO
10 年前
大武山後門26%歡樂陡坡!JJSC南台灣單車行Day2 / 被颱風追著跑 / 公路車 / CT Yeh
2 年前