Nikko Irohazaka Practical Guide: Segment-by-Segment Pacing and Gear Ratio Breakdown for 7.1 km with 394 m of Climbing
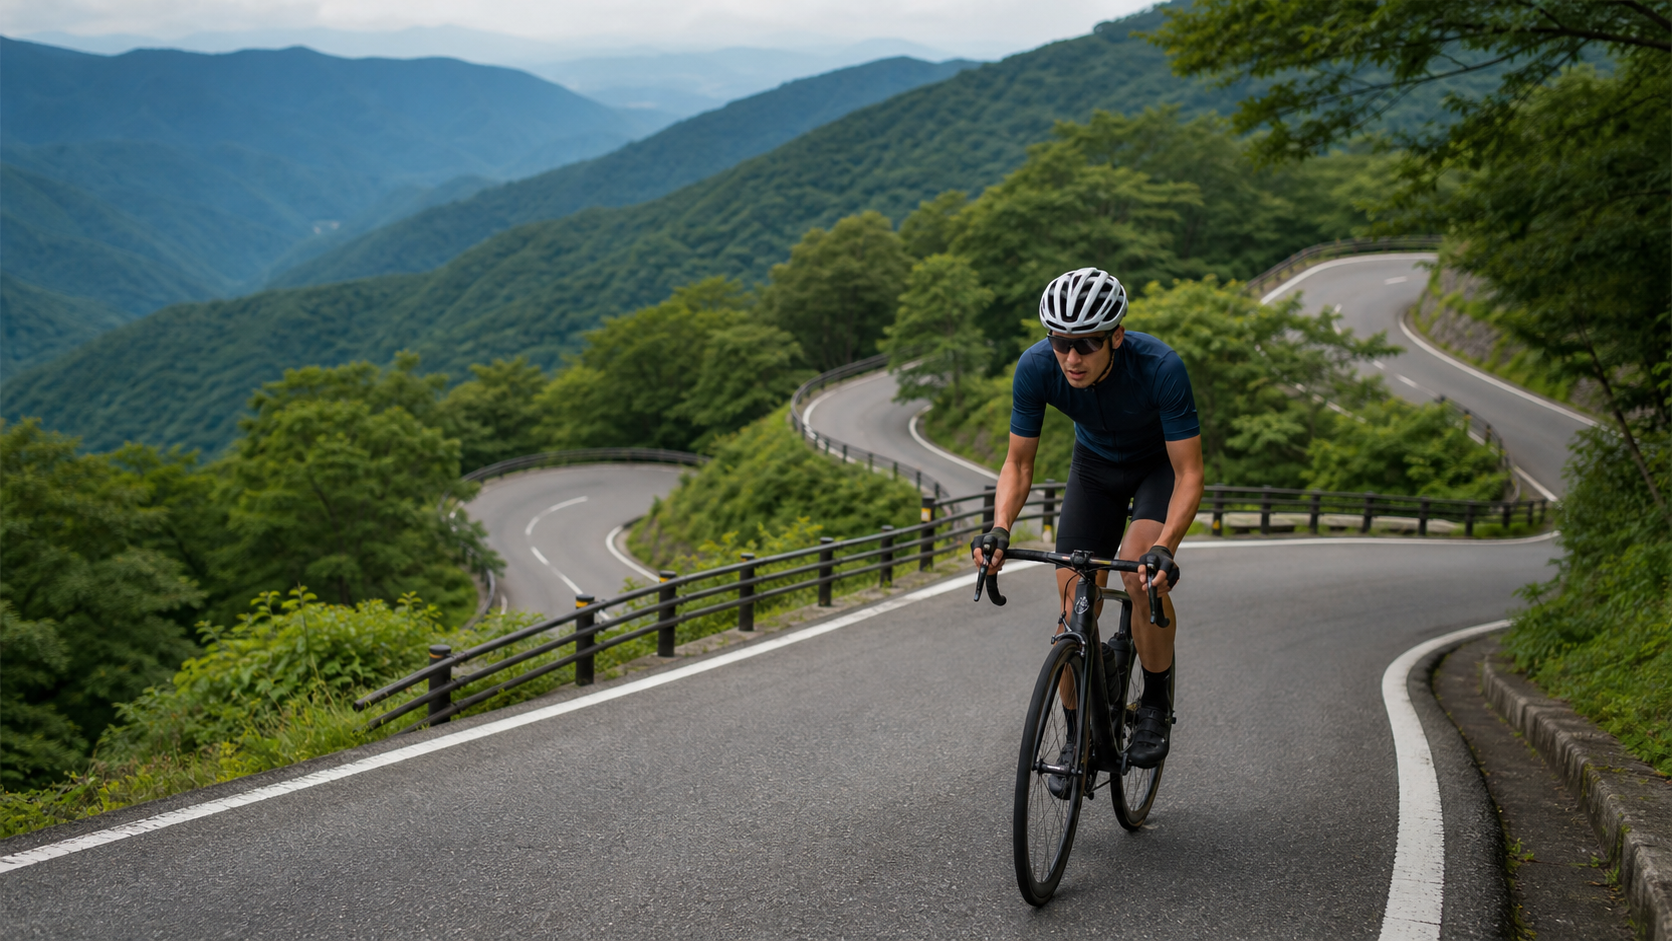
Nikko Irohazaka Practical Guide: Data Breakdown and Segment Pacing for a 7.1 km Climb with 394 m of Elevation
Route at a glance: Distance 7.1 km, total elevation gain 394 m, average gradient 5.5%, located in Nikko City, Tochigi Prefecture (Japanese name: Nikko Irohazaka). This article takes an engineer’s perspective to break this climb down into an executable pacing and gear-ratio plan.
Before you start pedaling, get the numbers straight. Nikko Irohazaka is 7.1 km long with 394 m of cumulative elevation gain and an average gradient of 5.5%. Looking only at the average underestimates it—the real difficulty never lies in the average, but in how the gradient is distributed and how it changes. A road with a 5.5% average could be “uniform throughout,” or it could be “gentle at the start, steep in the middle, and settling back down at the end”—the pacing strategies for the two are worlds apart. The purpose of this article is to lay out the rhythm of this road clearly, so you head into it with confidence.
1. Route Overview and Real Data Analysis
Nikko Irohazaka (日光いろは坂) is located in Nikko City, Tochigi Prefecture, and is one of the most iconic climbing routes in the area. Below are the core numbers, which also serve as the foundation for all pacing calculations:
| Item | Data |
|---|---|
| Total distance | 7.1 km |
| Total elevation gain | 394 m |
| Average gradient | 5.5% |
| Average elevation gain per km | Approx. 55 m |
| Location | Nikko City, Tochigi Prefecture |
The figure “average elevation gain of about 55 m per kilometer” is highly practical: it lets you use the distance on your bike computer to work backward and estimate how much elevation you “should” have gained, helping you judge whether you’re ahead of or behind your planned pace.
One concept worth establishing first: an average of 5.5% is a “sustained” gradient for most amateur riders. It won’t throw a wall at you that forces you off the bike instantly, but it will slowly wear down your willpower and your legs over time. On this kind of climb, the worst thing you can do is push too hard in the early section—the real battle is decided in the second half.
2. The Physics of Climbing and Gear Setup
The Physics of Climbing: Why “Weight” Is Your Biggest Enemy
On flat roads, aerodynamic drag is your biggest opponent; but once the gradient exceeds 3–4%, the battlefield changes completely—gravity replaces air as the primary force you must fight. This is why professional climbers tend to be lean: in the war against gravity, every kilogram is a burden.
The most core metric for measuring climbing ability is watts per kilogram of body weight (W/kg). Producing the same 250 watts, a 60 kg rider is at 4.17 W/kg, while an 80 kg rider is only at 3.13 W/kg—the gap gets mercilessly amplified on long climbs. This also reminds every rider who wants to get stronger: rather than spending big money on lightweight components, first examine your body weight and power-to-weight ratio—that is the most cost-effective investment for climbing.
Based on this segment’s 5.5% average gradient and 394 m of total elevation gain, a rider weighing 70 kg, with bike and gear bringing the total to about 80 kg, would need to overcome roughly 308 kilojoules of gravitational potential energy just to “lift themselves 394 m”—and that’s before accounting for rolling resistance and aerodynamic drag. Understanding this number makes it clear: there are no shortcuts on a climb. Conservation of energy is an iron law; you can only honestly pedal out every single joule.
The good news is that this also makes climbing the fairest and most visible form of progress in training. On flat roads, wind, drafting, and positioning can interfere with your results, but climbing depends almost entirely on your engine. This 7.1 km climb will faithfully record the effort you’ve put in over the season.
Gear Ratio and Equipment Recommendations
Given this segment’s average gradient of 5.5%, total elevation gain of 394 m, and distance of 7.1 km, gear ratio selection is key to finishing comfortably.
| Rider Level | Recommended Compact Crankset | Recommended Cassette | Notes |
|---|---|---|---|
| Advanced / Racing | 52-36T | 11-30T or 11-32T | Able to sustain high cadence, chasing performance |
| General / Recreational | 50-34T | 11-32T or 11-34T | Keep some margin, avoid knee strain in the latter half |
| Beginner / Endurance | 50-34T | 11-34T or even gravel gearing | Prioritize “being able to turn the pedals”; lighter is better than heavier |
- Cadence first: On a sustained climb, maintaining 70–85 rpm is far more important than muscling a big gear. Grinding at low cadence rapidly accumulates lactate and stresses the knees.
- Tires: 25c to 28c balances rolling resistance and comfort; if the descent has broken pavement, slightly wider tires with slightly lower pressure boost confidence.
- Braking: On long descents, brake intermittently rather than continuously—avoid overheating tubular rims (causing blowouts) or overheating disc brakes (causing fade). Use “alternating front and rear, short and firm braking” instead of prolonged dragging.
- Carrying supplies: Two bottles are the baseline; when mountain supply points are scarce, bring enough energy gels and salt tablets.
- Layered clothing: Use the “onion” approach in the mountains. On the climb, your body heats up, so a short-sleeve jersey may suffice; at the summit and on the long descent, you’ll need a packable wind vest or jacket. Remember: a soaked jersey is the biggest cause of hypothermia on the descent.
- Support gear: For a long climb, a bike computer displaying real-time gradient and heart rate is recommended so pacing has a data basis; if starting at night or early morning, be sure to have front and rear lights.
The Myth and Truth of Cadence
Many beginners mistakenly believe that “pedaling harder means faster,” so they choose gears that are too heavy and grind at low cadence. This is the most knee-damaging and least efficient way to ride.
- Low-cadence grinding (50–60 rpm): Each pedal stroke generates enormous torque, and the stress on your knee joints spikes accordingly—over time, this is a breeding ground for chronic overuse injuries. The muscles also work “anaerobically,” causing lactate to accumulate rapidly.
- High-cadence spinning (80–95 rpm): This shifts the burden from “muscular strength” to “cardiorespiratory system.” You’ll breathe harder, but your muscles last longer and your knees are safer. This is why pro riders tend to maintain high cadence on climbs.
Practical advice: on this 5.5% climb, set your target cadence at 70–85 rpm. If you’re still struggling badly below 60 rpm, it’s not that you’re not strong enough—it’s that your gearing isn’t light enough. Changing to an easier gear is nothing to be ashamed of.
3. Segment-by-Segment Guide from Start to Finish
The most charming—and most maddening—feature of Irohazaka is its 48 hairpin turns named after the Japanese syllabary “iroha.” The ascent uses the Second Irohazaka (20 turns), and the descent uses the First Irohazaka (28 turns); the two lanes are separated, which is actually a good thing for riders—on the climb, you don’t have to worry about oncoming traffic cutting your line.
Segment 1: The Approach (10 km before the climb starts)
From JR/Tobu Nikko Station to the start of the climb is about 10 km of gentle uphill. This section isn’t the main event, but it’s where many people set themselves up for failure: because the road looks flat, it’s easy to unconsciously push too hard. Treat it as a warm-up, keep your heart rate in Zone 2, and arrive at the base of the climb with legs that are “warm but not tired.”
Segment 2: The Steeper First Half (from the start to the middle, gradient 6–10%)
Once you enter the uphill-only road, the gradient fluctuates between roughly 6–10%—this is the section that demands the most restraint on the entire route. On the inside of hairpin turns the gradient is steeper, while the outside is more gradual; taking the outside line through corners lets you “steal” a bit of easier gradient for recovery. Avoid the urge to stand and sprint every time you see a corner—standing efforts burn oxygen at a high rate, so save them for when they’re truly necessary.
Segment 3: The Final Stretch Before Akechidaira (second half, gradient settles to 5–7%)
As you approach the summit, the gradient actually settles back down to 5–7%. This is the best psychological arrangement possible—just when you think you can’t hold on, the gradient gives you a little relief. At this point, you can raise your cadence slightly and use rhythm to roll through the final few corners.
The Finish: Akechidaira (approx. 1274 m)
At the summit, Akechidaira has vending machines and a shop, and the observation deck offers a panoramic view of Mount Nantai and the winding switchbacks of the First Irohazaka. This is an excellent spot for refueling and photos. If you still have energy afterward, you can continue on to Lake Chuzenji, Ryuzu Falls, and Senjogahara Marshland—the scenery reaches another level from there.
4. Climbing Technique: Posture, Breathing, and Alternating Between Seated and Standing
Climbing isn’t just about “pedaling hard”—it’s a skill that combines posture, breathing, and rhythm. With the same fitness level, a rider with good technique can save a considerable amount of energy.
Upper Body: Stay Relaxed, Don’t Waste Energy
When climbing, many people unconsciously tense up their entire body, shrug their shoulders, and grip the handlebars deathly tight. All this excess tension quietly drains your energy. The correct approach is: relax and lower your shoulders, keep your elbows slightly bent, and rest your hands lightly on the handlebars (usually on the hoods or the top of the brake levers). Keep your upper body as still as possible, channeling your energy into your legs.
Seated vs. Standing Climbing
- Seated Pedaling: This is your primary climbing position—the most efficient and energy-saving. On a sustained climb like a 5.5% grade, you should be seated over 90% of the time, maintaining a steady output.
- Standing Climbing: This is best for short, steep surges or for giving your seated muscles a brief rest. However, standing burns more oxygen and spikes your heart rate quickly. It’s a “short-term weapon,” not a “long-term strategy.” Remember not to stand and grind the entire way up a long climb—that’s the most common cause of blowing up for beginners.
- When to Switch: When the gradient suddenly steepens, or when you need to power through a tough section, stand up and surge for a few dozen seconds. Once you’re past it, sit back down immediately to bring your heart rate down.
Breathing: Deep and Rhythmic
Your breathing while climbing should be “deep, slow, and rhythmic.” Use diaphragmatic breathing to draw oxygen deep into the bottom of your lungs, rather than taking rapid, shallow breaths. Try syncing your breathing to your pedal cadence (e.g., inhale for two pedal strokes, exhale for two). This helps stabilize your rhythm and distracts your mind from the discomfort.
Pacing Psychology: Break the Big Climb into Small Segments
Facing a long climb, if you keep thinking “it’s still so far,” it’s easy to be defeated before you even start. The trick used by experienced riders is segmented thinking: break the entire climb into several small goals (the next corner, the next utility pole, the next road sign) and focus only on conquering the small section right in front of you. When you shift your focus from “how far is the finish” to “the next 100 meters ahead,” the pain becomes manageable, and time passes faster.
Descending Technique and Safety
Climbing 394 meters means descending 394 meters as well (if you return the same way). Descending may look easy, but it’s actually a high-risk zone for accidents—take it seriously.
- Shift Your Center of Gravity Back and Low: When descending, shift your center of gravity slightly back and lower it. Keep your hands firmly on the brake levers, ready to brake at any moment. When cornering, push the outside pedal down and lean your body into the inside of the turn to maximize tire grip.
- Brake with “Pulsing,” Not “Dragging”: The worst thing you can do on a long descent is drag your brakes the whole way down. This overheats your rims (with rim brakes) or rotors (with disc brakes)—overheated rims can cause inner tube blowouts, and overheated disc brakes can lead to brake fade. The correct method is to “alternate front and rear, brake firmly but briefly.” Slow down on the straights and release the brakes before entering a corner, giving your braking system a chance to cool.
- Look Ahead: Keep your eyes on the corner exit, not on the road right in front of you. Your vision guides your body—look far ahead, and you’ll flow through the corners smoothly.
- Leave a Safety Margin: On mountain descents, you may encounter oncoming cars, falling rocks, gravel, or wet sections. Always keep your speed within a range where you can “stop safely at any moment.” Results matter only for the living—safety always comes first.
5. Nutrition, Hydration, and Energy Management
Nutrition and Hydration Strategy
For a route with 394 meters of climbing, your fueling rhythm should be “early, small amounts, and frequent.” Don’t wait until you’re hungry or thirsty to refuel.
- Carbohydrates: 40–60 grams of carbs per hour (about 1–1.5 energy gels or equivalent). This is especially important for rides longer than 90 minutes.
- Fluids: 500–750 ml per hour, adjusted upward in summer heat or high humidity. Take “small sips” rather than gulping large amounts.
- Electrolytes: When you’re sweating heavily, plain water dilutes blood sodium. Be sure to pair it with salt tablets or an electrolyte sports drink to prevent cramps and hyponatremia.
- Before Starting the Climb: 30 minutes before you start climbing, take in some carbs and fluids to get your body into a steady energy-supply state, avoiding starting the climb on an “empty tank.”
- Caffeine: Moderate caffeine (30–45 minutes before the climb) can improve focus and delay fatigue. But if you have a sensitive stomach, test your tolerance during training first—don’t try it for the first time on challenge day.
The Physiology of “Hitting the Wall” and How to Prevent It
The thing climbers fear most on a long ascent is the dreaded “bonk”—sudden full-body weakness, dizziness, legs feeling like lead, completely unable to turn the pedals. This isn’t a matter of willpower; it’s a physiological phenomenon of glycogen depletion and a sudden drop in blood sugar.
The body’s stored glycogen is limited; at high intensity, it runs out in about 90 minutes. Once glycogen is gone and you haven’t replenished with external carbs, your body is forced to burn fat, which is far less efficient for fueling. That’s when you “bonk.”
The only way to prevent it is one word: early.
- Don’t wait until you’re hungry to eat. Start fueling regularly 30–40 minutes after you begin the climb, keeping your blood sugar steady—don’t let it spike and then crash.
- Fuel “little and often.” Stuffing down too much at once puts a burden on your gut and diverts blood to your digestive tract, making your climbing performance even worse.
- If you already feel the warning signs of dizziness or shaky hands, immediately consume fast-absorbing sugar (fruit gel, cola, candy), and ease off the intensity. Don’t push through it.
6. Weather and Seasons
Irohazaka is highly seasonal. The autumn foliage season in mid-to-late October is one of Japan’s most famous maple-viewing spots—the layered reds and yellows across the mountains are breathtaking. But it also means severe traffic congestion—during holiday periods, cars may be at a standstill, which ironically makes it easier for cyclists to weave through, but you must be extra careful with the mix of people and vehicles.
- Spring/Summer: Lush greenery and pleasant temperatures make it a great time for pure climbing training.
- Autumn (Foliage Season): The scenery is at its peak, but so are the crowds and traffic. It’s best to head out early in the morning.
- Winter: The summit area around Lake Chūzenji is at high altitude and may see snow or even road closures. Unless you’re a hardcore enthusiast, don’t risk it.
The summit viewpoint at Mageshō Pass is approximately 1,274 meters above sea level. Even in summer, long descents can feel cool, so it’s wise to carry a windbreaker.
7. Pre-Ride Training and Pre-Departure Checks
Pre-Ride Training and Preparation
To ride this 394-meter, 5.5% average grade climb well, on-the-day technique matters, but your real foundation comes from consistent training.
- Aerobic Base (Zone 2): Endurance on long climbs comes from your aerobic engine. Spend plenty of time doing long, low-intensity (heart rate Zone 2) rides to build a bigger “fuel tank.” This is the most solid fundamental work.
- Threshold Intervals (FTP Intervals): To boost your climbing power, schedule 1–2 threshold interval sessions per week, such as 4×8 minutes or 8×4 minutes of Zone 4 work. This effectively raises your power-to-weight ratio.
- Simulated Climbing: If you live on flat terrain, use a smart trainer’s grade simulation, or find any local hill and repeat it to get your body accustomed to the feeling of sustained effort.
- Core Training: A strong core lets you transfer power effectively to the pedals when you’re out of the saddle, rather than letting it dissipate. Bodyweight exercises like planks and bridges are very effective.
- Tapering: In the 3–5 days before challenge day, reduce your training volume while maintaining some intensity, allowing your body to fully recover and top off its glycogen stores so you arrive at the start line in peak condition.
Pre-Departure Checklist
- [ ] Tire pressure, brakes, shifting, and chain lubrication checked
- [ ] Spare tube kit (inner tube, tire levers, pump/CO2, quick link) complete
- [ ] Two bottles of water + enough energy gels/fuel + salt tablets
- [ ] Windbreaker/vest (for warmth on the descent)
- [ ] Phone, ID, some cash, emergency contact info
- [ ] Bike computer fully charged, lights ready (for dawn/dusk)
- [ ] Checked the weather, daylight hours, and (if applicable) road status
8. Risk Management and Target Times for Different Levels
Common Mistakes and DNF Risks
- Starting too hard: Charging out of the gate at the foot of the mountain with an adrenaline-fueled sprint, your heart rate maxes out immediately, and you blow up midway through. This is the most typical failure mode. Keep the pace in check during the early section.
- Gearing too heavy: You think you can turn the pedals, but the sustained climb slowly destroys your knees. When in doubt, go lighter rather than heavier.
- Fueling too late: Waiting until you feel dizzy or your legs go weak before eating means your blood sugar has already crashed, and it won’t come back.
- Getting cold or overheating on descents: Mountain areas have large temperature swings between day and night and with altitude. A sweat-soaked jersey at the summit can cause rapid hypothermia on a long descent; conversely, in summer, long braking with rim brakes can cause blowouts. Carrying a lightweight windbreaker is life-saving gear.
- Underestimating road conditions and traffic: Tourist routes have many buses and tour coaches. Don’t cut across lanes or fight for position in corners—safety always comes before results.
- No preparation for mechanical issues: On a long mountain road, a flat tire or dropped chain leaves you stranded in the middle of nowhere. Check tire pressure, brakes, and shifting before departure, and carry a spare tube, tire levers, a pump or CO2, and a quick link. This is basic self-sufficiency for mountain riding.
- Ignoring the energy needed for the return: Many people calculate their effort to just barely reach the summit, forgetting they still have to ride back. If you’re returning the same way or have more distance ahead, be sure to save energy and supplies—don’t empty yourself out at the top.
Three Typical DNF (Did Not Finish) Scenarios
Drawing from countless riders’ experiences, “DNF” on this climb usually plays out in one of three scenarios:
- Blown up in the early section: Adrenaline sprint at the foot, heart rate maxed out, completely out of gas midway, forced to stop by the roadside gasping. Solution—deliberately hold back the pace at the start and lock that excitement away.
- Fueling collapse: Reluctant to stop and eat, or forgetting to bring enough supplies, you hit a blood sugar crash halfway up and your legs turn to jelly. Solution—eat early, in small amounts, and often; treat fueling as part of your pacing.
- Equipment error: Gearing too heavy, your knees protest on the sustained climb until the pain makes it impossible to continue. Solution—lighter is always better; leave the “ego gearing” at home.
Understand these three scenarios and you’ve avoided ninety percent of failures.
Target Times for Riders of Different Levels
The following are reference times for completing the 7.1 km / 5.5% average climb (for pacing planning only; actual times are heavily influenced by weight, wind, and temperature):
| Rider Level | Average Speed Reference | Finish Time (Approximate) | Pacing Key Points |
|---|---|---|---|
| Competitive | 15–18 km/h uphill | Push actively, keep heart rate near threshold | Control the start, go all out at the end |
| Advanced | 11–14 km/h uphill | Steady rhythm, avoid blowing up | Focus on power or heart rate zone 3 |
| Intermediate | 8–10 km/h uphill | Aim for a steady finish, nail the fueling | Heart rate zones 2–3, better slow than blown |
| Beginner | 6–8 km/h uphill | Allowed to stop and rest, complete in segments | First goal: “don’t put a foot down” |
The purpose of this table isn’t to make you chase someone else’s numbers, but to help you understand where you are right now and set a goal that’s “just within reach if you stretch.” The growth curve on climbs is very clear: with the right approach and enough training, your finish time on this climb will improve season after season. That visible sense of accomplishment is exactly what makes climbing so rewarding.
9. FAQ (Frequently Asked Questions)
Q: I’m new to climbing. Is this road suitable for me?
A: Nikko Irohazaka has an average gradient of 5.5% and 394 meters of elevation gain. As long as you have basic riding experience, a light enough gear ratio (a 34T chainring paired with a 32T or larger cassette is recommended), and the mindset of “not chasing speed, just aiming to finish,” most motivated beginners can complete it. The key is to slow down your pace, allow yourself to stop and rest at the viewpoints, and don’t compare yourself to others.
Q: How light a gear ratio do I need?
A: On a sustained climb, “lighter is always better” is the right call. If you’re unsure of your ability, go straight to a 34T chainring with an 11-34T cassette, or even consider gravel gearing. The extra low gears are just insurance—if you don’t use them, no harm done; but if your gearing isn’t light enough, the damage to your knees is real.
Q: How much fuel should I bring?
A: Estimate based on your finish time. If you expect to ride for more than 90 minutes, bring at least two bottles (including one with electrolytes), 2–3 energy gels or equivalent fuel, and salt tablets. Supply points are scarce in the mountains—better to overpack.
Q: Is it safe to ride alone?
A: When riding solo in the mountains, always tell friends or family your route and expected time. Carry your phone (confirm there’s signal on the route), ID, a small amount of cash, and a full set of puncture repair tools. If you’re unfamiliar with the road, riding with a companion is safer.
Q: How do I know if I’m improving?
A: Compare finish times or average power on the same stretch of road under similar weather and equipment conditions. Climbing is the most honest mirror—with the right approach and enough training, the numbers will look better season after season. Use a bike computer or power meter to record your data and make the progress visible.
Q: What if I can’t ride anymore and want to give up?
A: Don’t rush to DNF. Stop, take a bite of sugar, drink some water, and breathe deeply for a few minutes. Many cases of “I can’t ride anymore” are actually low blood sugar or lost pacing control—after a rest, you can often continue. And if you truly can’t go on, that’s okay too—the mountain will always be there. Getting down safely and coming back another day is what a smart rider does.
10. Three Keys to Riding This Road Well
When it comes down to it, riding Nikko Irohazaka well comes down to three things—simple, yet hard to execute consistently:
- Pacing discipline: Deliberately hold back 10–15% in the early section and save your strength for the second half. The riders you pass at the foot of the mountain will usually be caught again before the summit. Climbing is a mental battle against your own urge to “go hard”—hold back early, and you’ll be smiling at the end.
- Honest gearing: Don’t choose your gear ratio based on “ego.” On a sustained 5.5% climb, it’s better to have one extra gear and keep your cadence above 75 rpm. Your knees and your endurance for the second half will thank you. No one asks what size cassette you used at the summit, but your knees will remember.
- Fueling in advance: Make “early, small amounts, often” a muscle memory. If you wait until you’re hungry to eat, this 7.1 km climb will turn into a long punishment. Treat fueling as part of your pacing, not an optional side note.
Read the data, hold the rhythm, and nail the fueling—Nikko Irohazaka transforms from a daunting challenge into an enjoyable, high-quality training session. This famous climb in Nikko City, Tochigi Prefecture, deserves your most honest preparation. Ride well, ride safe, and enjoy the view at the summit that belongs to those who put in the effort.
Related Reading
- Ibuki Mountain South Side Practical Guide: Segment Pacing and Gear Ratio Breakdown for 6.2 km with 612 m of Climbing
- Yabitsu Pass Practical Guide: Segment Pacing and Gear Ratio Breakdown for 11.5 km with 642 m of Climbing
- Bandai-Azuma Skyline (Takayu Onsen Side) Practical Guide: Segment Pacing and Gear Ratio Breakdown for 13.9 km with 824 m of Climbing
- Aso Milk Road Practical Guide: Segment Pacing and Gear Ratio Breakdown for 11.6 km with 723 m of Climbing
台北闊瀨陡坡 騎旅 / 日本單車雜誌編輯車友臨時加入!/ 髮香才是最強的 / feat. 北迴歸線小隊 / 公路車 CT Yeh
6 個月前
半日 小台灣 極限單車路線挑戰實錄
7 年前
單車 梅山36灣 坡度介紹 路段介紹 空拍 (相關遊記影片,請參考說明或我的頻道喔,歡迎訂閱)
6 年前
#公路車 #西進武嶺 配速配瓦實驗 坡度分析 四小時內攻略 建大盃 NeverStop #西進武嶺攻略
6 年前
大武山後門26%歡樂陡坡!JJSC南台灣單車行Day2 / 被颱風追著跑 / 公路車 / CT Yeh
2 年前
大禹嶺 到 武嶺牌樓 全程前後實況錄影 | 北進武嶺 | 東進武嶺 | KOM | 訓練台 | 坡度分析 | Taiwan KOM Last 10 km HARD | 公路車
6 年前
西進武嶺各路段 前8000名 大數據分析 配速攻略/功率/心律/推力比/維持率/踏頻/踏瓦比/牽車率 大公開 | 建大盃 NeverStop 可參考 | 公路車 | CT Yeh
5 年前
一日北高常見問題大集合 | 攻略 | 路線 | 訓練 | 補給 | 自行車 單車 | 一日雙城 | 雙塔 | TWB北高360 | 屁股痛
6 年前