Kirishima Ebino Highland Climbing实战 Guide: Full Analysis of the 12km, 861m Elevation Gain Volcanic Highland Long Climb Data
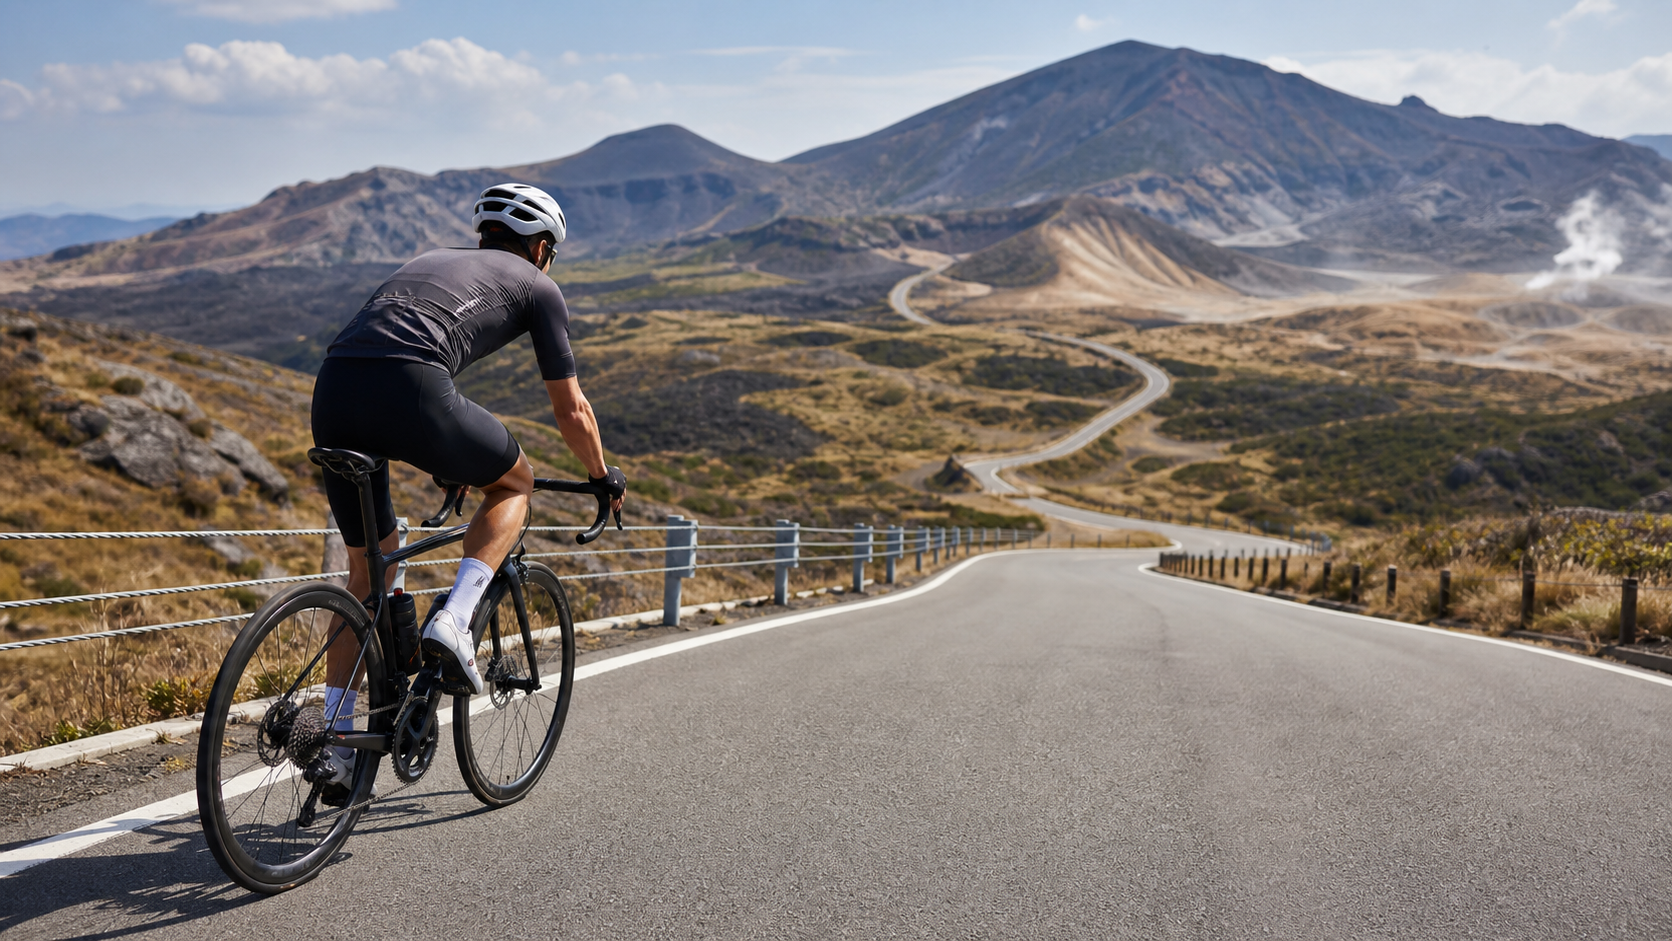
Kirishima Ebino Skyline: A Highland Climb Surrounded by Volcanoes
The Ebino Highland Hill Climb is one of the most iconic road cycling climbs in Kirishima City, Kagoshima Prefecture, Kyushu, Japan. The core stats are clear: total length 12,136.6 m (approx. 12.14 km), total elevation gain 861.4 m, average gradient 4.9%, classified as Category 3 on Strava. On paper, it reads as a “mid-distance, moderate-gradient” highland climb, but anyone who has actually ridden it knows that this road, following Prefectural Route 1 “Ebino Skyline,” is far more intriguing than the numbers suggest.
It starts around the Kirishima Onsen area and winds its way up to the Ebino Highland at roughly 1,200 m elevation, surrounded by volcanic peaks such as Karakuni-dake and Mount Io. This article takes an engineer’s perspective, breaking the entire route into executable segment strategies, gear ratios, fueling plans, and risk management, so you can “calculate” this climb before you even set off. For riders accustomed to classic Taiwanese climbs like Wuling, Fengguizui, and Beiyi, this route sits roughly between an “advanced training climb” and a “classic challenge climb”—a solid addition to any Kyushu itinerary.
In one sentence: this is not a brutally steep wall that sends your heart rate soaring; it’s a highland long climb that demands “power and pacing management” from start to finish. Whoever can sustain a steady output in the middle and late sections without fading will get the result they want.
Route Overview and Real Data Analysis
Let’s lay out the core data first. An average gradient of 4.9% isn’t intimidating for a trained rider, but the word “average” often deceives. Over 12 km, the gradient undulates with the terrain—some sections may sit at just 2–3%, while the inside of certain switchbacks can spike to 7–8%. The Category 3 rating is Strava’s difficulty tier weighted by “distance × average gradient,” indicating a climb that is “substantial but not elite”—an excellent training and challenge target for the average advanced rider.
Let’s run a few key conversions so you have a mental baseline while riding:
| Metric | Value | Notes |
|---|---|---|
| Total distance | 12.14 km | Equivalent to a standard long-climb training session |
| Total elevation gain | 861.4 m | Close to the vertical drop of a mid-sized mountain |
| Average gradient | 4.9% | Moderate intensity, tests sustained output |
| Average gain per km | Approx. 70.9 m | Baseline for estimating split times |
| Summit elevation | Approx. 1,200 m | Highland effects and temperature shifts cannot be ignored |
| Strava category | Category 3 | Mid-to-high difficulty long climb |
One variable that’s easy to overlook deserves special attention: elevation. With the summit near 1,200 m, temperatures at the top will be noticeably cooler than at the base, even in summer. For every 100 m of ascent, temperature drops roughly 0.6°C, which translates to the highland being 5–7°C cooler than the onsen town below. Add in the wind and fog that often roll across the highland, and the perceived temperature gap grows even larger. This directly affects pacing and gear choices, which we’ll cover in detail later.
Another concept worth establishing early is “power-based riding.” For a climb like this—around 5% and lasting nearly an hour—the best approach is to “hold a steady power output” rather than mashing by feel. If you have a power meter, target a safe percentage of your FTP (functional threshold power); chasing instantaneous speed is far more likely to blow you up in the later stages. No power meter? No problem—use heart rate and breathing rhythm as proxies to achieve the same steady-output effect.
Worth noting: on the Miyazaki Prefecture side, there’s another route to the same highland, roughly 14.2 km with an average gradient of 6.4%—clearly longer and steeper than this Kagoshita-side Ebino Skyline. These two routes are often compared: the Kagoshima side leans “long and steady,” while the Miyazaki side leans “long and hard.” If your goal this trip is a steady finish and enjoying the highland scenery, the Kagoshima side’s 12.14 km at 4.9% is the friendlier entry point; only if you’re chasing higher-intensity training stimulus should you consider the Miyazaki version. This article focuses on the classic Ebino Skyline on the Kagoshima side.
Let’s also give you an intuitive sense from a “power-to-weight ratio” perspective. A rider weighing 65 kg who can sustain 200 W has a power-to-weight ratio of about 3.08 W/kg; on a long climb around 5%, their theoretical cruising speed lands in the mid-to-upper range. Meanwhile, a beginner of the same weight who can only hold 150 W will naturally pace more conservatively. This is why this article keeps stressing “base your pace on your own sustainable output” rather than blindly following someone else’s speed—on a long climb, overreaching to match another rider is almost always how blow-ups begin.
Segment Strategy: Breaking 12 km into Five Sections
The most effective way to ride a long climb well is to “divide and conquer.” I suggest mentally splitting these 12.14 km into five segments, each with different tactical priorities. The actual road markers won’t align perfectly, but this mental framework will help you maintain rhythm and avoid the frustration of not seeing the summit.
Segment 1 (0–2.5 km): Warm-Up and Suppressing the Urge
This opening stretch is where the whole ride is most often lost. Fresh legs and surging adrenaline at the start lead many riders to unconsciously push cadence and power too high. Please suppress that urge. The task here is to warm up, letting your heart rate rise smoothly into the aerobic zone rather than diving straight into anaerobic effort. The ideal approach is to deliberately keep yourself “feeling like you have something left,” holding cadence between 75–85 rpm and starting at an intensity slightly below your target power.
If the gradient near the start is gentle, don’t rush to sprint on the big ring to grab a few seconds; treat it as a buffer zone to settle your breathing, confirm your nutrition placement, and check your shifting feel. The energy saved here will pay you back in the second half in the form of “not fading.” From a sports-physiology standpoint, your aerobic system is still “warming up” in the first 10 minutes; going too hard too early taps into glycolysis prematurely, accumulating lactate and effectively borrowing from your later reserves. Pro riders often look “unreasonably slow” at the start of a long climb—this is exactly why.
Segment 2 (2.5–5.5 km): Settling Into Rhythm
Past the warm-up, your body enters a steady state, and it’s time to raise power to your set cruising target. This stretch is usually the “main rhythm zone” of the route, with gradients mostly near the average—it’s where you bank time and open gaps on rivals.
The key word is “steady.” Use smooth pedaling to lock power in your target range, avoiding surges and lulls. On every slightly steeper pitch, shift down to preserve cadence rather than grinding a big gear. This “trade cadence for gradient” shifting philosophy keeps muscle load more even and delays lactate buildup. In practice, treat your 3-second power on the head unit as a live gauge: if the number creeps above the top of your target range, ease off or shift down; if it drops below the bottom, add a bit of force or shift up. By micro-adjusting this way and keeping the coefficient of variation as low as possible, you’re riding in the most efficient manner.
This segment is also a great time to establish a “breathing rhythm.” Try syncing your breath with your cadence—for example, take a deep exhale every few pedal strokes to regularize your diaphragm’s motion. When breathing has rhythm, heart rate stabilizes too, and you’ll find you can sustain higher output at the same oxygen cost.
Segment 3 (5.5–8 km): The Mid-Climb Endurance Test
This is the segment that determines success or failure. As you pass the halfway point and fatigue begins to accumulate, a psychological heaviness sets in—the feeling that “there’s still half to go.” The most common mistake here is “unintentional pace fade”—you think you’re maintaining your effort, but your power is quietly slipping downward.
The countermeasure is active monitoring. Periodically check your cadence and breathing rhythm; if you notice your cadence dropping, shift down a gear and pull it back up. This segment is also a good time to start your fueling rhythm: take small, regular sips of water and energy, rather than waiting until you’re thirsty or hungry—by then, it’s often already too late.
On the mental side, this segment is about learning to “narrow your focus.” Don’t keep thinking “there are still several kilometers to go”—that only magnifies the suffering. Bring your attention back to the short stretch of road ahead, the next corner, the next utility pole. Breaking a big goal into a series of small ones is a shared mindset among all endurance athletes. You can also count beats or hum a tune in your head—any technique that shifts your attention from “fatigue” to “rhythm” is worth trying.
Segment 4 (8–11 km): Wind and Cold Near the Plateau
As you climb past roughly 1,000 meters, you’ll clearly feel the air turn cooler and the wind pick up. This is a hallmark of highland routes, and a place where beginners are often caught off guard. The drop in temperature makes muscles stiffer, while strong winds can hinder your progress from the side or head-on.
The tactic for this segment is to “hold your core output and adapt to the environment.” When facing a headwind, shift down moderately and lower your profile to reduce wind resistance—maintain power rather than chasing speed. When you reach the area near Mount Iō, you may notice a distinct sulfur smell and see volcanic steam; this is proof that you’re riding through an active volcanic zone, and a signal to stay focused on the road. Don’t let curiosity distract you—keep your peripheral vision on the pavement and your strength on the pedals.
Another physiological effect of the altitude gain is “thinner air.” While 1,200 meters isn’t enough to cause noticeable altitude sickness, the slight drop in oxygen content will make you feel “a bit more breathless” at the same intensity. This is normal—don’t panic and disrupt your rhythm. Just ease off the pace slightly and let your breathing find its pattern again.
Segment 5 (11–12.14 km): The Final Sprint and Cool-Down
In the last kilometer or so, if you’ve paced yourself well, you should still have enough left to “empty the last fuel from the tank.” Depending on your condition, you can moderately increase the intensity here, releasing your reserved strength to sprint toward Ebino Kōgen. But remember: the prerequisite for sprinting is that you genuinely have energy left. If you’ve already spent everything in the earlier sections, forcing a sprint here will only lead to cramping or bonking before the finish.
After arriving at Ebino Kōgen, don’t stop and gasp immediately. First, shift down and spin gently for a few hundred meters to let your heart rate settle gradually. This “active cool-down” can greatly reduce post-ride discomfort. Once you’ve cooled down, find a safe place to park your bike, replenish fluids and calories, put on a warm layer, and take a moment to enjoy this highland embraced by volcanic lakes and mountain ridges—you’ve just earned it with your legs.
Gearing and Equipment Setup
Set up your gearing based on an average gradient of 4.9% and nearly an hour of sustained climbing, with the core principle of “protecting your cadence.” What you need is the ability to maintain at least 70 rpm on the steepest sections, not the misery of being dragged down by too-large gears until your cadence drops below 50 rpm. Grinding at low cadence not only hurts your knees but also depletes muscle glycogen faster—a cardinal sin on long climbs.
| Rider Level | Recommended Chainring | Recommended Cassette | Notes |
|---|---|---|---|
| Advanced/Racing | 50/34 Standard Compact | 11-30T or 11-32T | Sufficient leg strength to hold high output, but still needs a bailout gear for steep sections |
| General Enthusiast | 50/34 Compact | 11-32T or 11-34T | Most versatile combo, balancing cruising and steep climbs |
| Beginner/Endurance-Focused | 46/30 or 48/31 Sub-Compact | 11-34T and above | Pursues an easy rhythm with finishing as the goal |
Beyond gearing, several equipment details are worth noting:
- Wheels and Tire Pressure: This is a paved-road climb, so no off-road tires are needed. However, since the highland sections may have fallen leaves, volcanic debris, or moisture, don’t inflate to the maximum pressure—slightly lower pressure offers better grip and comfort. For common 25c or 28c road tires, a rider of average weight can set the pressure in the mid-range to balance rolling efficiency and cornering grip.
- Warm Layer: Because the summit is high and cold, even if the base of the mountain is hot, it’s recommended to carry a packable windbreaker or vest. The wind-chill effect is amplified by speed on the descent, and without a warm layer, hypothermia is a real risk. A lightweight windbreaker that fits in a rear pocket weighs almost nothing but is crucial for the safety of the return trip.
- Gloves and Eyewear: The strong highland winds and volcanic dust make a good pair of glasses practical; long-finger or short-finger gloves depend on the season. In winter or for early-morning starts, insulated long-finger gloves are nearly essential.
- Computer Data Fields: It’s recommended to set power (or heart rate), cadence, gradient, and elevation gained as your primary display fields—these are the numbers you truly need to watch on a long climb. Push “instant speed” down the priority list: on a climb, speed fluctuates wildly with the gradient, and staring at it will only make you anxious.
One more often-overlooked point: bike weight. On a climb like this, lasting nearly an hour, every kilogram saved from the total bike-and-gear weight will show up directly in your time. Before departing, check whether you’re carrying unnecessary accessories, whether your bottles are overfilled (if you can refill at the summit, there’s no need to haul two full bottles up), and whether your rear pockets are stuffed with unused items. Lightening up doesn’t require spending money on upgrades—starting with “removing the excess” is the most cost-effective weight loss.
Nutrition and Hydration Strategy
A climb lasting nearly an hour with 861 meters of elevation gain consumes a considerable amount of energy. The golden rule of fueling is “small amounts, regular intervals, in advance”—not waiting until your body sends out warning signals before scrambling to respond.
- Before Departure: Ensure sufficient carbohydrate stores from the previous night and breakfast. Finish your main meal 1–2 hours before riding, avoiding starting on an empty stomach or overly full. For breakfast, choose easily digestible carbs such as rice balls, toast, or bananas, so your glycogen stores are topped up at the start.
- During the Ride: Replenish carbohydrates every 20–30 minutes, whether from energy gels, bars, or bananas. Based on an estimated finish time of 50–70 minutes for this route, plan at least one to two fueling opportunities along the way. Keep your fuel in the most accessible spot (such as a top-tube bag or outer pocket) to minimize fumbling while riding.
- Hydration: The dry, cold highland air makes it easy to underestimate how much you’re sweating. It’s recommended to carry at least one bottle, or two in hot weather, and drink in small, regular sips during the climb rather than gulping it all at once. Consider adding electrolytes to prevent cramping. Cramping is often not simply dehydration—it’s electrolyte loss (especially sodium). After prolonged sweating, drinking only plain water can actually dilute blood sodium and make cramping more likely.
- Summit Refueling: Upon reaching Ebino Kōgen, this is a tourist area, usually with basic dining and rest facilities—a good place to replenish with hot food and drinks and recharge for the return trip (please check actual operating conditions on-site). There’s still a long descent ahead, so don’t let your guard down just because the climb is done. “Fill the tank” before heading back out.
Weather and Seasons: When Is the Best Time to Visit
Kirishima is a Geopark, and its volcanic terrain offers spectacular scenery, but it also brings weather variables that demand caution.
- Spring: Temperatures warm up and the mountain air is fresh, making it a very comfortable riding season, though you should still watch out for large temperature swings between morning and evening. Spring air on the plateau is clear, and visibility is often excellent.
- Summer: The foothills are hot, but the plateau is relatively cool, making it a great choice for climbing to escape the heat; however, afternoon thunderstorms are common in the mountains, so an early start is recommended. Be sure to apply sunscreen and stay hydrated in summer—UV radiation on the plateau is stronger than at lower elevations.
- Autumn: Kirishima’s autumn foliage is quite famous. With crisp autumn air and hillsides blanketed in color, it’s the most enjoyable season both visually and physically, which also means it’s a busier period. If you want to avoid the crowds, riding on weekdays or starting early in the morning will give you more breathing room.
- Winter: The plateau can see frost or even snow accumulation, and icy roads significantly raise safety risks. It’s not advisable for anyone without extensive experience to attempt it. Before any winter challenge, be sure to double-check road conditions and closure information.
Regardless of the season, always check the volcanic warning level before heading out. Around Mount Iō (Sulfur Mountain), road access can be affected by elevated warnings during certain periods due to volcanic activity. This is not something to take lightly—when roads are closed or volcanic gas concentrations are too high, safety always comes before the obsession with finishing the ride. This is the most unique and non-negotiable variable on this route, so put it at the very top of your pre-ride preparations. You’ll never go wrong with that.
Common Mistakes and DNF Risks
Even though the numbers don’t place this route at the extreme end of difficulty, plenty of riders still come undone here. These are the most common mistakes:
- Starting too hard: Getting caught up in the excitement early on and pushing power too high, only to blow up in the middle section and be forced to stop and rest, resulting in a worse overall time. This is the number one killer—almost everyone attempting a long climb for the first time makes this mistake.
- Gearing that’s too hard: Bringing only a race-oriented cassette like 11-25T means you’re forced to grind at low cadence on steep sections, quickly draining your knees and legs.
- Underestimating plateau temperatures: Not bringing a warm layer leads to shivering and poor bike handling from the cold at the summit and on descents, sometimes forcing an early end to the ride.
- Refueling too late: Waiting until you’re hungry or thirsty to eat and drink means your blood sugar and hydration are already depleted, leading to “hitting the wall” and sudden loss of muscle power.
- Ignoring the volcanic warning level: Going up without checking the warning level, only to find roads closed and the trip wasted, or accidentally riding into sections with high gas concentrations.
- Losing control on the descent: Focusing only on riding the climb well, then losing control on the way down due to strong plateau winds, corners, and numb hands. You need to get down safely, not just get up.
Avoid these six points and you’ll already be ahead of most first-timers. Points one and six deserve special emphasis: climb with pacing, descend with composure. If you don’t get these two right, even the best fitness can be undone by a single lapse in judgment.
Target Time References for Riders of Different Levels
The times below are conceptual references only. Actual performance is heavily influenced by fitness, weather, equipment, and how you feel on the day, so treat them as coordinates for self-positioning rather than hard standards.
| Rider Level | Approximate Finish Time | Average Speed Concept | Positioning |
|---|---|---|---|
| Competitive | ~40–48 min | Higher sustained output | Chasing rankings and PRs |
| Advanced enthusiast | ~50–60 min | Steady aerobic output | Finishing while enjoying the rhythm |
| General rider | ~60–75 min | Comfortable sustained output | Aiming to complete the challenge |
| Beginner/Endurance type | 75+ min | Conservative, relaxed pace | Safe finish, riding within your limits |
Here’s a practical self-check method: if you can complete the ride while maintaining the ability to hold a conversation (still able to speak in broken sentences without gasping for air), your pacing is conservative and safe; if you’re completely unable to speak by the middle section and can only gasp for air, you likely went out too hard and should hold back more next time. This “talk test” requires no equipment and is one of the oldest and most reliable methods of self-assessing intensity.
If you want a more scientific approach, you can measure your FTP on a trainer or a familiar long climb before the event, then use that to estimate the power range you can sustain on this route, which lets you work backward to a relatively accurate predicted time. But even without that data, as long as you follow the three-phase principle of “conservative at the start, steady in the middle, unleash at the end,” your performance will usually be solid.
Pre-Ride Checklist
Going through this checklist item by item the night before you leave will greatly reduce the odds of discovering problems only after you arrive:
- [ ] Volcanic warning level: Confirm that roads around Mount Iō / Ebino Kōgen are open and the warning level is safe.
- [ ] Weather forecast: Check the day’s plateau temperature, wind speed, and chance of rain, and prepare accordingly.
- [ ] Gearing check: Confirm your cassette has enough bailout gears for climbing (32T or higher recommended).
- [ ] Tire pressure and condition: Check tire pressure and inspect treads for cuts or debris.
- [ ] Brake system: The long descent on the way back demands a lot from your brakes—make sure brake pads and lever feel are in good working order.
- [ ] Nutrition prep: Energy gels/bars, plenty of water, and electrolytes ready.
- [ ] Warm layer: A windbreaker or vest stowed in your pocket to handle plateau cold and wind chill on descents.
- [ ] Computer battery and data fields: Fully charged, with power/heart rate/gradient displays set up.
- [ ] Transport logistics: Confirm the route and timing from Kagoshima Airport (about 25 km from the climb start, bike-friendly) or your accommodation to the start point.
- [ ] Emergency contacts and location sharing: Phone fully charged, local emergency numbers saved. Cell signal can be unreliable in the mountains, so let your riding companions know your planned route and estimated time.
Work through this checklist and you’ll have all the controllable variables covered. The rest is up to your legs and this volcano-embraced plateau. Ride steady, climb smooth, and descend safe—when you stand atop Ebino Kōgen and look back at the long climb you just conquered, you’ll understand that every one of those 861 meters of elevation gain was worth it.
Related Reading
- Riding into Myth and Volcano: A Ride Report from Ebino Kōgen, a Highland Pilgrimage Through the Kirishima Mountain Range
- Bandai-Azuma Skyline (Takayu Onsen Side) Practical Guide: Segment-by-Segment Pacing and Gearing Breakdown for 13.9 km with 824 m of Climbing
- Hachimantai Aspite Line (Iwate Side) Complete Guide: Data Analysis of a 19 km, 1,083 m Elevation Gain Volcanic Sky Corridor Climb
- Nikkō Irohazaka Practical Guide: Segment-by-Segment Pacing and Gearing Breakdown for 7.1 km with 394 m of Climbing
台北闊瀨陡坡 騎旅 / 日本單車雜誌編輯車友臨時加入!/ 髮香才是最強的 / feat. 北迴歸線小隊 / 公路車 CT Yeh
6 個月前
#公路車 #西進武嶺 配速配瓦實驗 坡度分析 四小時內攻略 建大盃 NeverStop #西進武嶺攻略
6 年前
單車 梅山36灣 坡度介紹 路段介紹 空拍 (相關遊記影片,請參考說明或我的頻道喔,歡迎訂閱)
6 年前
大武山20%魔王陡坡【JJSC南台灣遊騎Day2】!屁股真的要裂開了...凡士林抹滿也沒用?神秘金教堂還有超便宜夜市
3 個月前
半日 小台灣 極限單車路線挑戰實錄
7 年前
西進武嶺 8000名單車友數據分析 PART1 | 從新手到高手數量/瓦數/推力比/FTP推力比/功率計使用率 大解析 | 公路車 | CTYeh
5 年前
2025 乘鞍岳登山賽 比賽全紀錄篇 / 完整路線攻略介紹 / 日本版武嶺 公路最高點 / 高山空拍絕景 / 明年會開團! / 公路車 / CT Yeh
10 個月前
大武山後門26%歡樂陡坡!JJSC南台灣單車行Day2 / 被颱風追著跑 / 公路車 / CT Yeh
2 年前