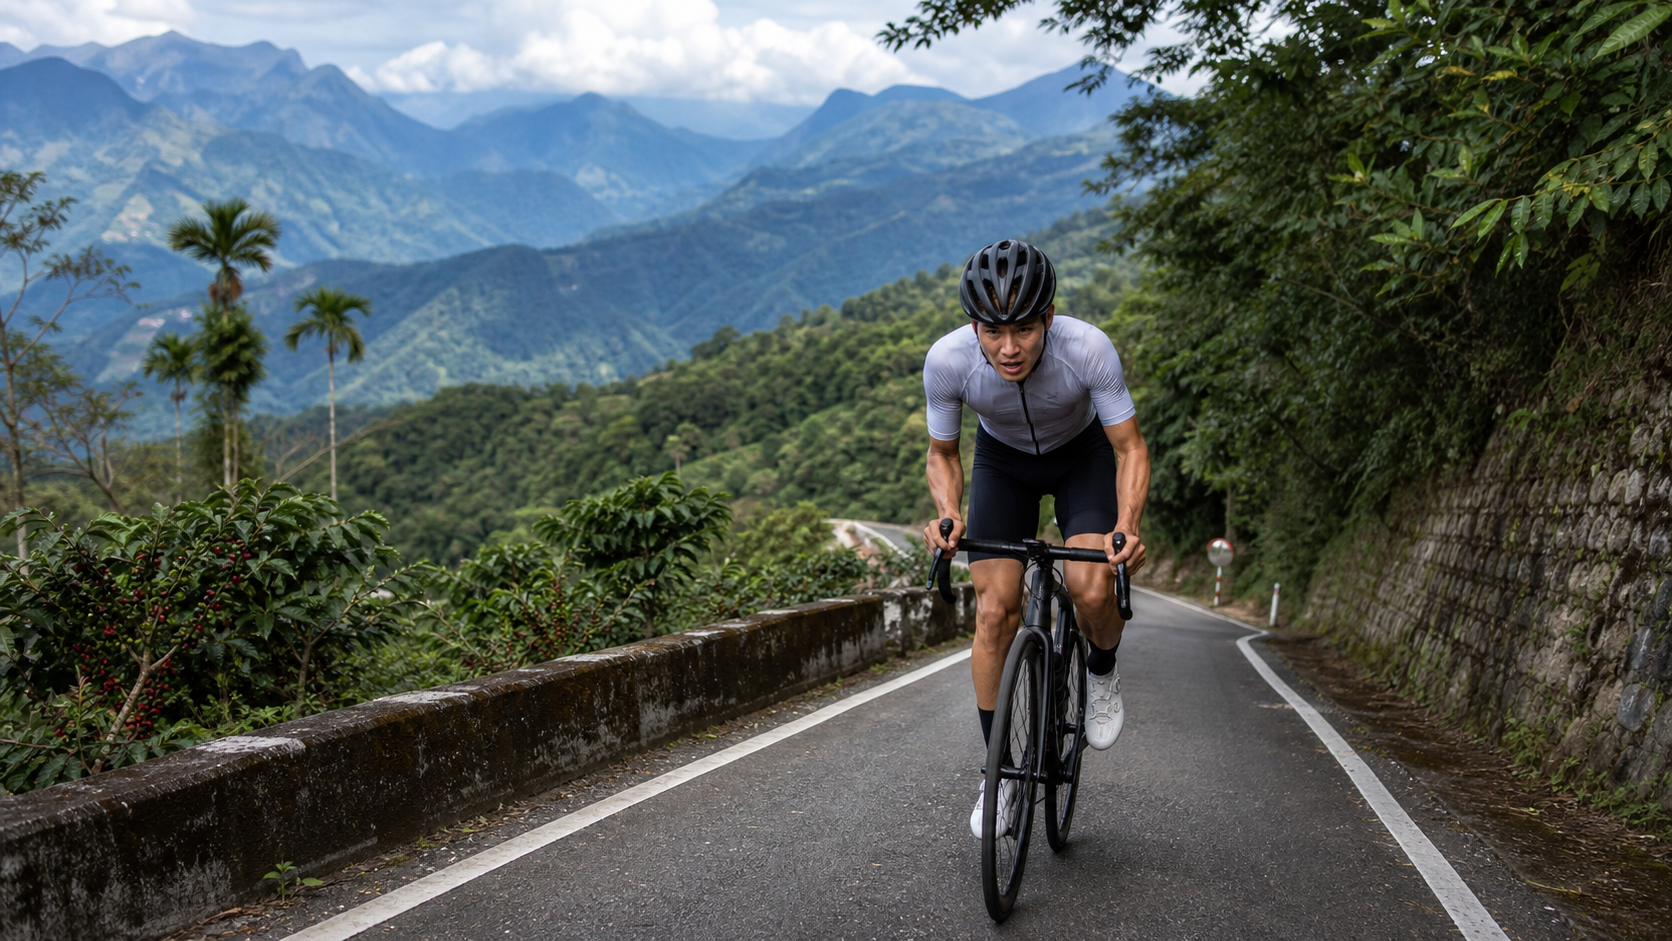
Guoxing Demon Slope: The Complete Guide to the 8.1% Brutal Climb in Taiwan’s Coffee Homeland
Hidden among the mountains of Nantou County’s Guoxing Township lies a climb that strikes fear into cyclists’ hearts, yet keeps drawing them back for more. It has no official name—riders simply call it the “Demon Slope” (Mówáng Pō)—and that nickname alone says everything about how tough it is.
Let’s lay out the numbers first: total length 5,705.6 meters (approximately 5.71 km), cumulative elevation gain 467.6 meters, average gradient of 8.1%, and a Strava rating of Category 3. Note the key word here: “average” 8.1%. A road that can hold an average gradient of 8.1% means there is almost no flat section to catch your breath, and there must be sections exceeding 10% or even steeper—the true “demon” segments. This is not a warm-up climb for beginners; this is a proving ground for prepared riders to test their strength.
In this article, we’ll break down the Demon Slope from every angle with an engineer’s precision—how the gradient is distributed across segments, how to set up your gearing, how to pace yourself, how to plan hydration and nutrition, and how to avoid a DNF on the steep pitches. Whether you’re looking to collect this brutal climb as a finisher or want to use it to build your climbing ability as an advanced rider, after reading this, you’ll know exactly what strategy to bring to take on this “demon.”
Route Overview and Real Data Analysis
First, let’s build a complete picture of the road. The core parameters of the Demon Slope are as follows:
| Parameter | Value | Notes |
|---|---|---|
| Total Distance | 5,705.6 meters (5.71 km) | Short climb, but extremely intense |
| Total Elevation Gain | 467.6 meters | Nearly 470 meters of dense climbing |
| Average Gradient | 8.1% | Brutal intensity; sections exceeding 10% guaranteed |
| Strava Rating | Category 3 | Requires light gearing and solid climbing fitness |
| Location | Guoxing Township, Nantou County | Major coffee-producing area in Taiwan; mountainous terrain |
The 8.1% average gradient is the true “demon” attribute of this road. Let’s put that number into physical context. For a rider weighing approximately 80 kilograms with bike, riding at 10 km/h on an 8.1% gradient, the power required just to overcome gravity is close to 180 watts. Add rolling resistance and drivetrain losses, and your actual pedaling output typically lands around 200 watts. When the road hits the 10%+ demon sections, at the same speed, the power demand jumps to over 220 watts. That’s why many riders suddenly “hit a wall” on this road—it’s not that they don’t want to pedal; it’s that the gradient gets so steep your gearing and power output can’t keep up, and your speed drops to the point where you’re barely holding your balance.
Even more critical: the Demon Slope is only 5.71 km long, yet gains 467.6 meters. This kind of “short but dense” climbing means you don’t have much time to gradually adjust your pace—you must enter combat mode from the very start. Unlike 20-kilometer long climbs that offer enough buffer to correct pacing mistakes, the Demon Slope has very little margin for error—if you blow up in the early section, there’s almost no chance of recovery on the steeper pitches ahead.
Segment-by-Segment Strategy: Breaking 5.71 km into Four Sections
The core strategy for a short climb is “start conservatively, save energy for the steep sections.” Here’s my recommended four-segment approach.
Segment 1 (0–1.4 km): The Restrained Start Zone—Absolutely No Sprinting
The gradient at the entrance of the Demon Slope is roughly 6% to 7.5%, which by this road’s standards counts as “relatively mild.” But precisely because it’s mild, this is where the biggest mistakes happen. Your legs are fresh, adrenaline is surging, and many riders instinctively accelerate the moment they hit the climb—this is a fatal error. On this segment, deliberately hold your power at 80% to 85% of FTP, stay seated, and maintain a cadence of 75 to 85 rpm, smoothly transitioning your body from rest into an aerobic climbing state. Remember: every ounce of energy saved here is life-saving capital for the demon sections ahead.
Segment 2 (1.4–3.2 km): The Gradient Stacking Zone—Hold the Sweet Spot
Past the start section, the gradient gradually ramps up, entering a sustained climb of 8% to 9%. This is the critical zone that determines your final time. The goal is to stabilize your power in the sweet spot range of 87% to 92% of FTP. Your cadence may naturally drop to around 70 rpm here—that’s normal, so don’t force yourself into the easiest gear and start spinning. Stay seated, keep your breathing steady, and focus on “sustaining” rather than “accelerating.” The psychological challenge of this segment is that it “feels endless”—the gradient stays relentlessly high, and you’ll start doubting how much longer you can hold on. Trust your pacing discipline at this moment; just hold steady.
Segment 3 (3.2–4.6 km): The Demon Revealed Zone—A Battle of Gearing and Willpower
This is where the “Demon Slope” earns its name. This segment features the steepest sections of the entire climb, with gradients potentially reaching 10%, 11%, or even higher. All the energy you saved in the first two segments gets cashed in here. Facing this kind of steepness, the strategy is crystal clear:
First, shift to your easiest gear without hesitation. This is not the time for stubborn pride. A 34/34 or lighter gear combination exists precisely for this moment.
Second, keep your cadence from dropping below 55 to 60 rpm. Below that cadence, you’re muscling the pedals with brute force, putting massive strain on your knees, and you’ll exhaust yourself quickly.
Third, use the “zigzag” climbing technique wisely. When you’ve confirmed there’s no oncoming traffic and the road is wide enough, riding a gentle S-line across the road can effectively reduce the actual gradient you’re climbing—an old-school tactic for tackling ultra-steep sections. But safety is the absolute priority; watch for traffic and blind spots.
Fourth, deliberately deepen your breathing rhythm and lengthen your exhales, engage your core, and grind your way up one revolution at a time. This segment tests not just your fitness, but your willpower.
Segment 4 (4.6–5.71 km): The Final Stretch—Empty the Tank
After surviving the demon section, the final kilometer or so typically eases slightly (though it’s still far from easy). If you’ve managed your energy well, this is the moment to unleash your reserves—you can stand up and sprint, pushing higher output to power through the remaining climb. But if you’re already running on fumes, treat this segment as “keep moving forward and finish safely.” Don’t push beyond your limits; reaching the summit safely is what matters most.
Gearing and Equipment: Light Gearing Is Not Optional, It’s Essential
Facing an 8.1% average gradient and a demon section exceeding 10%, the importance of gear configuration cannot be overstated. Here are recommendations for riders of different levels:
| Rider Level | Chainring | Cassette | Notes |
|---|---|---|---|
| Advanced Beginner | 50/34 (Compact) | 11-34T | 34T is the minimum guarantee for the demon section; highly recommended |
| Intermediate Rider | 50/34 | 11-32T or 11-34T | Go straight to 34T; extra margin means extra peace of mind |
| Competitive Rider | 52/36 | 11-34T | Even with sufficient power, 34T can save you on steep sections |
On a route like Demon Slope, my stance is very clear: the largest cog on your cassette must be 34T. This isn’t laziness; it’s smart riding. At the easiest gear of 34/34, one full crank revolution moves you forward only about 2.1 meters, allowing you to maintain a cadence above 55 rpm even on gradients exceeding 10%. This spreads the effort across more pedal strokes, protecting your knees and delaying exhaustion through a “high cadence, low torque” approach. Conversely, if you stubbornly tackle the demon section with a 30T or even 28T cog, you’ll likely be forced into grinding at a low 40 rpm with high torque—your knees and lungs will both be in trouble within a few hundred meters.
Regarding equipment, Guoxing is mountainous, with varied conditions on industrial and mountain roads—expect gravel, fallen leaves, potholes, and damp moss. Tires of 25C or wider, even 28C, are recommended, with slightly lower pressure than on flat roads to increase grip and cornering confidence. Since this is a mountain route with scarce resupply points, be sure to carry a complete repair kit, spare tubes, a pump, and confirm your phone has sufficient battery and signal.
Nutrition and Hydration: Short but Intense Climbs Demand Care
Although Demon Slope is only 5.71 kilometers, the intensity is extreme, so nutrition and hydration cannot be neglected. On a high-intensity climb, even over a short distance, your body’s energy expenditure and sweat loss are considerable.
Consume an adequate amount of carbohydrates (banana, rice ball, energy bar) 1 to 2 hours before departure to ensure sufficient glycogen stores. 30 minutes before the climb, take in about 500 ml of electrolyte sports drink. Carry at least one large bottle of water (750 ml or more) on the bike, and add another bottle during summer heat.
Given the short distance, solid food isn’t necessary during the ride. However, if you plan to use Demon Slope as a repeat training venue, climbing it several times a day, you should plan nutrition as you would for a long ride—carry energy gels or food and ensure proper hydration and sugar intake between repeats. Guoxing Township is an important coffee-producing region in Taiwan, with coffee estates and farm products at the foot of the mountain. A locally brewed pour-over after the ride is both recovery and reward.
Weather and Seasons: When to Go
Located in the mountainous northwest of Nantou, Guoxing Township is rideable year-round, but seasons differ noticeably:
- Spring (March–May): Pleasant weather and lush greenery make this the most recommended riding season, though watch for afternoon thundershowers.
- Summer (June–August): Midday heat is intense; starting at dawn is strongly advised. Some mountain sections offer shade, but guard against heatstroke and dehydration.
- Autumn (September–November): Stable weather and clear air make this the golden season for chasing PRs and enjoying mountain views.
- Winter (December–February): Cool and dry, ideal for riders who dislike heat, but be mindful of temperature swings between day and night and staying warm on descents.
Be extremely cautious after rain. Mountain roads can have slippery leaves and moss after rainfall; a slip on the 10%+ demon section could be disastrous. Whether climbing or descending, err on the side of caution after rain.
Common Mistakes and DNF Risks
The DNF rate on Demon Slope is not low compared to similar routes. Here are the most common errors:
Mistake One: Starting too hard. Charging hard on the gentler first 1.4 kilometers causes lactate to build up early, leading to complete exhaustion and stopping when the demon section appears in the third segment. This is the most classic way to fail.
Mistake Two: Gearing too heavy. Having a 34T but not using it, or only having a 28T or 30T installed, causes cadence to drop below 40 rpm on 10%+ sections, resulting in knee pain, maxed-out lungs, and being forced to dismount and walk.
Mistake Three: Underestimating the demon section. Not doing homework and not knowing about the ultra-steep middle section means the sudden gradient spike catches you mentally off guard, and your morale collapses instantly.
Mistake Four: Insufficient hydration. Thinking “it’s only 5.7 kilometers” and neglecting fluids, combined with high intensity and summer heat, leads to dehydration and cramping halfway up.
DNFs on Demon Slope usually aren’t due to insufficient fitness, but rather a combination of “pacing errors + wrong gearing + inadequate mental preparation.” As long as you start conservatively, have light gearing ready, and know what to expect from the demon section, the vast majority of advanced-beginner riders and above can conquer it successfully.
Target Time References for Different Rider Levels
Below are reference times for completing the 5.71-kilometer Demon Slope by rider level:
| Rider Level | Power-to-Weight Ratio (W/kg) | Estimated Finish Time | Average Speed |
|---|---|---|---|
| Advanced Beginner | 2.0 – 2.5 | Approx. 38 – 48 min | 7 – 9 km/h |
| Intermediate Rider | 2.5 – 3.2 | Approx. 28 – 36 min | 9.5 – 12 km/h |
| Experienced Rider | 3.2 – 4.0 | Approx. 22 – 27 min | 12.5 – 15.5 km/h |
| Competitive Elite | 4.0+ | Under 22 min | Above 15.5 km/h |
For your first attempt at Demon Slope, make “finishing” rather than “time” your goal. With an 8.1% average gradient plus the demon section, pacing discipline is paramount. On the first try, focus on learning where the steep sections are and how your body responds at limit intensity. Save the time trials for your second and third attempts—it’s safer and more rewarding.
Pre-Ride Checklist
Go through each item before departure to minimize risk:
- ☐ Bike Check: Sufficient brake pads, smooth shifting, lubed chain, correct tire pressure, and quick-release/thru-axle tightened.
- ☐ Gearing Confirmation: The largest cassette cog must be 34T—it’s your lifeline on the demon section.
- ☐ Repair Kit: Spare tube, tire levers, inflation tool, and patches—rescue is inconvenient in the mountains.
- ☐ Hydration & Nutrition: At least one large water bottle plus electrolytes, with an extra bottle in summer.
- ☐ Sun & Cold Protection: Sunscreen, arm warmers, and a windbreaker for descents.
- ☐ Offline Navigation: Download the GPX track; some mountain sections have poor signal.
- ☐ Emergency Contact: Inform family or friends of your itinerary, keep your phone fully charged, and bring a power bank.
- ☐ Physical Condition: Well-rested, normal diet, and free from colds or excessive fatigue.
Advanced Tips: Using Demon Slope as a Climbing Training Ground
Demon Slope’s short, steep, and dense characteristics make it an excellent climbing training venue. If you live close enough or are willing to make the trip, here’s how to structure your training:
Repeat Climb Intervals. With a single ascent of only 5.71 kilometers and a fast descent, you can treat Demon Slope as a “natural interval trainer.” Climb it 3 to 4 times a day, going all out on each ascent, using the descents as recovery between efforts. This workout is highly effective for boosting FTP and climbing endurance.
Target Steep-Section Technique. Focus on the middle demon section and repeatedly practice your low-cadence pedaling, switchback line choices, and the timing of transitions between seated and standing climbs. Master the hardest part, and every other climb becomes manageable.
Power Zone Calibration. Bring a power meter and use Demon Slope as a calibration ground for your FTP and sweet spot zones. Through repeated data collection, you’ll gain a deeper understanding of your true power output on steep gradients.
Deep Dive into Pedaling Technique: How to Climb Steep Slopes Without Blowing Up
On a “Demon King” climb like this, where gradients routinely exceed 10%, pedaling technique matters even more than raw fitness. At the same power output, a skilled pedaler saves energy, while an unskilled one blows up early. Here are the key technical points.
Seated climbing as the primary mode, standing as a supplement. On sustained gradients of 8% to 9%, seated pedaling allows you to consistently engage large muscle groups like the glutes and quadriceps, relying primarily on aerobic metabolism, which delays lactic acid buildup. When seated, shift your hips slightly back, keep your upper body relaxed, and maintain core tension. While standing can generate a burst of higher torque, it consumes more oxygen and spikes your heart rate quickly. Reserve it for moments when the gradient exceeds 10%, or when your seated muscles are fatigued and you need a “change of pace.” During the entire Demon King climb, standing time should not exceed 20% of the total time; rely on seated pedaling to maintain the rhythm for the rest.
Pedal in circles, don’t just push down. Many riders only push down hard on steep climbs, neglecting the other quadrants of the pedal stroke. The ideal pedaling motion is like “scraping mud off the bottom of your shoe”—at the bottom dead center, pull your foot back, then smoothly lift it up, creating continuous and fluid power. This is especially crucial at the low cadences of steep climbs, as it minimizes power gaps and speed fluctuations caused by the “dead spots” in the pedal stroke.
Core stability at low cadence. When the gradient forces your cadence down to 55 to 60 rpm, the torque from each pedal stroke is immense. At this point, core stability is the key to efficiency. If your core wobbles, power leaks out through your hips; if your core is stable, power transmits fully to the pedals. So on the Demon King section, it’s not just your legs that need to work—your stomach and lower back need to be “braced” too.
The Discipline of Dual Meters: Heart Rate and Power
If you wear a heart rate strap and a power meter, the Demon King climb is the perfect exam for your “pacing discipline.”
Use the power meter as your primary gauge. Power readings are more immediate than heart rate when climbing. Set your screen to display “3-second average power” to avoid being misled by momentary spikes, and follow the four-stage strategy to keep your power within the corresponding FTP percentage. On the Demon King section, brief surges above FTP are allowed, but be aware that you’re “burning matches”—each match burned is gone, so don’t use them all up before you reach the steepest part.
Use heart rate as a safety valve. Heart rate responds more slowly, but it’s the true signal of your body’s fatigue. If you notice your heart rate drifting upward at the same power output, it means you’re accumulating fatigue or dehydration, and you should lower your target power accordingly. Generally, during the Demon King climb, intermediate and advanced riders should keep their heart rate between 85% and 92% of their maximum, only briefly touching 95% or higher in the final section.
If you don’t have a power meter, use the “talk test”: at the correct sweet-spot intensity, you should only be able to speak in short, broken sentences. If you can’t even get out single words, that’s a warning sign that the intensity is too high and you need to slow down.
Training Directions to Prepare for the Demon King Climb
If your current fitness isn’t yet ready to handle the 8.1% Demon King climb with ease, don’t rush into it. A gradual, progressive approach is better.
Build an aerobic base. Do 1 to 2 longer rides per week at moderate to low intensity for 60 to 90 minutes to solidify your cardiovascular foundation. This is the bedrock of all climbing ability.
Sweet spot intervals. On a trainer or a gentle slope, ride at 88% to 94% of FTP for 8 to 12 minutes, rest for 3 to 5 minutes, and repeat for 3 to 4 sets. This intensity corresponds exactly to the demands of the second section of the Demon King climb; with practice, climbing will become noticeably easier.
Specific steep-climb simulation. Find a short, steep hill with a gradient close to or exceeding that of the Demon King climb, and repeatedly practice low-cadence pedaling and transitions between seated and standing positions to simulate the real feel of the Demon King section. If you’ve practiced the hardest scenario, you’ll have confidence when you face the real challenge.
Manage your power-to-weight ratio. Climbing is a battle against gravity, and your power-to-weight ratio (W/kg) is the core determinant of climbing speed. Moderately managing your weight without sacrificing strength will allow you to climb faster and more easily at the same power output. This is also why the Demon King climb is so “sensitive” to weight—every extra kilogram is a real burden on an 8.1% gradient.
Downhill Safety Reminders
Getting to the top is only half the journey; getting down safely completes the ride. The Demon King climb is on a mountain road, and the risks on the descent are even higher than on the ascent:
First, prioritize speed control. With many curves, blind spots, and the possibility of oncoming traffic and farm vehicles, you must keep your speed at a level where you can “stop within your visible range at any time.”
Second, feather the brakes to dissipate heat. On long, steep descents, don’t drag your brakes constantly, as this can overheat your rims or discs. Use intermittent, pulsing braking instead.
Third, body position and vision in corners. Put your outside pedal down at the bottom dead center, look toward the corner exit, and slow down well in advance for corners with wet leaves.
Fourth, stay warm at the summit. After climbing nearly 470 meters, it’s cooler at the top, and the wind on the descent will make it feel even colder. Be sure to put on a windbreaker before descending to avoid hypothermia affecting your control.
Quick Q&A on Common Questions
Q: Is the Demon King climb suitable for a road bike?
A: Yes, it’s a paved road, not an off-road trail. But you definitely need a light gear ratio (34T rear cassette), and tires of 25C to 28C are recommended. A gravel bike is also a great choice, offering comfort and versatility for varying road conditions and steep gradients.
Q: Can a beginner take on the Demon King climb?
A: For a complete beginner, an 8.1% average gradient with sections over 10% is indeed quite tough and could be discouraging. It’s advisable to first gain experience on gentler intermediate climbs, practice your climbing pedal stroke and pacing, and then come back to challenge it. If you do decide to try it, make sure you have a 34T cassette, take a slow pace, don’t chase a time, and be mentally prepared for the possibility of having to get off and walk.
Q: How many times can you climb it in a day?
A: Because the distance is short and the descent is fast, fit riders can use the Demon King climb as a repeat training ground, climbing it 3 to 4 times a day for climbing intervals. This is one of its major advantages as a training route.
Q: Do you need a mountain entry permit?
A: The Demon King climb is on a regular mountain road and farm access road, not a restricted entry area, so no permit is needed. However, please respect the local residents and farmers—slow down when passing through farmland and settlements, be careful, and don’t litter.
Turn Every Climb into Data
Here’s a suggestion for serious riders: record the data from every Demon King climb—segment times, average power, heart rate curve, and the day’s temperature and wind direction. Once you’ve accumulated several data points, you’ll clearly see your progress: the same finish time with a lower heart rate, or the same heart rate with higher power. These numbers don’t lie; they are the most honest testament to your training effectiveness. The short, intense nature of the Demon King climb makes it the perfect vehicle for this “quantified self” training philosophy—short enough to repeat and control variables, steep enough to make every data point meaningful. That’s why I wholeheartedly recommend this “Demon King” to every rider who seriously wants to get stronger.
Conclusion: Conquer the Demon, and Know Yourself
The Guoxing Demon King climb is not a friendly road. It’s short, it’s steep, and it will make you painfully question your life choices in the middle section where the Demon King reveals itself. But it’s precisely this uncompromising, hardcore difficulty that makes the sense of accomplishment from conquering it so real.
An 8.1% average gradient, nearly 470 meters of dense climbing, and Demon King sections exceeding 10%—these numbers constitute a comprehensive test of your fitness, gear ratios, and mental toughness. When you follow the strategy of a conservative start and saving energy for the steep sections, grinding your way up to the summit one pedal stroke at a time, you conquer not just this climb, but also the version of yourself that wanted to give up on the steep slopes.
So, get your 34T ready, do your homework, find a cool morning, and go meet this “Demon King” that reigns over Taiwan’s coffee homeland. It will be tough, but it will be worth it. And when you reach the top, don’t forget to head down to the town for a cup of locally brewed Guoxing pour-over coffee, ending this hard-fought battle with the most aromatic finish.
Related Reading
- Coffee, Hot Springs, and the Memory of an Earthquake: A Deep Slow Ride on the Guoxing Demon King Climb
- Datun Mountain Aids Station Practical Guide: 17km, 1465m of Climbing, A Complete Analysis of Northern Taiwan’s Toughest Demon King Climb
- Zhongliao Erjian Mountain Guide: A Complete Analysis of Nantou’s 7.3% Hardcore Hidden Gem Climb in the Tea Hills
- Luye Songlin Practical Guide: How to Ride the Short, Explosive 3.8km Climb with Sections Exceeding 20%
台北闊瀨陡坡 騎旅 / 日本單車雜誌編輯車友臨時加入!/ 髮香才是最強的 / feat. 北迴歸線小隊 / 公路車 CT Yeh
6 個月前
爬坡ITT實境)台中 魔王 松鼠坡 首航 6:12 大肚山 大三元 科福路
8 年前
大武山20%魔王陡坡【JJSC南台灣遊騎Day2】!屁股真的要裂開了...凡士林抹滿也沒用?神秘金教堂還有超便宜夜市
3 個月前
大武山後門26%歡樂陡坡!JJSC南台灣單車行Day2 / 被颱風追著跑 / 公路車 / CT Yeh
2 年前
新竹羅平 x 天湖部落 大禹嶺級變態陡坡! 4K超高畫質 空拍 | 公路車
5 年前
萬年峽谷! 30% 超激陡坡 里佳部落DAY2 還是很硬! | 公路車 | CT Yeh
3 年前
台中大雪山 膏王領騎 震到都沒畫面了 公路車
5 年前
里佳部落魔王陡坡,被小黑無情欺負 #公路車
9 個月前