Tataka New Central Cross-Island Highway Climb Complete Guide: Data Analysis of Taiwan's Summit Challenge — 70km with 2,517m of Elevation Gain
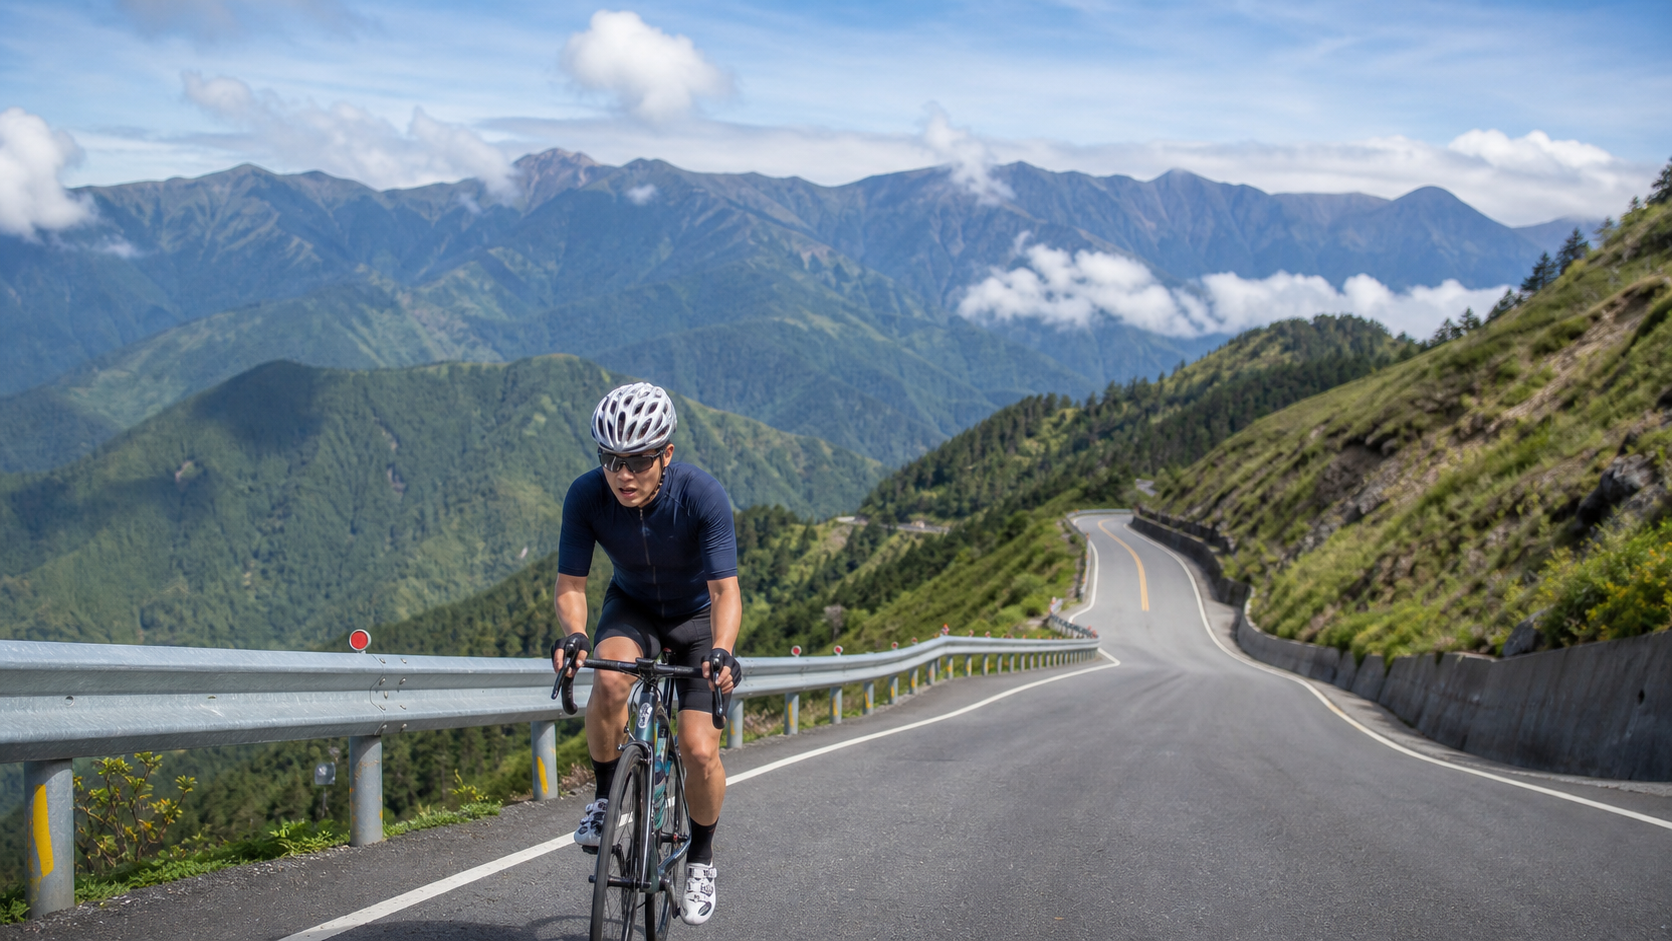
Tataka, meaning “land of the broad grassy plateau” in the Tsou language, sits at an elevation of 2,610 meters. It is the highest point on the New Central Cross-Mountain Highway and the junction of Provincial Highway 18 (Chiayi–Yushan section) and Provincial Highway 21 (Shuili–Yushan section), quietly nestled within Yushan National Park. For Taiwan’s long-distance climbing enthusiasts, this route climbing all the way from Shuili to Tataka is a comprehensive test of physical endurance, pacing strategy, and the ability to adapt to high altitude.
This article takes an engineering, data-driven approach, breaking down this 70.28 km route with 2,517.8 meters of total elevation gain and an average gradient of 3.3% into an executable segment-by-segment plan. Please note that the figure “average gradient of 3.3%” is highly misleading—it is a result diluted by the relatively gentle early sections. The real difficulty is concentrated in the final 20 kilometers, where the gradient noticeably steepens. If your pacing gets out of control there, the fatigue accumulated earlier will be mercilessly amplified at elevations above 2,000 meters.
1. Route Overview and Core Data
Let’s put the “certain numbers” up front first, because all subsequent strategies are built on these figures.
| Item | Data | Notes |
|---|---|---|
| Total Distance | 70,280.1 meters (approx. 70.28 km) | One-way, Shuili → Tataka direction |
| Total Elevation Gain | 2,517.8 meters | Cumulative gain, not net gain |
| Average Gradient | 3.3% | A figure averaged over a long distance; limited reference value |
| Maximum Elevation | 2,610 meters | Tataka Saddle |
| Strava Category | Category 5 | Long-distance, high-gain rating |
| Primary Tags | Tataka, Central Mountain Range, Alishan | Geographic positioning |
Why is the average gradient misleading? Using the simplest arithmetic: 2,517.8 meters of gain divided by 70,280 meters of distance gives an average of about 3.58%. But this road does not rise at a constant gradient. It includes the relatively gentle river valley section around Xinyi Township, the gradual transition slopes of Heshe and Dongpu, and finally the truly teeth-gritting steep section from Upper Dongpu to Tataka. The real riding sensation is “gentle at first, steep later.” Summarizing the difficulty of the entire route with a single average is as misleading as describing the difficulty of a marathon by its average pace.
An engineer’s reminder: Don’t let the “average 3.3%” tempt you into pushing hard in the early sections. This road doesn’t punish you for “not being fast enough”—it punishes you for “being fast too early.” Treat your energy as a finite budget; the final 20 kilometers are where you truly pay the bill.
2. Terrain Segmentation and Section-by-Section Strategy
I’ve divided the entire route into five functional segments. The goal for each segment is not “how fast to ride” but “using the appropriate pedaling cadence and gear ratio to keep your heart rate in the zone that segment calls for.”
Segment 1: Shuili–Xinyi (Warm-up River Valley, approx. 0–18 km)
This section climbs gently along the Chenyoulan River valley, with gradients mostly between 2–4%. It is the most “friendly” part of the entire route. But friendly doesn’t mean you can let loose.
- Pedaling Cadence: Maintain a high cadence of 90–95 rpm, using a light gear to warm up your legs under low resistance.
- Heart Rate Control: Be sure to keep it in the aerobic zone (approximately 65–75% of max heart rate). If your heart rate spikes to threshold levels here, it means your condition is off today, or your pacing strategy needs to be reassessed.
- Gear Ratio Suggestion: Use the small chainring up front (34T on a compact or semi-compact crank), with the rear cassette in the middle range (e.g., 15–19T), saving the lighter gears for later.
- Mental Positioning: Treat these 18 kilometers as “free warm-up”—the more energy you save, the better. Xinyi Township is famous for plums, grapes, and tea, and the river valley scenery is pleasant, but don’t let the views cause you to unconsciously speed up.
Segment 2: Xinyi–Heshe (Gradual Transition, approx. 18–35 km)
The gradient begins to gradually increase to 3–5%, and the route officially enters the mountain transition zone. The key to this segment is “establishing a sustainable rhythm.”
- Pedaling Cadence: Slightly reduce cadence to 80–88 rpm, but still maintain smooth pedaling to avoid dead spots.
- Pacing Strategy: Use “being able to speak a full sentence” as a self-check for intensity—if you can only utter fragmented single words, the intensity is too high, and you should shift to an easier gear and back off.
- Refueling Point: The Heshe area is an important refueling and psychological milestone. Be sure to take in solid carbohydrates and water here, because the road ahead will offer fewer natural excuses to stop.
Segment 3: Heshe–Dongpu/Upper Dongpu (Intensity Climb, approx. 35–50 km)
The gradient further increases to 5–7%, elevation begins to rise noticeably, and the oxygen content in the air decreases accordingly. This is the critical transition “from aerobic toward the edge of the lactate threshold.”
- Gear Ratio: At this point, the rear cassette should start moving toward larger cogs (e.g., 25–28T) to protect your knees and maintain cadence.
- Pedaling: Allow cadence to drop further to 75–82 rpm, but never grind below 70 rpm on a heavy gear—that’s a knee killer and a precursor to cramping.
- Altitude Awareness: Past 1,500 meters, you’ll begin to “feel” the altitude. At the same power output, your heart rate will be higher than at sea level. This is a normal physiological response—don’t panic and speed up to “make up time.”
Segment 4: Upper Dongpu–Husband-and-Wife Trees–Yushan Trailhead (High-Altitude Hard Climb, approx. 50–65 km)
This is the most difficult core section of the entire route, with gradients fluctuating between 7–10% and elevation pushing past 2,000 meters toward 2,500 meters. The famous Husband-and-Wife Trees (a landmark of dead standing trees) are located in this area—those two upright dead trees often serve as a mental anchor for riders when oxygen is thin and legs feel like lead.
- Pacing Iron Rule: Here, your power output should be “actively discounted” by 10–15% compared to the same gradient at sea level. Above 2,000 meters, your VO2 max has already significantly declined; pushing through will only cause you to hit the wall early.
- Gear Ratio: Without hesitation, use your lightest gear combination (e.g., 34T × 32T or lighter, at or below 1:1). Climbing isn’t about who uses the heaviest gear—it’s about who can keep the pedals turning.
- Cramp Defense Line: This section is where cramping is most likely. Beyond gear ratio and cadence, electrolyte intake must be proactive—don’t wait until you cramp to replenish; by then it’s too late.
- Mental Management: Shift your focus from “how much farther” to “the next corner.” High-altitude hard climbs consume willpower the most; break the big goal into small 50-meter targets.
Segment 5: Yushan Trailhead–Tataka Saddle (Final Push, approx. 65–70 km)
After reaching the Yushan Trailhead, the Tataka Saddle is not far away. The gradient in these final few kilometers remains unforgiving, but psychologically you can already see the finish. The Big Hemlock Trail, Tataka Visitor Center, and Yushan Trailhead are all on this high-mountain grassland, and on clear days you can see Yushan Main Peak in the distance.
- Strategy: If you paced the first four segments well, you’ll still have some energy for a controlled push here; if you overspent earlier, make “not stopping” your only goal and grind slowly to the finish.
- Definition of Completion: On this road, “finishing without putting a foot down or walking” is itself a commendable achievement—there’s no need to compare speed with anyone.
3. Gear Ratio and Equipment Setup
The core requirement for equipment on a long, high-gain climb can be summed up in one sentence: Ensure that on the steepest, highest, and most tiring sections, you can still maintain a cadence above 70 rpm.
| Rider Level | Recommended Front Chainring | Recommended Max Rear Cog | Notes |
|---|---|---|---|
| Advanced/Racing | Standard compact 50/34T | 30–32T | Has sufficient leg strength, but still advised to keep a large cog as insurance |
| General Fitness | Compact 50/34T | 32–34T | The most mainstream and safest climbing setup |
| Beginner/First Attempt | Triple chainring or gravel gearing | 36T or above, or below 1:1 | Trading gear ratio for completion rate is nothing to be ashamed of |
Key Equipment Checklist:
- Wheels: Prioritize lightweight for climbing. Deep-section aero wheels are useless here and are merely a weight penalty.
- Tire Pressure: Set according to body weight and tire width. Be slightly conservative for the long descent (return trip) to avoid blowouts from heat buildup.
- Warmth: This is the most easily overlooked item. It might be 25°C at the bottom, but only single digits at Tataka, and even colder when afternoon fog rolls in. A windbreaker, arm warmers, and full-finger gloves are mandatory, not optional.
- Lighting: Fog and changing weather are common in the afternoon. Be sure to carry front and rear lights with sufficient battery.
- Repair Supplies: Spare tubes, CO2 cartridges or a pump, tire patches, and a quick-link for the chain—cell phone reception is poor in the mountains and rescue is difficult; you’re on your own.
4. Nutrition and Hydration Strategy
This is a long ride that could take 4–7 hours. Refueling isn’t “eat when hungry”—it’s “follow the schedule.”
- Carbohydrate Rhythm: Consume approximately 60 grams of carbohydrates per hour. Alternate between energy gels, bananas, rice balls, and energy bars to avoid gastrointestinal fatigue from a single source.
- Fluids: 500–750 ml per hour. The dry, cold air at high altitude accelerates dehydration without making you feel thirsty, so hydrate proactively.
- Electrolytes: Add electrolyte tablets or sports drink powder to each bottle. The cramp defense line is deployed from the first sip.
- Refueling Point Planning: The Xinyi and Heshe areas are relatively reliable refueling points. After Upper Dongpu, refueling options are scarce, so be sure to carry everything you need for the entire ride before leaving the bottom. Don’t gamble on shops being open in the mountains.
A common fatal mistake: forgetting to eat and drink during the easy early sections, then remembering only when you hit the high-altitude hard climb in Segment 4. By then, your gut, under hypoxia and high intensity, can no longer absorb effectively—your entire nutrition plan is bankrupt.
5. Weather and Seasons
Tataka is located in the high mountains, and weather is the biggest unpredictable variable on this route.
- Afternoon Thunderstorms and Fog: In spring and summer, mountain weather can change rapidly in the afternoon. Fog can drastically reduce visibility and drop temperatures. Start as early as possible, aiming to summit before noon and descend in the afternoon.
- Temperature Difference: The temperature gap between the mountain and the valley can exceed 15°C. Be sure to bring all the warmth gear mentioned above.
- Season Selection: Autumn (stable weather, good visibility) and late spring are relatively favorable periods. In winter, there are risks of ice and road closures on the high-altitude sections—be sure to check real-time road conditions from Yushan National Park and the highway authority before departing.
- Return Descent: The long descent is another kind of challenge. Cold fingers stiffen and affect braking control. Brake intermittently, avoid prolonged continuous braking that overheats rims or rotors, and stop periodically to let the braking system cool down.
6. Altitude Sickness and Physiological Risks
An elevation of 2,610 meters won’t trigger severe altitude sickness in most people, but mild symptoms (headache, nausea, fatigue, loss of appetite) are not uncommon, especially with insufficient sleep or dehydration.
- Recognizing the Signs: A continuously worsening headache, unusual shortness of breath, and declining judgment are all signs your body is protesting.
- Response Principles: When symptoms appear, slow down, rest, and hydrate are the first priorities; if symptoms continue to worsen, the most effective treatment is to “descend in elevation”—don’t tough it out.
- Gradual Progression: Treat your pacing as giving your body time to adapt to the altitude. This is another physiological layer of meaning behind the “don’t push early” strategy.
7. Common Mistakes and DNF Risks
Here are the most typical reasons riders fail to finish (DNF) on this route. Avoid each one, and your completion rate will rise significantly.
- Loss of Pacing Control in the Early Sections: Tempted by the gentle river valley, you spend your most precious energy budget too early.
- Gear Ratio Too Heavy: Grinding on heavy gears leads to knee injuries and cramping, causing a complete collapse on the high-altitude hard climb.
- Belated Refueling: Waiting until you’re hungry to eat, thirsty to drink, and cramping to take electrolytes—all are disasters of being half a step behind.
- Underestimating Warmth: Hypothermia in the mountains rapidly drains your energy and judgment. A short-sleeve jersey at Tataka is a dangerous kind of romance.
- Departing Too Late: Reaching altitude in the afternoon, you hit fog, changing weather, and low temperatures, multiplying the difficulty several times over.
8. Target Times for Riders of Different Levels
The following are reference completion times for the one-way route (Shuili → Tataka). Actual times are heavily influenced by weather, condition, and rest time; these are for pacing planning reference only.
| Rider Level | Reference One-Way Time | Key Strategy |
|---|---|---|
| Racing/Advanced | 3.5–4.5 hours | Steady power, actively reduce power at high altitude |
| General Fitness | 5–6 hours | Segment pacing, proper refueling, ample warmth gear |
| First Attempt | 6.5–7.5+ hours | Completion as the only goal, more rest, light gears |
9. Pre-Ride Checklist
The day before departure, check off each item below:
- [ ] Bike: Brakes (braking is less critical on the climb up, but the long descent back is the real test), shifting, tire pressure, chain lubrication.
- [ ] Gear Ratio: Confirm you have sufficiently light climbing gears—don’t wait until the Husband-and-Wife Trees to regret it.
- [ ] Nutrition: All the carbohydrates, water, and electrolytes needed for the entire ride, stocked up before leaving the bottom.
- [ ] Warmth: Windbreaker, arm warmers, full-finger gloves, headband/buff.
- [ ] Lighting: Front and rear lights with sufficient battery, for fog and changing weather.
- [ ] Repair: Spare tubes, inflation tools, tire patches, quick-links, basic tools.
- [ ] Navigation and Communication: Offline route maps, power bank; inform family and friends of your itinerary and estimated time.
- [ ] Weather Check: Before departing, check Yushan National Park, real-time road conditions, and weather forecasts.
- [ ] Physical Condition: Well-rested, fed, and confirmed that you’re fit to go to high altitude today.
10. Power and Heart Rate Zone Management (Advanced Pacing Theory)
If you have a power meter or heart rate strap, this route is an excellent arena for putting “zone training theory” into real-world practice. The biggest fear on a long, high-gain climb is “intensity getting out of control,” and objective data can help you avoid misjudgment based on subjective feelings.
For riders with a power meter, I recommend setting your target power for the entire ride at “a certain percentage of Functional Threshold Power (FTP),” with dynamic downward adjustments as altitude increases:
| Segment | Recommended Power Zone (relative to FTP) | Notes |
|---|---|---|
| Segment 1 (River Valley Warm-up) | 55–65% | Pure aerobic, the more conservative the better, just warm up the muscles |
| Segment 2 (Gradual Transition) | 65–72% | Establish a sustainable rhythm, still in the aerobic zone |
| Segment 3 (Intensity Climb) | 72–80% | Approaching the sweet spot, but altitude begins to raise heart rate |
| Segment 4 (High-Altitude Hard Climb) | 68–76% (actively reduced) | Altitude reduces oxygen uptake; power must be discounted |
| Segment 5 (Final Push) | Depends on remaining energy | Push slightly if you have reserves; if overdrawn, just keep from stopping |
Note that power in Segment 4 goes down, not up—this isn’t laziness; it’s science. Above 2,000 meters, your VO2 max has already declined by approximately 8–12%. The same absolute power corresponds to a higher heart rate and faster fatigue accumulation. Insisting on maintaining your sea-level power numbers will only make you hit the wall early on the section where you need energy the most.
For riders with only a heart rate strap, the principle is the same: treat heart rate as your “real-time fatigue gauge.” Keep it in the aerobic zone in the early sections (approximately 65–75% of max heart rate), allow it to reach the threshold edge in the middle sections (80–88%), but if you notice your heart rate spiking abnormally in the high-altitude section while power output drops disproportionately, that’s your body warning you “time to back off.”
The value of data isn’t to make you ride faster—it’s to help you make rational decisions at the moments when subjective feelings are most likely to mislead you.
11. Training Preparation: What to Train Before the Challenge
A 70 km route with 2,517 meters of climbing cannot be powered through on willpower alone. At least 8–12 weeks before the challenge, you need targeted preparation.
- Long Aerobic Endurance: At least one ride of 3+ hours per week to build your body’s adaptation to “continuous multi-hour output.” This is the foundation for completing a long route.
- Climbing Specifics: Schedule 1–2 climbing workouts per week. Find a slope with a 5–8% gradient and practice repeatedly to simulate the muscle recruitment and cardiorespiratory load of the later hard climbs.
- Muscular Endurance (Low-Cadence, High-Torque): Deliberately climb a section with a slightly heavier gear at a low cadence of 55–65 rpm to build the muscular endurance needed for climbing. But keep each session short to avoid knee injury.
- Weight Management: Climbing is a game of “power-to-weight ratio.” Maintaining a reasonable body weight within healthy limits often helps climbing performance more directly than gaining a few extra watts.
- Altitude Acclimatization (if possible): If you can do a few rides or activities at moderate-to-high altitude before the challenge to let your body experience thin air in advance, it will greatly help on the actual day.
Training Cycle Taper: In the week before the challenge, taper—reduce training volume while maintaining intensity, so your body goes in fully recovered with full glycogen stores. Do not schedule heavy training in the days before the challenge; that will only send you up the mountain fatigued.
12. Mental Strategy: How to Survive the Darkest Segment 4
The true battlefield of a long climb is often not in the legs but in the brain. Segment 4, the high-altitude hard climb, is where willpower is most likely to crumble. Here are several mental techniques proven effective in practice:
- Chunk Your Goals: Don’t think about “20 kilometers to go”—that will crush you. Shrink your focus to “ride to the next corner” or “make it to the next utility pole.” Break the big goal into countless small ones and complete them one by one.
- Establish Anchors: The Husband-and-Wife Trees, a particular turn, a certain kilometer marker—all can be your mental anchors. Tell yourself “just ride to there first,” then set the next one once you arrive.
- Rhythmic Breathing: Turn your breathing into a metronome. A fixed inhale-exhale rhythm stabilizes heart rate and pulls a panicked mind back to the present.
- Accept the Pain: Climbing is supposed to hurt. Instead of resisting it or being intimidated by it, accept that “being tired right now is normal”—this actually reduces mental drain.
- Visualize the Finish: In the toughest moments, let yourself imagine standing at the Tataka Saddle, gazing at Yushan in the distance. That image will give you a reason to turn the pedals one more time.
Remember: what the body can endure is often far more than the brain thinks. When you want to give up, it’s usually not that your body has reached its limit—it’s that your brain surrendered first.
13-1. Where the Devil Hides in Equipment Details
On long high-mountain rides, many failures aren’t due to fitness but to a small equipment detail. Here are devilish details that veterans notice but beginners often overlook:
- Check Cleats and Pedals: Confirm before departure that your cleats aren’t excessively worn. If a cleat releases at the moment you need maximum power on a long climb, you not only lose pedaling efficiency but also risk danger.
- Chain Cleaning and Lubrication: A dry or dirty chain steals precious watts, especially noticeable on long climbs. Clean and apply appropriate chain lube before departure.
- Saddle Height and Riding Position: On a long climb, any positional flaw is amplified into pain. If you’ve recently adjusted your bike, do several long rides to confirm comfort—don’t discover knee or perineal discomfort on challenge day.
- Gloves and Bib Shorts: The pressure on your palms from prolonged handlebar gripping and on your sit bones from long hours in the saddle is not to be underestimated. A good pair of gloves and well-fitting bib shorts are invisible heroes that get you through hours of riding.
- Bring One Extra Layer: Better to bring it and not need it than to lack it and suffer hypothermia. Mountain weather changes on a dime; a packable lightweight windbreaker could save your life at a critical moment.
13. Complete Guide to the Return Descent
Many people focus all their attention on the climb up, overlooking that—if this route is an out-and-back, a continuous descent of over 2,500 meters awaits you on the return. This descent is both a reward and a hidden risk.
- Brake Heat Fade: The most dangerous aspect of a long continuous descent is brake system overheating. Disc brakes may experience heat fade, and rim brakes can cause inner tube blowouts. Use “intermittent braking”—brake decisively when needed, release when not, giving the braking system room to cool.
- Segment Breaks: Don’t attempt to descend in one go. Stop at safe spots periodically to let the brakes cool and to relax stiff fingers, shoulders, and neck.
- Cold Protection: Descending at high speed from 2,610 meters to the valley floor will make the perceived temperature extremely low. The sweat from the climb will cause rapid heat loss on the descent. Put on your windbreaker and gloves before descending.
- Focus on Road Conditions: Mountain roads have many curves, potential rockfall, and gravel. At high descent speeds, reaction time is short. Brake before corners, avoid hard braking mid-corner, and look far ahead.
- Judgment Under Fatigue: After hours of climbing, your focus has already declined. Mistakes on the descent are often more fatal than on the climb—remind yourself to stay alert.
Conclusion: Treat It Like an Engineering Project
The appeal of the Tataka New Central Cross-Mountain Highway route lies precisely in the fact that it’s not a goal you can conquer on a burst of adrenaline. 70 kilometers, 2,517 meters of climbing, 2,610 meters of elevation—every number reminds you that this is an engineering project requiring “planning, execution, monitoring, and correction.”
Treat pacing as your budget, refueling as your schedule, warmth as risk management, and high altitude as a buffer for uncontrollable variables, and you’ll greatly increase your odds of a safe finish. When you finally stand at the Tataka Saddle and look back at every corner you’ve passed, every dead tree beside the Husband-and-Wife Trees, and every breath of thin yet sweet mountain air, you’ll understand: what this road truly forges is never just your legs, but the discipline of breaking down a big goal and executing it patiently to the end. May you go up safely and come down safely, writing your own data at the summit of Taiwan.
Related Reading
- Tataka 20km Long Climb Full Guide: Complete Strategies for the New Central Cross-Mountain Highway’s High Altitude
- Tataka Challenge Full Guide: One of Taiwan’s Highest Highways, Harder Than Wuling
- Tataka Climb Guide: High-Altitude Challenge at the Foot of Yushan
- Nantou Shuili to Tataka Route: High-Altitude Riding on the Outskirts of Yushan National Park
阿里山塔塔加 兩倍特濃版!全新隧道開通! 進喔!公路車 | CT Yeh
3 年前
公路車 | 塔塔加驚險員工旅遊 | 還好手腳快沒被抓交替!
5 年前
爬坡ITT實境)台中 魔王 松鼠坡 首航 6:12 大肚山 大三元 科福路
8 年前
台北闊瀨陡坡 騎旅 / 日本單車雜誌編輯車友臨時加入!/ 髮香才是最強的 / feat. 北迴歸線小隊 / 公路車 CT Yeh
6 個月前
半日 小台灣 極限單車路線挑戰實錄
7 年前
塔塔加 員工旅遊 加料 各路段大數據分析 | EP2 | 公路車 | CT Yeh
4 年前
嘉義大埔、阿婆灣挑戰賽,美到以為在日本!ft. 環騎5 Cool 西拉雅188 / 公路車 / CT Yeh
7 個月前
大武山20%魔王陡坡【JJSC南台灣遊騎Day2】!屁股真的要裂開了...凡士林抹滿也沒用?神秘金教堂還有超便宜夜市
3 個月前