Fuji Azami Line Steep Climb Strategy: The Ultimate Survival Guide to the Lightest Gears on Japan's Steepest Slope
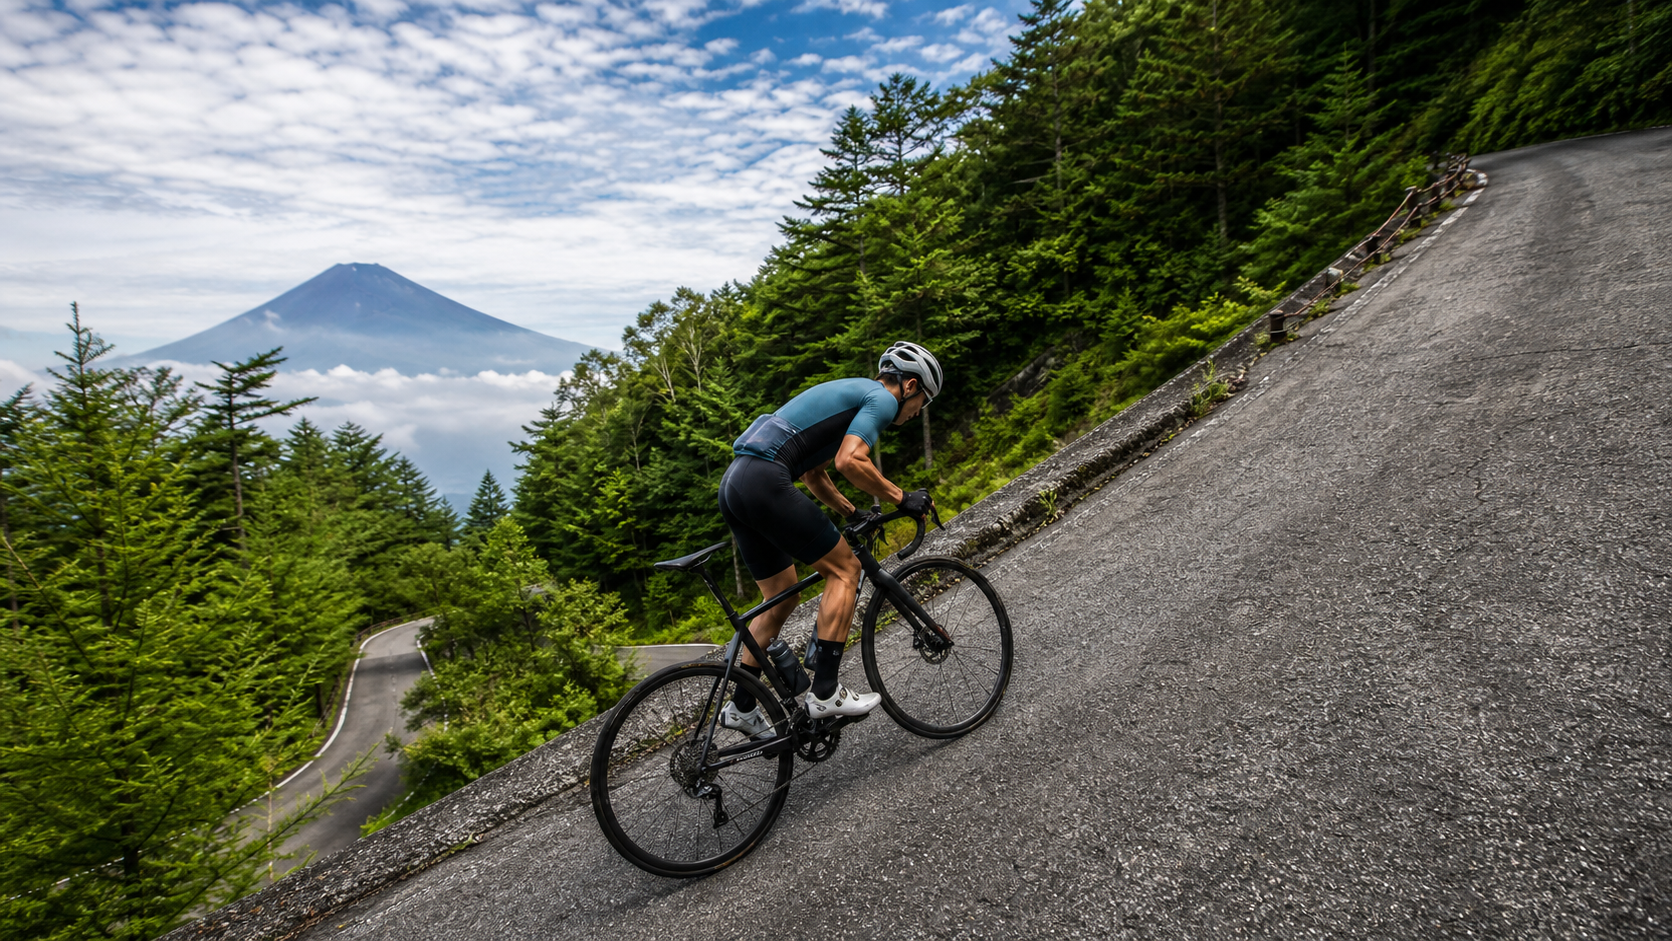
If there’s one climb in Japan that could be called the “King of Steep Climbs,” it would likely be this one—Fuji Azami Line. It carries the imposing nickname “Japan’s steepest climb” and is even compared to Italy’s Zoncolan, a climb that strikes fear into professional riders.
Let’s first clarify where it is. The Fuji Azami Line is located in Oyama Town, Sunto District, Shizuoka Prefecture, starting from the Subashiri area of Oyama Town and leading all the way to Subashiri 5th Station on Mount Fuji. It’s a free-access prefectural road and serves as the access road for the “Subashiri Climbing Route.” On ordinary days, it’s the route for hikers and tourists heading to Subashiri 5th Station, but for the cycling world, it has long been a legendary steep-climb mecca—a name that many hardcore riders consider “a must-challenge once in a lifetime.”
Regarding the data for this road, a special note is needed. The climb segment referenced in this article is approximately 8.27 km in distance, 609.6 meters of elevation gain, with an average gradient of 7.4% (these are measurements from a certain Strava climb segment, mostly covering the core steep section). Meanwhile, most Japanese primary sources (such as magazines and official race materials) record the full-course data as approximately 11.3 km, 1170–1200 meters of elevation gain, an average gradient of about 10%, and a maximum gradient approaching 22%, with the Subashiri 5th Station finish at an elevation of about 1980 meters. The difference between the two sets of numbers comes from the “measurement range”—the former is the core steep section, while the latter is the complete route including the early part. Whichever set you use, the essence of this road can be summed up in one word: steep.
Why is it compared to Zoncolan? Italy’s Zoncolan is one of the most feared climbs in the Giro d’Italia, renowned for its relentless, brutally steep gradients—a “boss-level” segment that makes even professional riders wince. The latter section of the Fuji Azami Line, with equally brutal gradients and an equally despair-inducing “towering wall,” has earned it the title of “Japan’s Zoncolan.” This comparison isn’t a marketing gimmick; it’s the heartfelt endorsement of those who have ridden it—a road that demands full effort from professionals and forces amateur riders to dismount and walk. Understanding this, you’ll prepare for it with the proper respect.
1. Route Overview and Real Data
| Item | Strava Climb Segment | Full Course Reference (Japanese Sources) |
|---|---|---|
| Distance | Approx. 8.27 km | Approx. 11.3 km |
| Elevation Gain | Approx. 609.6 m | Approx. 1170–1200 m |
| Average Gradient | 7.4% | Approx. 10% |
| Maximum Gradient | — | Claimed to approach 22% |
| Finish | Subashiri 5th Station | Same as left (approx. 1980 m) |
| Location | Oyama Town, Shizuoka Prefecture | Same as left |
Please note that the “22% maximum gradient” is a figure consistently cited by official race organizers and multiple media outlets to draw the comparison with Zoncolan. It’s a widely accepted value, but it comes from road signs and organizer markings rather than precise surveying, so to be rigorous, one would say “claimed maximum of 22%.” Regardless of the exact number, the brutality of that “towering wall” in the latter section is unanimous testimony from everyone who has ridden it.
Why “Average Gradient” Is Useless Here
Let’s establish a key concept first: for the Fuji Azami Line, looking at the “average gradient” can be deadly. Whether it’s 7.4% or 10%, this average severely underestimates its true difficulty. The reason is that the gradient distribution on this road is extremely uneven—the early and middle sections pull the average down, while that wall approaching 22% in the latter section is where the real battle is decided.
To put it simply: if a road averages 10%, it could be a uniform 10% climb throughout, or it could be an extreme combination of half at 3% and half at 17%. You could handle the former easily with a steady rhythm, but the latter would crush you on the 17% sections. The Fuji Azami Line is the ultimate version of the latter. So when planning this route, what you should be watching isn’t that gentle average, but “how steep is the steepest part”—because that’s the enemy you’ll actually be fighting. This concept directly determines how light a gear ratio you should bring and how you should pace your energy.
2. Gradient Distribution: Where the Pain Hides on This Road
Understanding the Fuji Azami Line hinges on its extremely uneven gradients. Based on Japanese first-hand ride reports, it can be broken down into three sections with distinctly different characters:
Section 1 (approx. 0–2 km): The Deceptively Gentle “False Straight Climb”
Near the start is a section of “straight climbing” with open views that looks gentle, but actually already has 10%+ gradients. This is the most deceptive part—because visually it’s a straight road heading upward with no curves for reference, you get the illusion of “pedaling but not making progress.” Many riders overexert here out of impatience, planting the seeds of a blow-up for the steep section ahead. Key principle: use a light gear and spin steadily through this section—don’t be fooled by “it doesn’t look steep.”
This kind of “visual deception” is common in climbing, but the Fuji Azami Line takes it to the extreme. When a road is straight and long with no obvious reference points on either side, the human brain underestimates the actual gradient, leading you to unconsciously push harder, wanting to “quickly get past this seemingly easy section.” The result is wasting precious glycogen and energy before the real challenge arrives. The solution is simple: trust your bike computer and your legs, not your eyes. Watch your power, heart rate, and cadence—pace yourself with data, and don’t let your vision dictate your rhythm.
Section 2 (approx. 3–5.5 km): The Relatively Breathable Forest Section
This section returns to around 8% gradient, winding through fresh green forest—the relatively “catch-your-breath” zone of the entire route. This is your golden window to refuel, regulate your breathing, and store energy for the big boss ahead. Key principle: use this section to bring your blood sugar and heart rate back under control.
It’s worth emphasizing that this is the only truly viable refueling window on the entire route. Once you pass Magaeshi and enter the towering wall, you’ll be too steep to have time or appetite to eat—both hands are needed to steady the bike, your whole body is fighting gravity, and there’s no spare capacity to grab nutrition. So, you must use this forest section to take in all the energy gels and water you need, topping off your blood sugar to the max. If you miss this window and run out of fuel on the steep section, you’ll be truly helpless. Treat this section as the last supply station before a hard battle, and take it seriously.
Section 3 (approx. 5.5–8 km, after “Old Magaeshi”): The Towering Wall
This is where the Fuji Azami Line earns its legendary status. After passing the famous landmark “Magaeshi (Old Magaeshi),” the real steep climb begins—a section of about 3 km with an average gradient approaching 15% and the steepest part nearing 22%, called the “sosoritatsu kabe (towering wall)” by Japanese riders. This section determines whether you can complete the ride and is one of the hardest climbing sections in all of Japan.
The name “Magaeshi” itself is a warning. It means “horses stop here; beyond this point, you must proceed on foot”—in ancient times, when people made pilgrimages to Mount Fuji, their mounts could only go this far. When a road is too steep even for a horse, you know what’s coming. Key principle: before entering this section, make sure your blood sugar is topped up and your heart rate has recovered; once you step into this wall, there’s no room to catch your breath. All you can do is drop to your lightest gear, shift your weight forward over the front wheel, and grind the pedals over one revolution at a time. For these 3 km, you’ll be riding slower than walking, but as long as you don’t dismount, don’t stop, and keep the pedals turning, you’re winning.
3. Gear Ratio: This Is a “Gear Ratio War”
The gear ratio choice for the Fuji Azami Line isn’t a “recommendation”—it’s a “survival necessity.” With the wrong gearing, even walking your bike will be miserable.
- Chainrings: Compact 50/34 is the absolute minimum standard, and it’s barely enough. If you’re serious about finishing, go straight to a lighter setup—such as a gravel bike’s 46/30, or even add mountain-bike-level gearing.
- Cassette: At least 11–34T; if your frame and derailleur allow, 11–36T or larger will give you a fighting chance at the 22% wall.
- Gear ratio reference: On a 22% gradient, 34×34 (ratio approx. 1.0) is already the bare minimum you can barely turn over; if you can manage 34×36 or even lighter, your knees will thank you.
A harsh reality: many riders who are perfectly capable on other famous climbs underestimate this one on their first visit, bring gearing that isn’t light enough, and end up dismounting and walking in front of the towering wall. Please prepare your gearing to the point where you think “this is ridiculously light”—this road deserves it.
Let Me Explain: What Gear Ratio Means
The gear ratio (front chainring teeth ÷ rear cassette teeth)—the smaller it is, the lighter and easier it is to climb. This number directly determines whether you can maintain your cadence on steep gradients. For example:
- 34×28 (ratio approx. 1.21): The common lightest combination on road bikes, sufficient on most famous climbs, but extremely taxing in front of the Fuji Azami Line’s 22% wall.
- 34×32 (ratio approx. 1.06): A clear improvement; a reasonable starting point for tackling this road.
- 34×34 (ratio approx. 1.0): The bare minimum you can barely turn over on a 22% gradient.
- 34×36 or lighter (ratio <1.0): Allows you to maintain some cadence on the steepest section, significantly reducing knee strain—the ideal setup for serious challengers.
In other words, don’t evaluate this road by thinking, “I had no problem with 34×28 on other mountains.” The Fuji Azami Line is on another level entirely—prepare your gearing in the direction you’d normally consider “too extreme.” One extra large cog could be the difference between finishing the ride and having to walk.
4. Pedaling Technique for the “Towering Wall”
Having a light gear ratio isn’t enough; a 22% gradient is also a severe test of pedaling technique:
- Ride seated primarily, shift weight forward: The steeper the gradient, the more the front wheel tends to wander or even lift. Deliberately press your upper body forward, sending your weight over the front wheel to maintain steering stability and rear-wheel traction.
- Apply power smoothly, avoid jerky movements: On a 22% gradient, a “hard stomp, then release” jerky pedaling style will cause the rear wheel to slip instantly. Imagine “pedaling in circles” to keep a smooth, continuous application of power.
- Be cautious with out-of-saddle efforts: Standing can save you on ultra-steep sections, but it consumes oxygen rapidly, and shifting weight backward can lift the front wheel. Use it only briefly when you genuinely can’t turn the pedals and need to crest the steepest point, then sit back down immediately to restore your rhythm.
- Choose your line: If road width and traffic allow, taking a wider arc on the steepest section can slightly reduce the effective gradient—but always check for traffic behind you first. Safety always comes before saving effort.
5. The Race: FUJI-ZONCOLAN Hill Climb
This road has hosted a famous hill climb race—FUJI-ZONCOLAN Hill Climb in Oyama Town—with the course running from the entrance all the way to Subashiri 5th Station. The race name originates from a friendship exchange between Shizuoka Prefecture and Italy’s Friuli-Venezia Giulia region, directly drawing a parallel to the legendary steep climb Zoncolan.
Known editions include 2016, 2017, and 2019 (mostly held in early October). Professional riders complete the course in around 41 minutes, and in 2017, Shunsuke Nakamura won by a margin of one second. A note of caution: this race is not held every year on a fixed schedule. Information on whether it has continued in recent years and details of subsequent editions is unclear—please refer to the latest official announcements when planning, and don’t treat it as a guaranteed annual event. Also, it’s sometimes mistakenly referred to as the “Mt. Fuji International Hill Climb,” but the correct name is FUJI-ZONCOLAN Hill Climb.
The race results also reveal how brutal this road is: even professional riders need to push for 41 minutes to complete the full course. To put that in perspective, in the same time, pros might have covered a longer distance on a typical climb; but in front of this wall, speed is forcibly suppressed by the gradient. This also gives amateur riders a mental preparation—don’t estimate your time on this road using your usual climbing speed. It will make you ride far slower than you imagine, and that’s completely normal. When you find your speed dropping to single digits on the towering wall, remember: even the pros aren’t much faster here.
Mental Strategies for Facing the Wall
On a 22% gradient, the physical pain is one thing; the mental collapse is another. When your speed slows to nearly walking pace and every pedal stroke feels like pushing against a wall, your brain starts blasting “give up” signals. Here are some practical mental tactics:
- Extreme goal segmentation: Don’t think “3 km to go”—that will crush you. Shrink your goal to “make it to the next utility pole” or “turn the pedals 20 more times.” Use a series of tiny, achievable goals to inch yourself upward.
- Accept the crawl: On this wall, slowness isn’t failure—it’s the only strategy. Allow yourself to move at single-digit speeds; as long as the wheels are turning, you’re making progress.
- Focus on breathing and cadence: Shift your attention from “how much farther” to controllable rhythms like “deep inhale, deep exhale, steady spin.” This effectively dilutes the pain.
- Visualize the moment you crest the wall: Give yourself an image—the relief and exhilaration when you finally pass the steepest section and the gradient eases. Let that image pull you upward.
6. Important Clarification: Don’t Confuse It with “Mt. Fuji Hill Climb”
This is the most common point of confusion for riders from outside the area. Japan’s famous large-scale hill climb race, “Mt. Fuji Hill Climb,” uses the Fuji Subaru Line (in Fujiyoshida City, Yamanashi Prefecture), finishing at Subaru Line 5th Station (elevation approx. 2305 meters). This is completely different from the Fuji Azami Line (Oyama Town, Shizuoka Prefecture, Subashiri entrance)—different road, different prefecture, different trailhead. Be sure to distinguish between the two when planning your trip, and don’t mix up information from the two routes.
7. Seasons, Weather, and Traffic Restrictions
- Winter closure: The Fuji Azami Line is closed in winter, typically from around mid-to-late November until roughly late April of the following year. Specific dates are announced annually and vary slightly.
- Climbing season my-car restrictions—but bicycles are exempt! This is a huge advantage for riders. During Mount Fuji’s climbing season (approximately early July to September 10), this road enforces vehicle restrictions (private cars must park at the perimeter and transfer to shuttle buses), but bicycles and other non-motorized vehicles are not subject to the restrictions and can still ride up to the 5th station during the restricted period. In other words, during peak climbing season, cars are kept out, making the road surface even cleaner—a rare advantage for climbing. The announced restriction period for the Subashiri entrance in 2026 is July 1, 09:00 to September 10, 18:00.
- High-altitude cold: The finish at the 5th station is at approximately 1980 meters elevation. Even in midsummer, it’s noticeably cool, and the section near the finish feels cold. There have been records of riders suffering hypothermia in autumn due to insufficient supplies. Be sure to carry windproof, insulating layers.
8. Common Mistakes and DNF Risks
- Gearing too heavy: This is the biggest cause of DNF on the Fuji Azami Line. Be sure to prepare gearing for 22%, not for the average gradient.
- Overexerting on the false straight climb in the early section: Fooled by “it doesn’t look steep,” riders burn through their energy before Magaeshi, leaving nothing to face the real wall when it arrives.
- Insufficient warmth: The finish is near 2000 meters with cold wind chill; hypothermia is a real risk, especially in autumn or poor weather.
- Miscalculating nutrition: Steep climbs consume enormous energy. If you don’t top off your blood sugar in the middle forest section, you’ll run out of fuel before the towering wall—the most frustrating mistake of all.
- Losing control on the descent: On such a steep road, the descent is equally dangerous. Prolonged heavy braking can overheat rims or discs; be sure to control speed in stages and release the brakes intermittently.
A Dedicated Warning for the Descent
The descent of the Fuji Azami Line deserves to be taken just as seriously as the climb—perhaps even more so. Descending a road with an average of 10% and a maximum of 22%, speed builds up extremely quickly, and you’ll be navigating sharp corners at high speed. If your brakes overheat and fail, the consequences are unthinkable.
The correct descent strategy is:
- Control speed in stages, release brakes intermittently: Don’t hold the brakes continuously the whole way—that causes heat to build up in the rims or discs. Instead, use an intermittent rhythm of “brake to slow—release to cool—brake again.”
- Slow before corners, accelerate after: Manage your speed on the straights, bringing it down to a safe range before entering each corner. Don’t brake hard mid-corner.
- Dress warmly: The wind chill on a long descent will rapidly strip away the body heat you accumulated on the climb. Put on your windproof layer before starting down to avoid numb fingers compromising your braking control.
- Check your bike: Before setting off, confirm your braking system and tires are in good condition. On a descent of this caliber, any small issue can be magnified.
Remember: you need to get down safely just as much as you got up safely. Only then is this steep-climb challenge truly complete.
9. Target Times for Riders of Different Levels
The following are reference times for the full course (approx. 11.3 km, approx. 1200 meters of elevation gain). Because this road is extremely difficult, times will vary widely:
| Rider Level | Reference Completion Time |
|---|---|
| Professional / Elite Competitive | Approx. 41–50 min |
| Advanced Climber | Approx. 55 min–1 hr 10 min |
| General Challenger (including walking sections) | Approx. 1 hr 20 min or more |
Please make “safe completion” your goal rather than pushing for a time. For the vast majority of people, being able to flexibly switch between “riding” and “walking” in front of the steepest wall and reaching the 5th station intact is a commendable result. In fact, simply “having the courage to take on this road” already puts you ahead of most riders—its reputation scares many people away, and the fact that you chose to stand at the start is courage worth acknowledging.
10. Make Walking a Formal Backup Plan
For a steep climb of the Fuji Azami Line’s caliber, listing “dismount and walk” as a formal strategy isn’t a sign of weakness—it’s smart. If you find on the towering wall that your gearing isn’t light enough, your heart rate is maxed out, or cramps are imminent if you keep pedaling, then dismounting and walking a stretch, getting past the steepest point, letting your heart rate drop, and then remounting is far wiser than pushing yourself to complete exhaustion and collapse. The difficulty of this road is what it is. Reaching the 5th station intact is what matters; whether you rode or walked part of the way doesn’t diminish the sense of accomplishment of “I conquered Japan’s steepest climb.”
11. Preparation Advice for Taiwanese Riders
For Taiwanese riders, the Fuji Azami Line is a true “steep-climb trial.” While Taiwan has its share of steep slopes (such as short, steep climbs in some northern suburbs or industrial roads in the central-south), finding a “continuous 3 km at 15% average with a 22% maximum” is not easy. Therefore, targeted preparation before the trip is especially important:
- Practice low-speed balance on steep slopes: On a 22% gradient, your speed may drop to single digits, and the biggest test is maintaining balance and smooth pedaling at low speeds. Find short, steep climbs in Taiwan and repeatedly practice low-speed climbing.
- Practice spinning with your lightest gear: If you rarely use your largest cassette cog, get familiar with its feel on steep slopes before coming here. Don’t use it for the first time on site.
- Strengthen your core and upper body: Ultra-steep climbs require your upper body to steady the bike and shift weight onto the front wheel. Core and arm strength directly affect your handling stability.
- Accept that “you might not finish”: The difficulty of this road makes “dismounting and walking” the norm rather than a disgrace. Approach the challenge with a calm mindset, putting safety and experience ahead of results.
If you complete these preparations, when you face that towering wall on site, at least you won’t be defeated completely unprepared.
Conclusion
The Fuji Azami Line is a road that will redefine your understanding of the word “steep.” An 8 km core steep section, a towering wall approaching 22%, and the Subashiri 5th Station at nearly 2000 meters—it concentrates the most brutal gradients into a short road, forcing you to bring out your gearing, technique, stamina, and willpower all at once. Prepare the lightest gear ratio of your life, pack adequate warmth and nutrition, and treat that wall with respect—then you’ll have the chance to stand at the 5th station yourself and say, “I rode Japan’s steepest climb.” This is a road for the hardcore, and a road that will transform you.
Finally, let me summarize the essence of conquering the Fuji Azami Line in one sentence: gear ratio lighter rather than heavier, hold back on the early section, grind through the latter section one stretch at a time, and take both the climb and descent deadly seriously. Nail these four things, and you’ve maximized your chances of success. As for whether you ride the whole way or walk a short stretch, it doesn’t affect the achievement of standing at Subashiri 5th Station—because you’ve faced Japan’s hardest wall in person and didn’t turn away. That, in itself, is the most precious reward the Fuji Azami Line has to offer.
Related Reading
- Pilgrimage Beneath the Towering Wall: The Fuji Azami Line, Subashiri Entrance, and a Test of Will on a Steep Climb
- Fuji Subaru Line Practical Guide: 24 km, 1210 Meters of Climbing, a Pure Test of Your Aerobic Threshold
- Fuji Skyline Guide: A 26 km Expedition to Mount Fuji’s Highest Rideable Point at 5th Station, 2400 Meters
- Riding to the Highest Reachable Point on Mount Fuji: The Fuji Skyline, Hoei Crater, and a Cloud-Level Journey Through the Forest Belt
台北闊瀨陡坡 騎旅 / 日本單車雜誌編輯車友臨時加入!/ 髮香才是最強的 / feat. 北迴歸線小隊 / 公路車 CT Yeh
6 個月前
萬年峽谷! 30% 超激陡坡 里佳部落DAY2 還是很硬! | 公路車 | CT Yeh
3 年前
半日 小台灣 極限單車路線挑戰實錄
7 年前
富士山KOM 賽事篇 VLOG!/ 小野田出沒!/ 完整路段分析 / 武嶺要騎多快才能拿環?/ 台灣選手 第20回Mt.富士ヒルクライム 参加!/ 公路車 / CT Yeh
2 年前
大武山後門26%歡樂陡坡!JJSC南台灣單車行Day2 / 被颱風追著跑 / 公路車 / CT Yeh
2 年前
小野田真的存在!日本赤城山爬坡公路賽 台灣首發團完全實錄 | 頭文字D真實賽道! | 看完東奧自行車賽後好想再去騎一次啊! | 公路車 | CT Yeh
4 年前
2025 乘鞍岳登山賽 比賽全紀錄篇 / 完整路線攻略介紹 / 日本版武嶺 公路最高點 / 高山空拍絕景 / 明年會開團! / 公路車 / CT Yeh
10 個月前
大武山20%魔王陡坡【JJSC南台灣遊騎Day2】!屁股真的要裂開了...凡士林抹滿也沒用?神秘金教堂還有超便宜夜市
3 個月前