Sanxia North 113 Dongyan Bridge Practical Guide: Don't Be Fooled by the "6.7% Average Gradient"—This Road Hides a 12% Grade Killer Move
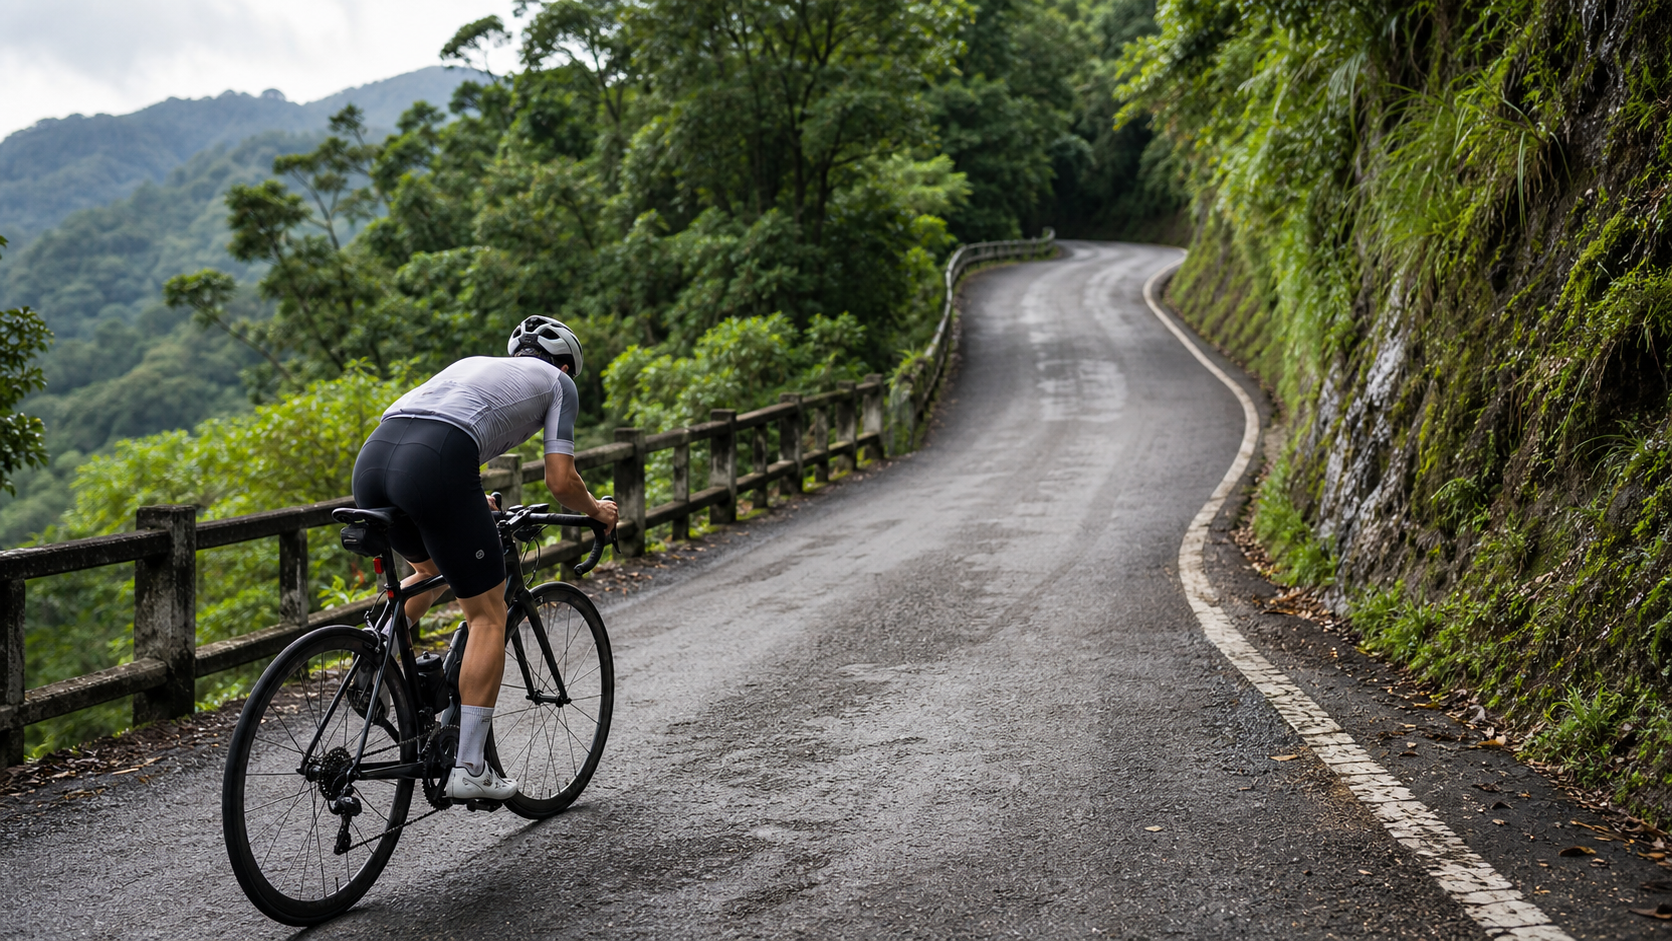
The Sanxia County Road 113 heading toward Dongyan Bridge is often categorized by seasoned cyclists as a “beginner-friendly suburban mountain route.” The reasoning is simple: the official recorded average gradient is only 6.7%, which looks far more gentle compared to brutal routes like Shiding Erge Mountain or Wulai Fushan, where gradients routinely start at 8% and climb higher. But if you actually hit the road with the mindset of “just riding an easy warm-up route today,” there’s a good chance you’ll be harshly schooled by the pavement after a certain turn. What this article aims to do is lay out the real data of this route clearly, so you know exactly what you’re up against before you set off.
Route Overview and Real Data Analysis
Let’s start with the most basic numbers — these form the foundation of all the analysis in this guide:
| Item | Value |
|---|---|
| Route Name | Sanxia North 113 Dongyan Bridge |
| Administrative District | Sanxia District, New Taipei City |
| Total Distance | 7034.09 meters (approx. 7.03 km) |
| Total Elevation Gain | 879.659 meters |
| Average Gradient (database recorded value) | 6.7% |
| Endpoint Landmark | Dongyan Bridge |
Looking at just the two figures “7 km, 6.7% average,” many riders’ first reaction will be: “Isn’t this just a moderate-intensity climbing warm-up route? At most, a beginner-level challenge.” After all, many of Taiwan’s famous long-distance climbing routes, such as Wuling or Hehuan Mountain, have average gradients around 5% and already require two to three hours to complete; a route that’s only 7 km with a 6.7% average should intuitively be finished in 20 to 30 minutes.
But this is exactly where this route demands to be treated with honesty.
We can use the most basic physics formula — multiplying distance by average gradient to back-calculate the theoretical elevation gain: 7034.09 meters × 6.7% ≈ 471 meters. If this number matched the route’s actual elevation gain, then the 6.7% average gradient label would basically be accurate, with no major misleading.
However, the database actually records an elevation gain of 879.659 meters — nearly 409 meters more than the theoretical back-calculated value of 471 meters, a gap of almost double. This isn’t fluctuation within a margin of error; this is a structural discrepancy.
What does this mean? It means the gradient distribution across the entire route is extremely uneven. If we use the actual elevation gain of 879.659 meters against the 7 km distance, the derived equivalent average gradient actually approaches 12.5% (879.659 ÷ 7034.09 ≈ 12.5%). In other words, if this route’s gradient were evenly distributed, the average gradient should be labeled around 12%, not the 6.7% shown on the official signage.
This kind of discrepancy usually has only one reasonable explanation: the route must contain sections significantly steeper than the average — likely a long stretch of steep wall in the middle or latter portion that pulls the overall average way up, and it’s only because the early section or some gentler segments dilute the average figure that the final displayed “6.7%” looks so mild. In practice, routes where elevation gain and distance are this disproportionate often feature localized sections exceeding 10%, or even momentarily approaching 15%.
An honest reminder for every rider preparing to take on this route: do not use the “6.7% average gradient” figure to assess your pacing strategy and equipment preparation. This route is far tougher than the surface data suggests. If you set out with the idea that “6.7% should be manageable with a compact crankset and a 25T rear cassette,” you may well find yourself halfway up realizing you completely misjudged the difficulty, stuck in the predicament of having to walk your bike through the remaining sections.
Section-by-Section Strategy: Pacing Plan from Warm-Up to Grinding Through Steep Climbs
Although there’s no per-kilometer gradient GPS data available to precisely break down the slope variation of each segment, based on this route’s elevation-gain-to-distance contradiction, as well as the terrain characteristics of County Road 113 as a mountainous industrial road overall, we can reasonably infer that the entire route can be roughly divided into three phases for pacing planning. This segmentation logic is generalized from the common patterns of many similar Taiwanese routes characterized by “short distance, moderate average gradient, but abnormally high total elevation gain.” Actual riding conditions should still take precedence, but this framework is quite practical as both a mental preparation and a pacing strategy.
Phase 1: Start Warm-Up Gentle Climb (approx. first 1.5–2 km)
Most mountainous industrial roads typically begin with a relatively gentle lead-in section that gradually transitions traffic from flatland or settlements into mountainous terrain. The gradient on this stretch is usually lower than the route’s average, giving your cardiovascular system and muscles time to get into gear.
Pacing advice for this phase: don’t push too hard just because the gradient looks mild. A common flaw among many riders is riding the opening section at near-maximal heart rate zones, thinking “it’s only 7 km anyway, should be done quickly,” only to find themselves with no reserve muscular strength or cardiovascular capacity left when they hit the steeper middle and latter sections. I’d suggest keeping your heart rate in Zone 2 to low Zone 3 of your FTP heart rate zones during this stretch, maintaining cadence between 85 and 95 rpm, letting your body genuinely warm up before entering the hard fight.
Phase 2: Mid-Route Core Steep Climb Zone (approx. middle 2.5–4 km)
This is the critical zone that the route’s elevation data points to. Based on the contradiction between elevation gain and distance, this section very likely contains continuous steep climbs with localized gradients exceeding 10%, or even approaching or surpassing 12%. At this level of gradient, in terms of pedaling mechanics, it means you can no longer rely purely on the cadence and gear combinations used for flat cruising — you must enter a climbing rhythm alternating between “standing out-of-saddle sprints and seated pedaling.”
Pacing advice: before entering this phase, do your mental preparation, raise your target heart rate to the Zone 3 to Zone 4 range, and be ready to shift into your lightest gear at any moment. If you feel your cadence dropping below 60 rpm here and your thighs starting to burn noticeably, that’s normal — it doesn’t mean you lack fitness; it means the road has genuinely gotten steeper. At this point, you should shorten the switching cycle between out-of-saddle sprints and seated pedaling — for example, switching positions every 30 seconds to 1 minute — to avoid excessive fatigue in any single muscle group.
Phase 3: Dongyan Bridge Final Stretch (approx. last 1–1.5 km)
When you enter the latter part of the route, approaching the Dongyan Bridge endpoint landmark, perceived fatigue has usually accumulated to its peak. At this point, even if the actual gradient numbers aren’t at their maximum, the subjective sensation makes it feel especially grueling. This is a shared psychological characteristic of all short-distance, high-elevation-gain routes: fatigue in the latter stages amplifies your perception of the gradient.
Pacing advice: in this phase, treat “finishing” as the goal rather than “speed” — slow down the pace, deepen your breathing, and consume the final climb with steady, sustained effort rather than explosive bursts. As the endpoint, Dongyan Bridge typically opens up to a broad vista, which serves as an excellent psychological anchor — tell yourself that once you see the bridge, the climb is over.
Gear Ratio and Equipment Recommendations: This Road Isn’t Easily Solved with a Compact 50/34
Given the reality of this route’s 879.659 meters of total elevation gain and localized gradients that may approach or even exceed 12%, equipment preparation must be approached with the specifications of a “hard climbing route,” not the mindset of a “7 km short route.”
Recommended Gear Ratio Configurations
- Front Crankset: Compact crankset (50/34T) is the baseline requirement — if your fitness and climbing experience are still in the accumulation stage, you might even consider a sub-compact crankset (46/30T).
- Rear Cassette: Prepare at least a 32T; riders with weaker climbing feel or those wanting to keep more reserve are advised to go up to 34T. Common pairing combinations include:
- Front 34T × Rear 32T: suitable for most riders with some climbing experience who want a challenge while keeping a safety margin.
- Front 32T × Rear 34T (if using a sub-compact crankset system): suitable for riders with less climbing experience, or those who want to ensure they can complete the entire route seated without being forced into out-of-saddle grinding.
Such gear ratio combinations provide a pedaling ratio close to 1:1 or even lighter, allowing you to maintain a relatively controllable cadence (without dropping into the “death cadence” zone below 40 rpm) when encountering localized 12%+ steep sections, reducing the risk of crashes and knee strain.
Other Equipment Checklist
- Tire Pressure and Width: Mountain industrial roads may not always have perfectly smooth surfaces. It is recommended to use tires 25c or wider, and tire pressure can be lowered by 5 to 10 psi compared to flat-road riding to increase grip, especially to avoid slipping when climbing out of the saddle on steep slopes.
- Brake System Check: This route features dense climbing, which means there will be corresponding descents on the return trip. Before setting off, be sure to check brake pad wear and the smoothness of the brake fluid (hydraulic disc brakes) or cables (mechanical).
- Bike Weight Considerations: If you have extra bottle cages or non-essential accessories you can swap out, this type of short, high-climbing route offers one of the highest “returns on lightweight investment.” Every kilogram saved on the bike will feel significantly more noticeable on a 12% gradient than on flat roads.
- Bike Computer/Head Unit Gradient Display: If your bike computer supports real-time gradient display, this route is particularly well-suited for training your ability to “adjust your pace based on the gradient number,” as the gradient changes will be quite dramatic.
Nutrition, Hydration, Weather, and Seasonal Advice
Although this route is short in distance, with a theoretical one-way riding time of 20 to 40 minutes (depending on individual fitness), the concentrated climbing and high intensity mean that nutrition planning should not be taken lightly.
Hydration and Electrolytes
- Make sure your bottles are completely full before departing. There is no clear information on mid-route resupply points along this route, and shops are sparsely distributed on New Taipei mountain industrial roads. It is recommended to treat this route as a “self-sufficient” segment.
- If challenging this route during peak summer heat, given the high-intensity heart rate load from concentrated climbing, it is recommended to carry extra electrolyte tablets or sports drinks to avoid cramping from heavy sweating in a short period.
- Afternoon thunderstorms are common in the Sanxia area during summer, and mountain humidity can change rapidly. Always check the real-time weather forecast before riding, and avoid going up the mountain during thunderstorm warnings.
Seasonal Recommendations
- Autumn/Winter (October to February): Cooler temperatures make this the most recommended time for high-intensity climbing challenges, as the perceived exertion is lower than in summer. However, New Taipei mountain areas occasionally experience damp, cold conditions and fog brought by the northeast monsoon in winter. When visibility drops, be sure to prioritize riding safety and consider wearing a long-sleeve jersey with windproof features.
- Summer (June to September): High temperatures combined with concentrated climbing can cause core body temperature to rise rapidly. It is recommended to ride in the early morning or evening to avoid the midday heat, and to increase hydration and electrolyte intake.
- Plum Rain Season (May to June): Mountain roads are prone to being wet, and some sections may be covered with fallen leaves or gravel. Extra attention to grip is needed on descents; it is recommended to reduce descending speed and brake earlier.
Common Mistakes and DNF Risks: Don’t Be Fooled by the Average
Based on the apparent contradiction between the route’s total elevation gain and its gradient, we can reasonably identify several common mistakes that most often lead to challenge failure (DNF, Did Not Finish, meaning giving up midway or having to walk the bike).
Mistake 1: Planning Your Entire Pace Based on the Average Gradient
This is the biggest trap on this route. If you use the 6.7% figure as a constant gradient to plan your pace—for example, setting a fixed power output target and intending to sustain that wattage for the entire climb—you will almost certainly see your power plummet, your heart rate spike past your lactate threshold in the steeper sections of the latter half, and ultimately find yourself forced to slow down dramatically or even dismount and walk. The correct approach is to prepare mentally and physically for this route as a “route with hidden steep walls,” rather than a route with a smooth, consistent gradient.
Mistake 2: Insufficient Gear Ratio Preparation
If your largest rear cassette cog is only 25T or 28T, when facing local sections that approach or even exceed 12%, your cadence will likely be forced into a dangerously low range (below 50 rpm). This not only accelerates muscle fatigue but also significantly increases the risk of stress on your knees (especially the patellar tendon), which could lead to overuse injuries over time.
Mistake 3: Underestimating the Intensity of a Short Route
Many riders have a psychological tendency: “It’s only 7 kilometers, how hard can it be?” This mindset is particularly dangerous on this route, because the short distance combined with highly concentrated climbing means the intensity is “compressed” rather than “diluted.” Compared to a long, gradual climb where you can slowly find your rhythm, this short, steep route offers very limited room for adjustment and recovery. If you misjudge your initial pace, it’s very difficult to correct it midway.
Mistake 4: Insufficient Hydration and Nutrition Preparation
Because the distance is short, many people set off with the attitude of “no need to carry much water.” However, concentrated climbing means the cardiovascular and muscular load over a short period is no less than that of a long-distance route. The risk of dehydration and electrolyte imbalance is not reduced simply because the distance is shorter.
Reference Time Table for Different Rider Levels
The following time ranges are approximate reference values compiled based on this route’s characteristics of “short distance, high elevation gain, uneven gradient,” and drawing on riding experience from similar routes (total elevation gain over 800 meters, distance around 7 kilometers). Actual completion times will vary significantly depending on individual fitness, weather conditions, road conditions, and equipment setup. These are for pre-ride mental preparation and goal setting only, and are not officially certified timing results.
| Rider Level | Estimated Completion Time | Average Power/Heart Rate Reference | Notes |
|---|---|---|---|
| Pro/Race Level | Approx. 18–23 min | FTP 4.0–5.0 W/kg or higher | Maintains seated high-power output almost the entire way, only briefly out of the saddle on the steepest sections |
| Strong Amateur Rider | Approx. 24–30 min | FTP 3.2–4.0 W/kg | Has extensive climbing experience, can handle local steep sections without losing too much speed |
| Regular Trained Rider | Approx. 30–40 min | FTP 2.5–3.2 W/kg | May need to lower cadence and briefly get out of the saddle to adjust on the steeper sections in the latter half |
| Advanced Beginner (with basic climbing experience) | Approx. 40–50 min | Primarily based on individual heart rate zones | Recommended to cap heart rate at Zone 3–4 on the steeper latter-half sections to avoid blowing up |
| Casual Recreational Rider | Approx. 50 min or more, including rest stops | Goal is simply to finish | Recommended to prepare the lightest gear ratio and maintain the mental flexibility to stop and walk at any time |
Power and Heart Rate Training Framework: How to Get Stronger Using This Route
If you’re not just looking to “complete” this route but want to use it as a training tool, the uneven gradient characteristics of this route actually make it an excellent interval training ground.
Training Suggestion 1: Gradient Perception Interval Training
Using the relatively gentler early section and the steeper latter half, you can deliberately practice “real-time power output adjustment”—ride the early section at a steady Sweet Spot (approximately 84% to 97% of FTP), then actively switch to short, high-intensity efforts near your anaerobic threshold (105% to 120% of FTP) when entering the steep sections. This trains your body’s power conversion response speed when the gradient changes suddenly. This training mode is particularly beneficial for preparing for long-distance events with varied gradients (such as Wuling, Provincial Highway 14, etc.).
Training Suggestion 2: Out-of-Saddle Climbing Strength Training
Facing local gradients approaching 12%, your out-of-saddle technique and strength will be thoroughly tested. You can treat this route as a regular “out-of-saddle strength checkpoint,” recording your sustained out-of-saddle duration and heart rate recovery speed on the steep sections during each attempt as a tracking metric for training progress.
Descent Safety Reminder
After completing the climbing challenge, most riders will choose to descend back the same way. At this point, be sure to note:
- An elevation gain of 879.659 meters means the descent will also feature a considerable elevation drop. Descent speeds on some steep sections may exceed your expectations; be sure to slow down in advance and avoid entering corners too fast.
- Mountain industrial roads have limited width, and you may encounter agricultural vehicles or local residents’ cars. When descending, be sure to stay within your lane and always leave ample braking distance.
- On descents, it is recommended to brake intermittently rather than continuously, to avoid brake fade (commonly known as “thermal fade”) caused by heat buildup from prolonged friction on the rims or rotors.
Positioning in Comparison with Nearby Sanxia Mountain Routes
The Sanxia mountain area is home to a considerable number of well-known climbing routes, and the positioning of North County Road 113’s Dongyan Bridge within this context helps you understand where this route fits into your overall training plan. Compared to the long-distance challenge routes commonly perceived as longer with greater total elevation gain (for example, routes requiring one to two hours or more to complete), North County Road 113’s Dongyan Bridge is a short-distance, high-intensity climbing route, suitable as:
- A highly efficient option for weekday training: You can achieve intensity stimulus close to that of a long-distance climb without spending an entire morning.
- A capability test before long-distance challenges: If you can complete this route steadily within a reasonable time without significant speed drop-off, it means your climbing strength and cardiorespiratory base are already sufficient to take on longer-distance routes.
- A natural venue for interval training: As mentioned earlier, the uneven gradient profile happens to fit the needs of interval training—no need to design additional training plans, as the route itself is the best coach.
Suggested Training Plan for the Week Before the Challenge
If you have already scheduled this route into your training or challenge itinerary, how you prepare in the week before will directly affect your performance and the quality of your finish on the day. Below are training suggestions based on this route’s “short-distance, high-intensity, uneven gradient” characteristics, designed for riders with a certain baseline training routine to reference and adjust.
Seven Days Before: Simulated Intensity Intervals
One week before challenge day, it is recommended to schedule one simulated intensity interval session. This can involve finding a climb segment near your home that is 1 to 2 kilometers long with a moderate-to-steep gradient, and performing 3 to 4 sets of high-intensity climbing intervals, with full recovery between sets (heart rate returning to Zone 1 to Zone 2 before starting the next set). The purpose of this training is not to exhaust yourself before the event, but to awaken the neuromuscular memory of “short-duration, high-intensity climbing.”
Three to Four Days Before: Reduce Intensity, Maintain Frequency
At this stage, it is recommended to significantly lower training intensity, focusing primarily on Zone 2 aerobic endurance riding, with duration controlled between 40 minutes and 1 hour. The goal is to allow the body to begin entering the recovery and supercompensation phase while maintaining neuromuscular activity in pedaling, avoiding the “pre-race sluggishness” caused by complete rest.
One to Two Days Before: Easy Ride or Complete Rest
For the final one to two days, it is recommended to choose complete rest or a very easy recovery ride (heart rate maintained in Zone 1, duration no more than 30 minutes), with focus placed on sleep quality and carbohydrate storage through nutrition. Carbohydrate intake can be moderately increased during these two days to ensure muscle glycogen stores reach saturation, which will directly help with the high-intensity steep climb output in the middle-to-later sections of this route.
Challenge Day: The Importance of Warming Up
Since the early section of this route is relatively gentle, but the middle-to-later sections can suddenly enter gradients approaching 12%, if you head out without a proper warm-up, your body may not have enough time to switch into high-intensity output mode, causing heart rate and lactate accumulation to spiral out of control on the mid-route steep sections. It is recommended to spend 10 to 15 minutes on a progressive warm-up before the official challenge, gradually building from easy cruising to near Zone 3 intensity, so that both the cardiorespiratory and muscular systems are fully prepared.
GPS and Route Data Usage Reminders
Although the official database for this route has recorded key data such as distance, elevation gain, and average gradient, given the “uneven gradient” characteristic repeatedly emphasized earlier, it is recommended that riders, before the actual challenge, use a cycling computer or mobile app with real-time gradient display capability to monitor the current gradient figures throughout the ride, rather than relying solely on pre-planned pacing strategies. This route is particularly well-suited for training the “read the data, adjust in real time” riding responsiveness, which is one of the core survival skills many experienced riders rely on when facing Taiwan’s varied mountain terrain.
Additionally, if you are using offline downloaded route maps, it is recommended to reconfirm the update date of the route map data before the challenge. Mountain access roads can occasionally undergo partial rerouting or closure due to construction, landslides, or other factors. Always defer to on-site actual road conditions and the latest official announcements to avoid misjudging road conditions due to outdated map data.
Conclusion: Face the Data Honestly to Complete the Challenge Safely
The first lesson that the Sanxia North County Road 113 Dongyan Bridge route teaches all riders is not about fitness or technique, but how to correctly interpret route data. The 6.7% average gradient label, paired with an actual elevation gain of 879.659 meters over a distance of 7.03 kilometers, clearly tells us the gap between the two: this route is absolutely not the gentle suburban mountain road its surface numbers suggest, but a hard-fought battle hiding localized steep walls, with an equivalent gradient potentially approaching 12.5%.
With the correct gear ratio setup, sufficient supply preparation, a sensible segmented pacing strategy, and a clear awareness of the “average value trap,” you can truly complete this seemingly short but actually formidable Sanxia mountain challenge route safely and with a sense of accomplishment. Wishing all riders a smooth ride up to Dongyan Bridge, where you can take in the expansive views belonging to the Sanxia mountain area.
Related Reading
- Dongyan Mountain Practical Guide: 12.4 km, 501 m Elevation Gain, 4.0% Average Gradient Intermediate Training Ground
- Sanxia Xiongkong Yue Ling Practical Guide: A Hellish Climb Under Three Kilometers—Are You Really Ready?
- Sanxia Li Shan Shen Gong Practical Guide: Technical Short Climb Analysis—6.3 km, 6.1% Average Gradient
- Sanxia Zihe Road Practical Guide: 2.87 km, 498 m Elevation Gain—Are You Ready to Face 14.9%?
台北闊瀨陡坡 騎旅 / 日本單車雜誌編輯車友臨時加入!/ 髮香才是最強的 / feat. 北迴歸線小隊 / 公路車 CT Yeh
6 個月前
半日 小台灣 極限單車路線挑戰實錄
7 年前
單車 梅山36灣 坡度介紹 路段介紹 空拍 (相關遊記影片,請參考說明或我的頻道喔,歡迎訂閱)
6 年前
爬坡ITT實境)台中 魔王 松鼠坡 首航 6:12 大肚山 大三元 科福路
8 年前
大武山後門26%歡樂陡坡!JJSC南台灣單車行Day2 / 被颱風追著跑 / 公路車 / CT Yeh
2 年前
萬年峽谷! 30% 超激陡坡 里佳部落DAY2 還是很硬! | 公路車 | CT Yeh
3 年前
一日北高常見問題大集合 | 攻略 | 路線 | 訓練 | 補給 | 自行車 單車 | 一日雙城 | 雙塔 | TWB北高360 | 屁股痛
6 年前
阿里山塔塔加 兩倍特濃版!全新隧道開通! 進喔!公路車 | CT Yeh
3 年前