Sanxia Lishan Shrine Practical Guide: Analysis of a 6.3km Technical Short Climb with 6.1% Average Gradient
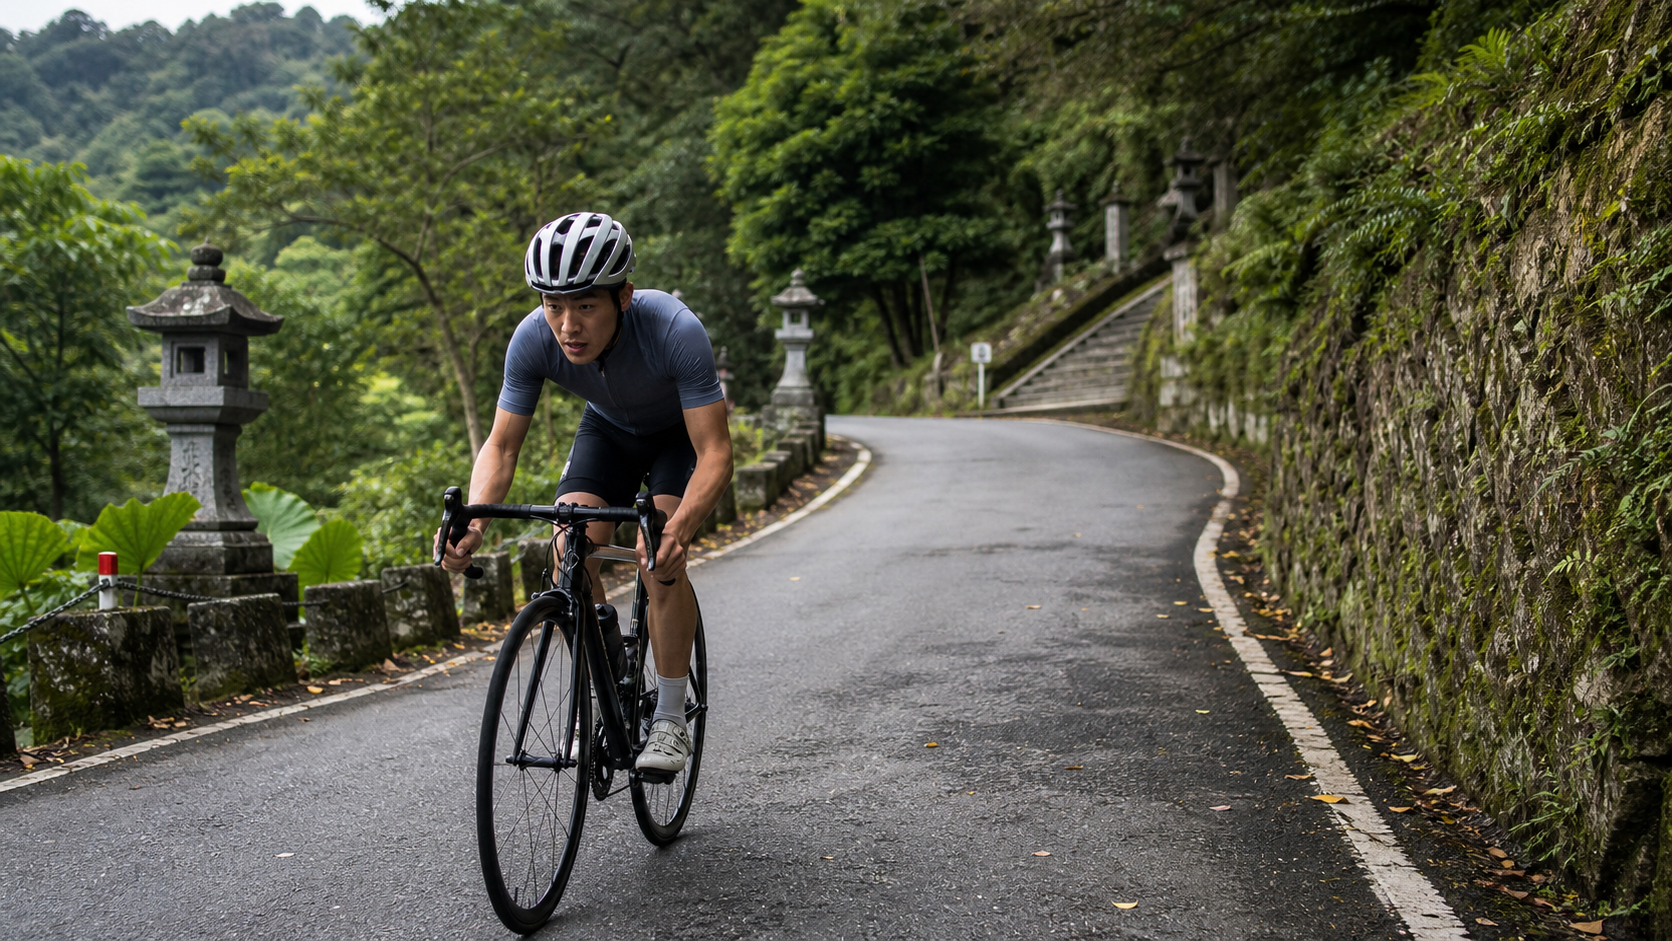
1. Route Overview and Real Data Analysis
Among the many mountain routes in Sanxia District, New Taipei City, the Sanxia Lishan Temple route falls into the category of “not long in distance but solid in intensity.” Let’s lay out the hard numbers first:
| Item | Value |
|---|---|
| Route Name | Sanxia Lishan Temple |
| Administrative District | Sanxia District, New Taipei City |
| Total Distance | 6338.1 meters (approx. 6.34 km) |
| Average Gradient | 6.1% |
| Estimated Total Elevation Gain | Approx. 387 meters (estimated value, see explanation below) |
An honest note on the elevation data: The raw elevation gain recorded in the database for this route is 0.0 meters, which is clearly missing data or a failure to properly record the elevation figure during the original upload/logging process. This absolutely does not mean the route truly has zero elevation gain—just looking at the 6.1% average gradient tells you that’s impossible. A 6.3 km route with a 6.1% average slope having zero elevation gain would mean it climbs horizontally into the sky, which is physically impossible.
To give riders at least a usable reference baseline, we used the most basic trigonometric approximation to back-calculate: distance × average gradient = 6338.1 meters × 0.061 ≈ 387 meters. This method treats the “average gradient” directly as a linear coefficient of distance to estimate vertical gain. It is a simplified estimate that does not account for the actual uneven distribution of gradients along the route (some sections are gentler, some steeper), nor whether the route includes any slight descents. In other words, this 387-meter figure is an estimate derived from the average gradient, not a precise elevation number recorded by an official GPS barometric altimeter. For actual elevation gain, please rely on your own cycling computer (Garmin, Wahoo, Karoo, or other devices equipped with barometric altimeters) recorded on-site. A variance of plus or minus 10–20% is a reasonable range.
Even so, the 387-meter estimate still holds practical value: it tells us the route has a fairly high “elevation density”—averaging about 61 meters of climbing per kilometer. Among Taiwan’s short suburban climbs, this ranks as medium-to-high intensity, comparable in intensity level to some well-known “short but punchy” climbs (such as certain sections of Fengguizui or the industrial roads around Erge Mountain).
2. Section-by-Section Strategy: Pacing Management from Start to Finish
Since this route currently lacks detailed per-kilometer gradient segment data (also part of the missing data), the following strategy is based on the “6.1% average gradient” combined with the typical gradient distribution characteristics of Taiwan’s mountain industrial roads (usually following a pattern of “warm-up at the start, main climbing in the middle, and easing off or a final steep pitch near the end”) to provide actionable recommendations. Actual gradient changes should still be based on on-site road conditions and your cycling computer’s real-time gradient display.
Start to Kilometer 1: Warm-Up and Heart Rate Building
The starting section of most Taiwan mountain routes typically has a gentler gradient than the average—this is the golden window for gradually easing your body into aerobic metabolism and letting your heart rate climb steadily. Recommendations:
- For the first 500 meters, deliberately keep your output low, giving your heart rate 2 to 3 minutes of buffer time to climb to the upper end of Zone 2 or the lower end of Zone 3, rather than surging to lactate threshold right from the start.
- Maintain a cadence of 80 to 90 rpm. This phase doesn’t require hard pedaling; the focus is on “warming up” the body.
- Observe your breathing rhythm. If you’re already gasping for air during this section, it means your pacing strategy needs to pull back later to avoid being overwhelmed by the steeper mid-section.
Kilometers 1 to 4: The Core Climbing Section—The Critical Zone for Intensity Management
This section is expected to carry the heaviest gradient load of the entire route and is where the ride is most likely won or lost. Based on the 6.1% average gradient, if the actual gradient in this mid-section falls between 7% and 9% (a common “mid-section steeper than average” phenomenon on Taiwan mountain routes), riders need to adjust their pedaling strategy:
- Power-based riders: Aim to sustain output steadily at 90% to 95% of FTP (Functional Threshold Power), avoiding an early surge above FTP that would cause rapid lactate accumulation and leave nothing for the later sections.
- Heart-rate-based riders (no power meter): Maintain a heart rate between 80% and 88% of maximum heart rate—commonly referred to as Zone 3 to the lower edge of Zone 4. This intensity can sustain 15 to 25 minutes of continuous climbing without blowing up.
- Cadence adjustment: On steeper sections, drop your cadence to 65 to 75 rpm, using a larger gear ratio combined with a seated climbing position with your center of gravity shifted forward, saving energy for potentially steeper sections or a sprint later on.
- If you encounter consecutive hairpin turns (common terrain on Taiwan mountain industrial roads), the inside of the turn is typically steeper than the outside. When cornering, slightly widen your line toward the outside to reduce instantaneous torque demands.
Kilometer 4 to the Finish: Wrapping Up and Arriving at Lishan Temple
Entering the final 2 kilometers or so, fatigue typically begins to accumulate noticeably. This is the stage where pacing errors are most common—either giving up due to exhaustion, or misjudging the remaining distance and surging too early, only to run completely empty in the final few hundred meters.
- Start “taking stock of your energy” during this section: if your heart rate is already approaching your anaerobic threshold (Zone 5), actively back off the pace. Better to finish slightly slower than to cramp up or be forced to dismount and walk before the finish.
- If there is a final kicker before the route’s endpoint (or a landmark along the way) at Lishan Temple—mountain temple surroundings commonly feature “the steepest section right before the temple plaza”—reserve at least 10% of your energy buffer to handle this finishing surge.
- After reaching the finish, be sure to do an active cool-down: spin easily for 3 to 5 minutes to bring your heart rate down rather than stopping immediately. This genuinely helps prevent post-climb orthostatic hypotension and muscle cramping.
3. Gear Ratio and Equipment Recommendations
With a 6.1% average gradient and a 6.3 km mid-distance climb, this route sits in the middle ground between “can power through it” and “recommended to use lighter gearing.” Specific setup recommendations are as follows:
Gear Ratio Configuration Reference
| Rider Type | Recommended Chainring | Recommended Cassette | Notes |
|---|---|---|---|
| Advanced/Racing Rider (FTP > 4.0 W/kg) | 50/34 Semi-Compact | 11-28T or 11-30T | Can maintain higher cadence output with mid-range gearing |
| General Recreational Rider (FTP 2.5-3.5 W/kg) | 50/34 Semi-Compact | 11-32T or 11-34T | Recommended to keep lighter gearing available for mid-section steep pitches |
| Beginner/Conservative Fitness Rider | 46/30 or Lighter Compact | 11-34T or Higher | Prioritize maintaining cadence to avoid spiking heart rate |
Since this route is only 6.3 km in total length, it falls into the category of a short, high-intensity climb—different in logic from long climbs of 15 km or more (such as certain sections of the Beihuan or Nanheng). Here, you don’t really need to worry about “energy conservation for endurance”; it’s closer to an interval training intensity model instead. Therefore, even riders with moderate fitness can consider using slightly heavier gearing to sustain higher power output, as long as you’re confident you can finish these 6.3 km without needing to worry about dozens more kilometers ahead.
Equipment Checklist
- Wheelset: General training wheels or durable wheelsets are sufficient. This route is short, so top-tier lightweight climbing wheels aren’t specifically necessary unless you’re a race-oriented rider looking to minimize overall bike weight.
- Braking System: Make sure your brake pads/brake shoes still have sufficient life remaining. Descending back down on mountain routes places considerable demand on the braking system, especially since Taiwan’s mountain areas often have afternoon thunderstorms in summer, and wet-road braking distances are longer.
- Tire Pressure: For general road tires, it’s recommended to run the front tire 5-10 psi lower than the rear. On wet mountain roads, you can drop another 3-5 psi for added grip, but be mindful of the snakebite puncture risk.
- Carrying Supplies: Since the route is only 6.3 km, a one-way ride time for most riders falls between 20 and 40 minutes. A standard water bottle and a few energy gels on hand are sufficient; there’s no need to carry large amounts of supplies.
4. Nutrition, Hydration, and Seasonal Weather Advice
Although this route is not long, the concentrated gradients, high intensity, and the hot, humid summer climate of the Sanxia mountain area mean that nutrition planning should not be taken lightly.
Hydration and Electrolytes
- Before setting off, it is recommended to consume 300 to 500 ml of fluid so that your body is fully hydrated before entering the high-intensity climb.
- If riding in the Sanxia mountains in summer (June to September), the perceived humidity is often more oppressive than in the city. It is recommended to carry at least one bottle of electrolyte sports drink. Even though the route is short, high-intensity climbing combined with the muggy environment can cause a rapid loss of sodium in a short time, and the risk of cramping is not low.
- In winter (December to February), the main concern is the temperature difference between “sweating on the climb and losing body heat on the descent.” It is recommended to carry a lightweight windbreaker and put it on for the descent back.
Weather and Seasonal Advice
- Best riding times: Early morning or late afternoon, avoiding the midday heat in summer. The Sanxia mountain area features hilly terrain; at noon, the heat reflected from the asphalt plus uneven tree shade makes the perceived temperature harsher than on flat urban roads.
- Rainy season precautions: During the plum rain season (May–June) and typhoon season (July–September), roads in New Taipei’s mountain areas are prone to slippery surfaces, falling rocks, and fallen branches. It is recommended to check whether the New Taipei City mountain roads have issued any warning or closure notices before riding.
- Visibility: Mountain roads have many bends. If you plan to ride in the late afternoon or near sunset, be sure to equip front and rear lights. Although this route is short, descent speeds can be considerable, so safety visibility gear is a must.
5. Common Mistakes and DNF Risks
Short, steep routes most easily lead riders to adopt the mistaken mindset of “it’s short, so I can ride it casually.” Below are common failure modes seen in practice:
-
Starting too fast: Because riders know the total distance is only 6.3 km, many start at near-sprint intensity, only to find their heart rate maxing out and their legs giving out around the 2 km mark, forcing them to slow down dramatically or even dismount, which ultimately makes their total time slower.
-
Ignoring the mental preparation for the mid-section steep grades: If you do not first understand the fact that “6.1% is only the average, and the actual mid-section grades may be steeper,” you are likely to mentally break down when encountering steeper sections than expected, which in turn affects your pacing decisions.
-
Gearing that is too heavy: Riders who are used to flat or gently rolling terrain often underestimate the intensity of this route and head up the mountain with flat-terrain gearing. As a result, they are forced to grind at very low cadence on the steep sections, placing heavy strain on the knees, which carries a risk of overuse injury over time.
-
Insufficient fluid intake: Because the distance is short, many riders do not hydrate at all before starting, thinking “I’ll finish in 20 to 30 minutes, so I don’t need it.” But combined with hot, humid weather and high-intensity output, dehydration sets in faster than expected.
-
Neglecting the risk of the descent on the return: If you ride out-and-back, riders often let their guard down after the hard climb, and poor speed control on the descent, combined with many blind corners on mountain roads, makes this the stage where accidents are most likely to happen. The descent always demands more focus than the climb.
-
Attempting the route without assessing personal fitness: Although this route is short, the 6.1% average gradient plus an estimated 387 meters of climbing places real demands on both cardiovascular fitness and muscular strength. Riders with a weaker fitness base, or those who have not trained regularly recently, are advised to build climbing experience on gentler routes before attempting this one, to avoid having to abandon midway or experiencing physical discomfort due to insufficient preparation.
6. Target Time Reference Table for Different Rider Levels
The time references below are based on the route’s intensity—6.1% average gradient, 6.3 km distance, and approximately 387 meters of estimated climbing—and are rough reference ranges extrapolated from typical riding performance on similar suburban mountain routes in Taiwan. Actual results will vary depending on individual fitness, weather conditions, wind resistance, road conditions, and other factors. These figures are for training planning reference only:
| Rider Level | Power-to-Weight Ratio Reference (W/kg) | Estimated Finish Time | Average Speed Reference |
|---|---|---|---|
| Competitive / Pro | 5.0 and above | Approx. 16–19 min | Approx. 20–24 km/h |
| Advanced Club Level | 4.0–5.0 | Approx. 19–23 min | Approx. 16–20 km/h |
| Intermediate Recreational | 3.0–4.0 | Approx. 23–29 min | Approx. 13–16 km/h |
| General Recreational | 2.0–3.0 | Approx. 29–38 min | Approx. 10–13 km/h |
| Beginner / Novice | Below 2.0 | Approx. 38 min or more | Below 10 km/h |
How to use this table: This comparison chart is derived from a rough power-to-weight ratio model. It is not an official timing record or big-data statistical result for this specific route. Its main purpose is to give riders of different levels a realistic expectation of their possible finish time. Actual performance should be based on your personal condition that day and the on-site road conditions.
7. Power and Heart Rate Training Framework Suggestions
If you plan to incorporate this route into a regular training menu, here are some suggestions for applying different training frameworks:
Interval Training Mode
Because the entire route is only 6.3 km and takes about 20 to 40 minutes (depending on rider level), this route is naturally suited as a vehicle for single-effort high-intensity interval training, rather than endurance training. Suggested approach:
- Warm-up: Ride on flat or gently rolling terrain for 15 to 20 minutes to fully warm up your heart rate and muscles.
- Main set: Challenge this 6.3 km climb at full effort, maintaining intensity at 95% to 105% of FTP (adjust based on your recovery capacity).
- Recovery: After finishing, coast downhill slowly or ride on flat terrain for 10 to 15 minutes as a cool-down, bringing your heart rate back down to Zone 1 to Zone 2.
- If your fitness allows, you may turn around and repeat for a second effort as a 2-rep climbing interval session, with 15 to 20 minutes of rest between reps.
Heart Rate Zone Reference
| Training Goal | Heart Rate Zone (% of Max HR) | Suitable Section |
|---|---|---|
| Aerobic Base Building | 60–70% | Start warm-up section |
| Tempo Riding | 76–85% | For riders maintaining steady output throughout |
| Threshold Training | 88–95% | For riders challenging the mid-section steep grades |
| Anaerobic / Sprint | 95% and above | Final sprint section (not recommended for the entire route) |
8. Positioning Comparison with Surrounding Sanxia Mountain Routes
Sanxia District itself is an administrative area with a very high density of mountain routes in New Taipei City. Within the broader Sanxia mountain road network, the Lishan Shrine route falls into the category of “short distance, concentrated gradients,” making it suitable for the following use cases:
- Quick training during a limited lunch break or after work: Since most riders can complete a single effort within 20 to 40 minutes, it works well as a training option for fragmented schedules.
- An ideal vehicle for climbing interval sessions: As discussed in the previous section, the short and steep nature of the route makes it naturally suited for repeated climbing intervals.
- A “stepping stone” for riders new to climbing routes: For riders who already have some foundation on gentle climbs and want to challenge higher intensity but are not yet ready for long, heavy climbs (such as Beihuang Lala Mountain or Wulai Fushan), this route offers a moderate-intensity, low-time-cost transitional option.
Descent safety reminder: Whether you return the same way or continue onto other routes, the descent sections of this type of mountain access road can also reach gradients of 6% or even steeper. Combined with blind corners, potential oncoming traffic, and animals crossing the road, it is strongly recommended that you: keep your speed within a range that allows you to safely negotiate corners, brake early and progressively rather than abruptly, keep both hands in positions that allow quick reactions (on the brake hoods or drops), and constantly watch for fallen leaves, loose gravel, or slippery sections on the road surface.
9. One-Week Pre-Race Training Adjustment Suggestions
If you plan to treat this route as a personal challenge, or even as a key segment in a group ride, your training adjustments in the week before will directly affect the quality of your performance on the day. Below are suggested training rhythms designed for this type of “short-distance, high-intensity climb” goal:
Seven to Four Days Before the Race: Maintain Intensity, Reduce Volume
During this phase, it’s not recommended to do long, high-volume endurance rides. Instead, you should schedule one or two short, high-intensity climbing intervals to keep your body sensitive to high-intensity output, but overall training volume should start to taper off to avoid accumulating excessive fatigue that could affect your pre-race condition. Suggested workout: 15 minutes warm-up, 3 sets of 5-minute climbing intervals (intensity at 100-110% of FTP), with 5 minutes rest between sets, finishing with a 15-minute cool-down ride.
Three Days to One Day Before the Race: Tapering and Neuromuscular Activation
The focus of these days is on “activating the neuromuscular system” rather than accumulating training effects. You can schedule one very short but extremely high-intensity sprint session (e.g., 4 to 6 sets of 30-second all-out sprints with 3 minutes rest between sets), paired with plenty of rest and sleep. The most common mistake in this phase is adding extra training due to nervousness, which ends up leaving you feeling fatigued on race day.
The Day Before the Race: Complete Rest or Very Light Activity
It’s recommended to do only 20 to 30 minutes of very low-intensity riding to keep blood circulation active, but absolutely no intensity stacking. The focus of this day should be on hydration, carbohydrate loading, and mental relaxation preparation.
10. Common Equipment Adjustment Details: From Saddle to Handlebar Position
Besides gear ratio setup, because this route has steep gradients and a short distance, fine-tuning your body position will also directly impact pedaling efficiency and comfort.
Saddle Fore-Aft Position
When climbing, your center of gravity naturally shifts forward. If your saddle position is too far back, it can lead to decreased pedaling efficiency and increased lower back strain. Before tackling this type of steep route, it’s recommended to first confirm whether your saddle fore-aft position is suitable for prolonged seated climbing. If necessary, you can make minor adjustments to the saddle angle to keep your pelvis stable during seated climbing without sliding forward.
Handlebar Position Choice and Standing Climb Technique
Facing an average gradient of 6.1% with potentially steeper sections in the middle, standing climbing is one of the necessary techniques, especially on sections where the gradient suddenly steepens or when you need a short burst of power to get through hairpin turns. When standing to climb, it’s recommended to hold the tops or the brake/shift levers lightly with both hands, letting your center of gravity sway left and right with the pedaling rhythm, but avoid excessive movement to prevent unnecessary energy expenditure. Alternating between standing and seated climbing can effectively distribute fatigue across different muscle groups and extend your overall climbing endurance.
Bike Weight and Preparation
Although this route is short and doesn’t require obsessing over every gram of bike weight like a long-distance climb, basic bike preparation is still important: before departing, confirm the shifting system operates smoothly (missed shifts on steep climbs can easily lead to chain breaks or crash risks), tire pressure is moderate, and brake pads are in good condition. These seemingly basic checks are often the key details that determine whether a climbing challenge goes smoothly.
11. Conclusion: Big Lessons in a Small Route
The Sanxia Li Shan Shrine route, in less than 6.5 kilometers, condenses all the typical elements of suburban mountain climbing routes in Taiwan: steep but manageable gradients, varied road conditions, and an intensity test that requires riders to honestly confront their physical condition. For riders looking to improve their climbing technique or seeking an efficient training vehicle, this is a route worth practicing repeatedly and improving on progressively.
Finally, I want to reiterate: the elevation gain estimates, target time references, training frameworks, and other content provided in this article are reference suggestions based on existing data and general sports science principles. When actually riding, always prioritize on-site road conditions, weather conditions, and your own physical condition as the foremost considerations. Safety is always the top priority.
For riders who have long treated climbing training as routine, the greatest value of this route may not lie in the results of a single challenge, but in its significance as a “repeatable, standardized test segment.” Because the distance is fixed at 6.3 kilometers and the gradient profile is relatively concentrated, you can return and re-challenge it periodically, using objective data like finish time, average heart rate, and average power to track long-term trends in your climbing ability. This “fixed-point retesting” training logic is a common and effective self-assessment method in sports science, far better at reflecting true fitness improvements than a single subjective feeling. For riders committed to long-term improvement, it’s recommended to create a simple record sheet, noting the day’s weather conditions, completion time, average heart rate, and subjective fatigue level after each challenge. Accumulated over time, this will become your own highly valuable training trajectory record.
All route data in this article is based on database records. Due to missing original records for the elevation gain value, it has been estimated using the “distance × average gradient” method. The figures are for reference only; please refer to your on-site GPS/cycling computer records for actual data. Before your trip, it’s recommended to check real-time weather and road condition information, and ride according to your own physical capabilities.
Related Reading
- Sanxia Xiongkong Yue Ling Practical Guide: The Hellish Slope Under 3 Kilometers, Are You Really Ready?
- Sanxia Bei 113 Dongyan Bridge Practical Guide: Don’t Be Fooled by the “6.7% Average Gradient” — This Road Hides a 12% Grade Killer Move
- Tou 56 Shenmu Climb Practical Guide: 6.9 Kilometers, 653 Meters of Elevation Gain, Data Analysis of Nantou’s Secret-Level Brutal Steep Climb
- Sanxia Zihe Road Practical Guide: 2.87 Kilometers, 498 Meters of Elevation Gain, Are You Ready to Face 14.9%?
台北闊瀨陡坡 騎旅 / 日本單車雜誌編輯車友臨時加入!/ 髮香才是最強的 / feat. 北迴歸線小隊 / 公路車 CT Yeh
6 個月前
新竹羅平 x 天湖部落 大禹嶺級變態陡坡! 4K超高畫質 空拍 | 公路車
5 年前
單車 梅山36灣 坡度介紹 路段介紹 空拍 (相關遊記影片,請參考說明或我的頻道喔,歡迎訂閱)
6 年前
半日 小台灣 極限單車路線挑戰實錄
7 年前
大武山20%魔王陡坡【JJSC南台灣遊騎Day2】!屁股真的要裂開了...凡士林抹滿也沒用?神秘金教堂還有超便宜夜市
3 個月前
大禹嶺 到 武嶺牌樓 全程前後實況錄影 | 北進武嶺 | 東進武嶺 | KOM | 訓練台 | 坡度分析 | Taiwan KOM Last 10 km HARD | 公路車
6 年前
嘉義大埔、阿婆灣挑戰賽,美到以為在日本!ft. 環騎5 Cool 西拉雅188 / 公路車 / CT Yeh
7 個月前
#公路車 #西進武嶺 配速配瓦實驗 坡度分析 四小時內攻略 建大盃 NeverStop #西進武嶺攻略
6 年前