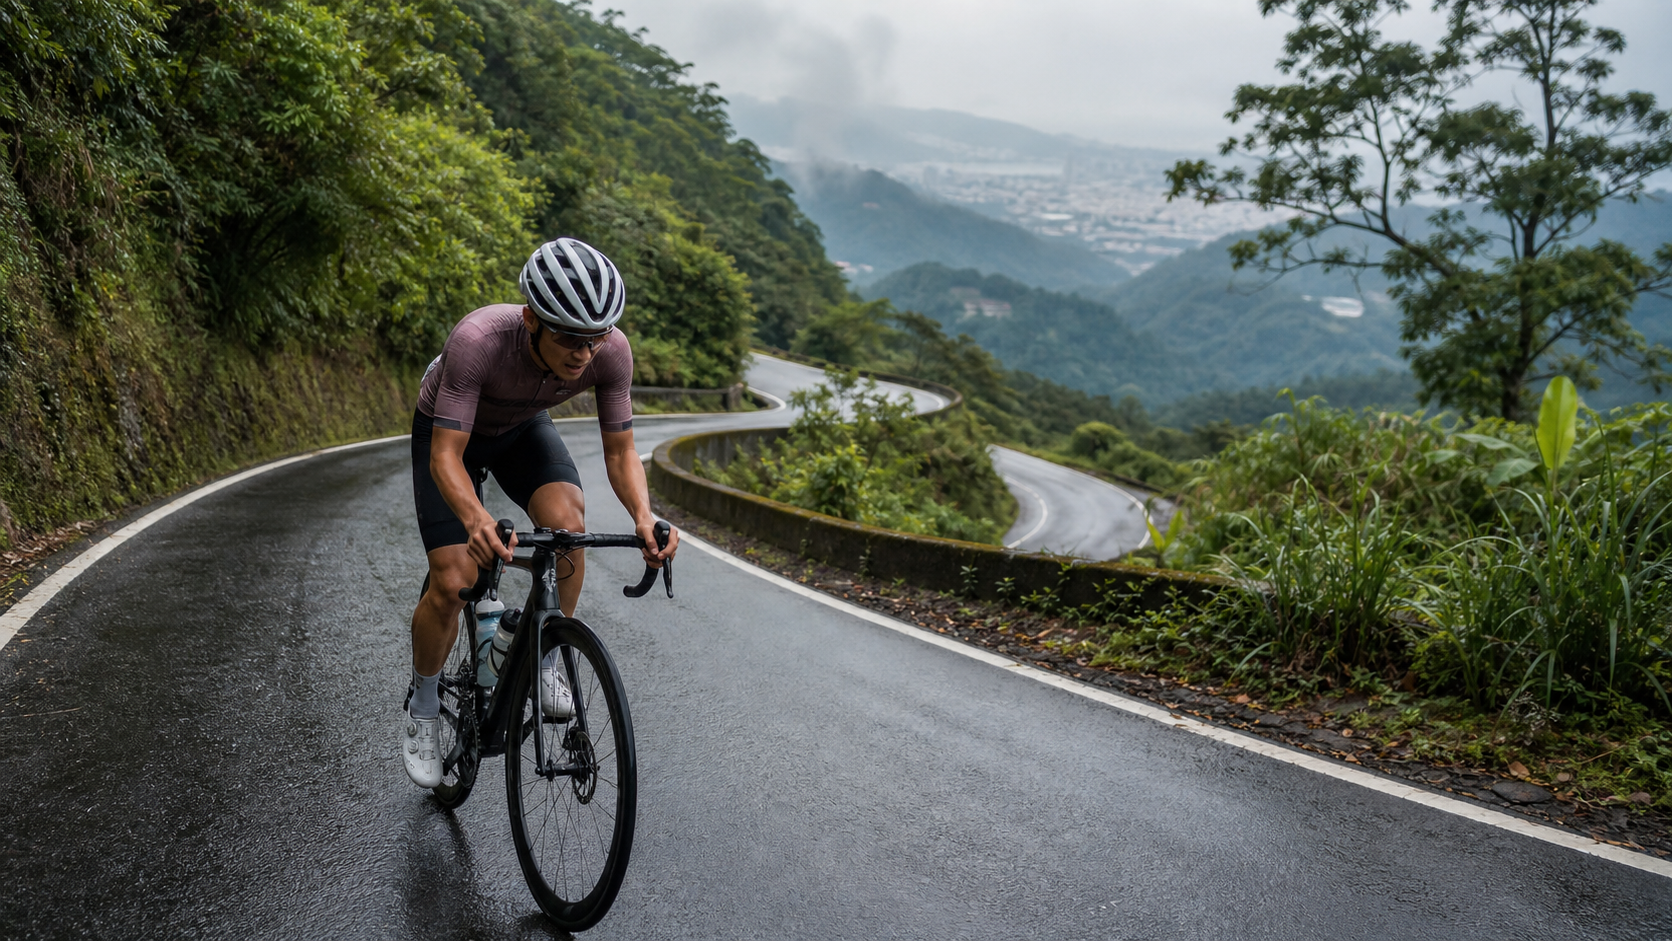
Wuzhi Mountain in Xizhi—a suburban mountain road often recommended by cycling clubs as an “entry-level climbing route.” But if you set off based only on the two figures you see in the route data—“10 km distance, 5.7% average gradient”—you may well question your life choices at some bend in the middle section. This article lays it out clearly with data: this route is tougher than it looks.
1. Route Overview and Real Data Analysis
Let’s start by laying out the basic figures from the official (database-recorded) data:
| Item | Value |
|---|---|
| Route Name | Wuzhi Mountain |
| Location | Xizhi District, New Taipei City |
| Total Distance | 10,037.0 m (approx. 10.04 km) |
| Total Elevation Gain | 839.1 m |
| Official Average Gradient | 5.7% |
At first glance, a 5.7% average gradient for riders familiar with Taiwan’s climbing routes falls into the “moderate to mild” category—compared with routes like Beiyi or Fengguizui, which routinely exceed 6% with local sections above 10%, 5.7% even sounds like something you could handle with relative ease.
But here lies a numerical contradiction we must honestly confront.
If we apply the most basic trigonometric concept and work backward using “distance × gradient” to derive the theoretical elevation gain:
10.037 km × 5.7% ≈ 0.572 km = 572 m
Here’s the problem: the actual elevation gain recorded in the database is 839.1 m—a full 267 m more than the 572 m derived above, a gap of over 40%. Conversely, if we work backward using “actual elevation gain ÷ distance” to find the true equivalent average gradient of this route:
839.1 m ÷ 10,037.0 m ≈ 8.36%
In other words, the true equivalent gradient of this route is closer to 8.4%, not the 5.7% stated in the official figures.
This discrepancy is not data fabrication—it’s the trap inherent in “average gradient” as a statistic. The 5.7% likely reflects only the gradient of a certain section (e.g., the gentler starting climb), or it’s the result of a distance-weighted average diluted across the entire route. When a route contains both flat or even descending sections and steep sections exceeding 10%, the simple average will drastically underestimate the maximum suffering you’ll actually encounter.
What this actually means for riders: 839 m of climbing packed into 10 km means this route very likely contains a substantial proportion of sections above 8%, and it’s entirely possible there are several short steep walls approaching or exceeding 10%. If you set off with the mental expectation that “5.7% shouldn’t be too painful,” the frustration when you hit sustained steep sections in the middle will be especially intense—this is precisely the dual psychological and physiological reason so many riders “blow up” on Wuzhi Mountain.
All the pacing advice, gear ratio recommendations, and nutrition suggestions in the rest of this guide are built on the honest premise that “this is a 10 km mountain road with an equivalent gradient near 8.4% and severe terrain undulation”—not a “gentle 5.7% climb.”
2. Section-by-Section Strategy: Breaking 10 km into Manageable Chunks
The worst mindset for a long climb is “charge first, think later.” With 10 km and 839 m of elevation gain, the coarsest way to plan your riding strategy is to split the route into three major segments:
2-1 Starting Warm-Up Section (Approx. First 2–3 km)
Most suburban mountain routes don’t throw the steepest gradients at you right from the start, and Wuzhi Mountain is no exception. This section is your buffer zone for transitioning from flat-road heart rate to climbing heart rate. Recommendations:
- Keep heart rate at the upper edge of Zone 2 to Zone 3, avoiding spiking your heart rate near the lactate threshold from the very beginning. If you push too hard early, the price you pay is usually that your leg muscles have already accumulated an oxygen debt by the time you hit the steep sections later.
- Maintain cadence at 85–95 rpm, using a higher cadence and lighter gear ratio to keep your muscles in the aerobic range, saving anaerobic buildup for the moments when you truly need to sprint or tackle short steep walls.
- This section is the golden opportunity to assess your condition for the day—if your heart rate is abnormally high and your breathing is labored during the warm-up, it means your body isn’t in good shape that day. Proactively downgrade your overall goal rather than pushing through until the middle section only to find you’ve run out of steam.
2-2 Mid-Section Steep Climb (The Core Pain Zone of the Route)
Based on the data analysis above, a large portion of this route’s elevation gain should be concentrated in the middle section. This is the interval requiring the most tactical thinking of the entire ride:
- Abandon the myth of “maintaining a steady speed.” Terrain that alternates between steep and gentle cannot be conquered at a single constant speed. The correct approach is to “anchor on power or perceived exertion (RPE), not on speed”—on steep sections you can briefly push power output higher, while on gentler or flatter sections you actively reduce power to recover, giving your body room to breathe.
- Make good use of zigzag lines or road positioning (if road width and traffic conditions allow). On mountain roads with hairpin turns or sustained steep sections, the climbing angle on the outside lane is usually slightly gentler than at the inside apex. Choosing your line wisely can save a fair amount of unnecessary climbing effort.
- Standing climbs (out-of-saddle) should only be used as a short-term tool, not for extended periods. While standing can momentarily boost output on steep sections, heart rate and energy expenditure climb rapidly. It’s recommended to use it only on short steep walls where the gradient clearly exceeds 10%, then immediately sit back down and resume a cruising cadence.
- Mental preparation matters far more than you’d think. This section is where the frustration of “another steep climb?” hits hardest, especially for riders carrying the expectation that “this route is only 5.7%.” I suggest mentally defining this section as “a hard climb equivalent to 8% or more”—you’ll find it far easier to maintain steady output without falling apart.
2-3 Final Section (Approaching the Finish)
By the latter part of a long climb, both your physical strength and willpower are largely depleted. The keyword for this section is “conservative”:
- Proactively lower your target pace, especially if you’ve already exceeded your planned power output in the middle section. In the latter part, it’s better to slow down than to risk cramping or hitting the wall.
- Watch your breathing and core stability. At the end of fatigue, posture compensation—hunching over and shallow breathing—is most likely to appear. Remind yourself to keep your chest up and breathe deeply; this can effectively slow the deterioration of perceived fatigue.
- Fuel in advance—don’t wait until the latter section to remember (see Section 4 for details). If you only replenish when blood sugar and electrolytes are already depleted in the latter part, absorption and effectiveness will be too late.
3. Gear Ratio and Equipment Recommendations
Given this route’s “gentle on the surface, hardcore underneath” character, it’s better to err on the side of caution in equipment setup rather than gamble:
3-1 Gear Ratio Setup
- Road bike riders: It’s strongly recommended to use a compact crankset (e.g., 50/34 or lighter), paired with a large cassette (e.g., 11-32T or 11-34T) to ensure you still have sufficient low gears available on the steep sections that may appear in the latter part. Don’t configure your gearing based solely on the impression of “5.7% average”—that will leave you unable to maintain cadence on the mid-to-late steep sections, forcing you to crawl at a snail’s pace or even dismount and walk.
- Mountain bike/gravel bike riders: Your gear range is usually already more generous, but it’s still worth confirming that your easiest gear can handle short steep sections above 10%, and pay attention to tire grip settings.
- General principle: For this route, adopt a “bias toward lighter gearing” strategy rather than “bias toward heavier gearing for speed”—10 km may not be a long distance, but the climbing is concentrated and the terrain undulates severely. Lighter gearing lets you power through steep sections with a higher cadence and less effort, avoiding excessive strain on your knees and muscles.
3-2 Equipment Checklist
- [ ] Confirm the drivetrain shifts smoothly, especially that the rear derailleur doesn’t skip or catch when shifting to the easiest gear
- [ ] Check brake pads (the braking load on descents is considerable; keep this in mind if you’re returning the same way or continuing on other suburban mountain routes)
- [ ] Adjust tire pressure according to the day’s temperature and road conditions—mountain roads may have fallen leaves and loose gravel
- [ ] Carry a basic puncture repair kit and spare inner tubes (mountain areas have limited access to supplies and rescue—be fully self-sufficient)
- [ ] Basic protective gear: helmet, gloves, sunglasses, etc.
- [ ] Pre-load the route GPX onto your bike computer or head unit to monitor remaining elevation gain and distance at all times
4. Nutrition, Hydration, and Seasonal Weather Recommendations
While 10 km may sound like a short distance, given the high-intensity climbing sections in the mid-to-late portion, your energy expenditure rate will be far higher than 10 km on flat roads—your fueling strategy cannot be taken lightly:
4-1 Fueling and Hydration
- Before Departure: It is recommended to finish a normal meal at least 1-2 hours before starting, to avoid riding on an empty stomach.
- During the Ride: Even if the total distance is only 10 km, if the expected completion time is over 40 minutes (a reasonable range for most non-elite riders), it is still recommended to take small sips of water every 15-20 minutes to prevent dehydration from affecting muscle performance. If the weather is hot or the day feels humid, it is recommended to carry extra electrolyte supplements.
- Pre-Climb Fueling Point Before the Steep Mid-Section: If you know your energy levels are insufficient, you can do a small refuel (one energy gel or sports drink) before entering the steep mid-section climb, to pre-store blood glucose for the upcoming high-intensity segment.
4-2 Weather and Seasonal Reminders
- Mountain weather changes rapidly. Although Wuzhi Mountain is not particularly high in elevation, it is still a suburban mountain terrain. The mountains are prone to localized clouds, fog, sudden rain, or poor visibility due to terrain effects. It is recommended to check the real-time weather and mountain forecast before departure, and not rely solely on the city weather.
- Wet roads after rain are a common risk on suburban mountain roads, especially on steep slopes and corners, where braking distance and grip are both affected. In rainy or slippery conditions, it is recommended to reduce speed and brake earlier.
- During summer high-temperature periods, avoid departing around noon. Choose early morning or evening time slots to reduce the risk of heatstroke and heat exhaustion. On long climbs in hot, humid conditions, perceived exertion is much higher than in dry weather.
- Low temperatures and strong winds under the influence of the autumn/winter northeast monsoon: Temperature differences in the mountains can increase significantly after dark. It is recommended to carry a lightweight windbreaker or prepare warm clothing, especially if you plan to descend after dusk.
5. Common Mistakes and DNF Risks
Based on the characteristics of this route—“the average gradient looks mild, but the actual climbing is concentrated and steep”—the following are the most common mistakes that easily lead to mid-route abandonment (DNF) or physical breakdown:
5-1 Misled by the Average Gradient, Pacing Too Fast in the Early Section
This is the most typical mistake pattern. Many riders see the number “5.7%” and intuitively assume this is a route that can be “ridden at cruising speed,” so they start the opening segment with a relatively high power output. By the time they reach the real steep sections in the middle, they realize the gradient is far steeper than expected. By then, too much energy has already been expended, and they cannot handle the subsequent hard climbs, forcing them to drastically slow down or even dismount and walk.
Countermeasure: From the very beginning, set the mental difficulty of this route as “a hard climb equivalent to 8% or more,” rather than “a gentle slope averaging 5.7%.” Your pacing will naturally be more conservative and better suited to the actual terrain.
5-2 Poor Energy Allocation in the Latter Section, Finishing with Cramps
Because the climbing is concentrated and the terrain alternates between steep and gentle, many riders find themselves with little energy left after tackling the continuous steep slopes in the middle section. If they still try to maintain their original pace at this point, they are highly prone to thigh or calf cramps, forcing them to stop by the roadside to stretch or even abandon the ride.
Countermeasure: After the mid-section steep climbs end, consciously acknowledge that you have already expended a large amount of energy. In the latter section, prioritize “completion” over “maintaining speed”—moderately reduce your pace and extend your recovery rhythm.
5-3 Fueling Too Late
Many riders are accustomed to fueling “only when they feel tired,” but it takes time for fuel to go from ingestion to actually taking effect. By the time you are already exhausted in the mid-to-late section and remember to fuel, it is often too late to turn things around.
Countermeasure: Adopt a “preventive fueling” strategy. Actively replenish energy and fluids before entering known high-intensity segments, rather than waiting for your body to send warning signals before reacting.
5-4 Insufficient Gear Ratio Setup, Forced to Grind Standing or Walk
If you configure your gearing based on the impression of “average 5.7%” (for example, choosing a heavier rear cassette), you may find that when you encounter the steep short walls that can appear in the latter section, you simply cannot turn the pedals. You would be forced to grind out of the saddle for extended periods, or even dismount and walk—both of which are highly damaging to your knees and overall riding rhythm.
Countermeasure: Be sure to refer to the gear ratio recommendations in Section 3. It is better to set up a slightly lighter gear ratio and not need it, than to discover on the spot that your gearing is insufficient.
5-5 Underestimating Mountain Weather Changes, Unable to React in Time
Some riders depart relying only on the city weather forecast, ignoring the localized sudden rain, fog, or temperature drops that mountain terrain effects can bring. This leaves them caught in adverse weather mid-ride without the proper gear to respond.
Countermeasure: Be sure to check real-time mountain weather information before departure, and prepare basic contingency gear as recommended in Section 4.
6. Reference Target Time Table for Riders of Different Levels
The time ranges below are for reference only. Actual completion times will vary depending on individual fitness levels, daily weather, road conditions, and the number of rest stops. It is recommended to rely primarily on your own perceived exertion and heart rate data, and there is no need to force yourself to match a specific time:
| Rider Level | Estimated Completion Time | Average Power/Heart Rate Reference Characteristics | Recommended Strategy |
|---|---|---|---|
| Elite/Competitive | Approx. 35-42 min | Maintains high-intensity output near FTP throughout | Precise pacing, good line selection, anchor power output on mid-section steep climbs |
| Experienced/Skilled Rider | Approx. 42-52 min | Primarily Zone 3-4, brief surges on steep sections | Segment-based pacing control, reserve energy for latter steep sections |
| General Recreational Rider | Approx. 52-63 min | Primarily Zone 2-3, moderate slowdown on steep sections | Conservative pacing, focus on fueling and rhythm, allow brief stops to regulate breathing |
| Beginner/Fitness-Oriented Rider | Approx. 63-75 min | Goal is completion throughout, not speed | Light gearing, low cadence pressure, stop to rest when necessary, prioritize safety over time |
Note: This time table is estimated based on the actual difficulty of “equivalent to 8.4% with severe terrain undulation.” If you originally estimated your completion time based on the impression of “average 5.7%,” it is recommended to adjust your target time upward (loosen it) to avoid unnecessary frustration from expectation gaps.
7. Power and Heart Rate Training Framework: Preparing for Wuzhi Mountain
If you treat Wuzhi Mountain as a periodic benchmark training route, here are training directions designed for route characteristics like “10 km with concentrated, steep climbing”:
7-1 Climbing Endurance Training
- Long Interval Climbing Training: Perform 8-15 minute climbing intervals at 90-100% of FTP, with full recovery between sets, to simulate the sustained pressure the continuous steep mid-section of Wuzhi Mountain places on the body.
- Variable-Pace Climbing Training: Deliberately alternate between high-power short steep surges and low-power gentle cruising on training climbs, to train the body’s ability to transition power output on terrain that “alternates between steep and gentle”—this is the core challenge of Wuzhi Mountain’s severe terrain undulation.
7-2 Cardiovascular and Muscular Endurance Foundation
- Zone 2 Long-Distance Base Riding: Schedule one or more long, low-intensity rides per week to build an aerobic base, allowing the body to utilize fat metabolism more efficiently on long climbs and preserve glycogen stores for the steep sections.
- Cadence Stability Training: Use a fixed gear ratio and focus on maintaining a cadence of 85-95 rpm to strengthen your ability to hold a stable cadence under fatigue, preventing cadence collapse in the latter section due to exhaustion.
7-3 Heart Rate Zone Application Reference
| Heart Rate Zone | Applicable Section | Training Purpose |
|---|---|---|
| Zone 2 | Opening warm-up segment | Build aerobic base, warm-up buffer |
| Zone 3 | Mid-section general climbing | Maintain steady output, accumulate endurance |
| Zone 4 | Mid-section key steep climbs | Handle short-duration high-intensity slopes |
| Zone 5 (brief) | Localized walls over 10% | Short sprint to get through, then immediately drop back to Zone 3 to recover |
8. Positioning Compared to Other Well-Known Suburban Climbing Routes in Greater Taipei
There are quite a few suburban climbing routes familiar to cyclists in the Greater Taipei area. Where does Wuzhi Mountain fit in? The following is only a general, high-level relative comparison, without involving specific data comparisons:
- Compared with the Yangmingshan route system: Some routes in the Yangmingshan area are known for their long distances and relatively steady, sustained gradients, testing more of your endurance for continuous output. Wuzhi Mountain, by contrast, concentrates its elevation gain into a short distance with dramatic terrain undulations, testing your tactical flexibility in handling constantly shifting steep-and-gentle terrain and your ability to produce high-intensity output in short bursts. The training benefits of the two are complementary.
- Compared with well-known hard climbs like Fengguizui: Routes like Fengguizui already carry a general reputation and psychological expectation of being a “hard climb” in the cycling community, so riders usually arrive mentally prepared for high-intensity climbing before they start. The trap of Wuzhi Mountain lies precisely in the fact that “the average gradient figure looks mild,” which easily lulls riders into complacency. This is also why this article has repeatedly emphasized the importance of interpreting the data honestly.
- Positioning as a training route: Wuzhi Mountain’s 10-kilometer distance makes it suitable as a “pocket route” for short-duration, high-intensity climbing training. It doesn’t require spending an entire day, yet it can provide training stimulus close to that of a long, hard climb. For commuter cyclists with limited training time on weekdays, it is a highly cost-effective choice.
9. Real-World Scenario Simulation: Turning Data into On-the-Spot Judgment
No matter how detailed a guide is, when you’re actually on the road, your mind can usually only hold onto a few key decision points. Here, the data and strategies from the previous sections are condensed into several scenario simulations of “what you should be thinking in the moment,” so you can quickly recall them during your ride:
Scenario 1: 10 minutes before departure, you’re checking your gear and mental preparation
The keyword that should come to mind is not “this route averages only 5.7%, so it should be manageable,” but rather “this is a hard climb with 839 meters of elevation gain packed into 10 kilometers, equivalent to 8.4%, and there will be noticeably steep sections in the middle.” This mental anchor determines whether your pacing for the rest of the ride remains rational. At the same time, double-check that your gear ratio, supplies, and water bottles are all in order, and that the weather information is from your latest query, not yesterday’s forecast.
Scenario 2: In the first two kilometers after starting the climb, your heart rate is noticeably lower than expected
This is a good sign—it means you haven’t been carried away by the excitement of the start. Maintain this rhythm and save your energy for the middle section. Whatever you do, don’t proactively speed up just because “it still feels easy”—the trap of Wuzhi Mountain is precisely its terrain rhythm of “easy at the start, biting hard in the middle.” Your current sense of ease may well be an illusion.
Scenario 3: Entering the middle section, the gradient turns noticeably steeper and your cadence starts to drop
This is the critical moment to decide whether to downshift. Rather than stubbornly grinding through with a low cadence (which easily puts strain on your knees and rapidly accumulates lactic acid in your muscles), decisively shift to an easier gear and get through the steep section with a higher cadence and lower torque. Your speed will drop, but your physiological exertion curve will be smoother, which is more favorable for completing the entire route.
Scenario 4: A brief respite or flat section appears after consecutive steep climbs
Don’t rush to treat this section as an opportunity to “sprint and make up time.” The real function of this easier stretch is recovery—bring your heart rate back down to between Zone 2 and Zone 3, give your breathing and leg muscles a chance to metabolize lactic acid, and prepare for the next possible steep section. Many riders habitually accelerate on such easier stretches, only to prematurely spend the reserves they’ll need for the steep sections ahead.
Scenario 5: Near the finish, you feel noticeably fatigued, but the gradient seems to turn steep again
This is the stage where pacing discipline is most easily abandoned, and where cramps or stalling are most likely to occur. It’s recommended to directly give up the obsession with “maintaining speed” and instead adopt the strategy of “maintaining cadence while allowing speed to drop” to ride out the final stretch. Finishing is far more important than any personal record, especially on mountain roads—the risks of overexerting your body far outweigh the difference of a few minutes.
10. Route Extensions: Fitting Wuzhi Mountain into Your Training Cycle
For riders who incorporate cycling training into a fixed periodized schedule, Wuzhi Mountain’s route characteristics (short distance, high climbing density) make it well suited to the following training scenarios:
- A short, high-intensity training day during the week: For commuter riders with long working hours who can only train in short windows after work, Wuzhi Mountain’s 10-kilometer distance doesn’t require too much time, yet provides training stimulus close to that of a long, hard climb—a pocket route with excellent cost-effectiveness.
- A climbing-specific week within a periodized training plan: You can schedule two to three consecutive weeks, with one to two repeat sessions on Wuzhi Mountain per week, progressively raising your target pace or lowering your completion time each week to test improvements in climbing endurance and power output.
- A test venue for simulating hard climbs before a race: If the route of an upcoming event includes terrain features similar to “surface gradient that doesn’t look extreme, but with clearly steep local sections,” Wuzhi Mountain serves as an excellent pre-race simulation and mental preparation venue, allowing you to familiarize yourself with the pacing transition rhythm on “alternating steep-and-gentle” terrain.
Conclusion
What the cycling community should most be wary of regarding the Wuzhi Mountain route is not its difficulty per se, but the fact that “the numbers can easily mislead.” 10 kilometers, 839.1 meters of elevation gain, translating to an equivalent gradient approaching 8.4%—this is the true baseline you should use to plan your pacing, gear ratio, and nutrition strategy, not that “average 5.7%” figure in the database that easily leads riders to underestimate the difficulty.
Prepare with honest data, ride with a conservative yet flexible strategy, and Wuzhi Mountain will be a solid and rewarding training route. But if you set out with the wrong mental expectations, it could very well become the most frustrating experience in your riding record. Please defer to actual on-site road conditions and the latest official information. Wishing all riders a successful finish and a safe descent.
Related Reading
- Xiping Highway Practical Guide: 8.3 km, 793 m Elevation Gain, the Most Solid Climbing Test in New Taipei’s Suburbs
- Wufen Mountain Guide: A Textbook on Rhythmic Riding at 10.28 km and 577 m of Elevation Gain
- Wugong Mountain Climb Fully Analyzed: The 14% Truth Hidden Behind the Official 9.7% Gradient (Maolin, Kaohsiung)
- Five Peaks, One Monologue: An Afternoon Riding into Xizhi’s Wuzhi Mountain
台北闊瀨陡坡 騎旅 / 日本單車雜誌編輯車友臨時加入!/ 髮香才是最強的 / feat. 北迴歸線小隊 / 公路車 CT Yeh
6 個月前
半日 小台灣 極限單車路線挑戰實錄
7 年前
大武山後門26%歡樂陡坡!JJSC南台灣單車行Day2 / 被颱風追著跑 / 公路車 / CT Yeh
2 年前
水金九不厭五分 10度寒流冷到不願停!feat. 卡卡 / 公路車 / CT Yeh
6 個月前
單車 梅山36灣 坡度介紹 路段介紹 空拍 (相關遊記影片,請參考說明或我的頻道喔,歡迎訂閱)
6 年前
爬坡ITT實境)台中 魔王 松鼠坡 首航 6:12 大肚山 大三元 科福路
8 年前
西進武嶺 8000名單車友數據分析 PART1 | 從新手到高手數量/瓦數/推力比/FTP推力比/功率計使用率 大解析 | 公路車 | CTYeh
5 年前
大武山20%魔王陡坡【JJSC南台灣遊騎Day2】!屁股真的要裂開了...凡士林抹滿也沒用?神秘金教堂還有超便宜夜市
3 個月前