Pingxi Wufen Mountain Guide: Full Analysis of a Tough Short Climb in Ruifang—4 km with 257 m of Elevation Gain and 6.4% Average Gradient
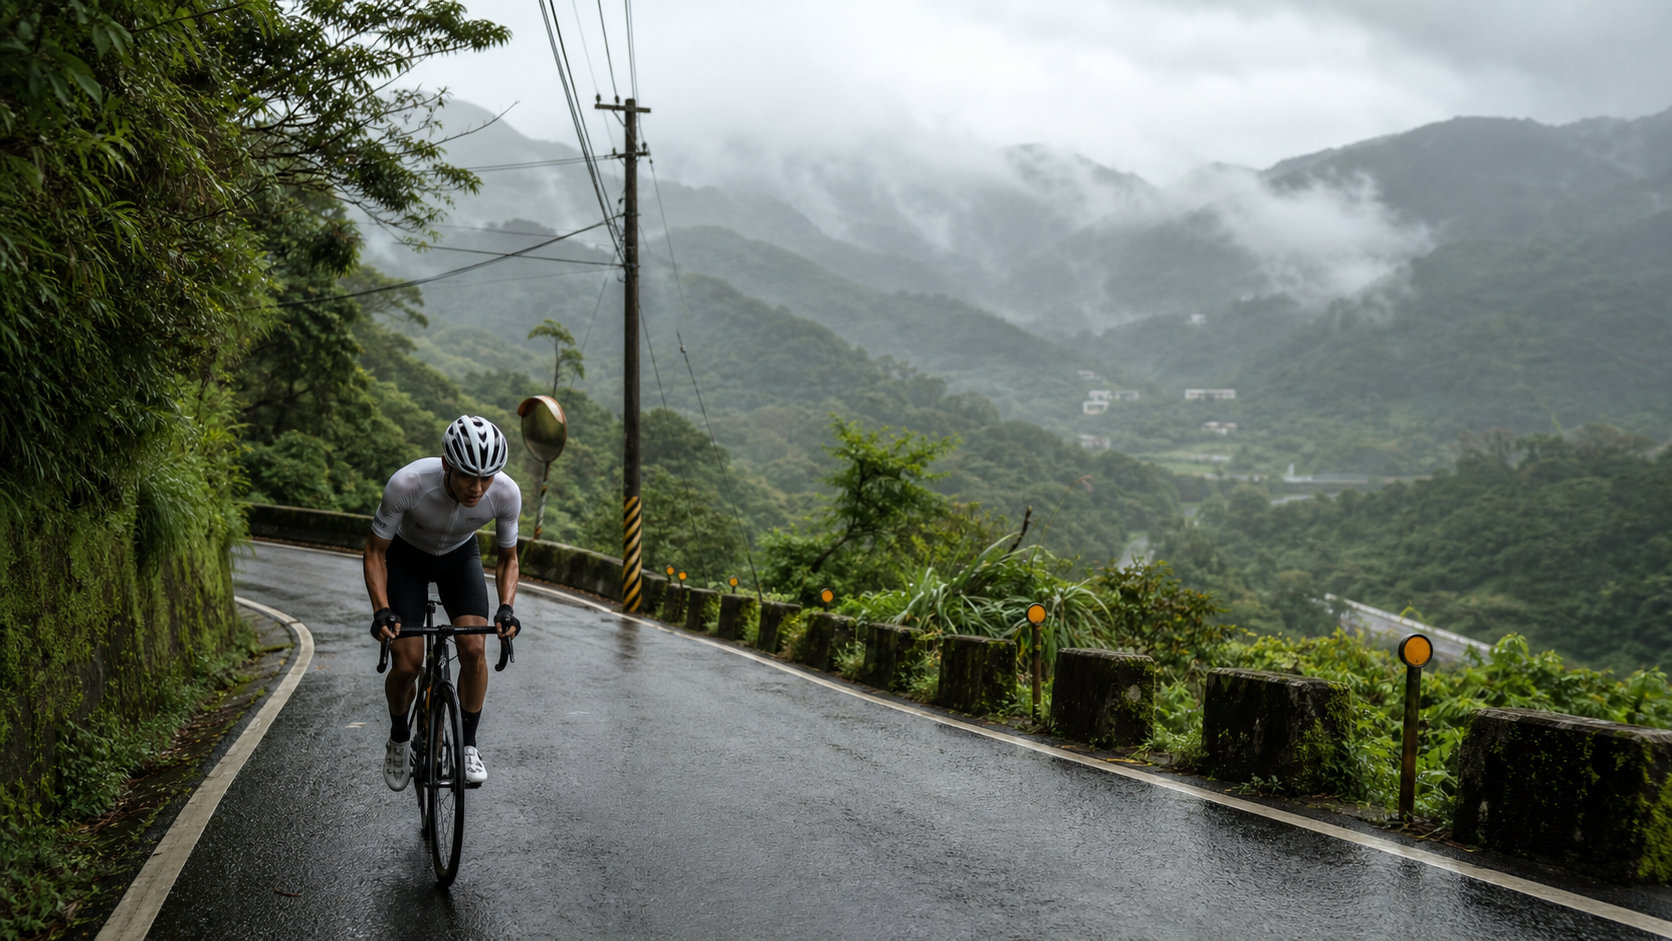
Distance 4.045 km, elevation gain 257.4 m, average gradient 6.4% — Pingxi Wufenshan (registered coordinates in New Taipei City’s Ruifang District, Strava segment code pingxi-wufenshan, official category Category 2) is a short but solid mountain climb. The gradient distribution along this road is highly concentrated, with little in the way of easy sections to let you enjoy the scenery. Within four kilometers, the elevation stacks up almost steadily, making it a classic “short but hard” training segment.
Let’s get the conclusion out of the way first: 257.4 meters divided by 4044.95 meters yields a gradient of 6.36%, which aligns almost perfectly with the 6.4% listed on Strava. The internal consistency of the data is solid, with none of the common “distance and elevation don’t add up” discrepancies. That’s good news for pacing strategy — it means you can confidently use the official numbers as your planning baseline without needing to discount them or build in extra safety margins. Based on this clean dataset, the following breaks the climb into functional sections, covering pacing, gearing, nutrition, and weather strategies segment by segment.
1. Understanding the Numbers First: What Grade of Climb Does 6.4% Represent?
A 6.4% average gradient places this climb squarely in the “moderately hard” range on the gradient spectrum, sitting between beginner-friendly rollers (under 4%) and hardman-grade steep pitches (above 8%). By Strava’s official Category 2 classification standards, this grade typically means even riders with a solid training base need to take pacing strategy seriously — you can’t just ride it with a flat-road cruising mindset. In terms of power profile, this gradient range is ideal for practicing sustained output near lactate threshold (Threshold or slightly above Sweet Spot intensity), making it an excellent testing ground for your aerobic ceiling and lactate tolerance.
It’s important to emphasize that 6.4% is the average across the entire segment. The instantaneous gradient on the actual road will inevitably fluctuate around that mean — short sections may approach or exceed 10%, while a few slightly easier stretches may offer brief recovery points. This variability is especially pronounced over a short four-kilometer distance, because there simply isn’t enough mileage to “smooth out” the impact of localized steep pitches. I recommend splitting the climb into three functional zones and tackling each accordingly: the opening attack, the core steep section, and the closing push.
| Distance Range | Characteristics | Recommended Heart Rate Zone (based on personal LTHR) | Recommended Cadence |
|---|---|---|---|
| 0~1.3K | Opening warm-up, gradient slightly below average | Zone 3 (80%~88% LTHR) | 80~90rpm |
| 1.3~2.8K | Core steep section, gradient may exceed average | Zone 4 (88%~95% LTHR) | 65~80rpm |
| 2.8~4.0K | Closing push, pick up speed based on feel | Zone 3~4 (85%~93% LTHR) | 80~90rpm |
If you ride with a power meter, I’d suggest setting your target power for the entire segment at 85%~95% of FTP. On the mid-climb steep sections, brief surges to 100%~110% FTP are acceptable, but keep them to a few dozen seconds before settling back down — you don’t want to spend the whole climb on the edge of anaerobic effort and end up completely unable to turn the pedals in the latter half.
2. Section-by-Section Strategy: Three-Part Breakdown and Pedaling Rhythm
Section 1 (0~1.3K): The opening attack — bringing your heart rate from flat-road cruising into climb mode. The gradient here is typically slightly below the segment average, offering valuable warm-up and mental adjustment space. I’d recommend holding cadence at 80~90rpm, starting in the middle ring with a lighter gear rather than muscling a heavy gear from the get-go. Since the entire climb is only four kilometers, pacing in the opening section is especially critical — one minute faster here can easily cost you ten extra breaths on the steep section later. Treat this stretch as your final check of equipment and breathing rhythm: confirm the shifting feels right, make sure the bottle cap is tight, and verify the bike computer is displaying properly.
Section 2 (1.3~2.8K): The core steep section — the decisive battleground for overall pacing. This is where the climb truly tests your legs and willpower. Instantaneous gradient here is likely to sit noticeably above the 6.4% segment average, and short bursts hitting 9%~10% wouldn’t be surprising. My recommendation for this section is a “seated-first, brief out-of-saddle when necessary” approach: seated riding with a lower cadence (65~75rpm) and higher torque handles most sustained steep pitches; for particularly short, punchy steep corners, you can stand and power through quickly, but keep standing time short to avoid spiking your heart rate past the anaerobic threshold. This section is also where the most common mistake occurs — seeing the gradient, panicking, and reflexively surging. The correct approach is to anticipate, shift down early, and let your cadence drop before hitting the steep pitch, rather than being forced into a reactive response by the road.
Section 3 (2.8~4.0K): The closing push — the verdict on whether your earlier pacing was sound. Entering the final kilometer-plus, if you paced the earlier sections well, you should still have enough in reserve to push the output slightly higher and cross the line at near Zone 4 intensity. If your legs feel heavy, your heart rate is drifting high, and speed is dropping, that’s a sign your earlier pacing was too aggressive — a signal to correct on your next ride. I’d suggest spending a minute after each ride recording a perceived exertion score (RPE, 1~10), cross-referenced with your bike computer’s actual data. Accumulated over time, this will calibrate the pacing strategy that works best for you.
3. Gearing and Equipment Recommendations
Given a 6.4% average gradient with short steep sections approaching 10% in the middle, road riders on a standard crankset (53/39T) should pair it with at least an 11-30T or even 11-32T cassette to maintain a sustainable cadence through the core steep section without being forced into prolonged standing efforts. Riders of average fitness or those who want to keep more in reserve are strongly encouraged to use a compact crankset (50/34T) paired with an 11-32T or wider-range cassette, allowing most of the core steep section to be ridden seated. The increasingly popular 1x systems (e.g., a 40T single chainring with a 10-36T cassette) are equally well-suited to this kind of short, steep climb, with intuitive gear changes — ideal for riders who treat this segment as a training ground for repeated efforts.
On tire pressure and tire choice: given that the mountain roads in the Northeast corner can be slippery and potholed in places, I’d recommend 25c~28c tires with pressure set slightly lower than your flat-road setup for better grip. For a rider around 70kg, roughly 85~90psi front and 90~95psi rear works well, with further reductions in wet conditions. On braking: since the descent is no slouch in gradient, brake early and progressively to shed speed. If you train on this route regularly with hydraulic disc brakes, expect brake pad wear to accelerate faster than on casual weekend rides, so increase your inspection frequency.
4. Nutrition and Hydration Strategy
For a short climb of 4.045 km with an ascent time of roughly 15~30 minutes (depending on rider ability), a single lap doesn’t necessarily require mid-climb refueling. However, given the steep gradient and higher intensity, make sure your bottle is topped off before departure, and consider carrying a small snack or energy gel as backup — especially if this climb is part of a longer loop route. After completing the climb, I’d suggest stopping for a few minutes to take small sips of water and electrolytes to avoid cramping from fluid loss after high-intensity output.
Humidity in the mountainous areas around the Northeast corner, Pingxi, and Ruifang tends to be heavy. Even when temperatures aren’t particularly high, the perceived humidity can reduce sweat evaporation efficiency and make it feel muggier than the thermometer suggests. Carrying electrolyte replenishment and departing during more stable weather windows is advisable. If you’re heading out on a hot, humid summer afternoon, bringing an extra bottle of plain water to pour over your head for cooling is a simple but effective trick that seasoned mountain riders commonly use.
5. Weather and Seasonal Advice: The Damp, Cold Microclimate of the Northeast Coast
The Ruifang and Pingxi area sits on the windward side of the northeast monsoon, and combined with the orographic lift effect of the mountainous terrain, humidity levels are generally high year-round. Especially during autumn and winter (October through March), when the northeast monsoon prevails, persistent damp, cold drizzle and even dense fog are common, drastically reducing visibility—a risk factor that cannot be ignored when riding on mountain roads. It is strongly recommended to check real-time weather and visibility conditions before heading out in winter. If dense fog is present, consider postponing your ride or lowering your overall pace target by 15%–20%, and wear windproof, water-repellent cycling jerseys and bib shorts.
Spring (March–April) and early summer offer relatively stable weather and are the better windows for scheduling this kind of climbing training, though you should still watch for the possibility of afternoon convective showers. Autumn (September–October), before the northeast monsoon fully kicks in, typically brings a window of better visibility and comfortable temperatures, ideal for combined rides that include photography and sightseeing. Regardless of the season, make it a habit to check real-time radar echo and mountain visibility before departing—the weather in the northeastern hill country along this route changes far more quickly than in the urban areas.
6. Common Mistakes and DNF Risk Assessment
Although this stretch is not long and theoretically should not lead to complete exhaustion, several common execution errors are still worth noting:
- Underestimating the true intensity of a 6.4% average gradient: Many riders see “only 4 kilometers” and let their guard down, starting at a pace that is too fast, only to run out of steam on the core steep section. This is the most common pacing error on short, steep climbs.
- Insufficient gear ratio setup: If you stick with gearing suited for flats or gentle rollers (e.g., a standard crankset paired with a small cassette), you will likely find it impossible to turn the pedals on the sections approaching 10%, forcing you into unnatural out-of-the-saddle grinding that increases injury risk.
- Ignoring dense fog and slippery roads: Weather in the northeastern hills is highly changeable. When fog is thick, sight distance shrinks dramatically, and combined with wet pavement, cornering and descending both require extra caution and reduced speed.
- Insufficient warm-up: Because the total distance is short, it is tempting to skip warming up and just start riding. But muscles that are not warmed up are far more prone to cramping when facing a 6.4% average gradient. Plan to spend five to ten minutes warming up on flat roads before starting.
- Neglecting nutrition planning: When this stretch is embedded in a longer route through the Pingxi and Ruifang mountain network, it is easy to overlook overall nutrition planning because this segment alone is short. Think in terms of the “entire ride” rather than a “single segment.”
7. Target Time References for Riders of Different Levels
The following times are for reference only; actual performance will vary with wind conditions on the day, fitness state, visibility, and equipment weight:
| Rider Level | Estimated Finish Time | Average Power Reference (70 kg rider) |
|---|---|---|
| Advanced / Race level | 11–14 min | 4.2–4.8 W/kg |
| Intermediate / Consistent trainer | 15–20 min | 3.2–3.8 W/kg |
| Beginner / Recreational rider | 21–30 min | 2.0–2.6 W/kg |
For riders who already have solid climbing experience and want to further challenge their lactate threshold intensity, this stretch works well as a “benchmark test segment.” Re-riding it periodically and recording time and heart rate response is the most intuitive way to gauge improvements in your threshold capability.
8. Positioning Within a Training Cycle
If you are planning a systematic climbing training cycle, this stretch fits naturally into the “intensity phase” of an interval training menu, serving as a repeat-climb segment for Threshold or VO2 max efforts. A single session can include three to four repeats, using gentle rollers or flat roads between efforts as recovery. Because the gradient is concentrated and the distance short, it is ideal for “short-interval, high-intensity” specific training, without requiring a full day like a long, big climb would.
For riders preparing for long, hard climbs such as Wuling or the Hehuan range, this stretch is also an excellent “intensity calibration” venue—since it is short and easy to access, you can repeatedly verify your breathing rhythm and cadence control near threshold intensity within a single session. By the time you face genuinely longer climbs, these details will already be honed.
9. Road Conditions and Traffic Safety Reminders
Although this mountain road is a familiar training route for cyclists, it remains a general-purpose road open to cars and motorcycles—not a closed cycling-only path. Always ride on the right side of the road, and anticipate blind spots around corners well in advance. The core steep section in particular has significant grade changes and numerous corners, some with poor sight distance. Wearing a reflective vest and mounting a rear warning light is recommended to increase your visibility. Roads in the northeastern hill country are generally narrow with limited passing space; when approaching oncoming traffic or when a vehicle behind wants to overtake, move over and yield early.
Regarding road surface conditions: because rainfall is frequent in the northeast, mountain roads are prone to potholes, moss, or accumulated fallen leaves due to drainage or geological factors. Check recent road condition reports through local cycling club communities before riding. Especially after typhoons or heavy rain, mountain roads are more likely to have rockfalls or washed-out roadbeds; for safety, avoid riding for one to two days after extreme weather events.
10. Notes on the Endpoint and the Wufen Mountain Radar Station
It should be noted specifically that this 4.045 km segment with 257.4 m of elevation gain ends at an elevation far below the main peak of Wufen Mountain (approximately 757 m). Therefore, unless this is the endpoint of the segment itself, it is very likely just an important climbing section on the way to the Wufen Mountain radar station at the summit (the Central Weather Administration’s Wufen Mountain Weather Radar Station, commonly nicknamed the “big white ball” by hikers and cyclists)—not the complete ascent to the summit. For the actual road network connections and endpoint location, defer to on-site signage or official maps. Do not assume that finishing this segment equals summiting the highest point of Wufen Mountain. This segmented mindset—“tackle a core steep section first, then decide based on energy and road connections whether to continue higher”—is actually a common structure on many intermediate mountain roads in Taiwan and is worth factoring into your route planning.
11. Equipment Checklist: Final Confirmation Before Departure
To close out this guide, here is a pre-departure equipment checklist: confirm tire pressure is set appropriately for the day’s weather and road slipperiness; confirm shifting and brake feel are normal, especially whether the rear derailleur skips gears under load on steep grades; confirm water bottles are full and carry an extra energy gel or snack just in case; since fog is common in the northeastern hills, carry or verify that headlight and taillight batteries are sufficiently charged—even a daytime start can encounter sudden visibility drops; confirm your phone is fully charged and offline maps are downloaded, as signal can be unstable in parts of the mountain area.
These seemingly trivial checks are the key to riding a “short but steep” route safely and solidly. This stretch may not be long, but the gradient is significant and the weather is highly variable—thorough preparation is always the first and most important line of defense for mountain riding safety.
12. Data Recording and Training Tracking Recommendations
To truly turn this stretch into an effective training tool, pair it with a GPS cycling computer or sports watch to record detailed data from every ride, including segment splits, heart rate curve, power output (if you have a power meter), and cadence variation. Over time, accumulating this data allows you to derive a personalized pacing formula near threshold intensity—far more precise than riding purely by feel. After each ride, spend two to three minutes recording how you felt, the weather conditions, and visibility. These supplementary notes are often the most critical contextual clues when reviewing data later—for example, a particularly poor split may not mean your fitness has declined, but rather that humidity was exceptionally high or fog affected your judgment and rhythm.
13. Combined Training Suggestions with the Nearby Road Network
If you have already mastered this core steep section and feel that four kilometers alone is insufficient for a complete training load, consider linking it with other mountain roads in the Ruifang and Pingxi area to form a composite route covering several tens of kilometers. A common approach is to use this stretch as the main intensity course, bookended by gentler roads for warm-up and cool-down, then decide based on energy whether to continue higher or turn back toward Houtong or Jiufen. This design logic—“open with a short, steep segment and finish on gentle rollers”—allows the body to complete high-intensity stimulation within a single segment first, then accumulate the day’s training volume at lower intensity, without keeping the entire ride at high tension.
For riders preparing for mountain bike races across Taiwan, this stretch also fits well into a pre-race intensity calibration period—use it to verify that your cadence control and breathing rhythm near threshold intensity are stable, while avoiding overly long training hours before race day that could pile up fatigue. Because the distance is short and access is convenient, even a one- or two-hour window is enough for three to four repeat climbs, making it far more efficient than traveling long distances to tackle climbs spanning tens of kilometers.
14. Advice for First-Timers Tackling This Kind of Short, Steep Section
If this is your first time seriously facing a section with an average gradient above 6%, it’s best to prepare yourself mentally first: this kind of “short but hard” climb often feels just as painful as a longer route with a gentler gradient, because your body doesn’t have enough mileage to spread out the impact of the steep grade—the intensity is concentrated into just a few minutes of effort. A common mistake beginners make is heading out with the same mindset they use for gentle slopes, only to be instantly brought back down to earth in the core steep section. This is completely normal and doesn’t mean you lack fitness or chose the wrong route.
My advice for first-timers is to set your goal as “complete the whole section without putting a foot down” rather than “chase a specific time.” Use your easiest gear and the most stable cadence to grind through the entire climb slowly. Once you’ve successfully completed it the first time, you can gradually try increasing intensity and aiming for faster times. This progressive mindset builds long-term confidence and a sense of accomplishment far better than sprinting hard from the start and blowing up halfway. Once you’ve ridden this section until it feels familiar, you’ll find that when you face other roads with similar gradients, your mental toughness has been forged stronger—and that’s exactly what makes short, steep sections so valuable as a training tool.
15. Recovery and Subsequent Training Arrangements
The recovery plan after completing this core steep section deserves just as much attention. Since the intensity of the entire effort hovers near or even above the lactate threshold, the stress placed on your muscles and cardiovascular system is no less than that of a longer, gentler climb. I recommend cooling down with at least ten to fifteen minutes of low-intensity spinning after finishing, allowing your heart rate to gradually return to baseline and avoiding the discomfort caused by stopping abruptly while blood pools in your legs. If you’re incorporating this section into a training session with multiple repeated climbs, I’d suggest five to eight minutes of recovery between efforts, adjusted based on how quickly your heart rate recovers. Too short a recovery interval will cause the quality of subsequent efforts to drop significantly, and you won’t achieve the intended intensity accumulation.
On the nutrition side, since this type of short, high-intensity climbing training significantly depletes muscle glycogen stores, I recommend consuming a recovery meal or supplement with an appropriate carbohydrate-to-protein ratio within thirty minutes after finishing, to make the most of the post-exercise golden recovery window. If your training frequency is high that week, also pay attention to sleep quality and overall fatigue accumulation, and schedule low-intensity recovery days as needed to avoid turning an overzealous pursuit of progress into injury.
16. Post-Ride Maintenance and Key Component Checks
After riding this section, bike maintenance shouldn’t be overlooked either. The high-torque output on the core steep section is a considerable test for the drivetrain. I recommend checking chain stretch and lubrication every three to five rides on this kind of short, steep section. If you ride in wet conditions and the chain picks up grit without being cleaned promptly, wear will accelerate far faster than on dry, flat roads. If the teeth on your cassette and chainrings show obvious hook-shaped wear, that usually means it’s time to replace them. Pushing worn chainrings through hard efforts on steep grades risks chain skip under high load—and chain skip on the core steep section is particularly dangerous, as it can cause you to suddenly lose pedaling support.
The braking system also deserves attention. As mentioned earlier, the downhill sections in the Northeast Coast mountains have considerable gradients, and hydraulic disc brake pads wear quickly with frequent on-off braking. I recommend checking pad thickness on a regular schedule, confirming there are no fluid leaks in the hoses, and making sure the lever feel is firm. If you notice the lever travel getting longer or the feel going soft, stop riding immediately and have the bike serviced—don’t ride wet mountain roads on a wing and a prayer. Also, check that the wheel hubs and quick-release skewers are properly tightened by hand before every ride; rough mountain roads are far more likely than smooth city streets to gradually loosen bolts.
For the frame and suspension fork (if you’re on a mountain bike or gravel bike), riding regularly in a humid environment means you should periodically inspect frame joints and carbon fiber surfaces for unusual cracks or signs of delamination. The bottom bracket and headset bearings should also be checked for noise or rough rotation caused by moisture ingress. These maintenance details may seem trivial, but for riders who treat this section as a long-term training base and ride it repeatedly at high frequency, they effectively extend the life of your equipment and are an important part of avoiding mechanical failures that interrupt your training rhythm mid-ride.
17. Photography and Viewpoints: Capturing the Scenery Beyond the Data
Although this guide focuses primarily on data and pacing strategy, there are actually a few viewpoints along this section worth slowing down for and pressing the shutter. As you gain elevation on the core steep section, the view back down the road gradually opens up. On clear days, you can see the layered丘陵 terrain of the Ruifang mountains stretching into the distance; when fog rolls in, the atmosphere is completely different—the mist-wreathed mountain path itself makes for a highly photogenic subject. For riders who want to document the ride, I’d suggest pausing briefly at the gentler stretch between the start of the attack and the core steep section. This spot usually offers a wider view and avoids the safety concerns of stopping mid-way up the steep part.
If you’re carrying a phone or action camera, make sure the lens is protected against water. The Northeast Coast mountains are humid, and fogged-up lenses or water droplets on the glass are common issues that directly affect image quality. In terms of lighting, the low-angle light of early morning and near dusk, combined with the intermittent mountain mist, often produces images with far more depth and texture than flat midday light. If your target is the faintly visible white dome of the Wufen Mountain radar station in the distance, I’d recommend bringing a telephoto lens or using your phone’s telephoto mode to capture it from a high vantage point on days with good visibility. This is a common approach among local photography enthusiasts shooting the Wufen Mountain landmark (for the actual best shooting locations and angles, I’d suggest referring to the field experience shared by local cycling clubs or photography communities).
18. Summary: A Short but Hard Training Cornerstone
Looking back over this entire guide, the positioning of this section is clear—it’s not a long, all-day mountain climb, but rather a training cornerstone with concise distance, solid gradient, and the ability to be ridden repeatedly at high frequency to test your threshold capability. 4.045 kilometers, 257.4 meters of elevation gain, 6.4% average gradient—the numbers are clean and consistent, with no elevation discrepancy concerns, making it a benchmark test section you can confidently track over the long term. Whether you’re an intermediate rider looking to accumulate more mountain climbing experience, or a seasoned veteran preparing to calibrate your effort before tackling longer, harder climbs, this section can find its place in your training blueprint. Mastering the pacing rhythm of this section also lays a solid foundation for future challenges—whether that’s pushing higher up Wufen Mountain or tackling other intermediate mountain roads across Taiwan.
Related Reading
- Pingxi Shifen Waterfall Direction Climb Practical Guide: Full Analysis of 4.0 km, 264 m Elevation Gain, 6.5% Gradient
- Wufen Mountain Guide: A Rhythm-Riding Textbook for 10.28 km and 577 m of Climbing
- Pingxi North County Road 47 Practical Guide: Full Pacing Analysis of a Quiet 8.3 km, 376 m Long Gentle Climb
- Xindian Shitoushan South Side Climb Full Guide: 7.64 km, 499 m Elevation Gain, Segment-by-Segment Tactics from Beginner to Advanced
#公路車 #西進武嶺 配速配瓦實驗 坡度分析 四小時內攻略 建大盃 NeverStop #西進武嶺攻略
6 年前
台北闊瀨陡坡 騎旅 / 日本單車雜誌編輯車友臨時加入!/ 髮香才是最強的 / feat. 北迴歸線小隊 / 公路車 CT Yeh
6 個月前
公路車 爬坡 破PR 紀錄 小技巧 分享
6 年前
西進武嶺各路段 前8000名 大數據分析 配速攻略/功率/心律/推力比/維持率/踏頻/踏瓦比/牽車率 大公開 | 建大盃 NeverStop 可參考 | 公路車 | CT Yeh
5 年前
風櫃嘴時間 預測西進武嶺時間?13000名車友統計數據分析告訴你 !
5 年前
萬年峽谷! 30% 超激陡坡 里佳部落DAY2 還是很硬! | 公路車 | CT Yeh
3 年前
半日 小台灣 極限單車路線挑戰實錄
7 年前
水金九不厭五分 10度寒流冷到不願停!feat. 卡卡 / 公路車 / CT Yeh
6 個月前