Chiayi Water Pipeline Climb Complete Guide: The 10.93km, 6.6% Average Grade Trial of Zhuqi Township
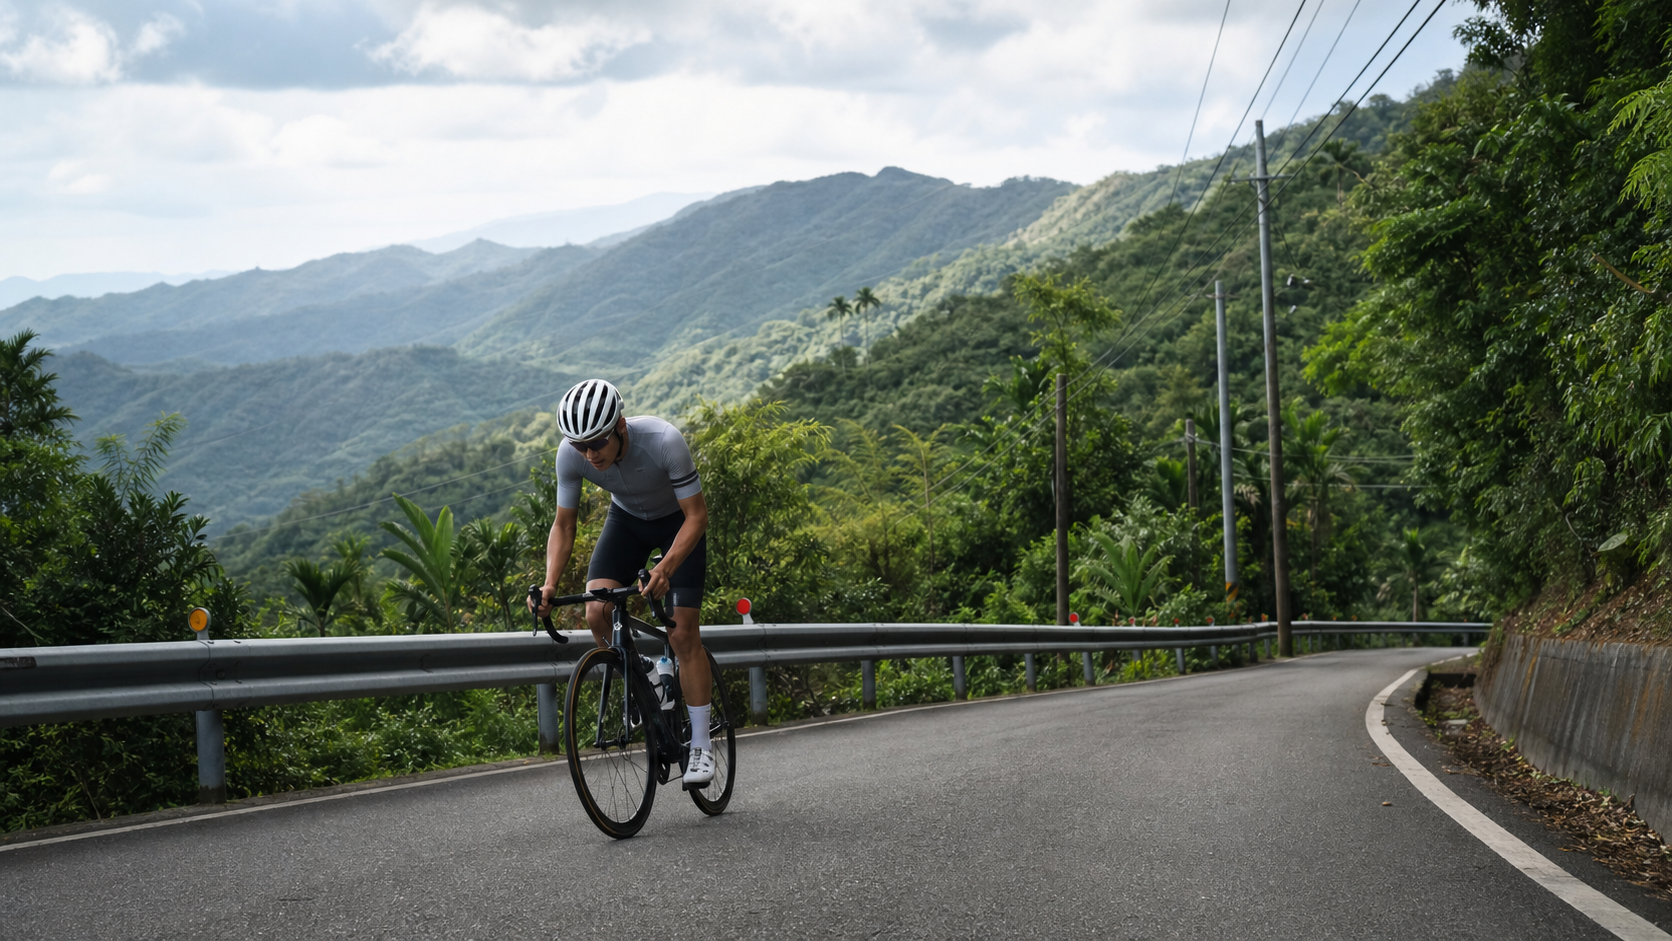
Chiayi Waterway Climbing Complete Guide: A 10.93 km, 6.6% Average Grade Trial in Zhuqi Township
Route Overview and Data Analysis
The Chiayi Waterway, Strava segment ID 3369733, is one of the well-known “leg-training meccas” for cyclists in central and southern Taiwan. Located in Zhuqi Township, Chiayi County, the route follows a local connector road climbing steadily into the mountains. The officially registered route length is 10,933.4 meters, which translates to 10.93 km, with an average grade of 6.6%. In Strava’s climbing classification system, it is categorized as Category 4.
Let me first clarify a commonly misunderstood point: the “total elevation gain” field for this segment in the route database currently reads 0 meters. This figure is not credible—it is essentially a missing value, not an indication that the route has no climbing. Since both the distance and average grade are reliable numbers, we can use the most basic climbing estimation formula to work backward:
Total elevation gain ≈ Distance × Average grade = 10,933.4 meters × 6.6% ≈ 722 meters
This 722-meter figure is an estimate derived from the average grade, not an officially measured precise elevation gain. During actual riding, because the road surface has undulations, with several gentle descents followed by steeper sections, the cumulative elevation gain recorded by your bike computer or Strava track is likely to be somewhat higher than this estimate. This is a common shortcoming of any method that back-calculates from average grade—a route cannot climb at a perfectly constant gradient, and the minor fluctuations along the way get averaged out. I recommend relying on the heatmap data recorded by your own GPS device after the ride; 722 meters is merely a reference baseline for pre-ride planning and gauging approximate difficulty. As a rider with an engineer’s mindset, my instinct when seeing a zero in a database field is to verify before citing. Here I also remind every reader: when faced with elevation figures displayed on any route platform or app, it is worth developing the habit of cross-checking, so that erroneous or incomplete source data does not mislead your training planning.
Using these two figures (10.93 km, 6.6% average grade) to compare against other well-known climbing routes in Taiwan, the Waterway sits roughly between a typical community road climb and a classic big climb: the grade is steeper than most urban rolling hills, but the distance is not long—it falls into the “short blade that cuts to the bone” category. You don’t need to sustain it for an entire afternoon, but there is almost no flat recovery section along the way to bring your heart rate back down. This is also why many coaches use the Waterway as an FTP test route or interval training venue: the length falls right in the 8-to-15-minute all-out effort window, corresponding to the classic “lactate threshold test” time frame in power-based training.
Digging further into the route’s data structure, a 6.6% average grade is already at the threshold of what qualifies as a “sustained effort” climb. The average amateur rider’s intuitive sense of grades is roughly as follows: below 3% is barely noticeable as climbing, cruise-level; 4% to 6% requires adjusting pedaling cadence and noticeably increases leg load; above 6% enters the “continuous resistance” zone, where your core and breathing rhythm must be actively engaged, or you will easily lose speed mid-climb. The Waterway’s average sits at 6.6%, meaning there is virtually no true flat recovery section for the entire route. This is why, even at a total length of only 10.93 km, many riders still find it more exhausting than certain 15 km routes with a 4% average grade—climbing fatigue is never simply a matter of distance, but rather the product of grade multiplied by time.
It is also worth noting that Category 4 is a relatively “approachable” classification within Strava’s system (Strava’s climbing categories from easiest to hardest are roughly 4, 3, 2, 1, HC—the lower the number or the HC designation, the harder the climb). This means that while the Waterway’s intensity is not low, it still falls within the range that most amateur riders with some training foundation can master through repeated practice and gradually improve. It is well suited as a “gateway to advanced climbing”—before you can ride classic big climbs well, getting the Waterway to a point where you can complete it consistently at your ideal pacing is a training logic many coaches recommend.
Section-by-Section Strategy: Pacing Plan from Start to Finish
Breaking the 10.93 km into several stages makes it easier to manage your pacing. The following sections are described based on the typical grade distribution logic of a Category 4 climb; for actual mileage marker positions, please refer to your own GPS track and the Strava segment map.
Section 1 (Warm-up gradual climb): The early portion after the start typically has a slightly gentler grade than the overall average. This is the critical transition period where your body shifts from flat-road heart rate to climbing heart rate. Do not—under any circumstances—start with power output exceeding your threshold in this section. Many riders who DNF or blow up in the later stages trace the root cause to heart rate spiking above 90% in the first kilometer. I recommend starting at roughly 75-80% of your maximum heart rate, giving your body a gradual process to adapt to the load.
Section 2 (Main climb, grade at or slightly above the 6.6% average): Once you enter this section, the grade begins to stabilize at or slightly above the overall 6.6% average. This is the core segment of the entire route that truly tests sustained power output. Here I recommend a “steady power” strategy rather than an “attack-then-recover” interval approach—because once your heart rate spikes on a climb, it takes much longer to come back down. Rather than attacking and then being forced to slow down and gasp for air, it is better to maintain a steady power output you can sustain for the entire section. This way, your overall completion time will actually be faster than going hard and soft in alternation.
Section 3 (Local steep sections/corners): Most Category 4 climbs feature localized steep sections in the middle-to-late portion where the grade is clearly higher than the average. These are also the spots where riders are most likely to lose speed or even have to dismount and walk. For such sections, my advice is: do not stay out of the saddle and grind for too long (more than 30 seconds of standing climbing will spike your heart rate rapidly and make recovery difficult); seated pedaling with a lighter gear and higher cadence will be more energy-efficient and sustainable than muscling a heavy gear.
Section 4 (Final stretch): Near the finish, if you have managed your pacing well up front, you should still have some reserve for a final push. If you went out too hard earlier, this section is often the most painful “hitting the wall” phase. I suggest treating the final 500 meters before the finish as an independent goal, telling yourself visually “just one last short stretch”—mentally breaking it down can effectively delay the spike in perceived exertion (RPE).
Looking at these four sections together, the pacing philosophy for the entire route can be distilled into one sentence: “Hold back in the early part, hold steady in the middle, and hold on for the finish.” The biggest mistake many riders make on their first attempt at the Waterway is treating the route as a single whole, riding from start to finish at one power or heart rate target, while ignoring the fact that each section has different actual road grades and different physical demands. I recommend that more advanced riders make good use of the lap function on their bike computers—press the lap button every kilometer or at each obvious grade transition point. After the ride, review the average power and heart rate changes for each section. This is how you can truly identify which section you tend to lose speed in and which section still has room to push harder, allowing you to make more precise pacing adjustments on your next attempt. Accumulating this kind of sectional data over the long term is also one of the most effective ways to improve climbing performance—far more efficient than blindly challenging the route over and over again based on feel alone.
Gear Ratio and Equipment Recommendations
Given the climbing characteristics of an average gradient of 6.6% with local sections potentially exceeding 10%, your gear ratio setup will directly determine whether this ride is “effective training” or “sheer agony.”
| Rider Level | Recommended Chainring | Recommended Cassette | Notes |
|---|---|---|---|
| Beginner/Recreational Rider | 34/50 (Compact) | 11-32T or 11-34T | Ensure sufficient low gears for steep sections to avoid having to grind out of the saddle |
| Advanced Rider | 34/50 or 36/52 | 11-28T or 11-30T | Balances flat-road cruising efficiency with climbing reserve gears |
| Competitive Level | Adjust based on personal FTP and power-to-weight ratio | 11-25T or tighter ratios | Pursues sustained high-power output in the saddle; gearing serves to maintain ideal cadence |
In terms of equipment, for this type of short-to-medium distance climb with sustained effort, riders should pay special attention to the following:
- Wheels: You don’t need ultra-aero wheels; rather, the balance between weight and stiffness matters more. Lightweight climbing wheels with a medium-low rim depth (30-40mm) will suit this route better than deep-section aero wheels.
- Tire Pressure: Mountain roads occasionally have patches or gravel. Avoid inflating tires too hard; moderately lowering tire pressure (adjusted according to body weight and tire width) improves grip and comfort.
- Bottle Cages: Make sure you have at least a dual bottle cage setup. Hydration needs during a hot summer climb are greater than you might expect.
- Computer/Heart Rate Monitor: This route is well-suited for structured training with a power meter or heart rate strap. Riding purely by feel makes it easy to go out too hard in the early stages.
Beyond the hardware mentioned above, the rider’s own weight and power-to-weight ratio (W/kg) are the most critical variables determining climbing performance. Equipment can only enhance performance—it cannot replace base fitness. If you don’t have a power meter, you can substitute with heart rate zones combined with the Rating of Perceived Exertion scale (RPE 1-10)—on the main climb, it’s recommended to keep the effort between RPE 6 and 7, which corresponds to “breathing hard but still able to speak short sentences intermittently.” This intensity range typically corresponds to roughly 80-90% of maximum heart rate, and is the sweet spot where most amateur riders can sustain output without burning out too quickly. The braking system should also not be overlooked. Although the water pipeline route is a climb, the descent back down covers the same gradient. Ensure your brake pads and rotors (or rims) are in good condition to avoid brake fade from continuous braking on the long descent.
Nutrition and Hydration Strategy
At 10.93 km with an average gradient of 6.6%, most riders will complete this climb in anywhere from 35 minutes to over an hour (see the time estimation table below). It’s a short-to-medium distance climb with relatively high intensity. You don’t need to carry large amounts of solid food like you would on a long forest road ride, but hydration management remains a key variable in determining performance.
Before the Ride: Complete your main fluid and electrolyte intake 2 hours before departure to avoid stomach discomfort from chugging water right before starting. Summer mountain conditions in Chiayi are hot and humid, so it’s advisable to start paying attention to fluid intake the night before.
During the Ride: For this duration, if the weather is cool, a single bottle of sports drink or electrolyte water is usually sufficient for the entire climb. If tackling it during the midday heat of summer, a dual bottle setup is recommended, with one bottle containing electrolyte powder to prevent sodium loss from prolonged sweating from affecting muscle contraction efficiency and leading to cramps.
After the Ride: Within the golden 30 minutes after finishing the climb, moderate carbohydrate and protein intake aids muscle recovery, especially if you have other plans later that day or plan to train the next day.
Regarding solid food: since the total challenge time for the water pipeline route mostly falls within one hour (see the time estimation table below), for advanced riders and above, additional food intake during the climb is typically unnecessary—glycogen stores are sufficient to sustain high-intensity output for this duration. However, if you’re a beginner rider expecting your completion time to stretch beyond one hour, or if you’re scheduling this climb in the middle or latter part of a long-distance ride (e.g., tackling it after already riding 50 km or more), it’s recommended to consume an easily digestible carbohydrate source 15-20 minutes before starting, such as a banana or energy gel, to avoid “bonking” from low blood sugar midway through the climb. That sudden feeling of full-body weakness and mental fog is far harder to deal with than simple muscle soreness, and it also poses a greater safety risk.
Weather and Seasonal Recommendations
Zhuqi Township in Chiayi features low mountain and hill terrain, with hot, humid summers and frequent afternoon thunderstorms—this directly affects how you schedule your climb.
Recommended Season: Late autumn through early spring of the following year (approximately November to March) is the best season to tackle the water pipeline route. Cooler temperatures and relatively lower humidity make the perceived exertion much lighter than in summer, allowing you to focus more energy on pacing and rhythm rather than simply fighting the heat.
Recommended Time of Day: Even in the cooler season, it’s still advisable to avoid starting at midday. Early morning or late afternoon offer friendlier light and temperatures. Summer challengers must be mindful of the regularity of afternoon thunderstorms—mountain terrain allows convective cloud systems to develop rapidly, so it’s recommended to complete the climb and descend before noon.
Road Conditions: Mountain roads occasionally have fallen leaves, gravel, or wet sections after rain. Especially on corners, it’s advisable to slow down early and avoid leaning at excessive angles to prevent crash risk.
Clothing Preparation: Since your body will sweat heavily during the climb, but temperature differences between morning and evening can still exist in Zhuqi Township’s mountain areas, a layering strategy is recommended—a moisture-wicking base layer, with a lightweight windbreaker carried depending on weather. You can stay warm before reaching the start point, then adjust based on how you feel once warmed up and ready to begin. Summer challengers must apply sun protection. Although mountain shade provides partial cover, there are still plenty of sections with direct sunlight. UV-protective arm sleeves and sport sunglasses are recommended for both sun protection and riding visibility safety.
Common Mistakes and DNF Risks
Most riders who fail on the water pipeline route (failing to complete it or having to stop and walk) can typically trace the root cause to one of the following:
Mistake One: Pacing too hard at the start. As mentioned earlier, many people are fooled by the gentle initial section and surge out at near-maximal power, only to find their heart rate near its limit once they hit the main climb, leaving them crawling or walking in the latter half. Solution: Ride at a power you can sustain all the way to the finish. Better to feel like you’re “holding back” in the early stages than to blow up later.
Mistake Two: Insufficient gear ratio preparation. Bringing too heavy a gear setup (e.g., a standard chainring paired with a compact cassette) to tackle the locally steep sections forces you to grind with brute force, increasing knee strain and reducing efficiency. Solution: Refer to the gear ratio recommendation table above—better to have a slightly easier gear available than to need it and not have it.
Mistake Three: Neglecting hydration and cramping in the latter half. Summer challengers especially tend to underestimate their sweat rate. By the time you feel thirsty, it’s usually already too late. Solution: Adopt a “fixed time, fixed amount” hydration strategy rather than waiting for thirst signals to appear.
Mistake Four: Underestimating the psychological impact of the steep sections. Without mental preparation for the climb’s segments, encountering steeper sections than expected can easily trigger thoughts of giving up. Solution: Familiarize yourself with the approximate gradient profile of the route beforehand and manage your psychological expectations.
Mistake Five: Ignoring descent safety and focusing only on climbing performance. Many riders put all their attention on power and time during the climb, only to have an accident on the descent afterward due to fatigue and diminished focus. The muscles work hard during the climb, and by the descent, your reaction speed and grip strength are already diminished compared to when you started. It’s essential to maintain a sensible speed on the descent, especially slowing down early at corners and steep sections. Don’t treat the descent as an outlet to “compensate for the suffering of the climb.”
Mistake Six: Blindly following others in a group ride and losing pace control. If you’re tackling the water pipeline route as a group, it’s easy to feel pressured to keep up with faster riders in the group and end up riding beyond your planned intensity. Solution: Communicate with your group beforehand and agree that everyone rides the climb at their own pace, meeting at the summit rather than riding side-by-side the whole way. This way, you can balance both safety and training effectiveness.
Estimated Finish Times by Rider Level
The following time estimates are based on a general climbing performance model for a 10.93 km route with an average gradient of 6.6%. They are for pre-ride reference only; actual finish times will vary depending on individual fitness, weather conditions on the day, wind direction, and equipment.
| Rider Level | Estimated Finish Time | Average Speed | Notes |
|---|---|---|---|
| Beginner / Recreational Rider | 55–75 min | Approx. 8.7–11.9 km/h | Primary goal is to finish without injury; short breaks are acceptable |
| Intermediate / Advanced Rider | 40–55 min | Approx. 11.9–16.4 km/h | Has a certain climbing training base; can maintain a steady pace without dismounting |
| Experienced / Race-Level Rider | 28–40 min | Approx. 16.4–23.4 km/h | Has a structured power-training background; sustained high-intensity output throughout |
| Elite / Professional-Level Rider | Under 25 min | Above 26 km/h | Extremely rare top-level performance; not recommended as a short-term goal for most amateur riders |
Note: The time ranges above are rough model estimates, not official certified data. First-time challengers are advised to aim for “completion” rather than setting overly aggressive time targets from the start. Pacing yourself according to your ability and adjusting your speed based on your body’s real-time response is the key to long-term enjoyment of climbing. It is also recommended to record your finish time, average heart rate, average power, and subjective feelings in detail after each attempt. Over time, this first-hand data will reflect your progress and training effectiveness more accurately than any single result.
Pre-Ride Checklist
Before heading out to challenge Shui Dao (Water Road), it is recommended to do a final check against the list below to avoid small details affecting your entire ride experience:
| Check Item | Description |
|---|---|
| Tire Pressure | Adjust according to body weight and tire width to avoid increased rolling resistance from under-inflated tires during the climb |
| Brake System | Check brake pad wear; verify braking performance before the long descent and repeated braking |
| Gear Ratio Setup | Confirm the lightest gear on the cassette is sufficient for the steeper sections to avoid discovering the gearing is too heavy on the spot |
| Water Bottles & Nutrition | Carry at least two bottles; in summer, consider bringing extra electrolyte supplements |
| Cycle Computer / GPS Device | Ensure sufficient battery and pre-load the route track for navigation and pacing reference |
| Weather Forecast | Check the day’s rain probability and afternoon thunderstorm timing before departure to plan an appropriate start window |
| On-Bike Tool Kit | Spare tube, pump or CO2, and basic repair tools; resupply is difficult in the mountains, so you must rely on yourself in case of a mechanical issue |
Conclusion: Make Shui Dao Your Training Benchmark
Shui Dao is favored by cyclists in central and southern Taiwan not only because it is conveniently located not far from Chiayi City, but also because its gradient and length fall right into a “repeatable testing” sweet spot—you can come back and ride it every so often, using the same route to measure your fitness improvements. Whether you treat it as a pre-race simulation test or simply a routine weekend training ride, as long as you manage your pacing, gear selection, and hydration strategy well, this 10.93 km climb in Zhuqi Township with an average 6.6% gradient will be a route worth challenging again and again on your cycling training list.
Finally, I would also like to remind every rider preparing to take on Shui Dao that data and time tables are only supporting tools; what truly matters is the real feedback your body sends during the ride. If you are not feeling well on the day, your heart rate is unusually high, or you feel noticeably unwell, it is better to slow down or even turn back midway rather than push yourself just to chase a certain time goal. Cycling training is a long-term cumulative process. Shui Dao will always be there—when you are in peak condition, you can go all out to chase your personal best then. Wishing every rider the chance to find their own rhythm and sense of accomplishment on the mountain roads of Zhuqi Township.
Related Reading
- Fanlu Puwei Practical Guide: Data and Tactical Breakdown of the Best Warm-Up Section on Alishan Highway
- Meishan Wangfengting Practical Guide: Complete Analysis of Chiayi’s 9 km, 6.4% Gradient Hill Training Route
- Dongshan Coffee Highway Practical Guide: The 16.41 km, 3.9% Average Gradient Endurance Training Top Pick
- Shui Dao: A Quiet Yet Demanding Climb on the Hillside of Zhuqi Township
半日 小台灣 極限單車路線挑戰實錄
7 年前
嘉義大埔、阿婆灣挑戰賽,美到以為在日本!ft. 環騎5 Cool 西拉雅188 / 公路車 / CT Yeh
7 個月前
4K單車實境) 嘉義 梅山36灣 訓練台 爬坡 輕鬆騎
6 年前
台北闊瀨陡坡 騎旅 / 日本單車雜誌編輯車友臨時加入!/ 髮香才是最強的 / feat. 北迴歸線小隊 / 公路車 CT Yeh
6 個月前
爬坡ITT實境)台中 魔王 松鼠坡 首航 6:12 大肚山 大三元 科福路
8 年前
阿里山塔塔加 兩倍特濃版!全新隧道開通! 進喔!公路車 | CT Yeh
3 年前
2016 彰化經典百K - 74號爬坡全程
10 年前
單車 梅山36灣 坡度介紹 路段介紹 空拍 (相關遊記影片,請參考說明或我的頻道喔,歡迎訂閱)
6 年前