Provincial Highway 3 Meiling Practical Guide: 8.91 km, 618 m of Climbing — How to Ride This Tainan Mountain Road
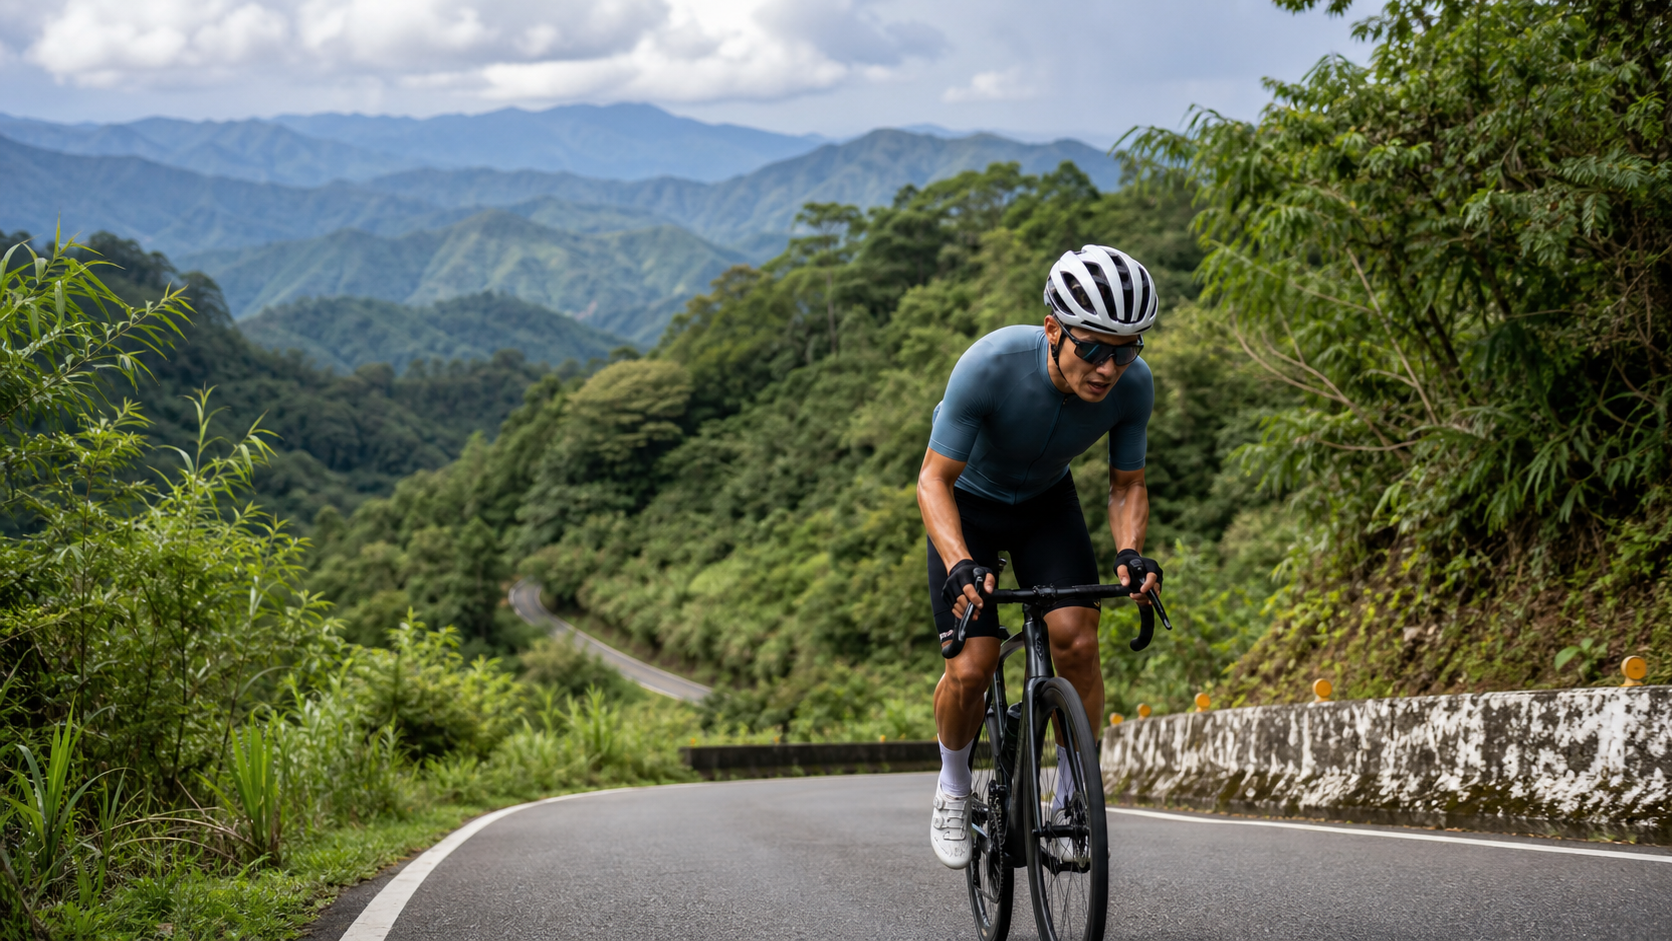
Route 3 Meiling Practical Guide: 8.91 km, 618 m of Climbing – How to Ride This Tainan Mountain Road
Route Overview and Key Data
The Route 3 Meiling section is one of the most iconic climbing routes in the Wanqiu Industrial Road area of Yushanli, Nansi District, Tainan. It falls within the Siraya National Scenic Area, with elevations ranging from roughly 500 to 1,100 meters. This route is catalogued as Strava segment 7584548 and serves as a classic benchmark for southern Taiwan riders transitioning from lowland communities into mountainous terrain. Let’s lay out the numbers first:
| Item | Value |
|---|---|
| Route Name | Route 3 Meiling |
| Start/End Location | Wanqiu Industrial Road area, Yushanli, Nansi District, Tainan City |
| Distance | 8,908.8 meters (approx. 8.91 km) |
| Total Climbing | 618.1 meters |
| Average Gradient | 6.1% |
| Category | Category 3 (moderately difficult) |
| Elevation Range | Approx. 500–1,100 meters |
| Strava Segment | 7584548 |
Looking at just the 6.1% average gradient, many riders might think, “That’s not too bad, I can probably manage it.” But here’s a common miscalculation to flag: if you simply multiply distance by average gradient to estimate total climbing, you get roughly 543 meters—a noticeable gap from the official 618.1 meters. This discrepancy isn’t a data error; it’s because the route doesn’t climb at a steady rate—there are several sections in the middle where the gradient steepens significantly, dragging down the overall average. So the “steepness” you actually feel while riding will be more punishing than the average gradient suggests. In other words, 6.1% is just the route-wide average; the instantaneous gradient on local sections definitely exceeds that figure, so don’t plan on this being a consistently gentle climb.
In terms of riding profile, 8.91 km with 618 meters of climbing places this in the “mid-distance climbing test” category—not the kind of prolonged endurance battle you’d find on Wuling or Alishan, but also not a gentle slope a beginner can breeze through. For riders in the Tainan and Kaohsiung area, this route has a clear geographical advantage—no need to trek all the way to the Central Cross-Island Highway or northern mountain ranges. A solid climbing workout can be completed in a single weekend morning, making it a go-to route for southern riders seeking both “climbing muscle training” and “weekend riding ritual.”
Below, I’ll break the entire route down from start to finish into several key sections, explaining section by section what to watch out for, how to pace, how to gear, how to manage nutrition, and what reasonable finish times to expect for riders of different levels.
One more planning note: many riders habitually compare “category ratings” directly with other well-known routes, but the category only reflects the combined difficulty grading of gradient and distance—it doesn’t represent an absolute suffering index. A Category 3 route means it sits in the range between “beginners can attempt it but need preparation” and “advanced riders treat it as routine”—in other words, this route inherently plays a “gateway test” role, suitable for checking whether you have the foundational ability to tackle longer, steeper routes. If you find yourself struggling significantly on a route like Meiling, I’d suggest focusing your training on improving FTP and muscular endurance rather than rushing to challenge harder routes. Conversely, if you ride it with room to spare, this route can also serve as pre-race tempo maintenance training, simulating the pacing feel of a mid-distance climbing segment.
Section Guide 1: The Gentle Approach on Route 3
The start of the route is classic “low-hill, gradual climb into the mountains” terrain. Route 3 hasn’t yet entered true mountain switchbacks at this point—the road alignment is relatively straight and open, and the gradient hasn’t fully flexed its muscles yet. Riding it gives you a false sense that “maybe this road is overrated.”
The most common mistake at this stage is being fooled by the gentle gradient and charging out at near-full effort from the gun. 8.91 km isn’t long, but it isn’t short either—if you push your heart rate near the lactate threshold in the early going, your legs will hit a “power cut” feeling when you reach the real steep sections—that helpless sensation of pedaling but feeling no torque response is a shared painful memory for many first-time Meiling challengers.
The recommended approach is to treat this section as a warm-up and route observation:
- Heart rate control: Stay within Zone 2 to Zone 3 of your FTP-corresponding heart rate range, roughly 70%–80% of max heart rate. Don’t charge into the anaerobic zone from the start.
- Cadence over torque: Use a lighter gear and higher cadence (90–95 rpm) to adapt to the climbing rhythm, saving muscle fatigue for the sections later that truly need explosive power.
- Watch the road surface and wind: This section is surrounded by orchards and industrial road intersections. Watch for leaves and mud left by agricultural vehicles on the road, and be especially cautious of slippery conditions after rain.
Another key point at this stage: while the gradient hasn’t tightened up yet, confirm that your nutrition is easily accessible—check the position of your water bottles and energy gels before entering the steep sections, so you don’t have to fumble for supplies while you should be focused on pedaling.
This section is also a good time to adjust your body position. Many riders immediately drop into an aggressive low posture to minimize wind resistance, but climbing doesn’t require such an aggressive stance—relax your upper body slightly, hold the tops of the bars or the brake-shift levers lightly, and keep your airway open. Breathing efficiency matters far more than deliberately lowering your aero profile. Also, use this relatively gentle stretch to mentally assess the day’s wind direction, temperature, and road wetness—this information will influence how conservatively you should pace the steeper sections ahead. If you’re riding in a group, this is also the last chance to check on your teammates and align on pacing—once you hit the mountain switchbacks, the speed gaps between riders will widen rapidly, and the group will easily splinter.
Section Guide 2: The Gradient Steepens After Entering the Mountains
Past the gentle low-hill approach, the road clearly transitions into mountainous terrain—this is the most pressure-intensive core section of the entire route. Here, the gradient shows the aforementioned “locally steeper sections,” which is exactly why the average speed drops—successive switchbacks come with sharp gradient increases, putting real demands on both your cardiovascular system and leg strength.
Riding strategy recommendations for this section:
- Seated climbing as the primary, standing as supplementary: On steep sections, stick primarily to seated pedaling to maintain a steady breathing rhythm; switch to standing bursts only for particularly steep short pitches, but standing burns more energy and shouldn’t be sustained for long.
- Look ahead and plan your line through corners: Mountain roads have many bends and obstructed sightlines. Scan the road surface before entering each corner and choose the smoother inside line to minimize unnecessary gradient losses.
- Pacing rule: Keep your power output at a level you can sustain for 5 to 8 minutes. If you notice your heart rate climbing persistently toward max, actively back off—better to ride slower and finish than to blow up halfway up the mountain.
Worth noting: the gradient changes on this section aren’t gradual—it alternates between “a bit easier” and “a bit steeper.” This rhythm is especially taxing for beginners who haven’t found their climbing groove. I’d suggest breaking this section into several “mini-goals”—use intersections, utility poles, or prominent landmarks as split points. Reassess your perceived effort after each small segment rather than staring at the remaining distance on your Garmin, which tends to cause mental fatigue.
If you have a power meter, this section is the best place to practice the concept of “normalized power output.” The idea is to keep your power output in a similar range regardless of gradient fluctuations, rather than easing off on gentler slopes and grinding hard on steeper ones. The goal is to delay anaerobic metabolism from kicking in too early and slow the rate of lactate accumulation. Riders without a power meter can substitute with Rate of Perceived Exertion (RPE)—keep your perceived effort around 6 to 7 on a 10-point scale throughout the climb, saving some reserve for the steeper sections ahead. Additionally, this section has many switchbacks, and rock faces and vegetation block part of the view. Stay alert for oncoming traffic and riders behind you at all times, especially on weekends when SUVs or motorcycles may overtake aggressively—stay vigilant, ride on the right, and don’t hog the entire lane.
Segment Strategy 3: Handling Local Steep Sections and Gear Ratio Setup
As mentioned earlier, the average gradient of 6.1% is just the overall average. The actual route contains several sections where the gradient noticeably exceeds the average, and these are the parts of the route that require the most careful handling.
Gear Ratio Recommendation: Given the combination of a mid-distance climb with local steep sections, road bike riders are generally advised to equip at least a 34-32 (34-tooth small chainring, 32-tooth or larger large cassette sprocket) gear ratio. For riders with average climbing ability or heavier riders, an even lighter combination such as 34-34 can be considered. In recent years, popular disc-brake road bikes with a standard compact crankset (50/34T) paired with an 11-32T cassette should be sufficient for this route. If you’re riding a traditional standard crankset (53/39T), be sure to confirm that your cassette has a sufficiently large largest sprocket; otherwise, you may be forced to stand and grind on the local steep sections, which will disproportionately increase your energy expenditure.
Techniques for Handling Local Steep Sections:
- Shift one gear early: When you sense the gradient is about to increase, shift into a lighter gear in advance. Avoid shifting when the slope has already become steep and torque load is already high, as this can cause chain skipping or dropping.
- Shift weight forward: When standing and grinding on steep sections, shift your weight slightly toward the front of the bike to prevent rear-wheel slippage. This is especially important on roads that have recently seen rain, as traction on the industrial roads in the surrounding area drops noticeably.
- Sync breathing rhythm with cadence: Many riders unconsciously hold their breath on steep sections. It’s recommended to use a fixed breathing rhythm (e.g., inhale over two pedal strokes, exhale over two) matched to your cadence, which can effectively delay the buildup of anaerobic fatigue.
“Climbing isn’t about who has the strongest legs, but who can distribute their power most evenly.” This saying is particularly apt for a route like Meiling, where the gradient is uneven — rather than pushing hard in the early sections, save your strength for the truly demanding steep sections in the middle and later parts.
Segment Strategy 4: The Final Stretch Approaching Meiling Scenic Area
As the elevation gradually approaches the route’s summit area (approximately 1,100 meters), the road begins to take on the atmosphere of entering the scenic area — the views gradually open up, and surrounding orchards and plum groves gradually replace the original industrial settlement landscape. Although this section may not have the steepest gradient on the entire route, it is actually the most mentally challenging because your energy has already been largely depleted by this point.
A “conservative finish” strategy is recommended here:
- Lower your pace expectations: Don’t still be thinking about chasing a personal best at this stage. Be slightly conservative in how you feel, and save your remaining energy for any short steep sections that might unexpectedly appear.
- Last chance for hydration and nutrition: If your on-bike supplies are running low, this section is the final opportunity before entering the scenic area to assess whether you should slow down, catch your breath, and replenish with energy gels or water.
- Watch for oncoming traffic: On the sections approaching the scenic area, holiday traffic (including cars, motorcycles, and other cyclists) increases noticeably. On sections with limited road width, stay alert, and be sure to slow down appropriately when passing oncoming vehicles around corners.
After completing this climb, it’s recommended to find a safe shoulder or viewpoint near the scenic area to pause briefly. Besides letting your body recover from the high-intensity heart rate, this is also a good opportunity to enjoy the Siraya mountain landscape and take photos to document your achievement. Remember not to immediately chug ice water or do intense stretching right after finishing the climb. First, let your heart rate gradually come down with easy riding, then proceed with your post-ride cooldown routine.
Nutrition, Hydration, and Equipment Recommendations
For an 8.91-kilometer climb with 618 meters of elevation gain, a rider of average fitness can expect a one-way completion time of roughly 35 to 70 minutes (see the next section for detailed time estimates). This duration is sufficient to cause noticeable fluid and electrolyte loss. Combined with the high summer temperatures and intense sunlight in the Tainan mountain area, your nutrition plan cannot be taken lightly.
Hydration Recommendations:
- Before departure, make sure to carry at least one 750ml or larger water bottle. If tackling the route during peak summer heat, consider bringing two bottles or using a hydration pack system.
- Shops are sparsely distributed in the mountain area, unlike the city where convenience stores are everywhere. Treat this route as a “self-sufficient” route when planning your supplies — don’t expect to be able to buy water along the way at any point.
Energy Supplement Recommendations:
- Finish a full meal 1.5 to 2 hours before departure to avoid a mid-climb blood sugar crash from riding on an empty stomach.
- Carry 1 to 2 energy gels or energy bars. It’s recommended to take them before entering the local steep sections (the sections mentioned in Segment Strategy 3), rather than waiting until you’re completely out of energy — by then, absorption and metabolism efficiency will be compromised.
- Electrolyte replacement should not be overlooked either. Especially in summer when sweat loss is high, replacing water without electrolytes can lead to cramps or early signs of heat exhaustion.
Equipment Checklist:
| Item | Recommendation |
|---|---|
| Gear ratio | At least 34-32; lighter gearing recommended for average fitness |
| Water bottles | 750ml or larger; dual bottles recommended in summer |
| Nutrition | 1-2 energy gels/bars |
| Sun protection | Sunscreen, arm sleeves, sunglasses |
| Tire pressure and condition | Check tire pressure before departure; watch for loose gravel on mountain roads |
| Lights | If riding in the early morning or evening, install front and rear lights |
Weather and Seasonal Considerations
Because the Route 3 Meiling route is adjacent to a famous plum-blossom viewing spot, seasonal fluctuations in traffic and visitor numbers are very pronounced. Be sure to factor this into your ride planning.
January Plum Blossom Season (Peak Traffic Period)
Around January each year is the peak season for plum blossom viewing at Meiling, when the mountainside plum trees are in full bloom, attracting large numbers of sightseers and tourist vehicles. If you plan to ride during this period, be sure to note:
- Holiday traffic: On weekends during the blossom season, mountain roads see a large influx of passenger cars, tour buses, and even motorcycles. Some sections may experience difficulty passing oncoming vehicles or temporary parking occupying the shoulder. It’s recommended to avoid the peak morning hours of blossom-viewing crowds on weekends, or challenge the route on weekdays instead.
- Increased blind-spot risk: Sightseers often stop suddenly to take photos, or pedestrians cross the road to admire the plum trees along the roadside. When passing through blind corners, cyclists must remain highly alert, slow down appropriately, and ring their bells more frequently as a warning.
Summer Afternoon Thunderstorms
The Tainan mountain area commonly experiences afternoon convective thunderstorms in summer, typically occurring in the afternoon hours. It’s recommended to schedule your ride in the early morning or morning hours to avoid afternoon rainfall and lightning risks. The drainage on mountain industrial roads is not as well-designed as in urban areas. After rain, wet roads combined with fallen leaves and accumulated mud and sand create additional risks for cornering and braking.
Sunlight and Sun Protection
Tainan’s low latitude means intense sunlight. Even though parts of this climbing route are shaded by trees, there are still plenty of exposed sections. Sunscreen, arm sleeves, and sunglasses should be considered essential gear. Prolonged sun exposure not only carries sunburn risk but also accelerates the loss of energy and fluids.
Common Mistakes and Risk Reminders
Here are some common mistakes and risk points that riders encounter when tackling this route. Knowing them in advance can help you avoid them effectively:
- Pacing too hard in the early section: Fooled by the relatively gentle feel of the early section, riders start with a high-intensity sprint, only to lose speed dramatically or blow up entirely when the gradient turns steep in the middle section.
- Ignoring the existence of local steep sections: Seeing only the 6.1% average gradient and letting your guard down, without reserving energy and mental preparation for the local steep sections that exceed the average.
- Recklessly challenging the route on blossom-season weekends: Not noticing the surge in traffic during plum blossom season, resulting in close calls with tourist vehicles in blind-spot sections.
- Inadequate supply planning: Mistakenly assuming there will be shops along the mountain route for supplies, only to run out of water halfway with no refill point in sight.
- Ignoring post-rain road risks: Heading out immediately after an afternoon thunderstorm, when wet roads combined with fallen leaves significantly lengthen braking distances on corners, without adjusting riding pace accordingly.
- Insufficient gear ratio setup: Riding a standard crankset with a small cassette and pushing through anyway, resulting in multiple forced standing grinds on steep sections, greatly increasing energy expenditure and cramp risk.
- Neglecting brake management on descents: When finishing the climb and preparing to return the same way or continue onto descending sections, the mountain roads have many corners and steep gradients. Continuous braking can cause brake pads to overheat and braking power to fade. It’s recommended to use intermittent, pulsing brake application rather than holding the brakes constantly.
- Group ride formation falling apart: When a group ride enters the steep sections, differences in fitness quickly string out the group. Without pre-agreed meeting points or a designated sweep rider, dropped teammates may be left to face mountain road conditions alone. It’s recommended to agree on staged regrouping points and waiting rules before departure.
Most of these mistakes are not technical errors but rather the result of insufficient planning and mental preparation. The Meiling route itself is moderately difficult — on the harder side of moderate. As long as you do your homework beforehand and manage your pace well, the vast majority of riders with a reasonable amount of cycling experience can complete the challenge safely and successfully.
Reference Completion Times for Riders of Different Levels
The following times are only for getting a rough sense of effort; they are not precise ranking criteria. Actual completion times will vary depending on individual fitness, weather conditions that day, wind direction, road conditions, and whether you are carrying weight (supplies, camera, etc.).
| Rider Level | Reference Completion Time | Description of Perceived Effort |
|---|---|---|
| Beginner (first time tackling a mid-distance climb) | Approximately 60–80 minutes | Requires frequent gear changes throughout; may need to stop to catch your breath in the latter half |
| Intermediate (has a regular climbing training routine) | Approximately 40–55 minutes | Can maintain a steady pace to finish; noticeable pressure on steeper sections |
| Advanced (good FTP and climbing experience) | Approximately 28–38 minutes | Maintains high-intensity output throughout; only feels significant load on the steepest sections |
If you are a newer rider attempting Meiling for the first time, it is recommended not to set out with the mindset of “I must ride this fast.” Instead, make finishing the climb and getting your nutrition and pacing right your primary goals. Once you become familiar with the route’s gradient distribution and corner characteristics, you can gradually try to increase your pace. The value of this route lies not only in challenging the gradient numbers, but also in being a training route that allows you to practice repeatedly and steadily build up your climbing strength—the 8.91 km distance fits neatly into a weekend routine training session without overly draining your energy or time budget for the day.
Conclusion: Make Meiling a Foundation for Long-Term Training
The Meiling route on Provincial Highway 3 is not the highest-altitude or longest challenge route in southern Taiwan, but it condenses the terrain characteristics of “gentle low-mountain climbs followed by localized steep sections,” and combined with seasonal crowds and summer weather variables, it is actually a route well-suited as a “comprehensive ability test.” Whether you are a beginner looking to practice pacing or a seasoned rider wanting to maintain climbing form, this 8.91 km route with 618.1 meters of elevation gain deserves a place on your regular training list. The next time you plan a ride around Tainan, consider adding Meiling to the itinerary and use your actual cadence and heart rate data to personally verify the undulating gradients hidden behind the route’s 6.1% average grade.
Related Reading
- Taiwan Provincial Highway 3 Guanziling Practical Guide: An 11.5 km Mid-Distance Climb to One of Taiwan’s Four Major Hot Springs
- Caoling Highway Practical Guide: How to Ride Yunlin’s 6.4 km Mountain Training Climb with 429 Meters of Elevation Gain
- West Approach Wuling Complete Riding Guide: A 53 km, 2889-Meter Elevation Gain Four-Segment Pacing Map
- Meishan 36 Bends Complete Guide: How to Tackle the 11.84 km Hairpin Battle with a 6.4% Average Grade
單車 梅山36灣 坡度介紹 路段介紹 空拍 (相關遊記影片,請參考說明或我的頻道喔,歡迎訂閱)
6 年前
#北橫 + #北進武嶺 最硬的員工旅遊 EP1 | #公路車 #拉拉山 | 明池 | 武嶺 | 武陵農場 | 雲海 | Taiwan Cycling Route Wulin
6 年前
梅山36彎 奮起湖 單車挑戰 下集 #公路車
6 年前
梅山36彎 奮起湖 #公路車 之旅 2400m
6 年前
台北闊瀨陡坡 騎旅 / 日本單車雜誌編輯車友臨時加入!/ 髮香才是最強的 / feat. 北迴歸線小隊 / 公路車 CT Yeh
6 個月前
藤枝二集團 單車行 Day1 | 南部小武嶺 | 爬坡爬到罵罵叫 | JJSC | 公路車 | CT Yeh
3 年前
雨戰! 西進武嶺員工旅遊 加料 各路段大數據分析 | 同事端出5公斤的公路車來挑戰!? EP1
4 年前
西進武嶺各路段 前8000名 大數據分析 配速攻略/功率/心律/推力比/維持率/踏頻/踏瓦比/牽車率 大公開 | 建大盃 NeverStop 可參考 | 公路車 | CT Yeh
5 年前