Taimali Gold Needle Mountain Practical Guide: Complete Breakdown of the Category 5 Hard Climb — 13.03 km, 1,250 m Elevation Gain
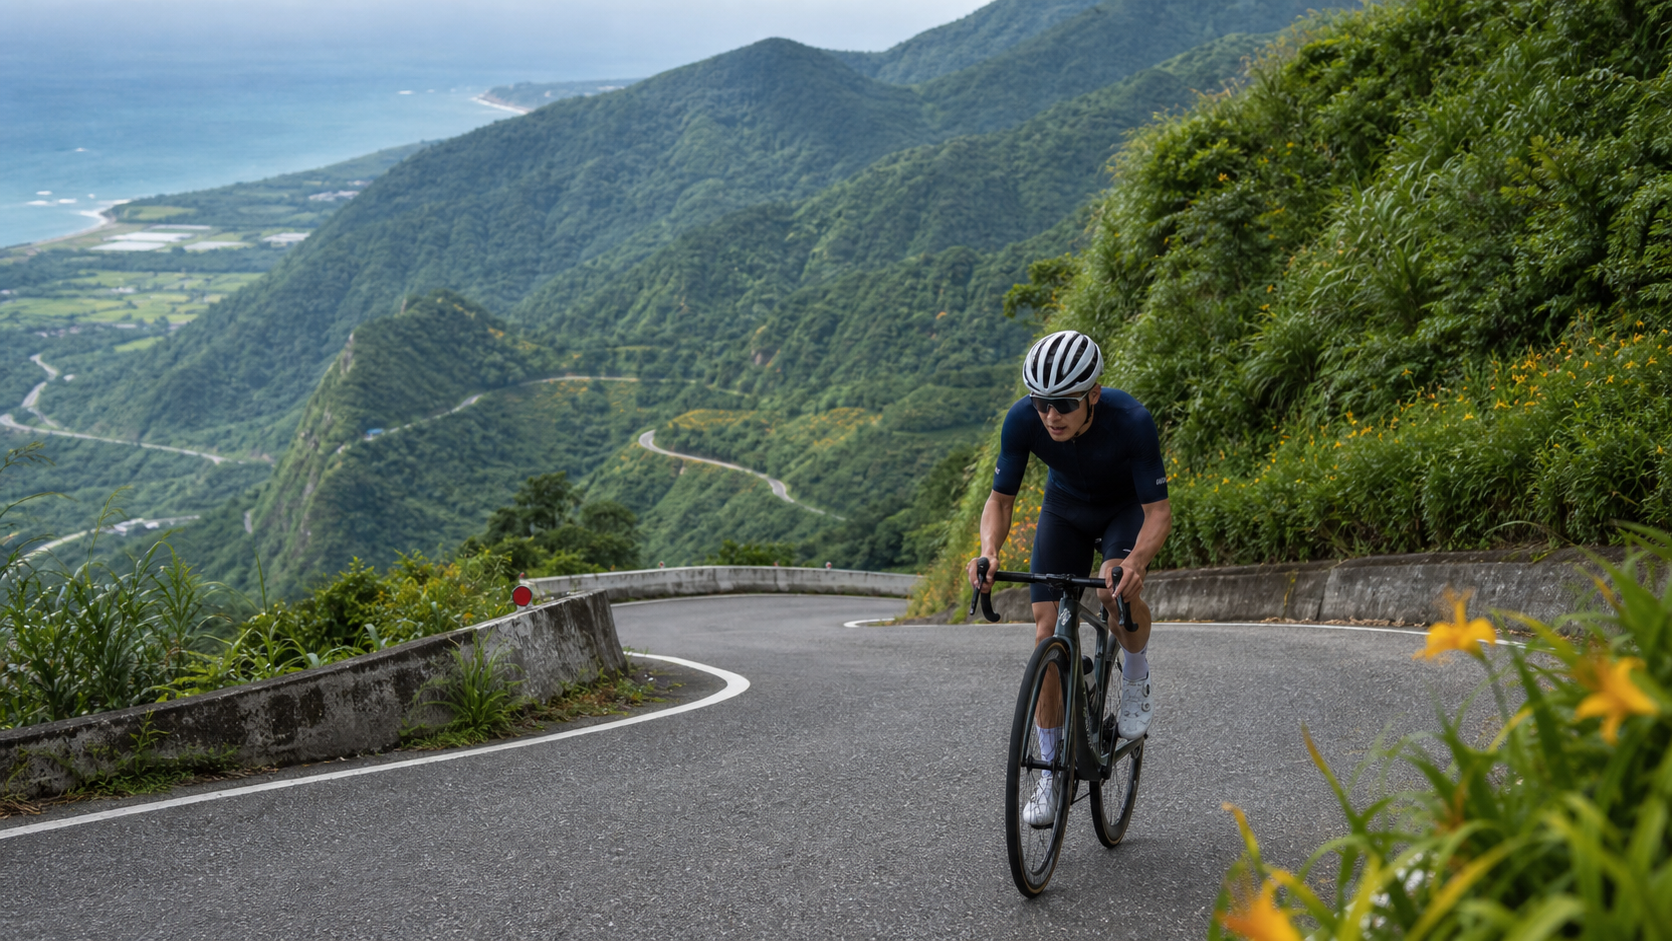
Route Overview: A Hard Climb Where the Numbers Don’t Lie
Taimali Gold Needle Mountain is practically synonymous with “hard climb” in Taiwan’s eastern cycling community. This guide uses real-world data from Strava segment 8113161 as the sole authoritative source of numbers. All segment times and gradient discussions are based on this data, with no other sources mixed in, to avoid confusion when you cross-reference.
Let’s lay out the hard numbers first:
| Item | Value |
|---|---|
| Strava Segment ID | 8113161 |
| Location | Taimali Township, Taitung County |
| Total Distance | 13,028.7 m (approx. 13.03 km) |
| Total Elevation Gain | 1,250.3 m |
| Average Gradient | 6.5% |
| Strava Category | Category 5 (highest difficulty rating) |
Let’s get straight to the point: 13.03 km, 1,250.3 m of climbing, and a 6.5% average gradient. Crunching those numbers, the average climbing rate exceeds 95 m per kilometer — this ranks among the hardest paved climbing routes in Taiwan. What makes it trickier: if you use the simplified “distance × average gradient” formula to estimate total elevation gain, 13.03 km multiplied by 6.5% would theoretically yield only about 847 m of climbing — but the actual measured figure is over 400 m more, at 1,250.3 m.
This discrepancy isn’t a measurement error — it’s because the gradient distribution along the route is extremely uneven. The 6.5% average is just a “mean value.” Hidden in the middle section are several stretches where the gradient far exceeds that figure, with some sections clearly approaching or even surpassing double the average. This “mild on average, hellish in spots” gradient profile is exactly why Gold Needle Mountain is so tough, and why many riders misjudge the difficulty and blow up in the middle section. Strava’s Category 5 classification — its highest difficulty tier — is well deserved.
For comparison with other long climbs familiar to Taiwanese riders: the western approach to Wuling stretches over 40 km, but its average gradient is far more forgiving — it’s a “win by volume” kind of climb. Gold Needle Mountain is the complete opposite: a concentrated climb that’s “short, brutal, and urgent” — 13 km demanding 1,250 m of elevation gain. The density is extreme, and the instantaneous load on your lungs and legs is far more punishing than a long, gentle climb. This is why many riders with solid baseline fitness still get exposed in the middle section on their first attempt, even doubting whether they misread the average gradient figure.
This article takes an engineer’s approach, breaking the route down into quantifiable, planable strategies: segment pacing, gear ratios, refueling timing, weather risks, and common DNF (Did Not Finish) traps — so you can minimize variables before you roll out, replacing luck with preparation.
Segment Strategy: From Taimali Town to Twin Breast Peak
The Gold Needle Mountain climb can be roughly divided into four main segments, each with completely different rhythm and challenges. Approaching it with a “segment mindset” is far more efficient than staring at the 13 km total, and it protects your energy allocation better.
Segment 1: Gentle Start from Town
Starting from Taimali town, the gradient in the opening section is relatively mild — one of the few spots on the entire route where you can “warm up the tires.” The focus here isn’t going all-out; it’s keeping your heart rate in the aerobic zone, confirming your nutrition and gear are properly secured, observing the day’s wind direction and cloud cover, and letting your body and breathing settle into a rhythm. The mistake many riders make here is treating the opening as a warm-up sprint stage, pushing heart rate too high too early — by the time they hit the truly steep sections, they have nothing left in reserve. Ride the opening at roughly 80–90% of your planned full-route pace, and save the real engine warm-up for the harder roads ahead.
Segment 2: Sustained Climbing in the Middle
After the gentle slopes, the gradient rises noticeably into sustained climbing with almost no flat respite. This is the segment with the greatest “volume” on the route, testing steady output and pace management rather than explosive power. Here, a fixed-cadence pacing strategy is recommended over gut-feel grinding — lock your cyclocomputer onto a cadence range you can sustain for 15+ minutes without falling apart, typically 70–85 rpm. This will serve you better than staring at gradient numbers or instantaneous speed, and it prevents a total collapse later on.
Segment 3: Steeper Sections Exceeding the Average — Where Strategy Matters Most
This is where Gold Needle Mountain truly “hides its blade.” The earlier-mentioned discrepancy — a 6.5% average yet far more total climbing than the back-calculated figure — occurs mainly in this segment. Here you’ll encounter several short, steep pitches with gradients clearly exceeding the average, some approaching double-digit percentages. The terrain rolls violently, putting severe strain on legs that have already burned significant energy — this is the most likely spot on the entire route to make you want to quit.
Facing these localized steep pitches, the engineer’s approach is “pre-allocating your output budget”: before entering this section, proactively dial your pace down 10–20% to hold extra reserve energy for the steep bursts. If your usual heart rate limit has a ceiling in your threshold zone, it’s acceptable here to briefly approach or even touch your personal limit — but immediately after each steep pitch, bring your heart rate back down and return to an aerobic rhythm. Don’t let consecutive steep pitches stack into a prolonged high-intensity output state — that’s exactly the pattern that leads to cramping and a cliff-edge drop in energy. Alternating between out-of-saddle surges and seated climbing is also recommended here, spreading the load across different muscle groups to avoid premature fatigue in any single one.
Segment 4: High-Altitude Finale Near Wangyou Valley and Twin Breast Peak
In the final stretch, as you approach Wangyou Valley and Twin Breast Peak, you’ll have climbed to considerable altitude. Temperatures drop noticeably from town, and mountain mist may begin to appear, affecting visibility and road surface grip. While the gradient here isn’t necessarily the steepest of the route, this is the final stage with little energy remaining, compounded by the respiratory burden of altitude — subjectively, the pain is often at its most intense here. The advice for this segment is “mind management” over “body management”: break the goal into visible landmarks rather than thinking about how many kilometers remain. Psychologically, this makes it far easier, and it’s easier to maintain a steady cadence until you truly reach the finish.
Gear Ratio and Equipment Recommendations: Proper Setup for Category 5
Strava’s Category 5 climb classification makes it clear: this is not a route you can “get by with a compact crank.” Below are specific equipment recommendations for this route — confirm each item before you roll out.
Front and Rear Gear Ratios
- Front chainring: A compact crank (Compact, 50/34T) is strongly recommended. If your body weight plus bike weight runs heavy, consider a sub-compact setup so your lowest gear is easier for the steep pitches.
- Rear cassette: At minimum, an 11-32T is recommended. Riders with less power or first-time challengers should consider a wider-range cassette, especially for the localized steep pitches in Segment 3. The sustained climbing in the middle section will already drain your legs; if you don’t have a light enough gear when hitting short, steep pitches well above the average, you’ll be forced out of the saddle, accelerating energy depletion and potentially hitting the wall early.
- Lowest gear test: Before departure, confirm on flat ground that your lowest gear shifts smoothly with no chain chatter or friction — you don’t want surprises mid-climb disrupting your rhythm.
Overall Weight Reduction Strategy
On a Category 5 climb, every kilogram is amplified into a noticeable difference in feel. That doesn’t mean you need to spend big on an upgraded carbon frame; instead:
- Remove all non-essential accessories and luggage — trim bottle cages and tool kits to the bare minimum
- If you have spare climbing wheels, this is the occasion to use them
- Adjust tire pressure based on the day’s road conditions — mountain roads occasionally have potholes or wet patches, so don’t inflate too high and sacrifice grip
Brake and Drivetrain Inspection
The descent back down is an equally overlooked risk point on this route. Before departure, confirm brake pad wear and hydraulic brake fluid levels. Sustained descending puts continuous high load on the braking system, and Gold Needle Mountain’s descent gradients are equally formidable — brake failure is a risk not to be taken lightly. Also lubricate the chain before heading out; long climbs wear the drivetrain far more than flat riding. One thorough pre-ride maintenance pass is often more efficient than troubleshooting mid-ride.
Nutrition and Hydration Management: The Essential Work You Can’t Skip on a 13km Long Climb
13.03 kilometers, 1,250.3 meters of elevation gain. At the pace of an average amateur rider, completing this climb takes roughly fifty minutes to over an hour and a half. Combined with the generally hot climate in eastern Taiwan and the high-intensity heart rate load from the steep gradients, water and energy depletion happens much faster than you might expect. Do not simply apply the same fueling rhythm you use on gentle rollers.
Preparation Before Departure
- Bottle Setup: It is recommended to carry at least two large-capacity bottles, with a total water volume of at least 1.2 to 1.5 liters. While there are some food and beverage facilities around the summit of Jinjhen Mountain, their operating hours and water supply reliability may not align with your schedule. Plan with the principle of “carrying sufficient water and not relying on mountain-top resupply.”
- Energy Intake: It is recommended to replenish carbohydrates every twenty to thirty minutes, whether through energy gels, energy bars, or sports drinks, depending on your digestive preferences. When climbing at higher intensity, choose products that are easily absorbed and unlikely to cause gastrointestinal distress, avoiding the hassle of dealing with indigestion on the steep sections.
- Electrolytes: Summer temperatures in eastern Taiwan are high and sunlight is intense, so sweat loss increases significantly. Replacing water without electrolytes can easily lead to cramping. It is recommended that at least one of your bottles contain an electrolyte drink or dissolved electrolyte tablets, and be sure to confirm your electrolyte supply is sufficient especially before the third section’s steep ramps.
Timing Your Fueling
It is recommended to align your fueling checkpoints with the four segments mentioned earlier: before starting the climb, confirm your bottles are full and energy gels are within easy reach; after the first gentle section ends and before entering the middle continuous climb, take your first energy gel; before the steep ramps of the third section, make sure you still have ample water—this section places the highest load on your heart rate and is where you need your energy reserves the most; upon reaching the final stretch, immediately replenish water and electrolytes to prepare for the descent and return trip. Do not wait until you feel thirsty to start refueling.
The Reality of Summit Facilities
Although there are some shops and food stalls around the summit of Jinjhen Mountain, Wangyou Valley, and Shuangru Peak, these operate seasonally in a tourism-oriented manner. Especially on weekdays or outside the blooming season, you cannot guarantee they will be open or providing water. Be sure to plan with the mindset of “you are responsible for your own supplies.” Do not treat mountain-top facilities as guaranteed aid stations—this is the most fundamental yet easily overlooked aspect of planning a long climb.
Weather and Seasonal Risks: The Double-Edged Sword of the Golden Daylily Season
Jinjhen Mountain is most famous for its golden daylily season from August to September each year, when the hillsides covered in golden blooms are a visual delight. But for cyclists, this period also brings several risk factors that require special attention. You cannot focus only on enjoying the flowers while neglecting riding safety.
Crowds of People and Vehicles on Bloom-Season Weekends
During the August-September blooming season, especially on weekends and holidays, Jinjhen Mountain sees a massive influx of self-driving tourists and tour buses coming up to see the flowers. The mountain roads themselves have limited width, and combined with the tourist crowds, you are likely to encounter restricted passing space, vehicles stopping illegally on the shoulder, and pedestrians crossing the road randomly to take photos. It is strongly recommended to tackle this route on weekdays or in the early morning. On one hand, you avoid peak traffic; on the other, morning temperatures are cooler and better suited for high-intensity climbing, making the physical load much more manageable.
Afternoon Convective Showers in Mountain Areas
In summer afternoons, convective cloud systems develop rapidly in the mountain areas of eastern Taiwan. Jinjhen Mountain sits on a windward slope, so the chance of afternoon thunderstorms is not low. If rain hits during your climb, wet roads significantly increase the risk of crashing, especially on descents where extra caution is essential. It is recommended to start early in the morning and aim to complete the challenge before noon, avoiding the high-risk window for afternoon thunderstorms and giving yourself more buffer to handle unexpected situations.
Sun Exposure and Sun Protection
Taimali is at a relatively low latitude with intense summer sunlight. Combined with the elevated heart rate and body temperature during climbing, prolonged sun exposure can easily lead to heatstroke or heat exhaustion. It is recommended to take proper sun protection measures, including sunscreen, arm sleeves, and sunglasses as basic gear. Also, constantly monitor yourself for early signs of heatstroke such as dizziness or nausea. If any appear, stop immediately, rest, rehydrate, and cool down. Do not push on stubbornly—safety always takes priority over finishing time.
The Advantage of the Non-Blooming Season
If your goal is purely to “conquer this hard climb” rather than see the flowers, avoiding the blooming season is actually the purer choice—no tourist traffic, no crowds, allowing you to focus more on pacing and rhythm. While the green hillsides lack the visual impact of the golden flower fields, the riding experience is more pure and efficient, making it easier to focus on chasing a personal best.
Common Mistakes and DNF Risk: Why This Route Takes People Down
DNFs—Did Not Finish—on Jinjhen Mountain are not uncommon among the hard climbs of eastern Taiwan, and the reasons are highly concentrated in a few preventable mistakes worth examining one by one.
Mistake One: Underestimating the Mid-Section Steeps and Pacing Too Fast Early On
The most common failure mode is the aforementioned average gradient of 6.5% misleading riders—seeing that the average isn’t particularly extreme, they ride the early sections at too high an intensity. By the time they reach the steep ramps of the third section, their energy is nearly spent, and they simply cannot handle gradients that clearly exceed the average, ultimately ending up pushing their bike or giving up entirely. The solution is simple: before departing, recognize this route’s gradient profile of “mild average, hellish sections,” pace conservatively in the early part, and save your energy for where it is truly needed.
Mistake Two: Bloom-Season Traffic Disrupting Your Rhythm
Riders who challenge this route on bloom-season weekends often find themselves forced to brake frequently and restart repeatedly due to slow-moving vehicles ahead, illegal parking blocking the road, and tourists crossing the street. Frequent braking and restarting on a climb exacts a far heavier toll on your energy than on flat roads. Each repeated acceleration requires tapping into anaerobic energy systems, and over time this prematurely drains the reserves in your leg muscles. This is another reason why it is recommended to avoid peak bloom-season weekends—what you save is not just time, but precious energy reserves.
Mistake Three: Poor Energy Distribution, Struggling or Cramping in the Final Stretch
Riders who do not plan their energy allocation according to a segment strategy often find themselves in serious struggle during the fourth high-altitude finishing section, sometimes even cramping from excessive electrolyte loss. The root of this problem can usually be traced back to poor fueling rhythm planning or poor intensity control in the early sections, leaving no buffer for the latter part. Be sure to follow the segment-based fueling timing plan outlined earlier. Do not decide when to refuel on the fly based on feel—by the time you realize there is a problem, it is often already too late.
Mistake Four: Ignoring the Risks of the Descent and Return Trip
Many riders focus all their attention on “getting up,” while ignoring that the descent back down requires just as much energy and focus. After expending massive amounts of energy and mental focus on the climb, your reaction time and judgment will be diminished on the descent. Combined with the equally formidable gradients on the way down Jinjhen Mountain, your braking system will be under sustained high load. It is recommended to reserve at least ten to fifteen minutes of rest at the finishing section—rehydrate, eat, and let your heart rate and mental state recover—before starting the descent. Do not rush to turn around the moment you reach the summit.
Estimated Target Times for Riders of Different Levels
The following are estimated reasonable target times for a Category 5 climb of 13.03 kilometers with 1,250.3 meters of elevation gain, broken down by rider level, provided as a reference for pre-race expectations. Actual times will vary depending on wind direction, temperature, and physical condition on the day:
| Rider Level | Estimated Finish Time | Reference Intensity |
|---|---|---|
| Top Amateur / Racer | Approximately 40–50 minutes | High power-to-weight ratio, long-term climbing training |
| Advanced Rider | Approximately 50–65 minutes | Regular training, multiple long-climb experiences |
| Intermediate Rider | Approximately 65–85 minutes | Basic endurance, occasional medium-to-long climbs |
| Beginner / Recreational Rider | Approximately 85–120+ minutes | First-time challenge or limited training volume |
This table is for reference only. Actual finish times are heavily influenced by variables such as body weight, daily condition, and whether it is your first attempt. Rather than chasing a specific time, riders tackling Jinjhen Mountain for the first time should set their goal as “safely and completely riding the entire route.” After building a real feel for the gradient distribution of this route, then consider chasing a personal best on the next attempt.
Regardless of which bracket in the table you fall into, the core strategy for conquering Jinjhen Mountain remains the same: respect the hidden steep sections behind that 6.5% average gradient, prepare thoroughly with nutrition and gear, avoid the peak crowds of bloom-season weekends, and maintain a steady rather than impulsive pacing rhythm throughout. The difficulty of this route is real, but with proper preparation, it is equally a route that can be rationally planned and conquered—one that deserves a personal attempt by every serious climbing enthusiast.
Route Conditions and Transportation Planning
Beyond fitness and equipment, incorporating traffic and route variables into your planning before departure can make the entire challenge more manageable and reduce the risk of discovering problems on the spot.
Mountain Road Surfaces and Passing Space
The roads on Jinzhen Mountain are classified as mountain industrial-road grade, with road widths generally not very spacious. Some corners have more blind spots, and passing space becomes even tighter when traffic surges during the blooming season. It is recommended to wear highly visible cycling apparel throughout the ride, and to keep front and rear lights flashing even during the day to increase the chance of being noticed by other road users. Slowing down on corners and maintaining a safe following distance are the basic principles of riding safely on this route—do not sacrifice your safety margin just because you are eager to chase a personal best time.
Paid Shuttle Bus as an Alternative
If your goal is to photograph the daylily flower fields, or if you want to first familiarize yourself with the area around the summit before deciding whether to take on the ride by bike, the existing paid shuttle service in the mountains can take you up without pedaling—a viable alternative for travelers who do not want to ride up directly. For cyclists, however, the value of this route is built precisely on personally completing the 13.03-kilometer, 1,250.3-meter climb. The shuttle is better suited as a backup for flower-viewing sightseeing or for those with concerns about their stamina, rather than as part of the challenge route itself.
Return Trip Planning
After completing the challenge and resting briefly at the summit, most riders choose to descend the same way back to Taimali town center. The entire descent demands the same level of focus, especially on sections where vehicles and pedestrians interweave during the blooming season. Speeds feel faster on descents than they actually are, so be sure to leave ample braking distance in advance and do not blindly charge through corners. If your energy level or weather conditions do not allow for a safe descent, you can also consider using the existing paid shuttle service to carry both you and your bike down the mountain. This is a pragmatic choice, not a shameful one—safety is always the top priority in any cycling activity.
Final Pre-Departure Checklist
Before officially starting the climb, it is recommended to do a quick pre-ride check: confirm your water bottles and energy supplies are ready, that your gear ratios match the demands of this Category 5 route, that your brakes and drivetrain are functioning properly, that the day’s weather forecast carries no severe afternoon thunderstorm warnings, and that you are aware of the peak traffic hours during the blooming season so you can avoid them. These seemingly trivial preparations are exactly the critical dividing line between success and failure on this brutally steep route—Jinzhen Mountain has never been a route you can tackle on a whim without preparation. It demands solid planning, and once that planning is in place, the sense of accomplishment you gain will be equally solid.
Related Reading
- Between Steep Climbs and Daylily Fields: A Riding Experience and Cultural Memory of Taimali Jinzhen Mountain
- From Taitung Taimali to Jinzhen Mountain: The Complete Guide to the Hilly Route in Southern Taiwan’s Flower-Producing Region
- Taipingshan Climbing Battle: 14.18 Kilometers, 973 Meters of Elevation—How to Ride This “Taiwan’s Version of Mount Fuji Road” Without DNF
- Zhiben Sanhe Radio Station Practical Guide: The Hidden 8.5-Kilometer, 5.7% Average Grade Test in the Taimali Mountains
台北闊瀨陡坡 騎旅 / 日本單車雜誌編輯車友臨時加入!/ 髮香才是最強的 / feat. 北迴歸線小隊 / 公路車 CT Yeh
6 個月前
那瑪夏x茶山 阿里山系深山單車行 Day2 累積爬升6000M | 🥶超陡連續下坡 整路看隊友刷 | 爬升一座西進武嶺 | JJSC | 公路車 | CT Yeh
3 年前
太平山單車員工旅遊 | 這樣玩CP值最高!| 公路車
5 年前
半日 小台灣 極限單車路線挑戰實錄
7 年前
大武山後門26%歡樂陡坡!JJSC南台灣單車行Day2 / 被颱風追著跑 / 公路車 / CT Yeh
2 年前
單車 梅山36灣 坡度介紹 路段介紹 空拍 (相關遊記影片,請參考說明或我的頻道喔,歡迎訂閱)
6 年前
萬年峽谷! 30% 超激陡坡 里佳部落DAY2 還是很硬! | 公路車 | CT Yeh
3 年前
一定要騎一次!阿里山最深處:里佳部落!單車旅行 | 2800m爬升 | 深度部落體驗:嗨翻晚會、螢火蟲、銀河 | feat. JJSC & 廢物伙伴 | 公路車 CT Yeh
9 個月前