Beiyi Nine Bends and Eighteen Turns Climbing Guide: A Pacing Management Lesson on 13.37K with 511.6M of Elevation Gain
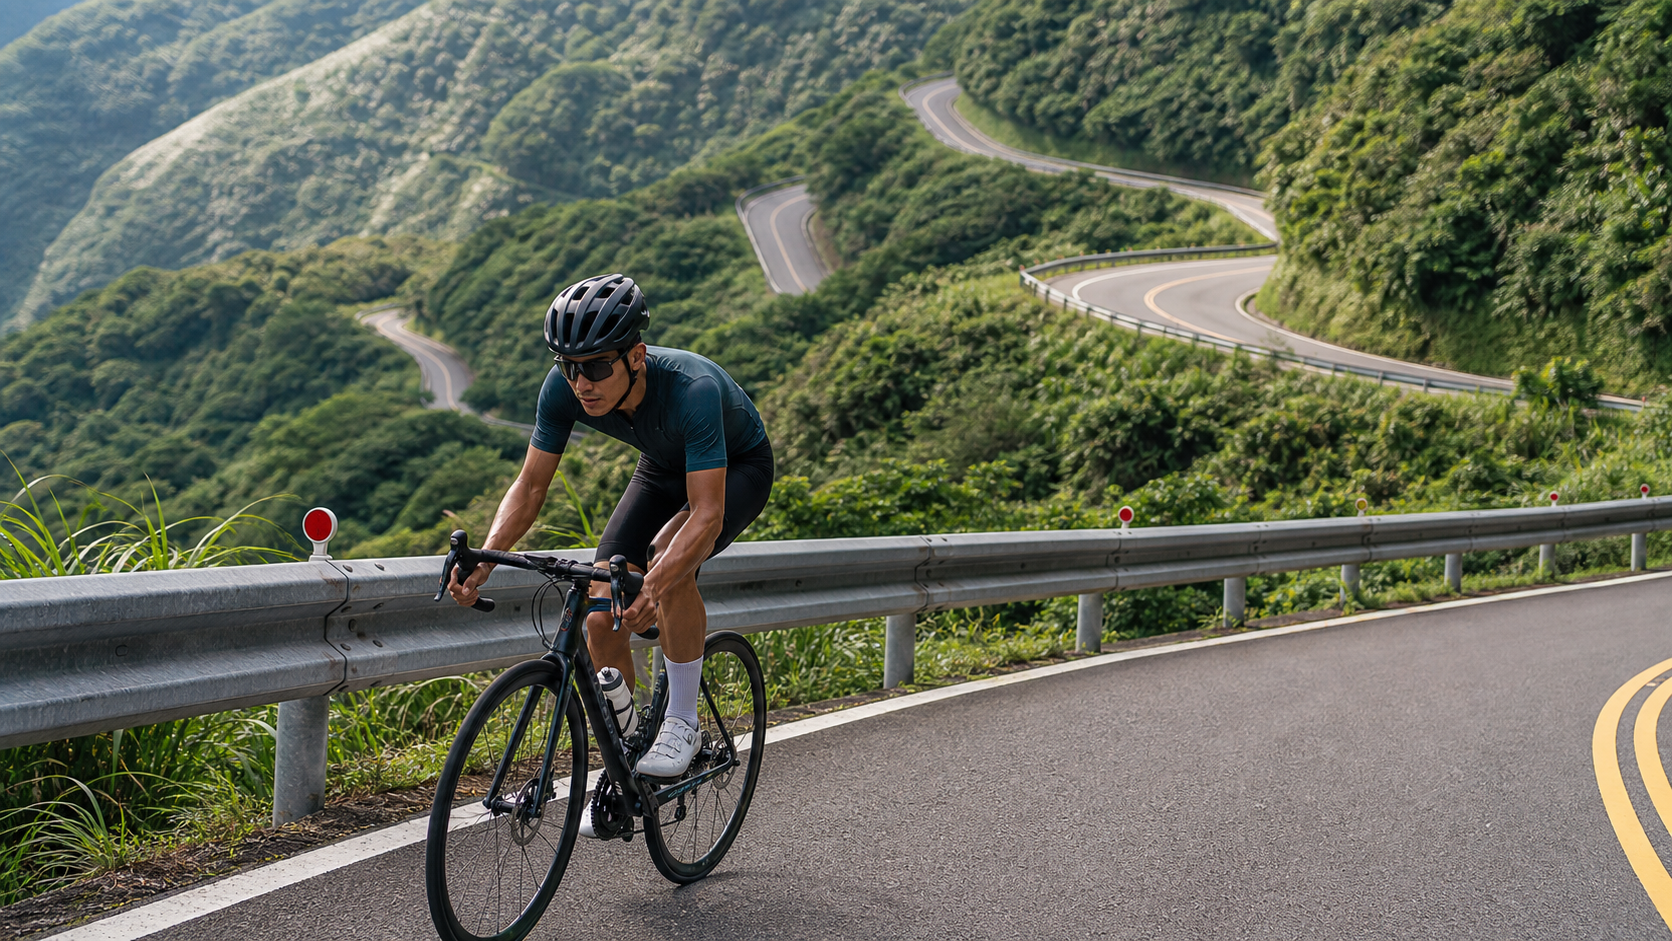
Beiyi Nine Bends Eighteen Turns Climbing Guide: A Pacing Masterclass on 13.37K, 511.6M of Elevation
Introduction: An Underrated Mid-Distance Climb
In Taiwan’s road cycling community, when “Beiyi” (Northern Cross-Island Highway) comes up, most people picture the long descent from Xindian to Toucheng, or the traditional “Beiyi Jiantan” route in reverse from Toucheng to Bitan. But the section we’re breaking down today runs in the opposite direction and is more precisely defined—climbing from Toucheng Township all the way to the Yilan County boundary marker, covering 13.37 kilometers with 511.6 meters of total elevation gain, an average gradient of 3.8%, and an official category 3 rating.
The heart of this route is the “Nine Bends Eighteen Turns,” a name familiar to both motorcyclists and cyclists. Most people associate this area with the series of hairpin turns on the descent, but when the direction is reversed—climbing from Toucheng—the route presents an entirely different physical challenge: not a test of explosive power on a short, steep climb, but an endurance and pacing masterclass spanning over 13 kilometers, where the seemingly gentle average gradient hides undulating sections through the switchbacks. For riders looking to improve their climbing ability but not yet ready to take on Wuling-level mountains, this is an ideal intermediate benchmark route.
This article will use data as its core, breaking down the route segment by segment, gear ratios, nutrition strategy, weather risks, common mistakes, and realistic target times for riders of different levels, helping you do your homework before taking on the challenge.
Route Overview and Real Data Analysis
Let’s lay out the basic numbers first. This “Toucheng to County Boundary Marker” route covers a total distance of 13,367.6 meters, or 13.37 kilometers; 511.6 meters of total elevation gain; an average gradient of 3.8%; and a category 3 classification.
Looking at the raw numbers, a 3.8% average gradient isn’t intimidating—many of Taiwan’s famous cycling landmark routes average 6% or more, and even Wuling-class routes hover around 5% on average. The gentle average gradient of this Beiyi section can, to some extent, cause those who haven’t actually ridden it to underestimate the difficulty. But an engineer’s mindset tells us that “averages” never fully describe a route’s true difficulty—we need to break down the gradient distribution further.
The defining characteristic of the Nine Bends Eighteen Turns section of Beiyi Highway is that the gradient is not evenly distributed. The entire route can be conceptually divided into three types of terrain:
- Gentle approach segment: The early climbing after leaving Toucheng city, with relatively mild gradients mostly between 2% and 3%, is the critical zone for warming up the body and finding your pedaling rhythm.
- Nine Bends Eighteen Turns core segment: Once you enter the famous series of continuous hairpin turns, the gradient shows noticeable undulation. Some straight sections before corners may spike to 5% or higher, then ease off slightly after exiting the turn, creating a “sawtooth” gradient profile.
- Final stretch to the county boundary marker: In the last section approaching the Yilan County boundary marker, the gradient typically converges again, feeling like a relatively steady cruising climb.
This gradient distribution pattern means that simply using the “3.8% average gradient” to estimate your pacing strategy can easily backfire in the dense hairpin section in the middle—heart rate spiking without finding a consistent pedaling rhythm is the main reason many riders find this route surprisingly taxing.
Looking at elevation gain per unit distance, 511.6 meters spread over 13.37 kilometers works out to roughly 38.3 meters of climbing per kilometer. In Taiwan’s climbing route database, this number sits at the upper-middle range, but because the distance is long enough (over 13 kilometers), the overall load on your cardiovascular system and muscular endurance is no less than some shorter but steeper sections. Simply put: this Beiyi section doesn’t test your instantaneous explosive power—it tests whether you can sustain a steady power output over 13 kilometers of continuous effort without falling apart.
Segment-by-Segment Strategy: Five Stages from Toucheng to the County Boundary Marker
Below, the full 13.37-kilometer route is broken into five segments, with gradient characteristics, suggested pacing principles, and pedaling rhythm for each. Note that since this is the “Toucheng to County Boundary Marker” direction, the entire route is an uphill climb with no significant descent for recovery, making pace distribution especially critical.
Segment 1: Toucheng City Start Line (Approx. 0-2.5K)
From the Toucheng city area to the outskirts after departure, the gradient is relatively gentle, mostly around 2%. This is the only section of the entire route where you can let your heart rate “ramp up slowly,” and it’s strongly recommended to keep your power or heart rate at the lower end of your target zone—don’t go too fast just because the gradient feels easy. This is the classic “warm-up trap”—many riders unconsciously push higher output because the early section feels effortless, only to discover their muscles and cardiovascular system are already depleted by the time they hit the Nine Bends Eighteen Turns core. The engineer’s pacing principle: distribute your total power budget evenly, deliberately holding back 5% to 10% of power output in the early section to preserve reserves for the middle and later stages.
Segment 2: Entering the Gentle Climbing Zone (Approx. 2.5-5K)
The gradient gradually increases to the 3% to 4% range, gentle left-right curves begin to appear, and the scenery transitions from urban views to mountain forest shade. This is the critical section for establishing your pedaling rhythm. It’s recommended to maintain a cadence of 80-90rpm, avoiding the temptation to grind a heavy gear that causes premature lactic acid buildup in the quadriceps. For breathing, a fixed cycle of “three counts in, two counts out” or “two in, two out” is recommended to help your body settle into a sustainable aerobic metabolic mode.
Segment 3: Nine Bends Eighteen Turns Core Hairpin Section (Approx. 5-9K)
This is the technical and physical heart of the entire route. The continuous hairpins mean the gradient fluctuates frequently—the straight sections before corners can spike to 5% or even 6%+, then ease off slightly after exiting. This “intermittent” gradient variation is the ultimate test of a rider’s power modulation ability.
Practical advice: Don’t try to muscle through the entire section in a fixed gear. On the steep sections before corners, downshifting appropriately and increasing cadence to maintain stable power output is far more energy-efficient than gritting your teeth and grinding a heavy gear. For hairpin cornering lines, follow standard climbing corner principles—wide entry, tight exit can slightly reduce the effective gradient, but be sure to watch for oncoming traffic and motorcycles—this road is a famous motorcycle destination with heavy weekend traffic. Stay alert when cornering and don’t compromise safety for a tighter line.
Heart rate should be controlled in the 85%-92% range of your personal lactate threshold heart rate (LTHR)—a sustainable intensity band that won’t cause rapid collapse. If you don’t have a heart rate monitor or power meter, the perceived exertion rule is: breathing is heavy but you can still maintain a steady three-syllable short-phrase conversation. Going beyond that means you’re overdrawing.
Segment 4: Around the Shipai Viewpoint (Approx. 9-11K)
Near the well-known Shipai landmark, the gradient typically eases for a stretch—one of the few natural “catch-your-breath” points on the route. Even if you don’t stop for photos, it’s advisable to treat this as an active recovery zone in your energy planning: adjust your breathing, take on fluids, and reserve energy for the final push to the county boundary marker.
Segment 5: Final Stretch to the County Boundary Marker (Approx. 11-13.37K)
In this final section, the gradient regularizes again, typically settling in the 3% to 4% range—a classic “cruising climb” segment. By now, your body has accumulated over 10 kilometers of climbing load, and mental fatigue often sets in before physical fatigue. It’s recommended to use a “segmented psychological anchor” strategy here—don’t stare at the finish line thinking “how much further,” but instead break the remaining distance into 500-meter mini-goals and advance step by step, reducing the impact of mental fatigue on your pacing.
Upon reaching the Yilan County boundary marker, you’ll have climbed over 500 meters in elevation, and the Lanyang Plain—with Gueishan Island visible on clear days—will unfold before you. This is the best visual reward of the entire route and the natural payoff for your investment of both physical and mental effort.
Gear Ratio Configuration and Equipment Recommendations
Given the route’s characteristics—3.8% average gradient with local sections exceeding 5-6%—gear ratio configuration needs to balance “long-distance cruising efficiency” with “rescue gearing for steep sections.”
Crankset and Cassette Recommendations:
- A standard road double setup (e.g., 50/34T compact crankset) paired with an 11-28T or 11-32T cassette is sufficient for this route’s gradient range and is a practical choice for most amateur riders.
- If you’re a climbing novice or your recent climbing training volume has been insufficient, consider a wide-range cassette like 11-32T or even 11-34T to ensure you still have spare cadence available on the hairpin steep sections, avoiding forced low-cadence grinding that can strain your knees.
- Advanced riders seeking speed and power output efficiency might consider a 53/39T standard crankset with an 11-28T cassette, but only if your FTP (Functional Threshold Power) and climbing experience are already solid.
Other Equipment Details:
- For wheels, this route has a long climb but not extremely steep gradients, making mid-profile (30-40mm) aluminum or carbon wheels perfectly suitable. There’s no need to sacrifice significant aerodynamic efficiency for weight savings, since average speeds won’t be extremely low.
- Tire pressure should be fine-tuned based on body weight and tire width. For typical 23-28C tires, 80-100psi is appropriate. Road conditions are good, so there’s no need to sacrifice rolling resistance efficiency for comfort.
- It’s recommended to carry a basic puncture repair kit and spare inner tubes. While there are motorcycle shops along Beiyi Highway, dedicated cycling repair resources are relatively scarce, so self-rescue capability remains essential.
Nutrition and Hydration Management
For a load of 13.37 kilometers, 3.8% average gradient, and 511.6 meters of total elevation gain, most amateur riders will take anywhere from 40 minutes to over an hour to complete at moderate intensity—a sustained aerobic effort in the medium-to-high intensity range. Here are the nutrition strategy recommendations:
Hydration: Ensure at least one bottle (500-750ml) is filled before departure. If temperatures are high (especially summer afternoons), prepare two bottles—one for drinking, one for external cooling. While the climbing time isn’t extremely long, summer sun on Beiyi Highway is intense and it feels muggy, so dehydration risk should not be underestimated.
Energy: If your target time is under an hour, normal pre-ride nutrition plus hydration during the ride is usually sufficient—no need for additional energy gels or food. However, if you’re combining this route into a longer ride (e.g., continuing to other sections of Beiyi Highway or planning an out-and-back), it’s recommended to supplement carbohydrates every 30-40 minutes to maintain stable blood sugar and avoid “hitting the wall” in the later stages.
Electrolytes: Summer heat means heavy sweating on the climb. Adding electrolyte supplements to your bottles is recommended to avoid cramping from excessive fluid loss, especially in the undulating Nine Bends Eighteen Turns core—if your calves or thighs cramp there, it directly affects riding safety.
Weather and Seasonal Considerations
The Nine Bends Eighteen Turns section of Beiyi Highway is in mountainous terrain, and the Yilan end’s climate is significantly influenced by the northeast monsoon and orographic rainfall, making weather planning an essential part of preparing for this ride.
Rain and Wet Surfaces: During autumn and winter, the Yilan region sees significantly higher rainfall probability due to the northeast monsoon, with mountain areas prone to fog and drizzle. Once hairpin sections become wet, braking distances and cornering grip are both compromised. It’s recommended to reduce speed and increase braking lead time in rain or on wet surfaces, especially for descending riders (though this article’s route direction is uphill, you still need to watch for oncoming traffic and fellow riders descending).
Visibility and Fog: Mountain sections are prone to reduced visibility from orographic clouds or post-rain fog. Front and rear lights are recommended, even in daylight—use flashing mode to increase visibility. This route carries heavy traffic (including many motorcycles and cars), and safety risks rise significantly in poor visibility.
Summer Heat: Summer afternoons in the mountains often bring thunderstorms. Check real-time weather data before departure and avoid times when thunderstorm cells are passing through. Also, summer road surface reflection and perceived temperatures are high, so hydration planning should be more conservative than usual.
Recommended Riding Times: Considering both traffic volume and temperature, early morning or off-peak weekday departures are recommended. This avoids the safety risks of heavy weekend motorcycle traffic and takes advantage of cooler morning temperatures, which help maintain better performance and comfort.
Common Mistakes and DNF Risks
Although this route is classified as category 3 and isn’t at the top tier of difficulty, several common mistakes can ruin the riding experience or even force an early stop:
Mistake 1: Pacing too fast in the early section. As mentioned earlier, the gentle gradient on the Toucheng city start line makes it easy to unconsciously push higher output. Once the gradient undulation intensifies in the Nine Bends Eighteen Turns core, your energy is already depleted, forcing a significant slowdown or even walking in the later stages.
Mistake 2: Gear ratios too heavy. If you choose a standard crankset with a narrow-range cassette (e.g., 11-25T), you’ll be forced to grind at low cadence on the hairpin steep sections—not only inefficient, but also prone to knee discomfort and potential long-term injury risk.
Mistake 3: Ignoring traffic and riding safety. Beiyi Highway is a famous motorcycle destination with extremely heavy weekend traffic. Some motorcyclists show off their cornering skills on the hairpins, with speeds and trajectories that can exceed expectations. Cyclists must stay alert and not sacrifice awareness of oncoming or following traffic to hold a particular line.
Mistake 4: Insufficient hydration and electrolytes. Especially during summer heat, if you don’t properly hydrate before departure and the climb takes longer than expected, dehydration and cramping can occur in the middle-to-late stages, directly affecting ride completion.
Mistake 5: Underestimating mental fatigue. While the 3.8% average gradient isn’t extreme, over 13 kilometers of continuous climbing is also a test of willpower. If you’re not mentally prepared, you may experience a “why isn’t this over yet” frustration in the middle section, which can destabilize your pacing.
Target Time References for Riders of Different Levels
The following times are rough reference values. Actual completion times will vary based on individual fitness, weather conditions, traffic, and other factors. These are for training planning reference only:
| Rider Level | Estimated Average Speed | Estimated Completion Time | Notes |
|---|---|---|---|
| Beginner / Recreational Rider | Approx. 10-13 km/h | 60-80+ minutes | Recommended to use wide-range cassette, take multiple short breaks |
| General Amateur Rider | Approx. 14-17 km/h | 47-57 minutes | Has a certain climbing training foundation |
| Advanced Club Level | Approx. 18-22 km/h | 36-45 minutes | Stable FTP, good climbing power-to-weight ratio |
| Competitive Race Level | Approx. 23km/h+ | Under 35 minutes | Race-level climbing capability |
This time table is only a rough estimation baseline; actual performance depends on your condition that day and on-road conditions. First-time challengers are advised to make “completing the route” the primary goal rather than setting aggressive time pressure from the start. After accumulating several rides, you can gradually fine-tune your pacing and gear ratio strategies.
Practical Application of Power and Heart Rate Training Zones
For riders equipped with a power meter or heart rate monitor, this route is an excellent venue for validating training effectiveness. Here are more detailed zone application suggestions to help you turn this ride into quantifiable, trackable training data.
Power Zone Planning: Using FTP (Functional Threshold Power) as the baseline, the full 13.37-kilometer climb is best approached with a “higher in the middle, conservative at both ends” strategy. On the first segment (Toucheng city start line), power should be controlled at 70%-80% of FTP—the aerobic endurance zone, designed to gradually bring the body into working state without prematurely depleting glycogen stores. After entering the Nine Bends Eighteen Turns core, power will naturally fluctuate due to frequent gradient changes, but the overall average is recommended to fall between 85%-95% of FTP—the classic “race climb zone” (between tempo and threshold)—sustainable for extended periods while effectively improving climbing efficiency. In the final push to the county boundary marker, if you still have energy in reserve, you can attempt to push power to 95%-105% of FTP as a near-threshold finishing test.
It’s worth noting that power output on hairpin sections will naturally show a sawtooth pattern—there’s no need to force an absolutely smooth power curve. From an engineer’s mindset, the more practical approach is to focus on “Normalized Power” rather than instantaneous power, as this more accurately reflects the actual physiological load your body experiences, avoiding training misjudgments caused by intermittent power spikes between corners.
Heart Rate Lag Reminder: Many riders habitually use heart rate as their pacing guide, but heart rate has a physiological lag in responding to intensity changes, especially on hairpin sections with rapidly changing gradients. Heart rate often “can’t keep up” with instantaneous power changes. This means relying solely on a heart rate monitor to adjust pedaling effort can cause you to respond too slowly on steep sections and exceed your limit, then misjudge yourself as still in a high-intensity zone after exiting corners because heart rate remains elevated. If conditions allow, dual monitoring with both power meter and heart rate monitor is the ideal training setup for this route.
Interval Training Application: If you use the Beiyi Nine Bends Eighteen Turns section as a regular training route, consider designing a “corner interval” training method—using the natural gradient undulations of the hairpins, deliberately increasing power output on the steep sections before corners for short interval surges, then actively reducing intensity to recover on the gentler sections after corners, repeating this cycle several times. Beyond improving climbing explosive power, this training method also trains your body’s lactate metabolism efficiency under repeated intensity transitions, which will have direct transfer benefits for future challenges on routes with more dramatic gradient changes (such as Wuling or Hehuan Mountain level).
Strategy Differences Between Group Rides and Solo Rides
Due to heavy traffic and dense corners, this route shows clear tactical differences between group and solo riding, worth discussing separately.
Solo Riding Strategy: The biggest advantage of tackling this route solo is complete pacing autonomy—you can adjust intensity based on how you feel at any moment without accommodating teammates’ rhythms. Conversely, solo riding means no drafting partners to share aerodynamic drag (though wind resistance matters less on climbs than flats anyway), and support resources are more limited in unexpected situations (like mechanical failures or cramping). Solo riders are strongly advised to carry a complete self-rescue toolkit and inform friends or family of the route and estimated time in advance.
Group Riding Strategy: When tackling this route as a group, because the climb is long and gradients vary significantly, fitness differences between members are easily amplified in the middle section—stronger riders may pull away early, while weaker riders may fall behind or even feel frustrated. It’s recommended to adopt a “ride at your own pace, but agree on meeting points” strategy, such as agreeing to regroup at the Shipai viewpoint or a specific milestone. This allows riders of different abilities to ride at their own rhythm while maintaining group cohesion.
In group rides, special attention should be paid to formation through the hairpin sections. Given the heavy traffic on this road (especially weekend motorcycles), riding in a single-file line rather than side-by-side is recommended, maintaining appropriate spacing to avoid chain-reaction accidents from sudden braking or evasive maneuvers. At corners with poor sightlines, the lead rider should use hand signals or verbal warnings to alert riders behind about oncoming traffic.
Combined Ride Suggestions with Other Beiyi Highway Sections
If you’re already familiar with the 13.37-kilometer climb from Toucheng to the county boundary marker, consider incorporating it into longer combined ride plans to further increase training intensity and riding variety.
Full Beiyi Challenge: Beiyi Highway (Provincial Highway 9) spans approximately 58 kilometers, connecting Xindian’s Bitan in New Taipei City to Toucheng in Yilan. If fitness and time allow, plan a ride starting from the Xindian end, challenging all the way to the Toucheng end, then decide whether to return the same way or arrange a shuttle based on your condition. This full challenge demands far more from fitness and nutrition planning than the Toucheng-to-boundary-marker section alone. It’s recommended to master the pacing of this article’s route first before gradually extending the challenge.
Out-and-Back Advanced Training: If logistics and time permit, consider an out-and-back training session on the Toucheng-to-boundary-marker section—“climb plus controlled descent.” This method accumulates more total elevation gain within a limited route area and is an effective way to build climbing muscular endurance. However, note that the descent carries heavy traffic and many corners—speed must be kept within safe limits, and don’t sacrifice riding safety for training efficiency on the downhill.
Combining with Lanyang Plain Surrounding Routes: After reaching the Yilan end, depending on your energy level, you can arrange a flat cruising route around the Lanyang Plain as a recovery ride, allowing your body to gradually transition from high-intensity climbing to low-intensity aerobic recovery. This “climb plus recovery” combination also provides practical benefits for post-training recovery.
Conclusion: An Intermediate Benchmark Route Worth Repeated Practice
The Beiyi Nine Bends Eighteen Turns Toucheng-to-boundary-marker section, with its combination of 13.37 kilometers, 511.6 meters of total elevation gain, and 3.8% average gradient, offers a climbing scenario that’s moderate in difficulty yet extremely valuable for training. It doesn’t require the long-term specialized training that Wuling demands, but it’s far from a casual ride—especially the gradient undulations in the middle Nine Bends Eighteen Turns core, which are a solid test of pacing management and cardiovascular regulation.
For riders planning advanced climbing training, this route is highly suitable as a periodic benchmark segment: through repeated rides and recording power and time data, you can clearly track your progress in climbing endurance and rhythm management. And the Lanyang Plain vista that unfolds after reaching the county boundary marker will be the most tangible reward after every challenge.
Related Reading
- Beiyi Highway Nine Bends Eighteen Turns: A Cyclist’s Reverse Challenge on a Motorcycle Mecca
- Beiyi Highway (Provincial Highway 9) Riding Guide: Gradient Analysis of the 9 Bends 18 Turns
- The Weight of Nine Bends Eighteen Turns: A Beiyi Highway Memory from Spirit Money to Pedals
- Beiyi Highway Pinglin Section 4km Analysis: Taipei Riders’ Climbing Proving Ground
台北闊瀨陡坡 騎旅 / 日本單車雜誌編輯車友臨時加入!/ 髮香才是最強的 / feat. 北迴歸線小隊 / 公路車 CT Yeh
6 個月前
#北橫 + #北進武嶺 最硬的員工旅遊 EP1 | #公路車 #拉拉山 | 明池 | 武嶺 | 武陵農場 | 雲海 | Taiwan Cycling Route Wulin
6 年前
大武山20%魔王陡坡【JJSC南台灣遊騎Day2】!屁股真的要裂開了...凡士林抹滿也沒用?神秘金教堂還有超便宜夜市
3 個月前
大武山後門26%歡樂陡坡!JJSC南台灣單車行Day2 / 被颱風追著跑 / 公路車 / CT Yeh
2 年前
#公路車 #西進武嶺 配速配瓦實驗 坡度分析 四小時內攻略 建大盃 NeverStop #西進武嶺攻略
6 年前
大禹嶺 到 武嶺牌樓 全程前後實況錄影 | 北進武嶺 | 東進武嶺 | KOM | 訓練台 | 坡度分析 | Taiwan KOM Last 10 km HARD | 公路車
6 年前
#北宜 #北進武嶺 單車員工旅遊 | 環山部落空拍大景!壯闊俯瞰視角! | 類97850|E01 | #公路車 | CT Yeh
4 年前
西進武嶺 自製新版AI配速表產生器 x 賽前攻略 抱佛腳! 沒有功率計也可以產生配速表嗎?有什麼其他眉角賽前要注意的呢? | 西進武嶺 / 東進武嶺 KOM 攻略 | 公路車 | CT Yeh
4 年前