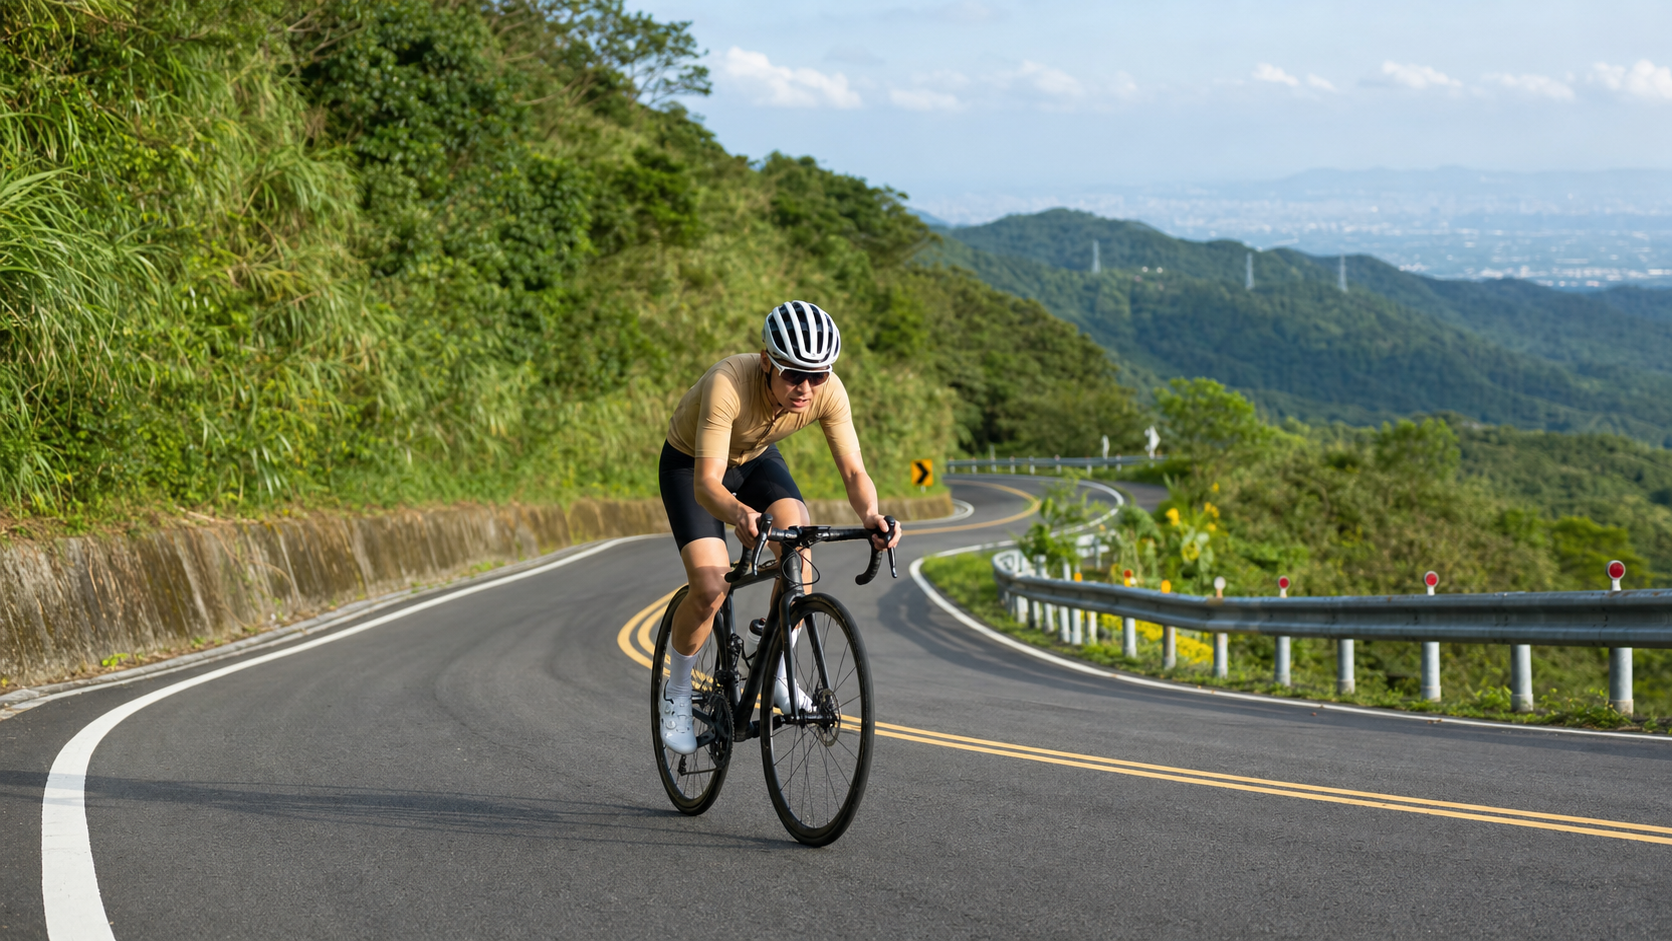
Rome Road Mid-Section Practical Guide: 5.0 km, 4.0% Average Grade, Full Analysis of a Popular Taoyuan Group Ride Route
Rome Road is a well-known training and group ride route in the northern Taiwan road cycling community, connecting Daxi in Taoyuan toward Fuxing and the Dongyanshan area via mountain roads. This article focuses on one of its popular “mid-sections”—approximately 5.0 km long with a 4.0% average grade—covering data interpretation, segment-by-segment strategy, and equipment recommendations to help you ride this stretch smarter and safer.
1. Route Overview and Data Analysis: Understanding the Numbers First
Before starting any strategy guide, honestly facing the data is always the first step. The official (Strava segment) data for this mid-section of Rome Road is:
- Distance: 5036.8 meters, approximately 5.0 km
- Total elevation gain: 369.3 meters
- Average grade: 4.0%
If you’re even slightly mathematically inclined, you might immediately spot a problem: if the distance is 5.0 km and the average grade is truly 4.0%, the theoretical elevation gain should be around 5000 meters × 4.0% ≈ 200 meters, or roughly 201.5 meters. But the total elevation gain given for this segment is 369.3 meters—nearly double the theoretical figure. Conversely, if we back-calculate the average grade using “total gain ÷ distance,” 369.3 meters ÷ 5036.8 meters yields a result close to 7.3%, a significant discrepancy from the officially stated 4.0%.
This kind of data discrepancy is actually not uncommon in road cycling route data, and we don’t intend to dodge it or pick one number and pretend there’s no contradiction. The more reasonable interpretation is: this is a “mid-section” (Strava segment), not a complete standalone route, and the grade distribution within the segment is likely uneven. In other words, within these 5 kilometers, there are likely several sections with grades significantly above the average (possibly reaching 8%, 10%, or even higher on short steep pitches), as well as some relatively flat or even slightly descending sections. When mixed together, these average out to the relatively mild figure of “4.0% average,” but the cumulative elevation gain reflects the real burden of the localized steep sections within the segment.
For riders, the practical implication of this conclusion is very direct: don’t be fooled by the “4.0% average grade” figure into thinking this is an easy, gentle climb. During actual riding, your heart rate and power output will likely spike noticeably in certain sections, then settle into relatively mild or even recovery stretches. If you set your pacing strategy and gear selection based only on the average grade, you may suffer on the steep sections, or even blow up early due to poor pacing. Our recommendation: rely on on-site riding feel and GPS recordings for actual terrain variations, and treat this guide as mental preparation and a strategic framework rather than a meter-by-meter terrain forecast.
Rome Road itself has long been a “quasi-classic” training and group ride route in the northern Taiwan road cycling community. It is one of the important mountain roads connecting Daxi, Taoyuan toward Fuxing and the Dongyanshan area. Because it links several well-known place names along the way, cyclists affectionately call it “Rome Road” (rumored to be named for connecting the Luofu and Mawudu areas along the route; for the official origin, please defer to local historical records). Compared to the main Beihang route (Provincial Highway 7) heading in the same direction toward Fuxing, Rome Road has significantly less traffic. Especially on weekdays and early weekend mornings, you’ll often see groups of road cyclists training on climbs and cruising in formation. The road surface quality is also widely praised by riders, making it increasingly one of the most popular mid-distance mountain training routes in northern Taiwan.
This “mid-section” is a representative yet not overly long or exhausting training interval along the entire Rome Road—moderate in distance (5 km), making it a highly suitable choice for weekday evenings when you want a workout with intensity without burning up the entire weekend. For weekend group rides, it’s also frequently selected by teams as a warm-up and main workout segment after gathering.
2. Start-to-Finish Segment Strategy: Breaking the 5 km into Three Parts
Facing a segment with 369.3 meters of total gain and uneven internal grades, the most practical approach is to break it into several smaller sections that are mentally and physically digestible, setting mini-goals for each rather than thinking “I need to survive 5 km” from the start. Below, we conceptually divide this route into three segments of approximately 1.6 to 1.7 km each, with riding strategy suggestions (actual terrain variations still subject to on-site conditions).
Segment 1 (approx. 0 to 1.7 km): Warm-up and Probing Phase
This is the beginning of the entire stretch and the easiest place to make mistakes. Many riders, having just entered the climb and not yet fully settled into their rhythm, unconsciously push harder when they see teammates or riders ahead setting a faster pace. This is a cardinal sin. For this section, we recommend keeping your heart rate and power output in the lower-to-middle range of your personal “sustainable climbing intensity,” allowing your body to gradually adapt to the climbing load. If you have a power meter, aim for 75% to 85% of your FTP (Functional Threshold Power) in this section; without a power meter, use “still able to breathe smoothly through your nose, but already feeling leg effort” as your reference point. If you pace this section well, you should still feel “you have something left in the tank” at the end, rather than “already breathing hard.”
Segment 2 (approx. 1.7 to 3.4 km): Core of the Route, Likely the Steepest Local Pitches
Based on the earlier analysis of the data discrepancy, we speculate that the truly steep sections of this stretch are likely concentrated in this middle portion. This is the critical point for your overall pacing strategy: if you managed Segment 1 well and conserved energy, this is where you can push slightly harder while still leaving some margin. We recommend keeping power between 85% and 95% of FTP—a range most amateur riders can sustain through mid-distance steep climbs without blowing up. If you feel the grade suddenly steepen and your breathing rhythm gets disrupted, don’t panic. Slow your pace, increase your cadence (recommended to maintain 70 to 85 rpm), and let your body find a stable breathing and pedaling rhythm again. It’s better to sacrifice a little speed than to let your heart rate spike into an unsustainable zone.
Segment 3 (approx. 3.4 to 5.0 km): Finishing Stretch and Mental Toughness Test
By the final 1.6 km or so, fatigue has gradually accumulated, and the challenge here is more psychological—you know the finish is near, but your legs are starting to feel heavy. For this section, we recommend a “segmented confirmation” mental technique: break the remaining distance into smaller 500-meter mini-goals, and give yourself positive feedback each time you complete one. Physiologically, if you paced the first two segments well, you should still have something left for a final push here. But if you’ve already spent your reserves, we recommend slowing down rather than forcing it, to avoid cramping or physical discomfort from overexertion.
Overall, this three-phase pacing logic of “steady start, hold the middle, close strong” is particularly well-suited to a route like this where the elevation gain and grade data don’t fully align, indicating uneven internal terrain.
3. Gear Ratio and Equipment Recommendations
Facing an average gradient of 4.0% but with sections that may be noticeably steeper, your gear ratio choice will directly affect your riding quality and safety. Below are gear ratio recommendations for riders of different levels:
| Rider Level | Recommended Chainring | Recommended Cassette | Notes |
|---|---|---|---|
| Beginner / Average fitness | 50-34T (standard compact) | 11-32T or 11-34T | Ensure the easiest gear can handle local steep sections, avoiding explosive, grinding pedal strokes |
| Intermediate / Some climbing experience | 50-34T or 52-36T | 11-30T | Balances flat-road cruising efficiency with climbing reserve |
| Competitive / Power-oriented rider | 52-36T | 11-28T or 11-30T | If confident in your FTP, a tighter cassette can maintain pedaling efficiency |
For riders who rarely ride climbing routes or are new to road cycling, we recommend “it’s better to have a slightly easier gear ratio prepared than to find yourself unable to turn the pedals halfway up the mountain.” After all, the gradient on this section is uneven—if you hit a steeper pitch without a light enough gear, you may be forced to stand and grind, burning excessive energy, or even risk cramping as your pedaling rhythm is disrupted.
In terms of equipment, beyond gear ratio setup, the following points are also worth noting:
- Wheel selection: This type of short-to-medium climbing section is sensitive to wheel weight. If you have lightweight climbing wheels, they can be put to good use, but a general training wheelset is also perfectly adequate—no need to over-invest in equipment.
- Tire pressure and width: Mountain roads occasionally have patches or potholes. A tire width of 28C or wider with moderately reduced pressure (adjusted according to body weight and tire brand) is recommended for a balance of grip and comfort.
- Braking system: Whether using rim brakes or hydraulic disc brakes, be sure to check brake pad condition and brake fluid lines before departure. Climbing sections in the mountains are often followed by long descents, and brake reliability is critical to safety.
- Clothing: Temperature differences between morning and evening are significant in mountain areas. Layered dressing is recommended—a lightweight, packable windbreaker or arm warmers will prove very useful.
4. Nutrition and Hydration Management
Although a 5.0 km section with 369.3 m of elevation gain is not particularly long in absolute distance, if it is part of a longer ride (such as a full out-and-back on the Luoma Highway, or a route continuing into the Beihang Highway or Dongyanshan), your nutrition plan cannot focus only on these 5 km—it must account for the energy and fluid demands of the entire ride.
Hydration management: A general recommendation is 500 to 750 ml of fluid per hour, adjusted according to temperature and personal sweat rate. If the day is hot (especially summer afternoons), make sure your bottles are sufficiently full before entering this climb to avoid performance loss or even heat-related illness from dehydration. Although there are a few scattered shops along the Taoyuan mountain routes, they are not dense, so it is advisable to identify the next refill point along your route in advance rather than improvising when you run dry.
Energy intake: Given the intensity and duration of this section itself (roughly 15 to 30 minutes depending on rider level), if you are riding it as a standalone training segment, a full pre-ride meal plus one or two energy gels or a banana carried with you should suffice. However, if this section is part of a longer ride, adopt a “small amounts, frequent intake” strategy: replenish carbohydrates (energy gels, bars, or fruit) every 40 to 60 minutes, rather than waiting until you clearly feel your energy drop (commonly known as “hitting the wall”)—by then it is often too late.
Electrolyte supplementation: In summer heat, electrolyte loss accelerates during climbing. Adding electrolyte tablets or sports drink to your bottles is recommended, especially for group rides or rides exceeding 2 hours total. Insufficient electrolytes can easily lead to cramping, particularly on routes with varying gradients that demand intermittent bursts of effort.
5. Weather and Seasonal Recommendations
The weather patterns in the Taoyuan mountain area differ noticeably from the flat urban areas. When planning a ride on this middle section of the Luoma Highway, seasonal and weather factors should be taken into account.
Spring (March to May): The climate is relatively pleasant and is a preferred season for climbing training among many riders. However, watch out for spring rain and dense mountain fog—when visibility is poor, stay alert, and especially reduce speed on descents.
Summer (June to September): With high temperatures and strong UV radiation, it is advisable to avoid the hottest hours around noon and instead depart in the early morning or late afternoon. Summer afternoons in the mountains often bring thunderstorms. Check the real-time weather forecast before departure; if you encounter signs of an approaching thunderstorm while riding (muggy conditions, rapidly gathering dark clouds, distant thunder), seek shelter promptly and wait—continuing to climb in a thunderstorm is not recommended.
Autumn (October to November): The weather is typically more stable and dry, with day-night temperature differences beginning to widen. Many riders consider this one of the best seasons of the year for long-distance mountain rides.
Winter (December to February): Winter temperatures in the Taoyuan mountains are noticeably lower than in the plains, with single-digit temperatures possible in the early morning and evening. Combined with the northeast monsoon, strong winds occasionally occur in the mountains. Extra insulation layers are recommended, and be aware that roads may be more slippery due to low temperatures and moisture—descend with a more conservative speed reduction.
Regardless of the season, checking the real-time weather forecast and road conditions before departure is essential homework. Mountain weather changes quickly; clear skies in the flatlands do not guarantee clear skies in the mountains—a point to always keep in mind when planning mountain route rides.
6. Common Mistakes and DNF Risks (Including Group Ride Notes)
Common Mistake 1: Pacing too hard from the start
As mentioned in the section-by-section strategy in Part 2, the gradient on this section is uneven. If you push near maximal effort before understanding the road conditions, you may run out of steam when hitting the steeper mid-section, potentially forcing you to dismount or stop for extended rests. It is better to start conservatively and save your strength for where it is truly needed.
Common Mistake 2: Insufficient gear ratio preparation
If you choose a gear setup that is too heavy (for example, a cassette with a lightest gear of only 25T or 28T), you may be forced to stand and grind when encountering local steep sections, accelerating energy depletion and increasing the risk of knee strain. Follow the gear recommendations in Part 3—it is better to have slightly easier gears prepared.
Common Mistake 3: Neglecting descent safety
After completing this climb, there are usually descents on the return leg or the continuation of the route. Many riders relax their vigilance after finishing the climb, leading to poor speed control on descents. Combined with the many mountain curves and occasional rocks or loose gravel, accidents can easily happen. Stay alert on descents, check road conditions before entering corners, and avoid emergency braking or excessive lean angles.
Common Mistake 4: Underestimating nutrition needs
As mentioned in Part 4, even if a single section is not long, poor overall ride planning and insufficient nutrition can still lead to hypoglycemia or dehydration symptoms during the climb (dizziness, shaking hands, reduced concentration)—a common contributing factor to cycling accidents.
Group Ride Notes—Weekend Traffic Reminder on the Luoma Highway
Although the Luoma Highway has less traffic than the main Beihang Highway, precisely because of this, it attracts many weekend group rides for training. Especially on weekend mornings and forenoons, multiple groups can often be seen riding simultaneously. When riding in a group, pay attention to the following:
- Maintain formation discipline: Follow distance, yielding when overtaking, and verbal and hand signals (such as “car,” “pothole,” “slowing”) must be practiced diligently. Particularly where the gradient changes, the group tends to stretch out due to individual fitness differences, making front-to-back distance control especially important.
- Yield to other road users: Even with lighter weekend traffic, local residents’ vehicles and other road users share the same road. Group rides should proactively yield and avoid occupying the entire lane riding side by side, especially on curves and sections with limited visibility.
- Watch for group splits: Due to uneven gradients within the section, weaker riders may get dropped at local steep pitches. It is recommended to designate a “sweeper” at the back to ensure no one is left alone for too long. Since cell phone signals in the mountains can be unreliable, the risk of being dropped deserves special attention.
- Descent regrouping point: It is recommended to set a regrouping point at the end of the climbing section so all members can gather before continuing the descent or subsequent route, preventing fitness differences from causing the group to lose mutual support on the descent.
DNF (Did Not Finish) is actually uncommon on this type of short-to-medium climbing section, but when it does occur, it often stems from a combination of one or more of the factors above: uncontrolled pacing, insufficient gearing, inadequate nutrition, compounded by insufficient mental preparation. Master these elements, and this section is a training route that the vast majority of riders with basic cycling experience can complete smoothly—and even thoroughly enjoy.
7. Target Time References for Riders of Different Levels
The times below are rough reference ranges. Actual completion times will vary significantly depending on individual fitness, weather conditions on the day, wind resistance, and whether riding in a group or solo. These are for setting expectations only and should not be treated as absolute standards.
| Rider Level | Estimated Completion Time (5.0 km Section) | Average Speed Reference |
|---|---|---|
| Beginner / Occasional Rider | 25 to 35 minutes | Approx. 9 to 12 km/h |
| General Recreational Rider | 18 to 25 minutes | Approx. 12 to 17 km/h |
| Advanced Rider with Regular Training | 13 to 18 minutes | Approx. 17 to 23 km/h |
| Competitive / Race-Level Rider | 10 to 13 minutes | Approx. 23 to 30 km/h |
It is worth noting that because the gradient variation within this section is significant (some parts may be noticeably steeper than the 4.0% average), the performance differences between riders of different levels on the steeper sections tend to be more pronounced than on roads with a uniform average gradient. Beginners are advised not to put excessive pressure on themselves with the times above. On your first attempt, completing the ride safely and steadily is far more important than chasing a time. Once you become familiar with the road’s characteristics and know where the steep sections are, you can gradually work on improving your pacing and target time.
8. Pre-Ride Training Recommendations
If you plan to make this middle section of Luoma Road a long-term training goal, or are preparing to take on the full Luoma Road (or even connect to the Beihang Highway, Dongyanshan, and other routes), here are some pre-ride training directions:
Base Aerobic Endurance: It is recommended to schedule at least one 1.5-hour or longer ride at low-to-moderate intensity each week to build your aerobic engine. This is the foundation for handling any long-distance mountain ride.
Intermittent Climbing Training: Since the gradient within this section is uneven and may include local steep pitches, consider adding intermittent climbing workouts to your regular training. For example, find a short, steep climb (6% to 8%) near your home and perform 4 to 6 repeats of 3 to 5 minutes each at high intensity to simulate the physiological load of the steeper sections on this route.
Core and Lower-Body Strength Training: Climbing places high demands on core stability and lower-body strength. It is recommended to schedule 1 to 2 strength or core sessions per week, focusing on compound movements such as squats and deadlifts, which can help improve pedaling efficiency and reduce the risk of injury.
Cadence Practice: Many climbing beginners tend to grind at too low a cadence, which can cause premature muscle fatigue. It is recommended to practice climbing at a higher cadence (80 rpm or above) during regular training to reduce over-reliance on muscular power and instead use your cardiovascular system more to share the load.
Simulated Ride: If time permits, it is recommended to actually visit the Luoma Road area and ride the route once to familiarize yourself with the conditions (including the actual locations of gradient changes). This is more helpful than any theoretical training plan and echoes what was mentioned at the beginning of this article: for actual elevation changes, rely on your on-site riding feel and GPS records.
9. Quick Q&A
Q1: Is this section really that hard? Isn’t the average gradient only 4.0%?
A: As analyzed in Section 1, there is a noticeable discrepancy between the 4.0% average gradient and the gradient calculated from the total elevation gain of 369.3 meters (approximately 7.3%), indicating that the gradient within the section is uneven and some parts may be significantly steeper than the average. It is recommended not to look only at the average gradient figure, but to be mentally prepared for “possibly encountering locally steep sections.”
Q2: Can a beginner take on this section?
A: Yes, but it is recommended to prepare sufficiently low gearing (such as a 50-34T crankset paired with an 11-32T or 11-34T cassette) and adopt a conservative pacing strategy. On steep sections, there is no need to force yourself to keep up with others; slowing down appropriately or even briefly dismounting and walking are all reasonable choices. Completing the ride safely is more important than chasing speed.
Q3: Will there be heavy traffic on weekends with group rides? Is it safe?
A: Luoma Road generally has less traffic than the main Beihang Highway, and the road surface quality is widely praised by cyclists. However, many teams still train here on weekends, and local residents also use the road. It is recommended to maintain group riding discipline, yield to other road users, and be cautious on mountain corners with poor visibility. Overall, it is a relatively friendly option among northern Taiwan mountain routes in terms of safety.
Q4: What supplies do I need to prepare, and should I buy them in advance?
A: If you are only tackling this 5 km section on its own, eating well before the ride and carrying one or two energy gels or some fruit should be sufficient. However, if this section is part of a longer ride, it is recommended to plan your nutrition strategy according to the suggestions in Section 4 and confirm the locations of supply points along the way to avoid being caught without a place to buy supplies.
10. Transportation, Itinerary Planning, and Summary
From a transportation perspective, this middle section of Luoma Road is located in the Taoyuan mountain area. Most cyclists choose to drive or ride to the Daxi area as a starting point, then connect to Luoma Road to reach the target section. Some cyclists also combine public transportation (such as taking a bus to Daxi Transfer Station) and then ride into the mountains. The actual transportation arrangements should be flexibly planned based on your location and itinerary, and it is advisable to confirm parking locations and return transportation in advance.
In terms of itinerary planning, this 5.0 km section with 369.3 meters of elevation gain can itself serve as a “short but highly efficient” training session, particularly suitable for cyclists with limited time who still want a solid workout, such as after work on weekdays or on weekend morning rides. It is also well-suited as a warm-up or core intensity segment within a longer ride (such as the full Luoma Road, or connecting to the Beihang Highway or Dongyanshan). When planning your itinerary, it is recommended to allow sufficient time flexibility, especially for first-time challengers—don’t schedule too tightly, and give yourself room to adapt (for example, for rest, refueling, taking photos, or responding to sudden weather changes).
In summary, although the official signage for this 5.0 km middle section of Luoma Road lists an average gradient of only 4.0%, which may seem gentle, cross-referencing the total elevation gain of 369.3 meters allows us to reasonably infer that the gradient distribution within the section is uneven, and there are likely to be locally steeper sections. This is also why this guide repeatedly emphasizes pacing strategy, gearing preparation, and mental readiness—rather than being misled by the “average” and underestimating the preparation needed, it is better to treat this as a training segment that deserves serious attention, but which can definitely be completed smoothly—and even enjoyed—with proper planning.
Whether you are a beginner just starting road bike climbing training or an experienced rider with plenty of group ride experience, the middle section of Luoma Road offers an excellent training ground with moderate distance, solid intensity, and the chance to enjoy the scenery of northern Taiwan’s mountain areas. May this guide help you ride with more composure, more safety, and a greater sense of accomplishment the next time you take on this section. Happy riding, and safety first.
Related Reading
- Finding Your Own Rhythm on the Slopes of Luoma Road—A Cycling Memory from the Taoyuan Mountains
- Dongyanshan Practical Guide: 12.4 km, 501 m Elevation Gain, an Intermediate Training Ground with a 4.0% Average Gradient
- Zhongshe Road Practical Guide: 3.94 km, 245 m Elevation Gain, the First Touchstone for Shilin Cyclists
- Alishan Highway Complete Guide: 53.57 km, Over 2,000 Meters of Elevation Gain—A Southern Taiwan Long-Distance Pilgrimage
台北闊瀨陡坡 騎旅 / 日本單車雜誌編輯車友臨時加入!/ 髮香才是最強的 / feat. 北迴歸線小隊 / 公路車 CT Yeh
6 個月前
大禹嶺 到 武嶺牌樓 全程前後實況錄影 | 北進武嶺 | 東進武嶺 | KOM | 訓練台 | 坡度分析 | Taiwan KOM Last 10 km HARD | 公路車
6 年前
梅山36彎 奮起湖 #公路車 之旅 2400m
6 年前
單車 梅山36灣 坡度介紹 路段介紹 空拍 (相關遊記影片,請參考說明或我的頻道喔,歡迎訂閱)
6 年前
半日 小台灣 極限單車路線挑戰實錄
7 年前
爬坡ITT實境)台中 魔王 松鼠坡 首航 6:12 大肚山 大三元 科福路
8 年前
微雨戰! 2022桃園市長盃錦標賽 無敵交管 沒來玩太可惜了! 羅馬公路太可怕 差點成佛! 公路車 | CT Yeh
4 年前
96聯賽 桃園市長盃 歷屆各路段大數據攻略 從菁英組到新手組的平均瓦數、均速、平均時間 x 賽前探路
5 年前