Eastbound Wuling - Sacred Tree Cup Race Guide: 19.8km Data Decoded and Full Guide to Long-Ride Gear and Nutrition
Route Overview and Data Analysis
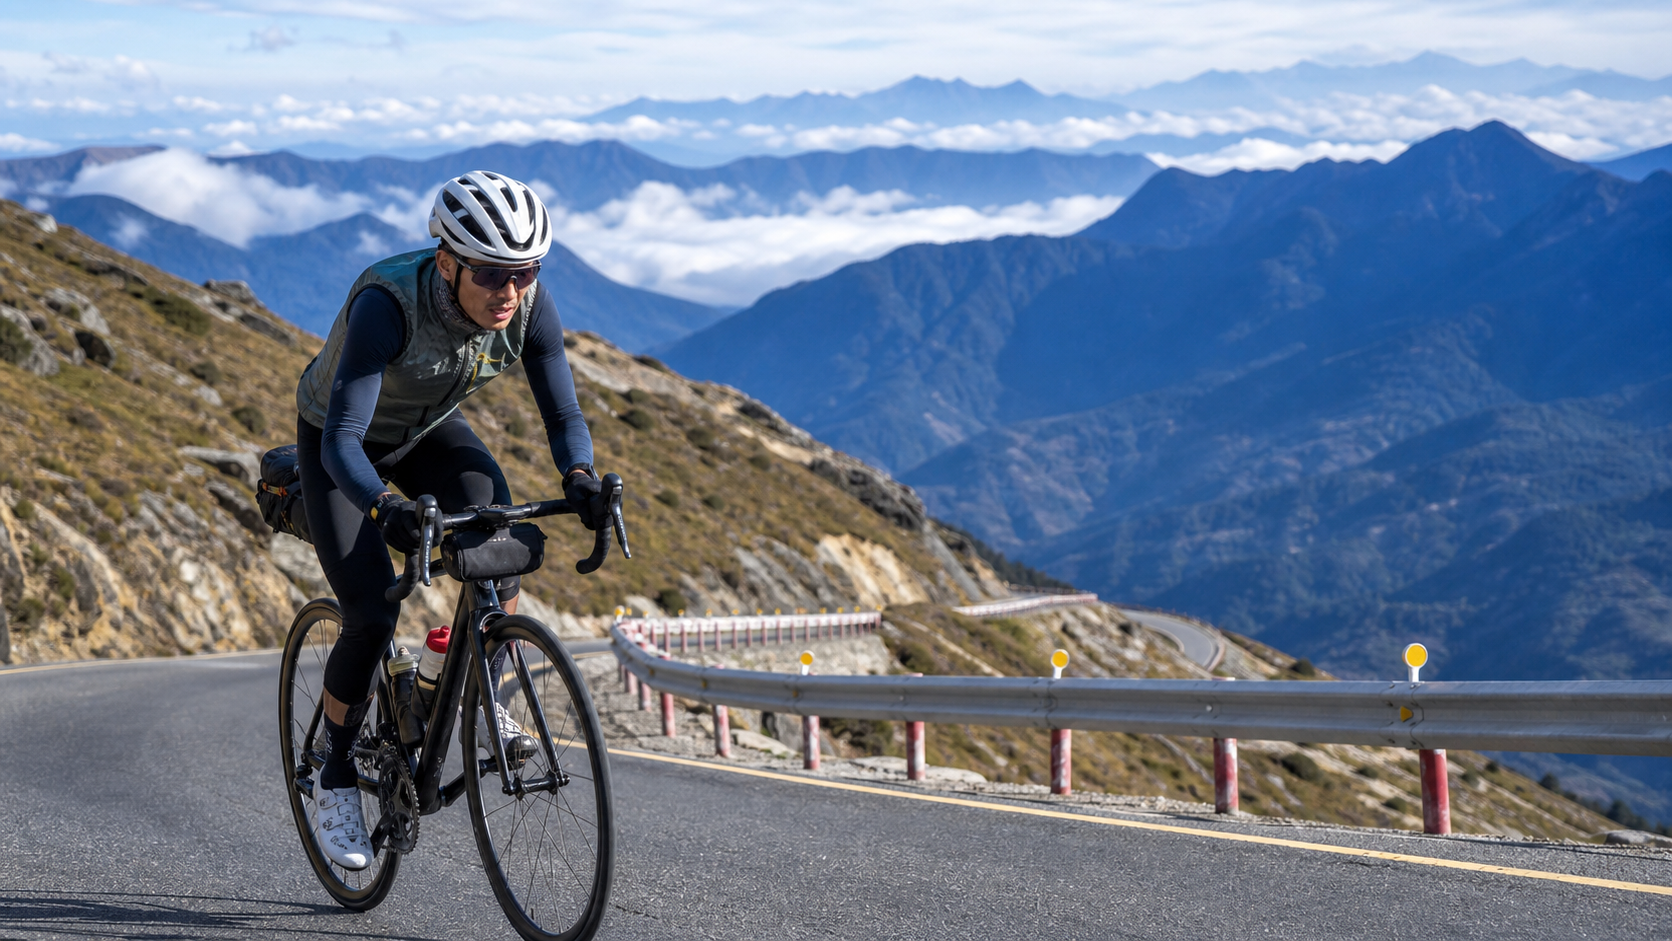
The final 14K of the Lixing side on Hehuan Mountain is one of the few high-mountain climbing routes in Taiwan’s road cycling community renowned for its “finishing segment.” The so-called “final 14K” refers to the fact that the endpoint of this road is the highly anticipated high-altitude highway area, while “Lixing side” indicates that this section connects up from the direction of the Lixing Industrial Road, administratively falling within Xiulin Township, Hualien County, inside Taroko National Park.
Let’s lay out the data first. The Strava segment 4012823 records a distance of 14,289 meters, converted to 14.29 km; total elevation gain of 940.2 meters; average gradient of 6.6%; Strava classifies it as Category 5, which is the highest tier in Strava’s climbing classification system, representing an “extremely hard” climbing segment. Let’s do a quick verification so readers can understand the consistency of this data: 14.29 km multiplied by a 6.6% average gradient yields a theoretical climb of approximately 943 meters, which aligns almost perfectly with the official figure of 940.2 meters—a discrepancy of less than 0.3%. This indicates that the gradient distribution along this route is relatively stable—not a sawtooth profile with “gentle start then sudden spikes” or “steep early then easing off”—but rather a sustained climb maintaining a moderate-to-high intensity throughout.
For riders familiar with Taiwan’s climbing routes, an average gradient of 6.6% might not sound extreme—other sections toward Wuling feature similar or even steeper grades. But the real killer on this route isn’t the gradient itself; it’s the altitude implied by its “final 14K” positioning. The endpoint of this segment heads toward the highest-altitude area in Taiwan’s highway system. In other words, by the time riders complete these 14.29 km, they’ve likely already been pedaling for a considerable duration in a thin-air environment at mid-to-high altitude, possibly approaching or exceeding 3,000 meters. This is why, even though on paper a 6.6% average gradient and 940 meters of total climb might be merely “moderately hard” on flat or low-altitude terrain, when placed in this altitude range, the difficulty must be multiplied by a hidden factor—altitude sickness.
Strava lists this segment as Category 5, the highest tier in Strava’s climbing classification (the tiers from easiest to hardest are 4, 3, 2, 1, HC, and above that is the top-tier Cat 5—though note that different data sources occasionally differ in their definitions of Cat 5 versus HC, so before riding, it’s advisable to rely on the real-time classification on the Strava segment page and other riders’ completion records). Regardless, a Category 5 or equivalent classification clearly conveys one message: this is not a route to be taken lightly. It requires advance physical preparation, equipment planning, and mental conditioning.
From an engineer’s perspective on this route, we can break it down into several quantifiable variables: distance of 14.29 km, cumulative elevation gain of 940.2 meters, average gradient of 6.6%, the significant elevation difference between start and finish, and the equally critical but harder-to-quantify “effect of altitude itself on the body.” The following sections will address each of these variables one by one, providing concrete, actionable strategy recommendations.
Segment-by-Segment Strategy: Gradient Changes and Pacing from Start to Finish
While complete segment-by-segment gradient data requires confirmation against actual GPX tracks or roadside kilometer markers (different sources may have slightly different segment cut points—before riding, it’s advisable to download the official or Strava segment track map for comparison), based on the general characteristics of this type of high-mountain long climb, along with the route profile of “6.6% average gradient, 940 meters total climb,” we can reasonably divide the full 14.29 km into four phases, offering pacing and cadence recommendations for each.
Phase 1 (0–4 km): Warm-up and power management period. This section is typically where riders are psychologically most prone to “overdoing it at the start,” because the body hasn’t yet entered a fatigued state, and many riders will push outputs beyond a reasonable range relative to their FTP (Functional Threshold Power), thinking “it’s just the beginning, I should push a bit.” This is the most common and most fatal pacing mistake. It’s recommended to keep power between 75%–85% of your FTP during this phase, with heart rate maintained around 75%–82% of max HR, allowing the body to gradually adapt to the sustained climbing load while reserving capacity for the decline in cardiorespiratory efficiency as altitude increases later.
Phase 2 (4–8 km): Entering substantive climbing and altitude perception period. If the elevation has already climbed to a certain level by this point, riders will begin to feel subtle changes in oxygen concentration in the air—breathing rate will unconsciously quicken, and even without increased power output, the subjective rating of perceived exertion (RPE) may quietly creep upward. This is the body’s normal compensatory response to a low-oxygen environment. In this phase, riders are advised to switch to a pacing method “led by breathing rhythm, supplemented by power numbers”: find a cadence that allows for stable, rhythmic breathing (recommended cadence of 80–90 rpm, avoiding overly heavy gears that cause rapid lactate accumulation from hard grinding), rather than staring rigidly at the power meter.
Phase 3 (8–11 km): The dual test of willpower and physiology. This is the section where there’s still a considerable distance to the finish, but the body has begun showing clear fatigue signals—and it’s also where the most riders choose to slow down or even dismount and walk. At this point, it’s recommended to adopt a “segmented psychological anchor” strategy—break the next 3 km into smaller targets of 500 meters or 1 kilometer, achieving them one by one, rather than thinking about “how many kilometers remain,” which is the kind of overall distance that easily demoralizes. Physiologically, it’s recommended to ease power slightly to 70%–78% of FTP in this section, conserving energy for the final high-altitude stretch. If heart rate shows “cardiac drift”—a phenomenon where HR doesn’t drop in tandem with reduced power output—this typically indicates dehydration or heat accumulation, requiring heightened vigilance and appropriate fluid intake.
Phase 4 (11–14.29 km): The altitude-deciding point before the final push. This is the stage that most tests high-altitude adaptation across the entire route. As altitude continues to rise, maximal oxygen uptake (VO2max) is substantially compromised due to decreased barometric pressure and reduced blood oxygen saturation. As a general estimate, for every 1,000 meters of elevation gain, maximal oxygen uptake capacity may decline by approximately 6%–10% (actual values vary by individual and are highly correlated with personal high-altitude adaptation status). This means that even power numbers you can consistently output at sea level may feel strenuous or even unsustainable at this stage. It’s recommended to completely abandon the “power target” obsession in this section, relying primarily on subjective perceived exertion and breathing rhythm, allowing yourself to slow down appropriately, and pushing through the final stretch with a steady but lower output—compared to blowing up from overexertion and being forced to stop and rest, this will actually get you to the finish faster.
Overall, the pacing philosophy for this route can be distilled into one sentence: **Be conservative and bank energy early, find your rhythm mid-route, yield to the altitude late, and hold back three-tenths of your effort before the finish. ** High-mountain climbing’s biggest taboo is bringing your flat-terrain pacing instincts up the mountain—the “just push through it” mindset that works at low altitude can, at high altitude, escalate into severe altitude sickness or even safety risks.
Gear Ratio and Equipment Recommendations
Gear Ratio Setup: Facing an average gradient of 6.6% with sections potentially exceeding 8–10%, gear ratio selection is one of the key factors determining the quality of this ride. Below are recommended gear setups for different rider levels (using a double-chainring road bike as the primary reference):
| Rider Level | Recommended Chainring | Recommended Cassette | Lowest Gear Ratio | Notes |
|---|---|---|---|---|
| Advanced/Racing | 50-34 (compact) | 11-30T | Approx. 1.13 | Even with solid climbing ability, a compact crank is still recommended to cope with fatigue at high altitude |
| General recreational rider | 50-34 (compact) | 11-32T or 11-34T | Approx. 1.0 | The safe choice for most amateur riders |
| Beginner/Conservative fitness | 46-30 or smaller chainring | 11-34T and above | Below 0.88 | Requires a rear derailleur compatible with an extra-wide-range cassette |
One point worth emphasizing: if your regular training is done at low altitude, do not underestimate the effect of high altitude on “the same gear ratio and same power output, yet you cannot turn the pedals.” It is better to prepare a gear ratio one step lighter than what you would use for climbing at sea level, so that when altitude increases and both muscles and心肺 are under strain in the latter part of the ride, you still retain the flexibility to maintain output at a higher cadence—rather than being forced into grinding at a low cadence. The latter is especially prone to triggering the anaerobic threshold sooner in a high-altitude environment, causing the body to enter a state of exhaustion more quickly.
Warmth and Clothing Equipment: This is the aspect most easily overlooked by riders who think in terms of flatland conditions. The Hehuan Mountain Highway runs at elevations frequently exceeding 2,500–3,000 meters. Even on summer days when temperatures at lower elevations exceed 30°C, temperatures in the mountains may only reach single digits to the low teens. Combined with heavy sweating during the climb, stronger winds at higher elevations, and dramatic day-night temperature swings, the risk of hypothermia should not be underestimated. The recommended equipment list is as follows:
- Layering principle: Base layer moisture-wicking top + mid-layer insulation (light fleece or synthetic vest) + outer windproof/water-resistant jacket, adjustable by taking layers on or off as needed.
- Arm warmers and leg warmers: Even when departing in summer, it is recommended to carry lightweight arm and leg warmers to cope with sudden temperature drops during the ascent.
- Insulated gloves and headband/buff: Keeping the extremities—hands and head—warm is critical for maintaining bike handling and thermoregulation; hypothermia at high altitude often begins at the extremities.
- Windproof jacket specifically for descents: After sweating on the climb and reaching the summit, the wind chill effect will cause perceived temperature to plummet rapidly on the descent. Be sure to carry a packable windproof jacket.
- Sunglasses and sun protection: UV intensity at high altitude is significantly stronger than at lower elevations. Even on overcast days, wearing eye protection is recommended.
Other Equipment Details: It is recommended to carry basic first-aid supplies, an emergency thermal blanket for warmth (a lightweight one is sufficient—small and light), spare inner tubes and inflation tools (supplies are scarce in the mountains, and you must be prepared to handle mechanical issues yourself), and a mobile phone (make sure the battery is fully charged; signal may be unreliable on some sections of the mountain road, and it is advisable to inform family or your riding group of your itinerary and expected return time).
Nutrition and Hydration Strategy: Prevention of Altitude Sickness as the Core Focus
On this route, nutrition planning is no longer just about “consuming enough calories”—it must incorporate the prevention of altitude sickness (high-altitude reaction) into the overall strategy.
Basic Principles of Calories and Hydration: Under general climbing intensity, it is recommended to consume 60–90 grams of carbohydrates per hour (adjusted according to individual gastrointestinal tolerance), and 500–750 ml of fluid per hour, depending on temperature and sweat rate. The estimated completion time for this route ranges from just over one hour to more than three hours depending on rider ability (see the time comparison table later in this article). It is recommended to plan the amount of supplies to carry before departure based on your estimated time, rather than relying on shops along the way—supply points in the mountains are scarce and unreliable, so self-carrying is essential.
Recognizing and Preventing Altitude Sickness: This is the health risk that needs the most emphasis on this route. Acute Mountain Sickness (AMS) commonly presents with symptoms including headache, nausea, dizziness, unusually severe fatigue, loss of appetite, and poor sleep quality. In severe cases, it can progress to high-altitude pulmonary edema or cerebral edema, which are emergencies requiring immediate descent to lower elevation. Here are specific recommendations for prevention and response:
- Avoid rapid altitude gain: If your schedule allows, it is recommended to spend the previous day acclimatizing at mid-elevation (for example, at a lower-altitude supply point or accommodation), rather than riding directly from low elevation to the high-altitude starting point on the same day before tackling this climb.
- Pay attention to body signals while riding: If you experience unusual headache, nausea, or dizziness, immediately reduce your pace or even stop climbing. If necessary, turn back and descend—symptoms usually ease as altitude decreases.
- Stay well hydrated but avoid overhydration: Dehydration can worsen altitude sickness symptoms, but consuming excessive water in a short period can also cause electrolyte imbalance. It is recommended to hydrate in small, frequent amounts.
- Avoid tackling high altitude on an empty stomach or with low blood sugar: Unstable blood sugar amplifies the discomfort of altitude reactions. Be sure to eat properly before departure and refuel regularly during the ride—do not wait until you are hungry to eat.
- Ride with companions: This route is not recommended as a solo challenge, especially for first-timers. Companions can observe each other’s mental state and verbal responses—these are often the early signs of altitude sickness that are easiest to overlook in oneself but noticeable to others.
Electrolyte Supplementation: At high altitude combined with prolonged climbing, electrolyte loss occurs faster than at lower elevations. It is recommended to add electrolyte supplements to your water bottles or carry salt tablets to compensate for sodium loss from heavy sweating, reducing the risk of cramping and heat exhaustion.
Weather and Seasonal Recommendations
The weather around the Hehuan Mountain Highway is notoriously “changeable”—this is not an exaggeration but the physical reality of high-altitude mountain climates: clouds and fog form rapidly, temperatures fluctuate dramatically with elevation and time of day, strong winds and poor visibility are common occurrences, and in winter there is even the possibility of ice and snow.
Pre-departure Weather Check: Be sure to check the Central Weather Administration’s forecast for mountain areas before departure, as well as real-time road condition announcements from Taroko National Park or relevant local authorities (mountain roads occasionally experience rockfalls, landslides, or traffic controls—always rely on the latest official announcements and never venture out based solely on outdated information or word of mouth).
Seasonal Recommendations (general principles; actual conditions depend on the year’s climate and on-site conditions):
- Spring/Summer (approximately April–August): Temperatures are relatively mild, making this the primary season for most riders to take on this route. However, afternoon convective cloud systems develop quickly, often bringing localized thunderstorms and dense fog in the afternoon. It is recommended to start early in the morning and complete the challenge and descend before the weather turns in the afternoon.
- Autumn (approximately September–November): Day-night temperature differences widen further, with noticeably cooler temperatures in the early morning and evening, but weather stability is generally better than in summer. This is the preferred season for many experienced riders, though attention to cold-weather gear is still necessary.
- Winter (approximately December–March): High-elevation sections may experience ice, snow, or even road closures. The difficulty and risk of the challenge increase substantially. This season is not recommended for those without extensive high-altitude riding experience and proper equipment. Before departure, be absolutely certain that the road is open.
Wind Speed and Visibility: Ridge-line terrain in the mountains is prone to localized strong winds, especially near open sections at higher elevations where wind intensity can increase noticeably, directly affecting bike handling and perceived temperature. If dense fog significantly reduces visibility, given the winding nature of mountain roads and sections adjacent to slopes, it is recommended to reduce speed and remain highly alert. If necessary, consider stopping to wait for the weather to improve or turning back.
Common Mistakes and DNF Risk Assessment
Based on common experience on long high-altitude climbing routes, riders who fail to finish (DNF) or have a poor riding experience on this type of segment can usually be attributed to the following categories of preventable mistakes:
Mistake 1: Poor pacing, going out too hard in the early stages. As mentioned in the segment-by-segment strategy above, this is the most common and most regrettable type of mistake. Many riders, fueled by confidence built from training at lower elevations, push out excessive power in the early part of the route. By the time the altitude climbs and the body begins showing signs of altitude sickness, they no longer have the reserves to adjust their pace, ultimately being forced to slow down dramatically or even dismount and walk in the latter stages—turning a route that could have been completed smoothly into an exceptionally painful ordeal.
Mistake 2: Underestimating the real physiological impact of high altitude. Many riders habitually gauge the difficulty of a route by thinking, “I can ride other climbs with similar gradients,” while overlooking the direct reduction in maximal oxygen uptake caused by altitude itself. This cognitive gap often leads to insufficient preparation in terms of nutrition and gear, or pacing strategies that simply follow sea-level logic, resulting in being caught off guard in the middle and latter sections of the route.
Mistake 3: Insufficient warm clothing leading to risk of hypothermia. This is especially common among riders who set off in summer with the mindset, “It’s summer, so it shouldn’t be cold.” They overlook the fact that temperatures at high altitude are inherently low, combined with the clammy chill from sweating during the climb, plus the wind chill effect from increased wind speed upon reaching the summit. These factors stacked together can make the perceived temperature far lower than expected. Without proper insulating layers and a windproof jacket, the risk of hypothermia should not be underestimated.
Mistake 4: Ignoring early signs of altitude sickness and pushing on. Some riders hold the mindset, “I’ve climbed this far, I don’t want to give up,” and choose to push through the route even when clear warning signs such as headaches, nausea, or unusual fatigue have already appeared. This approach carries extremely high risk. If altitude sickness is not addressed promptly and worsens into high-altitude pulmonary edema or cerebral edema, the consequences can be quite severe. At any point when the body sends clear warning signals, completing the route should never take priority over safety.
Mistake 5: Insufficient fluid and electrolyte intake, or poor timing of intake. Some riders are accustomed to “drinking only when thirsty,” but in the context of high altitude combined with prolonged high-intensity exercise, this reactive approach to hydration often lags behind the body’s actual rate of fluid loss. It is recommended to adopt a proactive, scheduled, and measured intake strategy rather than relying on the thirst reflex.
Mistake 6: Neglecting mechanical and safety preparation. Mountainous areas have relatively limited access to support and rescue resources. If mechanical issues such as flat tires or gear malfunctions occur, lacking basic self-rescue equipment and skills could escalate into a situation requiring external assistance, adding unnecessary risk and waiting time. Be sure to confirm your own and your companions’ equipment, tools, and basic repair capabilities before departure.
Target Time Table for Riders of Different Levels
The following time table provides general reference ranges. Actual completion times will be affected by factors such as daily weather, wind direction, personal fitness condition, and degree of altitude acclimatization. Riders are advised to set reasonable goals based on their own training status, without feeling compelled to compare with others.
| Rider Level | Estimated Completion Time | Reference Average Power (approx. % of FTP) | Recommended Strategy Focus |
|---|---|---|---|
| Elite competitive (with high-altitude race experience) | 55 min – 1 hr 10 min | 90%+ | Sustained high output throughout, but still reserve room for altitude adjustments |
| Advanced rider (regular training, climbing experience) | 1 hr 10 min – 1 hr 40 min | 80%–88% | Controlled early pace, adjust pacing in middle and latter stages based on altitude |
| General recreational rider (basic climbing ability) | 1 hr 40 min – 2 hr 20 min | 70%–80% | Segmented pacing, make full use of easy gearing |
| Beginner / first-time high-altitude route challenger | 2 hr 20 min or more, including rest time | Based primarily on perceived exertion, no need to chase power numbers | Prioritize finishing and safety, take adequate rest and nutrition |
Important reminder: The times in the table above are for planning reference only and should not serve as a source of psychological pressure during the challenge. The most detrimental mindset on a high-altitude climbing route is chasing a preset time schedule while ignoring the body’s warning signals. The true value of this route lies in the rider’s understanding of their own physical capabilities and mental fortitude upon completion, not merely in the clock time. First-time challengers are advised to set their goal as “finish safely and enjoyably,” and only after accumulating sufficient experience and high-altitude acclimatization should they progressively pursue faster completion times.
Conclusion: Preparation Beyond the Numbers
The core data of this route—14.29 kilometers, 940.2 meters of total elevation gain, 6.6% average gradient, Strava Category 5 classification—are certainly important and serve as the foundational basis for planning training and pacing strategies. But what truly determines the success or failure of this challenge is often the preparation that goes beyond the numbers: adequate high-altitude acclimatization, thorough warm clothing, careful nutrition and hydration management, vigilance for signs of altitude sickness, and most importantly—a mindset of riding within one’s limits.
The final 14K of the Lixing end of Hehuan Mountain is a route that honestly reflects the level of your preparation. Those who are well-prepared will experience the purest sense of achievement that road cycling has to offer; those who are underprepared may face a dual test of physical and physiological endurance halfway through. All riders planning to take on this route are strongly advised to actually implement the equipment checklist, nutrition strategy, and weather-check procedures mentioned in this article into their pre-ride preparation, and to always defer to the latest official road condition and weather announcements, making this high-altitude challenge a safe and memorable riding experience.
Related Reading
- Complete Guide to the Final 14K of Hehuan Mountain Lixing End: High-Altitude Data Analysis of 14.29 km and 940 m of Climbing
- From Sea Level to the Clouds: The Human Spirit and Imagined Riding Journey of the East Approach Wuling–Shenmu Cup
- Tou 56 Shenmu Climb Practical Guide: 6.9 km with 653 m of Climbing, Data Analysis of Nantou’s Hidden Hard Steep Climb
- The Art of Pacing in Climbing Races: Perfect Strategies for the Wuling Cup and East Approach Wuling
大禹嶺 到 武嶺牌樓 全程前後實況錄影 | 北進武嶺 | 東進武嶺 | KOM | 訓練台 | 坡度分析 | Taiwan KOM Last 10 km HARD | 公路車
6 年前
#公路車 #西進武嶺 配速配瓦實驗 坡度分析 四小時內攻略 建大盃 NeverStop #西進武嶺攻略
6 年前
西進武嶺各路段 前8000名 大數據分析 配速攻略/功率/心律/推力比/維持率/踏頻/踏瓦比/牽車率 大公開 | 建大盃 NeverStop 可參考 | 公路車 | CT Yeh
5 年前
台北闊瀨陡坡 騎旅 / 日本單車雜誌編輯車友臨時加入!/ 髮香才是最強的 / feat. 北迴歸線小隊 / 公路車 CT Yeh
6 個月前
#北橫 + #北進武嶺 最硬的員工旅遊 EP1 | #公路車 #拉拉山 | 明池 | 武嶺 | 武陵農場 | 雲海 | Taiwan Cycling Route Wulin
6 年前
雨戰! 西進武嶺員工旅遊 加料 各路段大數據分析 | 同事端出5公斤的公路車來挑戰!? EP1
4 年前
崇越盃「西進武嶺」挑戰! / 天堂路史詩空拍 / 秘密爬坡武器/ PGYTECH CapLock MantisPod Power 續航拍攝棒 / 廢物伙伴軍團再次出征 / 公路車 / CT Yeh
2 年前
西進武嶺 自製新版AI配速表產生器 x 賽前攻略 抱佛腳! 沒有功率計也可以產生配速表嗎?有什麼其他眉角賽前要注意的呢? | 西進武嶺 / 東進武嶺 KOM 攻略 | 公路車 | CT Yeh
4 年前