Linkou Dake Road Practical Guide: A 5.13 km, 255 m Climb — An Urban-Style Hill Climbing Introductory Course
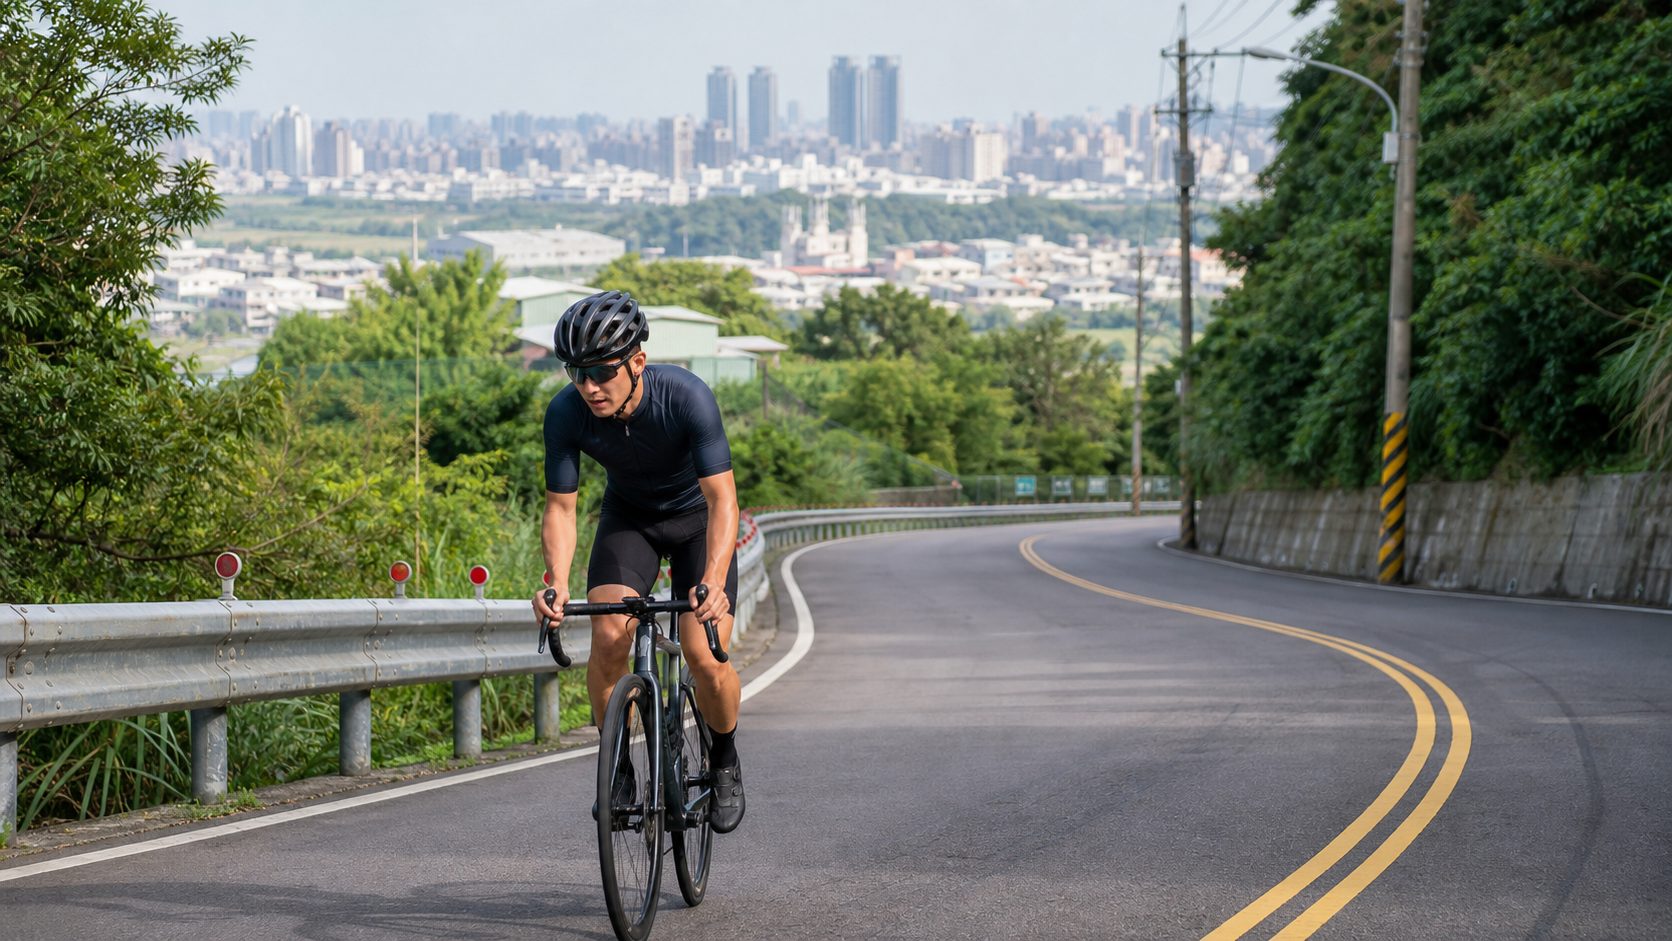
LinKou Dake Road Practical Guide: A 5.13 km, 255 m Climb — An Urban Hill-Climbing Primer
“It’s not long, but don’t underestimate it — Dake Road is the kind of climb that, after your first ride, makes you immediately open Strava to compare nearby routes.”
Dake Road (Strava segment ID 8851413) in New Taipei City’s LinKou District, bordering Taishan, has in recent years become a regular fixture on the morning rides, evening attacks, and weekend group rides of the greater Taipei cycling scene. The reason is simple: it’s close to the city, offers a complete range of gradients, and has consistently good pavement — one of the few climbs where you can squeeze in “a quick ride” after work and still get a training stimulus.
This article isn’t about scenery or food. It’s a pure breakdown of Dake Road from three angles: data, tactics, and equipment.
Route Overview and Real Data Analysis
Let’s lay out the hard numbers first, based on the Strava segment record:
| Item | Value |
|---|---|
| Distance | 5134.8 m (approx. 5.13 km) |
| Total elevation gain | 254.9 m |
| Average gradient | 4.2% |
| Start area | New Taipei City, Taishan / LinKou District border |
| Surface | Asphalt industrial road, stable conditions |
First, let’s address a question many people ask: “5.13 km times 4.2% gives roughly 216 m of climbing, which doesn’t match the official 254.9 m. Is something wrong?”
This is actually a normal phenomenon common to all GPS-measured climbs, not an error. The average gradient is a simplified figure derived by dividing total elevation gain by horizontal distance, while Strava’s total gain is calculated point-by-point from GPS elevation sensors, which includes every undulation along the route (including sections where you drop a little and climb back up). In other words, 254.9 m is the total elevation you actually have to “climb,” while 4.2% helps you build a general impression that “this road is moderately hard overall.” The two are complementary pieces of information, not contradictory.
For the average road cyclist, what level of route does this data represent? We can make a simple classification:
- Average gradient below 3%: Warm-up or recovery ride level; barely any need to get out of the saddle
- Average gradient 3–5% (Dake Road falls in this range): Moderate intensity; requires a certain aerobic base and pedaling efficiency, but won’t force you to constantly drop to your easiest gear and grind
- Average gradient 5–8%: Advanced route; tests muscular endurance and cardiovascular output simultaneously
- Average gradient above 8%: Hardman route; usually requires specially configured climbing gearing
Dake Road sits right in the “moderate intensity” sweet spot, which is exactly why it works well as a benchmark training segment — the intensity is high enough to feel it, but not so high that beginners blow up immediately. It’s ideal for tracking your progress curve over time.
Let’s break this down further. Where do 5.13 km and 254.9 m of gain place Dake Road on the map of Taiwan’s famous climbs? Compared to long, hard sessions like the Northern Cross-Island Highway, Fengguizui, or Bafu Yue-Ling — routes that stretch 10 km or more with 600–700 m of climbing — Dake Road is clearly not the kind of route that leaves you with dead legs for three days after one ride. It’s closer to a “concentrated” training stimulus: in relatively short time, with relatively manageable risk, you get a solid dose of climbing aerobic and muscular endurance work. For riders who can only carve out a one-hour training window on weekdays after work, this kind of “short time, high return” route is actually more practical than a long mountain ride, because you don’t need to plan a whole morning or afternoon — you can head out after work while daylight still holds.
Another point worth mentioning: the LinKou tableland terrain where Dake Road sits already has a certain elevation base (the tableland averages about 255 m above sea level). This means that as you ride up from the city flats, you’ll actually experience two distinct terrain characteristics: “climbing to the tableland edge” and “rolling gradients on the tableland itself.” If you approach from Xinzhuang or Taishan, you may first tackle the tableland’s edge slope before reaching the segment — which is why the perceived gradient during actual riding feels more undulating than the flat 4.2% average suggests. This isn’t a data issue with the Strava segment itself; it’s the terrain difference of the approach route, and it’s worth factoring into your ride planning.
Start-to-Finish Section-by-Section Guide: Three-Phase Pacing Management
Although Dake Road is only just over 5 km in total length, the gradient isn’t evenly distributed. Below is a three-phase breakdown to help you build a pacing map in your head (for actual corners and gradient changes, defer to on-site conditions and GPS tracks).
Phase 1 (approx. 0–1.8 km): Warm-up Climb, Find Your Rhythm
The opening section of the climb is typically the area for “waking the body up.” Gradient changes here are gentler, and the focus isn’t speed — it’s getting your heart rate and cadence synced up together. A common mistake many riders make is charging out of the gate at flat-road cadence, only to find their legs half-dead by the time they hit the steeper middle section.
Suggested strategy:
- Keep cadence in your normal cruising range (most people: 80–95 rpm)
- Keep heart rate at the edge of Zone 2 to Zone 3; don’t push into the anaerobic zone from the start
- Use this section to dial in your breathing rhythm and save energy for the middle
Another key point of this section is “reading the road and environment.” Dake Road is industrial-road grade at the LinKou/Taishan border. Traffic is generally light, but you’ll still encounter local residents’ vehicles and the occasional small truck or scooter. The gentler early gradient is the perfect time to observe lane markings, potholes, and drainage grate positions — build a “hazard map” in your head so that whether you’re sprinting or doing repeat rides, you can anticipate and avoid obstacles early rather than reacting at the last second. If you’re on a group ride, this section is also a good time to call out to each other, confirm pace, and assign pulling order — rather than having everyone go solo and gap each other from the start, treat the opening as a team calibration zone so that less powerful riders have room to match the rhythm, preventing the group from getting strung out and scattered in the later stages.
Establishing a breathing rhythm is equally important. Many riders default to a passive mode of “adjust breathing only when gasping for air,” but a better approach is to actively match a fixed breathing pattern to your cadence (for example, inhale over two pedal strokes, exhale over two). This gets your body into a stable oxygen-intake mode ahead of time. Once this breathing rhythm is established in the warm-up section, you’ll transition into an “aerobic steady state” more quickly when the middle steepens — rather than scrambling to re-adjust your breathing every time the gradient changes.
Phase 2 (approx. 1.8–3.5 km): The Core Test Section, Where the Gradient Becomes Noticeable
This is the section where the route “starts to make itself felt,” and it’s where most of that 4.2% average gradient comes from. Continuous climbing will naturally drop your cadence, and the key here is not to force a higher gear to maintain your original cadence, but to shift down to an easier gear and let cadence settle into a range you can sustain (generally recommended no lower than 70 rpm to avoid excessive knee strain).
Switching between seated and standing is also a key technique in this section:
- Seated climbing: Best for sustained, steady output; keep your weight on the saddle to reduce cardiovascular load
- Standing climbing (out of the saddle): Best for short accelerations or when the gradient suddenly steepens, but oxygen consumption is noticeably higher — not recommended for extended use here unless you’re chasing a TT time
In practice, the middle section is the “contested ground” of the entire route — if you’ve studied the segment splits of PR-setting riders on the Strava leaderboard, the biggest time gaps usually fall here, not in the relatively flatter start or finish. This means your tolerance for the middle-section gradient is the key variable determining your overall time. For training this section, try the “intermittent standing” technique: each standing effort no longer than 10–15 seconds, then immediately sit back down to recover. The brief standing bursts let your glutes share the load with your quads, slowing the accumulation of localized muscle fatigue.
Another often-overlooked detail is sightline management. During climbs, many riders habitually stare down at the front wheel or their bike computer, which tenses up the upper body and slightly restricts the airway. Instead, keep your eyes on the road 5–10 meters ahead — this lets you see gradient changes and road conditions earlier, and also helps maintain natural extension through the torso and neck, reducing unnecessary muscle tension. What makes the middle section hardest is often not absolute leg strength, but whether you can stay relaxed and efficient while sustaining output — which is why experienced riders always look easier than beginners: the difference isn’t leg power, it’s whole-body efficiency and mental pacing management.
Segment 3 (Approx. 3.5–5.13 km): The Final Stretch with Rolling Terrain — Manage Your Remaining Energy
Entering the final segment, many riders get carried away because they can “see the finish line ahead,” only to run out of steam in the last few hundred meters. The recommendation here is to follow the “hold back one percent” principle — maintain an intensity that allows you to make it to the end while still having enough reserve to ride back or continue your route after the descent.
If you’re using Dake Road as part of an interval training session (e.g., riding it back and forth for two laps to stack intensity), restraint is even more critical here. You want to avoid draining your glycogen stores on the first lap, which would severely compromise the quality of the second.
It’s worth noting that many riders have a vague definition of the “finish line.” If you treat the Strava segment endpoint as your sole goal, it’s easy to mentally deflate and stop pedaling the moment you cross it. Physiologically, this is actually a waste of efficiency — your cardiovascular system is still operating at high output, and suddenly relaxing completely can cause mild discomfort (dizziness, nausea). A better approach is to keep spinning gently after crossing the line, allowing your heart rate to come down gradually rather than dropping to zero instantly. If there’s more riding ahead beyond the finish, this cool-down pedaling habit will also help you recover faster and transition smoothly into the next stretch.
Gear Ratio and Equipment Recommendations
For a route with an average gradient of 4.2% and some sections slightly steeper than the average, here are the gear ratio recommendations:
- Road cyclists: A standard or compact crankset (50/34) paired with an 11-28T or 11-30T cassette is more than sufficient for most riders — no need to go down to mountain-bike-level gearing
- Beginners/less fit riders: Consider an 11-32T or even wider cassette to avoid cadence dropping to dangerously low levels, which can put stress on the joints
- Road tire pressure: No special adjustment is needed for typical road surfaces; just use your usual training pressure (fine-tune based on body weight and tire width)
- Wheels: For this distance and gradient, there’s no need to swap in lightweight rims — standard training wheels are more than adequate
Equipment checklist reminders:
- Make sure your bike computer or phone GPS is turned on and has a stable signal so you can accurately record elevation gain and PR times
- Carry a basic puncture repair kit — getting a ride after a flat on a mountain route isn’t easy
- Front and rear lights are recommended as standard gear, especially for morning or evening rides, since mountain sections have heavy tree cover and rapidly changing light conditions
If you’re treating Dake Road as a long-term training benchmark (i.e., re-riding it periodically to compare data), consider adding a power meter or at least a heart rate strap. Comparing “finish times” alone is subject to external variables like wind direction, temperature, and your mental state on any given day, which can produce different times for the same effort. Power or heart rate data provides a more stable, environment-independent reference for training intensity, and over time it will give you a more accurate picture of your improvement curve.
Regarding bike setup, do a quick check before heading out: whether the brake pads still have sufficient thickness (reliable braking is essential on mountain descents), whether the tires have obvious cracks or embedded debris, and whether the shifting is smooth without skipping gears. These checks take less than five minutes but can significantly reduce the risk of having your ride cut short by mechanical failure — especially on a route with varied gradients, where poor shifting directly affects your rhythm management and energy distribution.
Nutrition and Hydration Strategy
For a route like Dake Road — roughly 5 km in length, with a single ascent typically taking 15–25 minutes (depending on fitness and whether you repeat the climb) — a single lap doesn’t really require mid-ride refueling, but there are still some practical recommendations:
- Before the ride: Consume a moderate amount of carbohydrates 30–60 minutes before departure to avoid unstable blood sugar on an empty stomach
- Bottle setup: In hot summer conditions, carry at least one 750 ml bottle; if you’re planning multiple laps, bring two bottles or plan a refill point along the way
- If doing repeated climb training (e.g., 3–5 laps): Be sure to allow recovery time between laps and supplement electrolytes appropriately to avoid cramping
New Taipei City often sees brief afternoon thunderstorms in summer, and wet mountain roads carry a higher risk of slipping. It’s best to schedule morning or early evening rides and always check real-time weather before heading out.
If you’re incorporating Dake Road into a “repeated climb training” plan (e.g., as the core of an interval session, riding 3–5 laps back and forth), your fueling strategy needs to be more refined. Between laps, in addition to water, supplement with carbohydrates (energy gels, bananas, and energy bars are all common choices) to prevent blood sugar from dropping sharply in the latter half of the session, which would compromise both focus and power output. Also, many people overlook salt intake — repeated high-intensity climbing in summer causes heavy sweating, and replacing only water without electrolytes can lead to cramping late in the session, particularly in the calves and hamstrings. If you’re prone to cramping, carry sports drinks or electrolyte tablets — they maintain proper neuromuscular contraction better than plain water alone.
Weather and Seasonal Recommendations
- Spring (March–May): Generally comfortable weather, but watch for rain chances from passing weather fronts
- Summer (June–August): High temperatures and strong UV — ride in the early morning or evening, and step up sun protection and hydration
- Autumn (September–November): Before the northeast monsoon fully sets in, this is often one of the best seasons for riding, though the day-night temperature gap begins to widen
- Winter (December–February): Under the influence of the northeast monsoon, New Taipei’s mountain areas tend to see cold, damp rain — slow down on wet roads and pay extra attention to braking distance
Regardless of the season, weather in mountain areas can shift more dramatically than in the city, so always check real-time weather and air quality information before heading out.
From a timing perspective, because Dake Road is short and a single lap typically takes under half an hour, it fits well into a short post-work training window on weekdays. However, note that after dark, streetlight coverage on the Linkou Plateau may not be as complete as in urban areas, and with tree cover on some sections, light fades faster than on flat ground even during early evening. Make “arrive before sunset” your safety baseline. If you estimate you’ll be riding close to dark, make sure your lights are fully charged, reflective gear (e.g., reflective vests, reflective strips) is in place, and consider riding with a partner rather than solo to reduce the overall risk of night riding in the mountains.
Common Mistakes and DNF Risks
While Dake Road isn’t an extremely hardcore challenge route, there are still several common error patterns worth noting:
- Going out too fast in the early section: As mentioned in the pacing strategy, many riders push near-maximal effort during the warm-up stretch, leaving themselves exhausted by the time the mid-route gradient tests arrive
- Insufficient gear range: Riding a road bike with a compact crankset paired with a narrow cassette, then hitting the mid-route climbs, forces cadence to drop extremely low — this can cause knee discomfort or even injury
- Ignoring slippery road warnings: After rain or when morning dew hasn’t dried, mountain sections are prone to slipping, especially when braking through corners
- Insufficient hydration: Underestimating the physical toll of a short route, especially in summer heat, where it’s easy to overlook the importance of hydration
- Scheduling multiple repeated climbs without assessing fitness: Beginners who attempt 3+ repeated climbs on their first try often suffer from insufficient muscular endurance in the later stages, leading to cramps or premature abandonment
- Letting your guard down on the descent back: After exhausting yourself on the climb, many riders experience slower reaction times on the way back down due to reduced focus — especially on corners where braking timing can be misjudged. Stay alert on the return leg and don’t relax your attention to road conditions just because “the main challenge is done”
- Ignoring unilateral pedaling imbalance: Prolonged climbing can cause asymmetric power output between left and right legs due to fatigue, increasing compensatory strain on the knees or hips. Incorporate core and single-leg strength training into your routine to improve pedaling stability during climbs
- Blindly following others’ pace in group rides: Everyone has different fitness levels and training goals. If you blindly match the pace of a stronger rider in a group, you’ll be pushing beyond your own capability zone, leading to early exhaustion or even forced mid-ride stops. Ride according to your own heart rate or power zones rather than simply aiming to “keep up with the group”
Target Time References for Riders of Different Levels
The following times are only rough reference ranges. Actual results will vary due to fitness, daily condition, wind direction, and differences in bike and equipment. It is recommended to use the progression curve of your own past riding records as the primary reference rather than simply comparing yourself to others’ results:
| Rider Level | Approximate Completion Time Reference |
|---|---|
| Senior/Racing-level riders | Within 12–15 minutes |
| Intermediate-to-advanced amateur riders | 15–19 minutes |
| General recreational riders | 19–25 minutes |
| Beginners/first-time climbers | Over 25 minutes, just ride within your limits |
Rather than chasing an absolute time, it is more advisable to treat Dake Road as a standard segment for “tracking your own progress over the long term”—ride it once every fixed interval and compare changes in heart-rate zones and completion times. This offers more training reference value than a single result.
From the perspective of training-period planning, it is recommended to schedule a “benchmark test” every 4–6 weeks. Use the same warm-up routine and similar weather conditions to challenge Dake Road again, and record in detail your heart rate, cadence, completion time, and subjective fatigue level (you can self-assess using an RPE scale of 1–10). Accumulating such data over time will gradually reveal trends in your aerobic endurance, lactate threshold, and recovery capacity—this holds more practical training significance than simply chasing a one-off best time. For riders preparing for long-distance climbs such as Wuling or Beihang, Dake Road can also serve as one of the pre-race check routes—if even this short, moderate-intensity climb feels strenuous, it may indicate that your base aerobic fitness and muscular endurance still need strengthening. In that case, rashly tackling long-distance mountain routes would carry a relatively higher risk.
Conclusion: An Urban Climb Worth Adding to Your Training Menu
The value of Dake Road lies not in how hardcore it is, but in the fact that it sits right in an intensity range well suited for daily training: short enough to schedule anytime; demanding enough to genuinely train your cardio and muscular endurance; and close enough to the city that you don’t need to spend a lot of time traveling to start training.
If you’re looking for a climbing segment that can be regularly incorporated into your weekly training menu without taking up too much time, Linkou Dake Road is definitely worth adding to your shortlist. Remember to check road conditions and weather before riding, ride within your limits, and gradually push your completion time forward.
One final reminder: all time ranges and training suggestions in this article are rough reference values. Actual conditions will vary depending on individual fitness baselines, daily weather, road surface conditions, and equipment setup. It is recommended that beginner riders aim for “finishing and familiarizing yourself with the road” on their first attempt, rather than setting overly high performance thresholds from the start, to avoid prioritizing speed over safety and bodily signals. Once you are familiar with the route’s gradient distribution, corner positions, and road surface conditions, you can then gradually use pacing and power data to optimize each ride. This training rhythm allows for long-term accumulation, helps prevent injuries, and truly maximizes the training value of Dake Road.
Related Reading
- Wind on the Plateau, Red Clay, and a Climb Called Dake Road: A Cultural Journey on Linkou Cycling Routes
- Zhuzihu Road Practical Guide: 5.16 km, 253.6 m of Elevation Gain, a Pacing Lesson on Yangmingshan Valley Climbs
- Alishan Highway Complete Guide: 53.57 km, Over 2,000 m of Elevation Gain, the Southern Taiwan Long-Distance Pilgrimage
- Zhongshe Road Practical Guide: 3.94 km, 245 m of Elevation Gain, Shilin Riders’ First Touchstone
半日 小台灣 極限單車路線挑戰實錄
7 年前
台北闊瀨陡坡 騎旅 / 日本單車雜誌編輯車友臨時加入!/ 髮香才是最強的 / feat. 北迴歸線小隊 / 公路車 CT Yeh
6 個月前
爬坡ITT實境)台中 魔王 松鼠坡 首航 6:12 大肚山 大三元 科福路
8 年前
單車 一日北高 ( 雙城 ) 肥宅雙人瘋狂行 紀錄片 REACTO
10 年前
單車 梅山36灣 坡度介紹 路段介紹 空拍 (相關遊記影片,請參考說明或我的頻道喔,歡迎訂閱)
6 年前
一日北高常見問題大集合 | 攻略 | 路線 | 訓練 | 補給 | 自行車 單車 | 一日雙城 | 雙塔 | TWB北高360 | 屁股痛
6 年前
嘉義大埔、阿婆灣挑戰賽,美到以為在日本!ft. 環騎5 Cool 西拉雅188 / 公路車 / CT Yeh
7 個月前
公路車 | 塔塔加驚險員工旅遊 | 還好手腳快沒被抓交替!
5 年前