Smart Bike Light Buying Guide: Full Analysis of Auto-Dimming, Daytime Running Lights, and Brake-Sensing Features
Smart Bike Light Buying Guide: Full Analysis of Auto-Dimming, Daytime Running Lights, and Brake-Sensing Features
Bicycle lighting has evolved from simply being “bright or not” to “smart or not.” Today’s high-end bike lights aren’t just impressively bright—they can automatically adjust based on ambient conditions, sense deceleration to activate brake lights, and even sync with bike computers. This article will walk you through the core technologies behind smart bike lights.
Core Technologies of Smart Bike Lights
1. Auto Brightness Adjustment
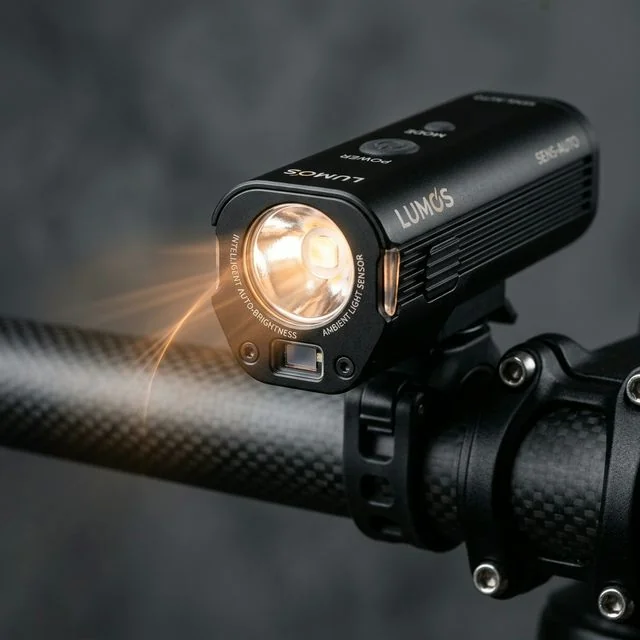
This is the most fundamental and practical feature of smart bike lights. The built-in light sensor detects ambient light intensity and automatically adjusts the LED output brightness.
How it works:
- Bright daylight: Switches to high-brightness flashing mode (daytime running light)
- Dusk, as light fades: Automatically increases steady-brightness output
- Entering a tunnel: Instantly switches to maximum brightness
- Night riding: Maintains appropriate brightness to conserve power
Representative products include the Bontrager Ion Pro RT, Lezyne Mega Drive 2400i, and others, all featuring excellent auto-dimming capabilities.
2. Brake-Sensing Function
Some smart taillights feature a built-in accelerometer (G-sensor) that detects when the rider is decelerating and automatically activates a brake warning light.
Technical details of brake sensing:
- The sensor detects negative acceleration (deceleration) exceeding a set threshold
- The taillight automatically switches to high-brightness steady mode
- Returns to normal mode after approximately 2-3 seconds
- Some products use different flash frequencies to distinguish braking status
Representative products currently featuring brake sensing:
| Product | Brake-Sensing Sensitivity | Battery Life | Price Range |
|---|---|---|---|
| Garmin Varia RTL516 | ★★★★☆ | 16hr | NT$5,500 |
| Bontrager Flare RT | ★★★★★ | 12hr | NT$3,500 |
| Magicshine Seemee 508 | ★★★☆☆ | 10hr | NT$1,200 |
| Ravemen TR Series | ★★★★☆ | 8hr | NT$1,800 |
3. Bike Computer Integration
High-end smart bike lights support connection to bike computers via ANT+ Light Network or Bluetooth, enabling the following features:
- Remote control: Switch light modes directly from the bike computer
- Battery monitoring: Check remaining light battery level on the bike computer
- Auto on/off: Lights automatically controlled when the bike computer starts/ends a ride recording
- Speed-linked adjustment: Automatically adjusts the beam pattern based on riding speed
ANT+ Light Network is currently the most mature light-integration standard, supported by most Garmin and Bontrager lights.
Front Light Buying Considerations
Brightness Isn’t the Only Criterion
Many riders are drawn to figures of 1,000 lumens or more, but brightness is only part of the equation. More important indicators include:
Beam pattern design:
- Spot beam: Suitable for highway riding, with long-range illumination
- Flood beam: Suitable for mountain roads or trails, with a wide field of view
- Anti-glare cutoff: Modeled after automotive low-beam headlights, prevents dazzling oncoming traffic
Anti-glare design deserves special attention. The EU’s bicycle front light regulation (StVZO standard) requires a distinct beam cutoff to prevent upward-scattered light from affecting other road users. Representative products include the Busch & Müller IQ-X, Lupine SL series, and others.
Charging Methods and Battery Life
Modern smart bike lights almost all use USB-C charging, with some high-end models supporting fast charging. When purchasing, consider:
- Type-C vs Micro-USB: It’s recommended to choose Type-C for better future compatibility
- Charge while in use: Can be paired with a power bank for long rides
- Battery indicator: At minimum, a low-battery warning is essential
Taillight Buying Considerations
Visibility Is the Top Priority
The taillight’s most important job is to make you visible to traffic behind you. Factors affecting visibility include:
- Brightness: Daytime visibility requires at least 50 lumens or more
- Flash patterns: Irregular flashing attracts more attention than regular flashing
- Beam angle: Taillights with a wide 270-degree angle remain visible to side traffic when turning
- Mounting position: Seatpost mounting is higher, providing greater visibility distance
Daytime Running Light Mode
Daytime running lights are already a basic requirement for bicycle safety in developed countries. Research shows that using daytime running lights can reduce accident risk by approximately 19%.
A good daytime running light should offer:
- High-brightness pulse flashing: To cut through sunlight
- Extended battery life: At least 8 hours or more (since it’s used on every ride)
- Automatic mode switching: Automatically switches to night mode after dark
Smart Bike Light Recommendations
Front Light Recommendations
Top-tier pick: Bontrager Ion Pro RT (NT$4,500)
- 1,300 lumens / ANT+ Light Network
- Auto brightness adjustment / Bike computer integration
- For riders seeking full smart functionality
Best value pick: Ravemen CR900 (NT$2,200)
- 900 lumens / Anti-glare cutoff design
- Auto brightness adjustment / Type-C charging
- For riders who prioritize beam quality
Entry-level pick: Magicshine Allty 800 (NT$1,500)
- 800 lumens / Auto dimming
- Excellent battery life
- For riders on a budget
Taillight Recommendations
Top-tier pick: Garmin Varia RTL516 (NT$5,500)
- Radar + smart taillight 2-in-1
- Brake sensing / ANT+ integration
- For safety-conscious road cyclists
Best value pick: Bontrager Flare RT (NT$3,500)
- 90 lumens / Brake sensing
- ANT+ Light Network / Daytime running light mode
- For users in the Trek/Bontrager ecosystem
Entry-level pick: Magicshine Seemee 508 (NT$1,200)
- Brake sensing / Wide-angle beam
- Type-C charging / Extended battery life
- For beginners wanting to experience smart features
Installation and Usage Tips
- Front light angle: Tilt slightly downward 5-10 degrees to illuminate the road ahead without dazzling oncoming traffic
- Taillight height: Mount on the seatpost rather than a saddle bag for better visibility
- Backup power: For long rides, consider carrying a power bank or spare light
- Regular charging: Develop the habit of charging immediately after each ride
- Firmware updates: Smart bike lights often receive firmware updates—remember to check regularly
Conclusion
The development of smart bike lights has brought a qualitative leap to riding safety. From auto-dimming to brake sensing, these features aren’t just gimmicks—they’re practical technology that genuinely reduces accident risk. We recommend that every rider invest in at least one front-and-rear light set with daytime running light functionality; it’s the most basic and effective safety investment you can make.
Related Reading
- Complete Guide to Bicycle Lights: Comparing Brightness, Batteries, and Sensor Features of Front and Rear Lights
- Bicycle Light Buying Guide: Lumens, Beam Angles, and Regulatory Requirements
- Complete Upgrade of Bicycle Lighting Systems: Recommendations for Daytime Warning Lights and Nighttime Safety Light Setups
- Bicycle Light Buying Guide: Lighting Solutions to Keep You Safe in the Dark
趣味單車配件:多功能智慧尾燈 / 有方向燈 可app編輯圖案!? / GRC x Lumii 聯名款 / 公路車 CT Yeh
9 個月前
#公路車 #Fitting 靠人工智慧APP 幫你調整單車
6 年前
雷達尾燈 雷不雷? 邁金L508 智慧雷達尾燈 情境考驗實測 | 同場加映 2千元等級的專業車錶 C406 Pro | 公路車 | CT Yeh
3 年前
單車小配件 GRC和wagii聯名智慧尾燈 #公路車
9 個月前
Insta360/DJI做不到的!如何製作「騎士頭頂瓦數特效」單車影片?CycleDash 完整教學 / 超強批次影片數據疊加軟體
11 天前
Garmin Edge 540/840 Solar 台灣首發開箱!完整車錶功能 道路實測 / ClimbPro 爬坡提示超級牛 / 強大續航實測 / 公路車 / CT Yeh
3 年前
單車胎壓觀察到的有趣現象,SRAM Quarq TyreWiz 2.0 無內胎胎壓計 / 裝了有哪些幫助? / Tubeless / 公路車 / CT Yeh
1 年前
2023自行車展!與環台賽選手一同表演賽 / 全自動AI Fitting?/ TIME新車發表/神秘充電桌等 精華分享 VLOG | CT Yeh | 公路車
3 年前