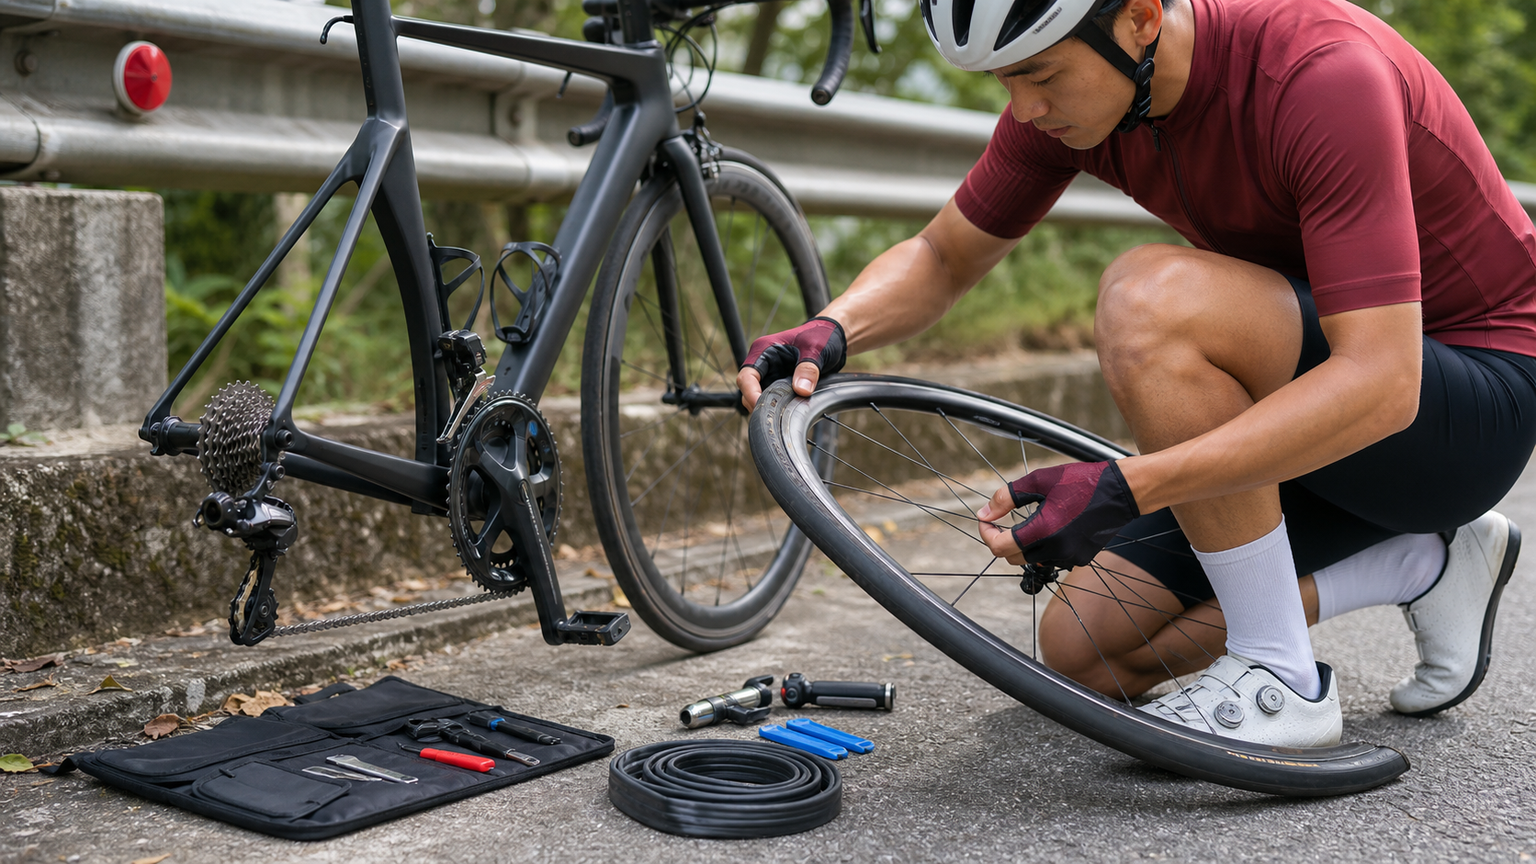
Basic Road Bike Maintenance: Tire Replacement, Gear Adjustment, and Brake Tuning Guide
Every road cyclist should master basic bicycle maintenance skills. Not just to save money, but to be able to help yourself when you get a flat or experience a mechanical failure out on the road. This article provides clear step-by-step instructions for the three most common and most important maintenance tasks.
1. Changing an Inner Tube by the Roadside (Flat Tire Repair)
A flat tire is the most common roadside situation for road cyclists. Master the correct steps and you can usually finish within 10 minutes.
Tools Required
- Spare inner tube (same specification as the tire)
- Tire levers × 2
- Pump (CO₂ inflator or hand pump)
- Thin cotton gloves (optional, to keep your hands clean)
Steps
Step 1: Stop and Check Safety
Pull over to the right, away from traffic, turn on your front and rear lights (if equipped), and avoid stopping on curves or in areas with poor visibility.
Step 2: Release the Brake Quick-Release
Road bike brakes usually have a quick-release function that allows the wheel to pass through:
- Rim brakes: Pull out the brake cable quick-release tab to open the caliper
- Disc brakes: This step is not needed
Step 3: Remove the Wheel
- Turn the quick-release lever (QR Lever) counterclockwise
- For the rear wheel, first shift to the smallest cog, then push the wheel downward and backward
- The front wheel is simpler: open the quick-release and pull it straight down
Step 4: Separate the Tire from the Rim
- Fully deflate the inner tube (for Presta valves, loosen the top nut first)
- Hook the tire lever under the tire bead and pry it over one side of the rim
- Slide the second lever forward to pry the entire side of the tire off the rim
Step 5: Remove the Old Tube and Inspect the Tire
- Before removing the old tube, mark the valve position to help locate the puncture point
- Run your fingers carefully along the inside of the tire to find the puncturing object (glass shards, nails, etc.)
- If the tire is severely damaged (tear larger than 5mm), it needs to be replaced as well
Step 6: Install the New Inner Tube
- Put a small amount of air into the new tube (just enough to give it shape, do not fully inflate)
- Insert the valve into the valve hole in the rim first
- Tuck the entire tube inside the tire around the rim
- Starting from the side opposite the valve, use both thumbs to push the tire bead back onto the rim
- The last section may be tight; if using a tire lever, be very careful to avoid pinching and puncturing the tube again
Step 7: Inflate
- Road bike tire pressure is typically 90–120 psi (depending on rider weight and tire markings)
- CO₂ cartridge: one cartridge is usually enough to fill one road bike tire
- Once inflated, tap the tire with your fingernail—it should sound crisp and springy
Step 8: Reinstall the Wheel
For the rear wheel, make sure the chain is seated on the correct cog; for the front wheel, make sure the disc rotor is aligned with the caliper. After tightening the quick-release, tug on the wheel to confirm it is secure.
2. Rear Derailleur Adjustment (Fixing Shifting Issues)
Rear derailleur adjustment falls into two categories:
A. Cable Slack Causing Poor Shifting
Symptoms: When pedaling, you try to shift to a larger cog (easier) but it won’t shift up, or it skips gears when shifting to a smaller cog (harder)
Adjustment Method:
- Locate the “Cable Tension Adjuster” at the rear of the derailleur
- Turn counterclockwise (increase tension): Fixes difficulty shifting to larger cogs
- Turn clockwise (decrease tension): Fixes chain drop or shifting too quickly
- Adjust in 1/4-turn increments and test while riding
B. Limit Screw Adjustment (H/L Screws)
H Screw (High, smallest cog): Controls the maximum outward travel of the derailleur
- If the chain drops off the smallest cog to the outside: Tighten the H screw clockwise
- If shifting to the smallest cog is not smooth: Loosen the H screw counterclockwise
L Screw (Low, largest cog): Controls the maximum inward travel of the derailleur
- If the chain drops off the largest cog to the inside: Tighten the L screw clockwise
3. Brake Adjustment
Rim Brake Adjustment
Check Brake Pad Contact Position:
- Correct position: Brake pads make full contact with the rim braking surface, with the top edge about 1–2mm below the tire bottom
- Brake pad wear line: Replace immediately when the groove disappears
Adjusting Brake Pad Height:
- Loosen the brake pad fixing bolt (usually a 5mm hex bolt)
- Reposition and retighten
- Squeeze the brake lever by hand to confirm even contact
Adjusting Brake Clearance (Left-Right Balance):
- There is usually a small screw on top of the caliper (centering screw)
- Turn clockwise: Moves the caliper to the left
- Turn counterclockwise: Moves the caliper to the right
Basic Disc Brake Adjustment
Causes of Disc Brake Rub:
The most common cause of disc brake rub is caliper misalignment (the rotor is biased to one side):
- Loosen the caliper mounting bolts (do not remove them completely)
- Slowly spin the wheel to let the rotor self-center
- Lightly squeeze the brake lever to clamp the caliper, and tighten the mounting bolts while holding this position
- Test to see if the rubbing sound is gone
Tool Selection Recommendations
| Tool | Recommended Model | Price |
|---|---|---|
| Floor Pump | Topeak Joe Blow Sport III | NT$1,200–1,800 |
| Mini Pump | Lezyne Road Drive | NT$800–1,200 |
| Hex Wrench Set | Park Tool AWS-10 | NT$600–1,000 |
| Multi-tool | Crank Brothers M19 | NT$1,200–1,800 |
Master these three basic maintenance skills and you can handle any situation on any road in Taiwan on your own. Part of cycling confidence comes from a sense of control over the machine.
Related Reading
- Road Bike Tire Change in Practice: On-the-Spot Repair for Tubular and Tubeless Tires
- Complete Guide to Replacing Inner Tubes and Patching Tires: From Tools to Techniques
- Bicycle Flat Tire First Aid: The Complete SOP for Roadside Tube Replacement and Patching
- Bicycle Tire Replacement in Practice: The Complete Process from Puncture Repair to Tire Change
碟煞公路車 銑面器 !? 原來銑完差這麼多! 降低蹭碟機率! | TIME 公路車 保養小記錄 | CT Yeh
3 年前
碟煞公路車 優缺點?換車一年半實際經驗分享 / 公路車 / CT Yeh
2 年前
公路車 BB培林大升級! / 備戰海鷗繞圈賽 Canyon Aerod & TIME 一起改 / MIT大廠 CEMA對鎖式陶瓷培林BB & 導輪 / 公路車 / CT Yeh
2 年前
Canyon 公路車斷把手 五年老車特規還能修嗎? 維修保養全記錄 feat. 501單車監理站 | 公路車 | CT Yeh
4 年前
DJI OSMO 360單車攝影 教學&技巧分享 / 概念、攝影手法、架設、後製 / 公路車 / CT Yeh
10 個月前
公路車 爬坡 破PR 紀錄 小技巧 分享
6 年前
#公路車 #Fitting 靠人工智慧APP 幫你調整單車
6 年前
摔車後補裝備: 好市多新款單車安全帽& Specialized Romin 北高整路屁股都不痛的坐墊 | 一千元居然有MIPS | CT Yeh | 公路車
4 年前