Introduction
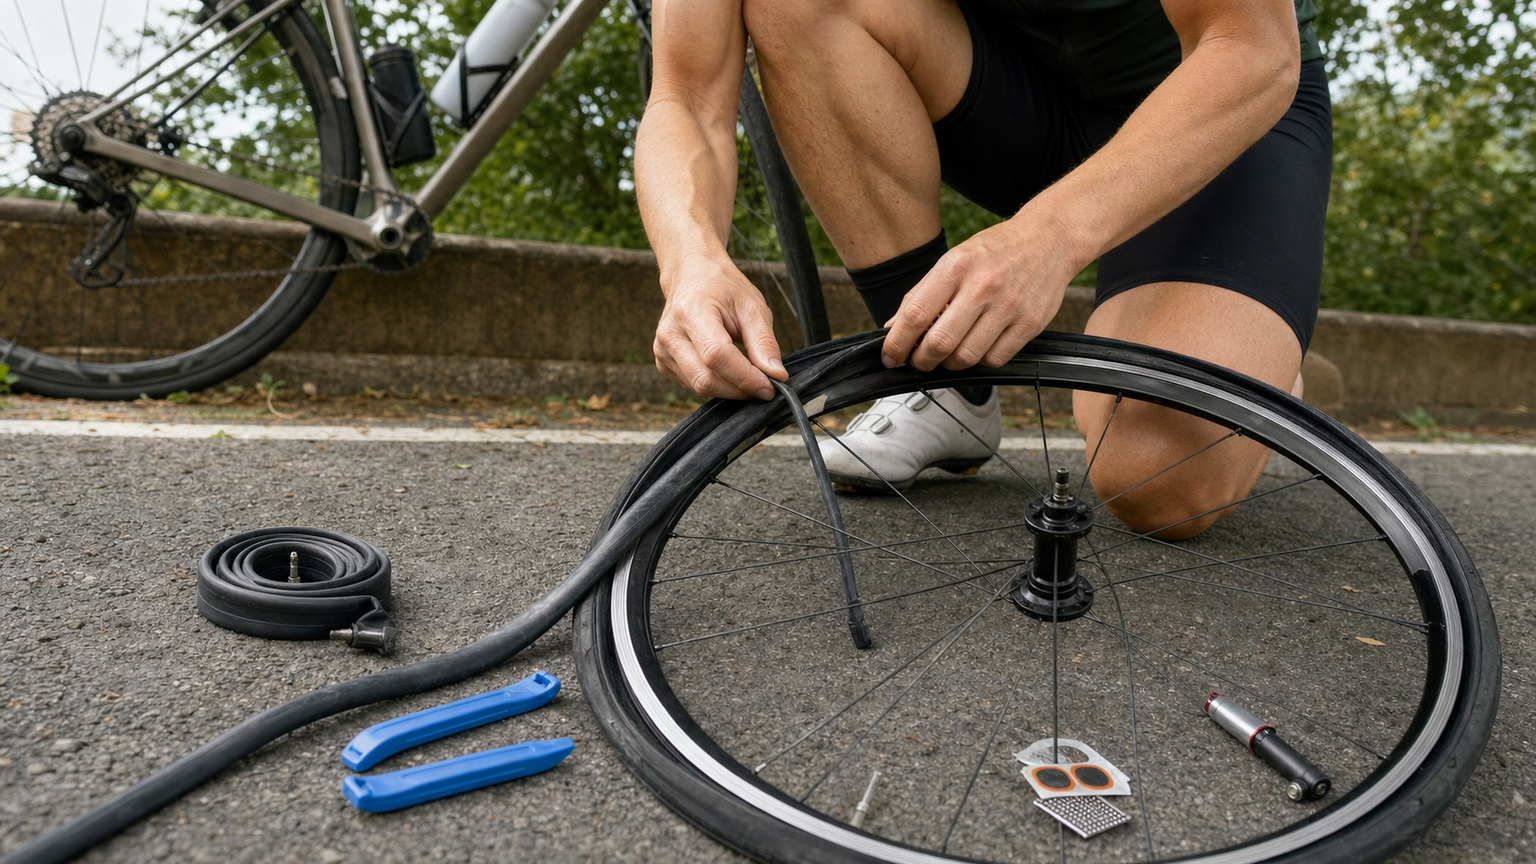
Road surface quality in Taiwan varies widely—mountain roads occasionally have falling rocks, and cities have manhole cover edges. Road bikes with narrow, high-pressure tires are prone to flats when encountering these obstacles. Many cyclists panic when faced with their first roadside flat, some even resorting to walking their bikes for help. In reality, replacing an inner tube requires only three tools, and once you’re proficient, it takes no more than 10 minutes.
This article details the steps and precautions for replacing and patching tubes, focusing on the most common high-pressure road bike tires in Taiwan (700C, 23–32 mm width).
Replacing with a New Inner Tube: Tool Preparation
| Tool | Purpose | Notes |
|---|---|---|
| Tire Levers ×2 | Removing the tire | Plastic material to avoid scratching the rim |
| Spare inner tube ×1 | Direct replacement | Faster than patching at the roadside |
| Pump (CO₂ cartridge) | Inflating | Lightweight CO₂ is ideal for roadside emergencies |
| Pressure gauge (optional) | Confirming pressure | Digital gauges are the most accurate |
Replacing with a New Inner Tube: Complete Steps
Removing the Wheel
- First, shift the rear derailleur to the smallest cog (to slacken the chain), then open the quick-release or loosen the axle nuts.
- When removing the rear wheel, gently press the rear derailleur while pulling the wheel backward; the chain will naturally disengage from the cassette.
- For disc brake models, be careful not to touch the rotor, and insert a brake pad spacer to prevent accidental squeezing of the calipers.
Deflating and Removing the Tire
- Fully deflate: For Presta valves, loosen the top nut and press down; for Schrader valves, press down with a key or a thin stick.
- Insert two tire levers between the rim and the tire bead, then pry outward to lift a section of the tire over the rim.
- Work one side of the tire bead off the rim all the way around; the other side can usually be pushed off by hand.
- Remove the old inner tube, and first locate the puncture (using the water immersion method or listening closely for the hiss of escaping air).
Installing the New Inner Tube
- Put a small amount of air into the new inner tube first (about 20–30 psi) so it takes a round shape, preventing it from getting twisted during installation.
- Insert the valve through the valve hole in the rim, then tuck the inner tube between the tire and the rim along one side.
- After confirming the inner tube is not twisted or folded, press the tire bead with the palm of your hand and work it back onto the rim all the way around.
- The last 10–15 cm will be tighter; use the heel of your palm to push it over. Do not use tire levers to force the bead back on—you risk pinching and puncturing the inner tube.
Inflating and Confirming
- Inflate to the recommended pressure (usually printed on the tire sidewall).
- Spin the wheel and visually check that the bead line is evenly seated on the rim. If a section appears sunken, deflate and reseat it by pushing firmly.
- Reinstall the wheel, confirm the quick-release or axle is tightened, and take a test ride to ensure there are no unusual noises.
Patching (Repairing): For When You’ve Run Out of Spare Tubes
Patching is a temporary solution suitable when you’ve used up your spare tubes on a trip or when you’re near a bike shop.
Cold Patch Steps
- Locate the puncture and lightly sand an area about 3 cm around the hole (to remove the oxidized surface layer).
- Apply an even coat of rubber cement and let it sit for 2–3 minutes until the glue turns hazy (semi-dry).
- Peel the backing off the patch, place it over the hole, and press firmly with your fingers for 1 minute, working from the center outward.
- Peel off the thin film on top of the patch and confirm the edges are fully adhered.
- Inflate and test to confirm there are no leaks.
Common Reasons for Patch Failure
- The area wasn’t sanded, so the glue couldn’t adhere
- The patch was applied before the glue was semi-dry (too wet)
- The patch edges weren’t pressed down firmly, allowing air to seep in from the edges
- The puncture is larger than 5 mm or is a slash-type cut, which is beyond the scope of cold patching
Practical Tips
- While 7-Eleven convenience stores in Taiwan have air pumps, most are Schrader (American) valves. Road bike Presta (French) valves require a separate adapter—keep one in your tool bag.
- For long rides, it’s recommended to carry 2 spare tubes, as consecutive flats on Taiwan’s mountain roads are not uncommon.
- Practice changing tubes at home 2–3 times to get familiar with how tight your specific tire is. Rushing at the roadside often leads to mistakes.
- After changing a tube, be sure to find the original cause of the flat when you get home: if glass shards or nails remain embedded in the tire, they will puncture the new tube as well.
Conclusion
Tire changing is the most fundamental and practical skill in all of road cycling. Mastering it gives you the confidence to handle any road condition independently, without relying on others for rescue. Practice at home a few times and get your tire change time under 10 minutes—it’s a milestone for every serious cyclist.
Related Reading
- Emergency Flat Tire Handling: A 10-Minute Guide to Quick Inner Tube Replacement on a Ride
- Bicycle Tire Replacement in Practice: The Complete Process from Puncture Repair to Tube Replacement
- Road Bike Tire Replacement in Practice: On-the-Spot Repair for Tubular and Tubeless Tires
- Bicycle Flat Tire First Aid: The Complete SOP for Roadside Inner Tube Replacement and Patching
再一組! 全碳幅條 碟煞/無內胎輪組 開箱! 到底好騎嗎? UNAAS X40 | 公路車 | CT Yeh
4 年前
碟煞公路車 銑面器 !? 原來銑完差這麼多! 降低蹭碟機率! | TIME 公路車 保養小記錄 | CT Yeh
3 年前
單車胎壓觀察到的有趣現象,SRAM Quarq TyreWiz 2.0 無內胎胎壓計 / 裝了有哪些幫助? / Tubeless / 公路車 / CT Yeh
1 年前
單車 一日北高 ( 雙城 ) 肥宅雙人瘋狂行 紀錄片 REACTO
10 年前
碟煞公路車 優缺點?換車一年半實際經驗分享 / 公路車 / CT Yeh
2 年前
#公路車 #西進武嶺 配速配瓦實驗 坡度分析 四小時內攻略 建大盃 NeverStop #西進武嶺攻略
6 年前
爬陡坡被爆胎的車友跑步超車 #cycling #里佳部落
9 個月前
公路車 BB培林大升級! / 備戰海鷗繞圈賽 Canyon Aerod & TIME 一起改 / MIT大廠 CEMA對鎖式陶瓷培林BB & 導輪 / 公路車 / CT Yeh
2 年前