Introduction
Tubeless systems have been widely adopted in the mountain biking community for years, and have recently gained increasing popularity among road cyclists in Taiwan. Compared to traditional inner tube systems, the advantages of Tubeless include: lower tire pressure for better grip (especially on wet and slippery roads in Taiwan’s mountainous areas), automatic sealing of small punctures, and eliminating the risk of pinch flats.
However, Tubeless systems also come with higher maintenance complexity. Sealant needs to be replenished regularly; if neglected for a long time, dried rubber particles not only lose their sealing function but can also compromise the bead seal. This article teaches you how to establish a Tubeless maintenance SOP so you can truly harness the benefits of this system.
Tubeless System Components
| Component | Function | Notes |
|---|---|---|
| Tubeless Ready Rim | Tighter rim bead design | Verify the rim supports TLR |
| Tubeless Valve | Replaces traditional inner tube valve | Tighten the locknut to ensure a seal |
| Rim Tape | Seals the rim holes | Must completely cover every spoke hole |
| Tubeless Tire | Tighter bead design | Confirm TLR or Tubeless marking |
| Sealant | Automatically seals punctures | Replenish every 3–6 months |
First-Time Tubeless Installation
Steps
- Apply rim tape: Starting next to the valve hole, wrap around the entire rim and overlap by 5 cm. The rim tape must be completely smooth, with no bubbles or lifting, otherwise sealant will seep through the gaps.
- Install the valve: Insert through the valve hole and tighten the locknut, making sure the rubber gasket at the valve base sits snugly against the rim tape.
- Mount one side of the tire: Push one side of the tire fully into the rim, confirming the bead sits into the rim channel.
- Inject sealant: Use a syringe to inject through the valve, or pour it into the tire before fully mounting the other side (the flip method). Recommended amounts: approximately 25–30 ml for 700x25C, and 35–45 ml for 700x32C.
- Mount the other side of the tire: The final section is the tightest; use the heel of your palm to apply force, and avoid using metal tire levers that could scratch the bead.
- Inflate to seat the bead: Use a high-volume floor pump or CO₂ for rapid inflation to snap the bead into the rim’s bead seat. If the bead won’t seat, use a tubeless inflator.
- Shake the wheel: After inflation, shake the wheel by hand to distribute the sealant evenly across the entire tire surface.
Preventive Liquid Refilling (Routine Maintenance)
Taiwan’s summer heat accelerates evaporation of the water content in sealant. It is recommended to check the liquid level every 3 months (every 2 months in summer):
How to Check the Liquid Level
- Remove the valve core and probe into the valve with a thin string or syringe needle to see if liquid is present.
- If you can’t hear liquid sloshing when shaking the wheel, or if opening the tire reveals a large amount of dried rubber particles inside, it’s time to top up.
Refilling Methods
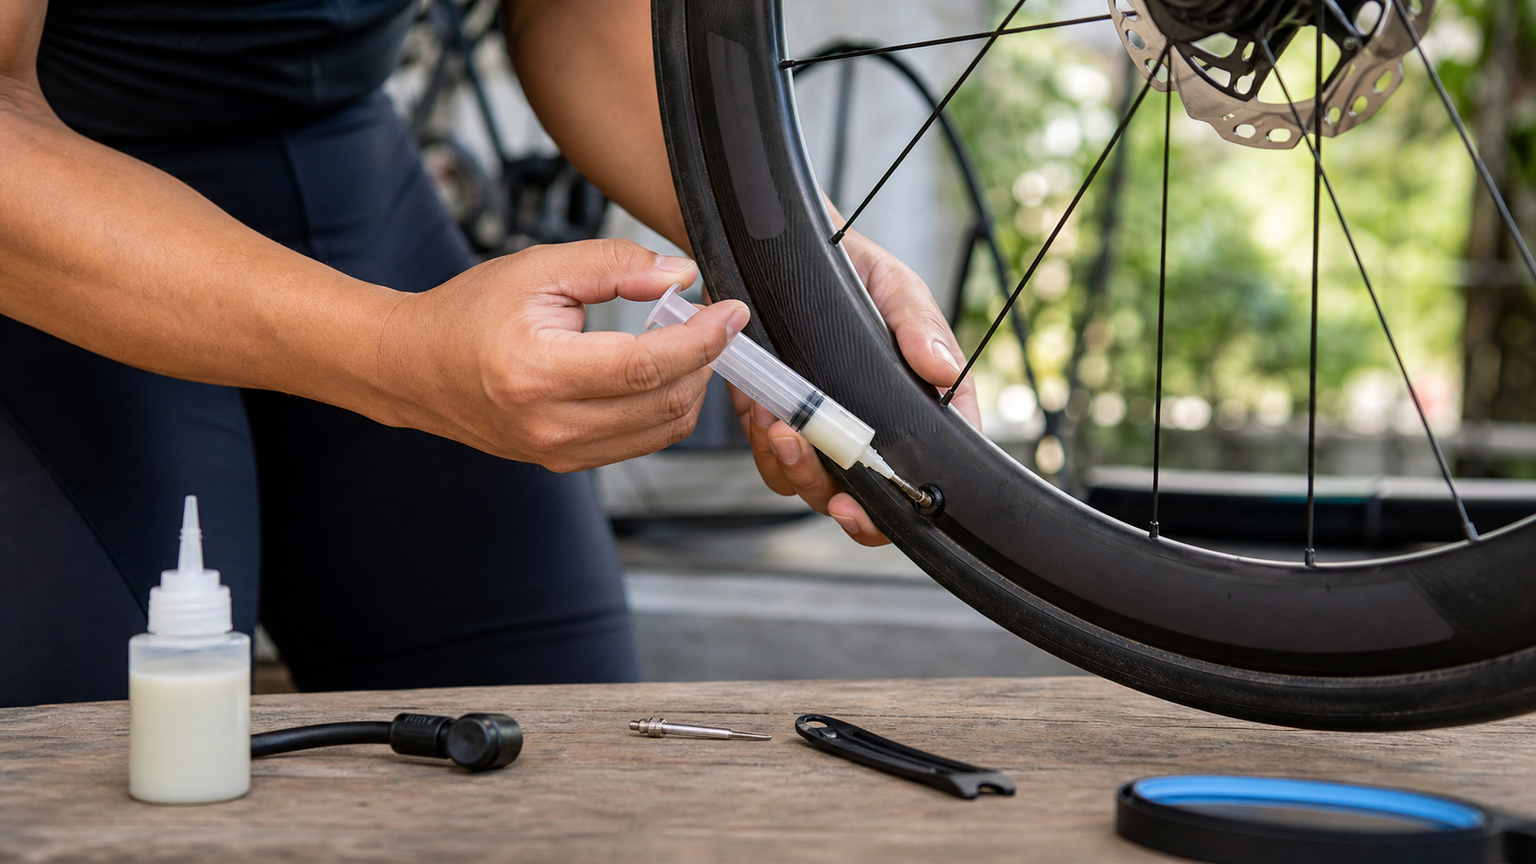
- Syringe method: Use a dedicated sealant syringe to inject through the valve without removing the tire—the most convenient option.
- Tire removal method: If there are too many dried particles, remove the tire to clean out the dried residue, then inject fresh sealant.
Roadside Emergency Puncture Repair
Most punctures smaller than 4–6 mm can be automatically sealed by the sealant within 1 minute. Steps:
- Pull out the puncturing object (if still embedded in the tire).
- Rotate the wheel so the puncture site is at the 6 o’clock position, allowing the liquid to flow toward the hole.
- Inflate slightly (if all air has escaped) and wait for the sealant to do its job (about 30 seconds to 1 minute).
- Inflate back to the recommended pressure and observe whether air continues to leak.
If the hole is too large for the sealant to seal, you can use a tubeless plug inserted from the outside to stop the leak. This has become the mainstream method for roadside repairs in recent years and is recommended for your on-bike tool kit.
Practical Tips
- Tubeless consumables are available at major bike shops in Taiwan. Sealant brands such as Stan’s NoTubes and Orange Seal are distributed locally and are also sold on Shopee.
- Store opened sealant in a cool place to prevent high temperatures from accelerating separation; if bottled sealant already contains many dried particles, discard it and replace with a new bottle.
- For your first attempt, it’s recommended to have a shop mechanic experienced with Tubeless installation handle it, and observe the process once before trying it yourself.
Conclusion
Tubeless systems require more maintenance knowledge than traditional inner tubes, but once you establish a maintenance SOP, you can greatly enhance riding comfort and safety. Especially in Taiwan’s environment of mountainous terrain and slippery roads, the low-pressure advantages of Tubeless truly shine.
Related Reading
- The Complete Guide to Tubeless Systems: Tubeless Setup, Sealant, and Common Questions
- The Complete Guide to Tubeless Systems: Installation, Sealant, and Daily Maintenance
- MTB Tubeless Setup Guide: Say Goodbye to Pinch Flats and Embrace Low-Pressure Control
- The Complete Road Bike Tubeless Guide: Conversion, Sealant, and Maintenance Workflow
單車胎壓觀察到的有趣現象,SRAM Quarq TyreWiz 2.0 無內胎胎壓計 / 裝了有哪些幫助? / Tubeless / 公路車 / CT Yeh
1 年前
再一組! 全碳幅條 碟煞/無內胎輪組 開箱! 到底好騎嗎? UNAAS X40 | 公路車 | CT Yeh
4 年前
西進武嶺 自製新版AI配速表產生器 x 賽前攻略 抱佛腳! 沒有功率計也可以產生配速表嗎?有什麼其他眉角賽前要注意的呢? | 西進武嶺 / 東進武嶺 KOM 攻略 | 公路車 | CT Yeh
4 年前
西進武嶺配速器 3.0更新 / NEW 免功率FTP估算! / 大數據xAI體能模型 / 如何模擬人止關前集團效應 / 配速儲存功能 / AI全台自行車賽事行事曆 / 公路車 / CT Yeh
1 年前
公路車 BB培林大升級! / 備戰海鷗繞圈賽 Canyon Aerod & TIME 一起改 / MIT大廠 CEMA對鎖式陶瓷培林BB & 導輪 / 公路車 / CT Yeh
2 年前
#公路車 #西進武嶺 配速配瓦實驗 坡度分析 四小時內攻略 建大盃 NeverStop #西進武嶺攻略
6 年前
鉅齒紋輪組!? ControlTech MEG-T50 EVO 碳纖維幅條輪組/ 功率對比實驗 / 公路車 / CT Yeh
2 年前
碟煞公路車 銑面器 !? 原來銑完差這麼多! 降低蹭碟機率! | TIME 公路車 保養小記錄 | CT Yeh
3 年前