Introduction
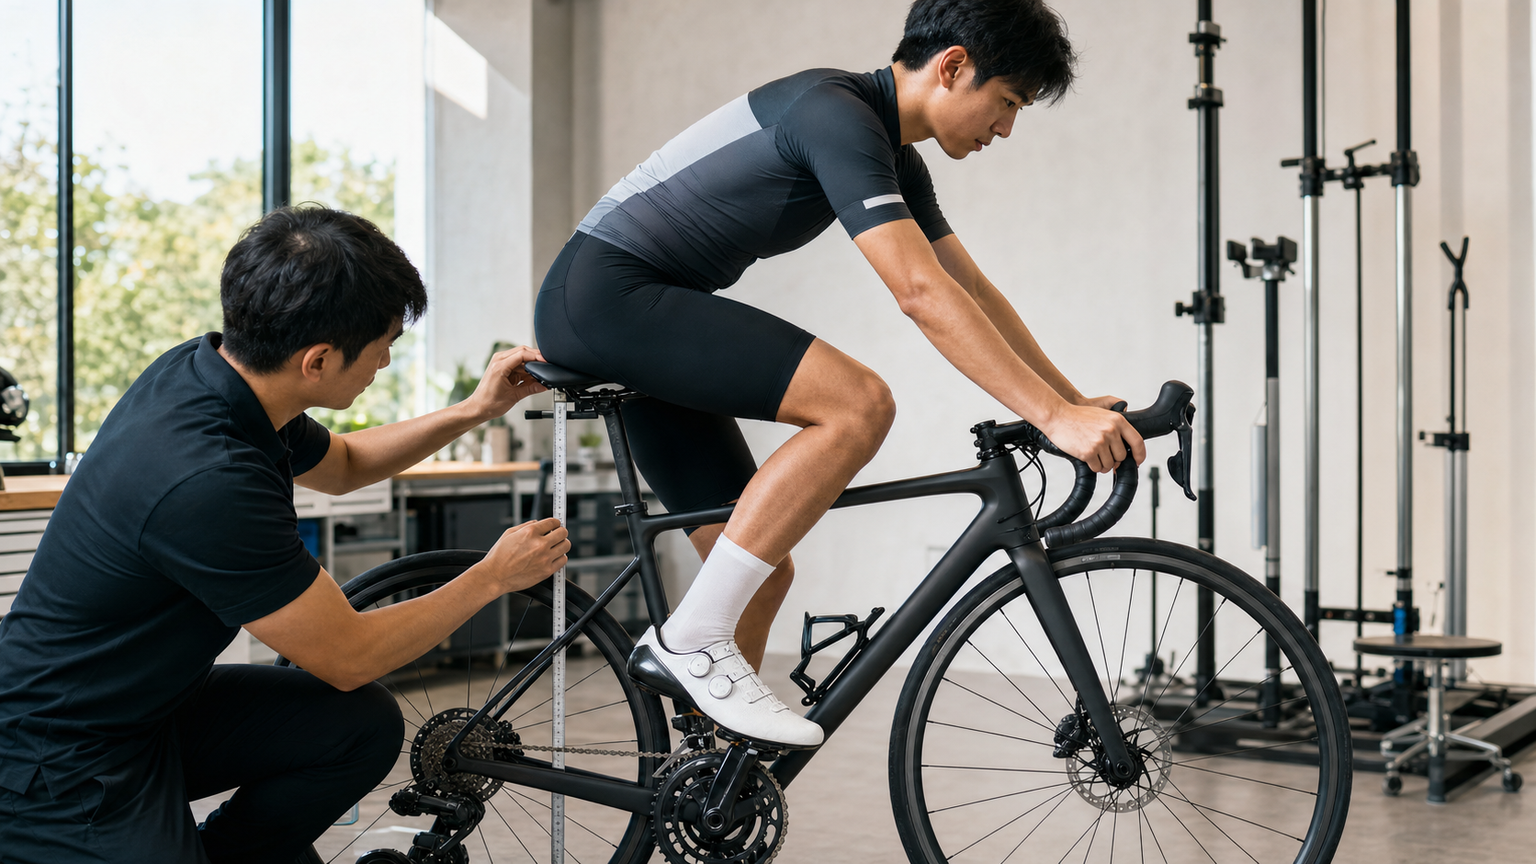
Every serious cyclist will eventually face the question: “Is my bike set up correctly?” Pain in the front or back of the knee, neck tightness after long rides, and numbness in the wrists are often not caused by overtraining, but by improper bike setup. Bike Fit is the process of systematically measuring and dynamically analyzing a rider’s position to adjust the bicycle to best match their individual biomechanics. This article starts with the core parameters to help Taiwanese cyclists understand the scientific foundation of Fit.
The Core Philosophy of Bike Fit
When a human rides a bicycle, there are three contact points:
- Pedals: The primary point of power output
- Saddle: The main support point bearing body weight
- Handlebar: Steering and partial weight distribution
The goal of Bike Fit is to position these three contact points so that the rider can ride in the most efficient posture without placing unnatural stress on joints, muscles, and nerves.
Saddle Height: The Most Critical Single Parameter
Saddle height is the parameter with the greatest impact on pedaling efficiency and knee joint health.
Common saddle height calculation methods:
| Method | Formula | Characteristics |
|---|---|---|
| Inseam × 0.883 | Inseam length (floor to crotch) × 0.883 | The most widely used entry-level formula |
| Holmes Method | Knee flexion angle of 25-35° at bottom dead center | Dynamic analysis, more precise |
| LeMond Method | Femur length × 0.883 (from BB center to saddle top) | Suitable for those with long legs and short torsos |
| Dynamic video analysis | 3D motion capture system measurement | Most accurate, used in professional Fit |
Symptoms of a saddle that is too high:
- Pelvis rocking side to side while riding (hip rocking)
- Pain behind the knee (hamstring)
- Excessive ankle pointing downward at the bottom of the pedal stroke (toe down)
Symptoms of a saddle that is too low:
- Pain in the front of the knee (patellar tendon)
- Feeling of weak pedaling, unable to fully extend the legs
- Excessive fatigue in the front of the thigh (quadriceps) after long rides
Practical measurement recommendations:
The simplest self-test: while stationary, rotate the pedal to its lowest point (6 o’clock position), place your foot flat (pedal center under the ball of the foot), and your knee should have a flexion angle of approximately 25-30°. This is only an initial baseline; dynamic analysis during actual riding is more accurate.
Setting Reach
Reach refers to the horizontal distance from the saddle to the top of the handlebar, determining the rider’s forward lean angle and degree of arm extension.
Insufficient reach (handlebar too close):
- Riding posture too upright, increasing aerodynamic drag
- Elbow angle too large, poor shock absorption
- Core bears insufficient body weight, ironically leading to lower back fatigue
- Steering overly sensitive (shortened wheelbase with less reach)
Excessive reach (handlebar too far):
- Requires excessive forward lean, causing neck and shoulder tension
- Too much weight on the wrists
- Compressed breathing space (especially for those with insufficient torso flexibility)
Determinants of reach:
Reach is determined by the frame’s Reach (horizontal distance from head tube center to BB center) plus stem length. The primary tool for adjusting reach is changing the stem (commonly 60-130mm, with every 10mm having a significant effect on riding posture). A common misconception among Taiwanese cyclists is that “a fitting frame means a fitting bike”—after determining frame size, reach still needs fine-tuning through stem length.
Pivot Point Adjustments
The pivot point is a more advanced concept in Bike Fit, referring to the trajectory and efficiency of the knee as it rotates with the pedal during pedaling. Three main adjustments affect the pivot point:
1. Saddle Fore/Aft Position:
Traditional recommendation: when the pedal is at the 3 o’clock position, the center of the patella should be vertically aligned with the pedal spindle (KOPS, Knee Over Pedal Spindle principle). However, modern Fit research considers KOPS overly simplistic, and adjustments should be made dynamically based on the rider’s femur length and power goals.
- Saddle further back: increases the knee’s extension arc over the pedal, beneficial for producing high power, but increases the load on the hip flexors
- Saddle further forward: knee positioned more directly over the pedal, with higher reliance on the quadriceps, suitable for high-cadence riding
2. Cleat Rotation:
The rotation angle of the pedal cleat determines the direction the toes point. If a rider whose toes naturally point outward is forced into a straight position, it can cause inward rotational stress on the knee. It is recommended to let the foot find its natural position on pedals with appropriate float (yellow or Look KEO wide float), then fix the cleat to that angle.
3. Cleat Medial/Lateral Position (Q-Factor Adjustment):
Q-Factor is the distance between the outside of the two crank arms. Differences in hip joint width between individuals affect the optimal distance between the feet. Using cleat shims of different thicknesses, or choosing cranks with different Q-Factors, can fine-tune the pedaling path.
Common Fit Issues Among Taiwanese Cyclists
Based on clinical observations from Taiwanese Fit specialists, the most common issues are:
- Saddle too low: The psychological fear of “not being able to reach the ground with a high saddle” leads to a higher proportion of saddles set too low, which is the primary cause of anterior knee pain
- Stem too short: Overly conservative choices at the time of purchase result in an overly upright riding posture, causing more fatigue on long rides
- Cleat position never adjusted: Cleats are installed directly after buying cycling shoes, never fine-tuned based on knee comfort
- Ignoring hip flexibility: Those with insufficient flexibility force themselves into aggressive forward-leaning postures, leading to chronic excessive tension in the back and neck
The Professional Bike Fit Process
A complete professional Bike Fit typically includes:
- Consultation: Riding history, injury history, primary riding goals
- Static measurements: Femur length, torso length, arm length, shoulder width, foot morphology
- Static bike adjustments: Initial setup of saddle height, saddle fore/aft, stem length
- Dynamic riding analysis: Video recording (side and rear views), analyzing knee trajectory, pelvic stability, lumbar angle
- Fine-tuning and confirmation: Adjustments based on dynamic analysis results, confirming comfort after adjustments
- Report output: Recording all adjustment data for future reference
Professional Bike Fit services in major Taiwanese cities typically cost approximately NT$3,000-8,000. Considering the maximization of equipment effectiveness and the long-term benefits of injury prevention that a proper Fit provides, this is an extremely valuable investment.
Practical Recommendations
- Prioritize a Bike Fit: It is recommended to have a Fit confirmation both before and after changing bikes or new equipment (integrated handlebars, specialized saddles)
- Self-observation checklist: During rides, pay attention to whether the pelvis rocks, whether the knees deviate from the pedal centerline, and whether the wrists bear excessive weight
- Make gradual adjustments: Do not exceed 5mm per adjustment, and allow an adaptation period (at least 2 weeks) after major changes
- Record current settings: Before making any Fit adjustments, document existing settings with photos and measurements for comparison and reversal purposes
Conclusion
Bike Fit is not a luxury service reserved only for professional racers, but fundamental knowledge that any cyclist who wishes to enjoy riding long-term and avoid sports injuries should understand. Correct settings for saddle height, reach, and pivot point allow every bit of pedaling energy to be precisely transferred into forward momentum while protecting your joints from unnecessary wear. This is the true science of achieving unity between rider and machine.
Related Reading
#公路車 #Fitting 靠人工智慧APP 幫你調整單車
6 年前
單車 一日北高 ( 雙城 ) 肥宅雙人瘋狂行 紀錄片 REACTO
10 年前
單車AI教練!全新 ChatGPT4o 幫你分析訓練成果!排武嶺課表,分析騎車姿勢! 太神了! / 公路車 / CT Yeh / feat. 緯緯
2 年前
一日北高常見問題大集合 | 攻略 | 路線 | 訓練 | 補給 | 自行車 單車 | 一日雙城 | 雙塔 | TWB北高360 | 屁股痛
6 年前
Fitting訓練兩用功率車 ! Thinkrider ST900 完整實測!/ 坡度升降 / 鄰居測試/ smart bike/公路車/ CT Yeh
2 年前
一日北高/長距離團騎 常見問題補充篇 / 組團或跟團的眉角 / 壯車友容易被瘦車友慢性拉爆 / 原來屁股痛可能是這個原因...? / 風場配速法 / 公路車 / CT Yeh
2 年前
靠單車減肥35公斤 心得分享與整理
7 年前
公路車 BB培林大升級! / 備戰海鷗繞圈賽 Canyon Aerod & TIME 一起改 / MIT大廠 CEMA對鎖式陶瓷培林BB & 導輪 / 公路車 / CT Yeh
2 年前