Introduction
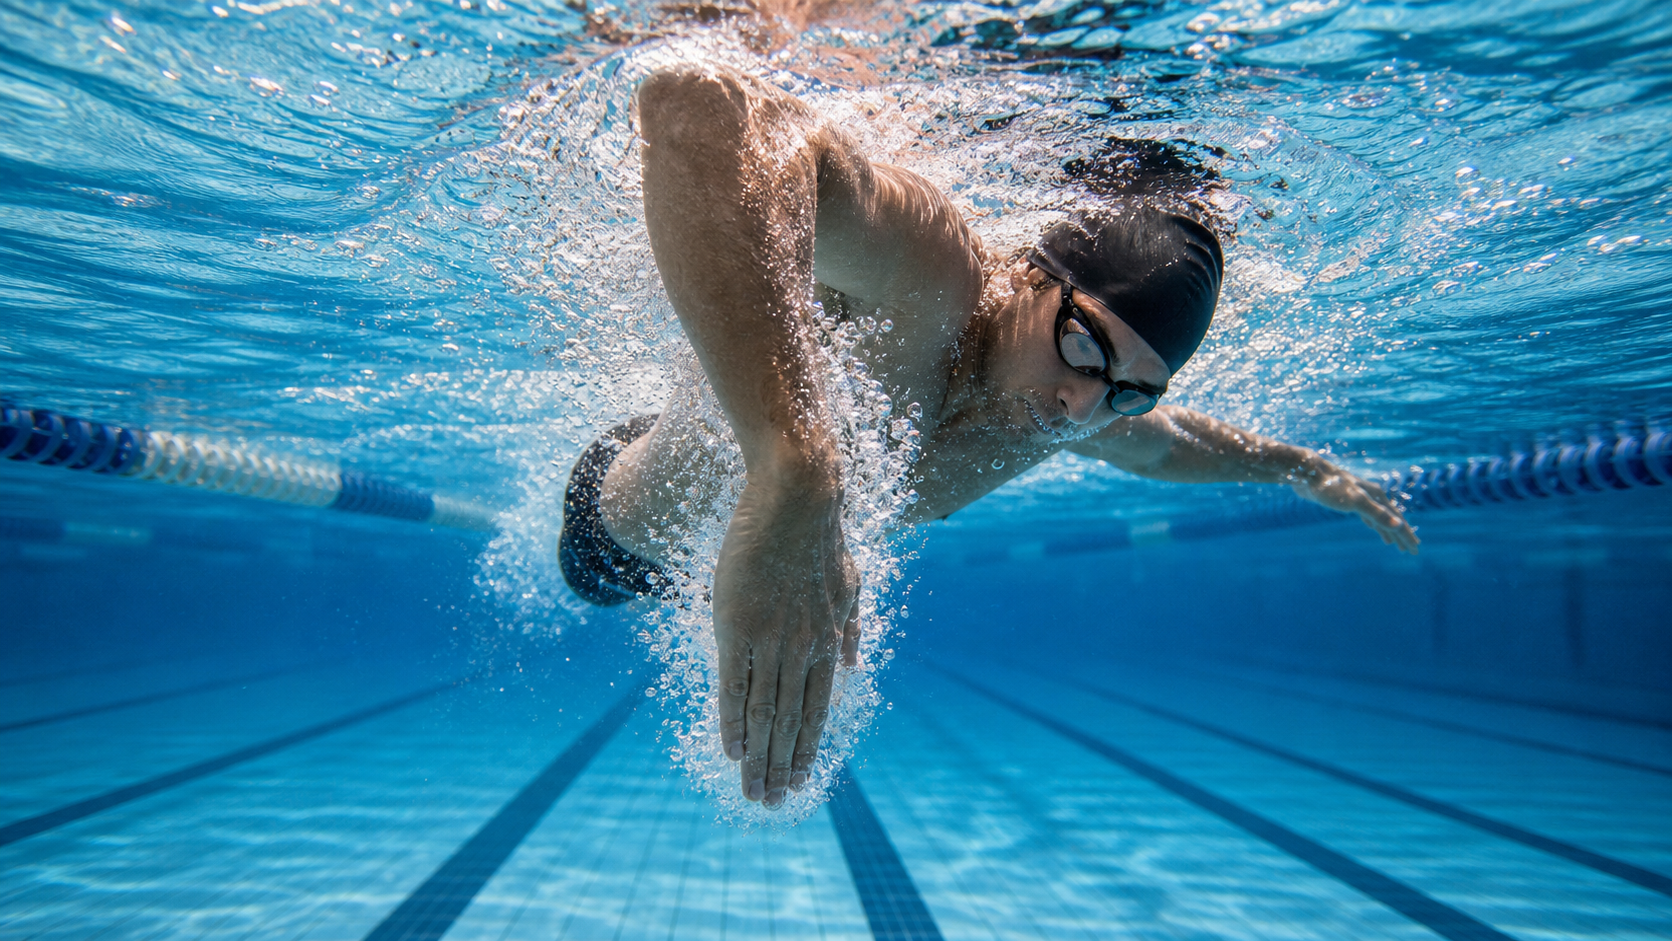
If you’ve watched Olympic freestyle swimmers’ underwater movements, you’ll notice their arms trace an elegant, powerful arc through the water—this is the “high-elbow pull” technique, also known as “Early Vertical Forearm (EVF).” Top swimming coaches call this technique “the highest level of water feel,” and it’s one of the most important technical differences separating recreational swimmers from competitive ones.
In Taiwan, more and more triathletes and swimming enthusiasts are beginning to value this technique. This article will break down the biomechanical principles of the high-elbow pull to help you build proper water feel.
What Is the High-Elbow Pull
Basic Concept
The high-elbow pull refers to maintaining a position during the catch phase of the stroke where the elbow is higher than the wrist, and the wrist is higher than the fingers. Viewed from the side, the forearm is nearly perpendicular to the water surface, forming a powerful “propulsive paddle surface.”
The traditional pulling technique (low elbow, or “pull-down style”) lets the elbow push downward first, with the forearm angled toward the bottom, which significantly reduces the effective propulsive surface area. The high-elbow technique, by contrast, turns the forearm into a vertical paddle, maximizing water capture and backward propulsion with every stroke.
High-Elbow vs. Low-Elbow Technique Comparison
| Technique Type | Effective Propulsive Surface | Shoulder Joint Stress | Stroke Efficiency | Learning Difficulty |
|---|---|---|---|---|
| Low Elbow (Traditional) | Low (forearm angled downward) | Low | Low–Medium | Easy |
| High Elbow (EVF) | High (forearm vertical) | Medium | High | Difficult |
| High Elbow + Body Rotation | Highest | Low (distributed) | Highest | Very Difficult |
High-Elbow Pull Movement Breakdown
Phase 1: Entry and Extension
After the hand enters the water at a 45-degree angle, the arm extends forward through the water—this movement is called the “Glide.” During extension, the palm stays facing down, the thumb side points outward, and the elbow is slightly bent, preparing for the upcoming catch.
Phase 2: Catch Phase—The Most Critical Step
This is the core of the entire high-elbow technique. The correct catch movement is:
- Wrist sinks first: The palm rotates downward and outward, as if “grasping” a ball
- Elbow stays high: The elbow must not drop; it should remain near shoulder height
- Forearm gradually becomes vertical: As the hand pushes backward, the forearm transitions from an angled position to perpendicular to the water surface
- Feel the water pressure: At this moment, the palm and forearm should feel distinct water pressure resistance—this is “water feel”
Phase 3: Pull & Push Phase
Once the forearm is vertical, use the latissimus dorsi and pectoralis major to push the water backward. The high-elbow position allows this force to translate directly into forward propulsion rather than being wasted in other directions.
Phase 4: Exit
When the push finishes near the thigh, the pinky side exits the water first, and the elbow leads the arm forward in the Recovery. Avoid slapping the water surface or creating splash during the exit.
Training Methods for Building Water Feel
1. Swim Bands Land Training
Use resistance bands to simulate the catch movement, focusing specifically on the sensation of “wrist bending down, elbow staying high.” Do 20 reps per set, 3–4 sets, before each training session.
2. Water Polo Ball Catch Drill
In the water, hold a larger water polo ball and practice catching with a high-elbow position. The ball’s resistance will give you a more intuitive sense of how elbow height affects propulsive efficiency.
3. Fist Drill
Swim with clenched fists, forcing yourself to rely on your forearms rather than your palms to feel water pressure. Immediately after fist swimming, switch to normal open-palm swimming, and you’ll clearly feel the increased propulsive surface from your palms, which helps enhance water feel.
4. Catch-Up Drill
One hand extends forward and waits while the other completes a full high-elbow stroke cycle before switching. This drill gives you ample time to focus on every detail of the catch movement.
Common Mistakes and Corrections
- Elbow “drops” to the side: After entry, the elbow flares outward, preventing the forearm from becoming vertical. Correction: Deliberately point the elbow toward the pool wall (rather than the pool bottom) during entry
- Wrist too stiff: A rigid wrist can’t bend down naturally, preventing proper catch angle. Correction: Practice wrist flexibility on land, imagining the wrist movement of “pouring tea”
- Rushing the push: Pushing backward before the forearm is vertical wastes the advantage of the catch. Correction: Practice “pause catch”—hold at the catch position for 0.5 seconds before pushing
- Excessive shoulder tension: Raising the shoulders causes stiff movements and reduces water feel. Correction: Do shoulder relaxation rotations before entering the water
Practical Advice
- The high-elbow technique requires strong rotator cuff muscles and latissimus dorsi; it’s recommended to supplement with dry-land training to strengthen these muscle groups
- Beginners will experience a temporary drop in speed when learning the high-elbow technique—this is normal, so don’t give up because of it
- Practice at low speed with high awareness each session; movement quality takes priority over speed
- The high-elbow technique breaks down most easily under fatigue, so pay extra attention to focus during the later stages of tiredness
- Swimming camps and triathlon clubs in Taiwan typically have underwater video equipment; it’s strongly recommended to periodically film your underwater movements for analysis
Conclusion
The high-elbow pull is one of the most difficult swimming techniques to master, yet one of the most rewarding. It’s not just a movement—it’s a way of perceiving water. When you truly master the high-elbow technique, you’ll begin to “feel” the pressure of water on your palm, and every stroke will feel like grabbing a fixed handle and pulling yourself forward. Once this water feel is established, it’s very hard to return to old, inefficient movements. Give yourself 3–6 months of deliberate practice, and the high-elbow technique will completely transform your swimming efficiency.
Related Reading
- Freestyle High-Elbow Pull (High Elbow Catch): The Most Important Stroke Technique
- Freestyle Stroke Technique: Modern Perspectives on High-Elbow Entry and S-Shaped Pull
- Freestyle “High-Elbow Entry” Technique: The Impact of Elbow Angle on Propulsive Efficiency
- Freestyle High-Elbow Catch Fully Deconstructed: The Mechanical Secrets from Entry to Push
CT 喇低賽) 武嶺牽車 才是王道 西進牽車四小時內秘訣 攝手位置 如何判斷 防抽筋小秘訣
7 年前
抖肩舞 台灣x日本交流版 (台灣 vs 前橋) 赤城山登山賽 coincidance
8 年前
西進武嶺 自製新版AI配速表產生器 x 賽前攻略 抱佛腳! 沒有功率計也可以產生配速表嗎?有什麼其他眉角賽前要注意的呢? | 西進武嶺 / 東進武嶺 KOM 攻略 | 公路車 | CT Yeh
4 年前
[教學] Premiere 影片 手震 修正 教學 防抖 單眼 影像 GoPro 穩定 Video Stabilization
8 年前
西進武嶺 免費訓練分析服務 Intervals | 練不夠還是練過頭?你哪一種類型選手?AI模型告訴你! | 備戰神器 | 公路車 訓練 | CT Yeh
4 年前
超激烈!2025 南庄仙山KOM 賽事精華 / 男菁英A x 女菁英A / 公路車 / CT Yeh
9 個月前
類空拍神器 Feiyu Pocket 2s (有優惠連結)三軸穩定 運動攝影機 開箱!比GoPro 還強的滑順視角!三小時長時間錄影 行車記錄器 | 環花東365實測 | 公路車 CT Yeh
4 年前
多機位拍片神器 DJI Action 2 拍出速度張力感 | 類空拍機視角 4陣列麥克風超強降風噪 實測! | 公路車 | CT Yeh
3 年前