Swimming Video Self-Analysis: Technical Diagnostic Methods for Above-Water and Underwater Filming
Introduction
Swimming is one of the few sports where you cannot see your own movements. Runners can use mirrors, and cyclists can watch their leg movements, but swimmers can only rely on “feel for the water”—and that feel varies from person to person, and is easily deceived by faulty perception.
Video Self-Analysis is the most effective tool to compensate for this shortcoming. Elite swimmers analyze their swimming footage every week; amateur swimmers who conduct a video analysis session once a month can also achieve significant technical improvements. This article provides a complete framework for camera setup, analysis, and corrective action planning.
Choosing Recording Equipment
Basic Requirements
- Waterproof camera: GoPro (Hero 11 and above) is the most popular choice; the wide-angle lens suits underwater shooting
- Waterproof phone case: Lower cost, but limited image quality and waterproof depth
- Mounting gear: Underwater camera mount (can be clipped to the pool edge), tripod (for above-water shooting)
- Minimum frame rate: 1080p / 60fps to ensure clear images during slow-motion analysis
Above-Water vs. Underwater Filming
| Camera Position | Analyzable Elements | Equipment Needed | Difficulty |
|---|---|---|---|
| Above water, side view | Arm recovery, breathing pattern, body undulation | Camera on deck | Low |
| Above water, front view | Hand entry width, body symmetry | Mounted at pool end | Low |
| Underwater, side view | Pull path, kick depth, body balance | Waterproof camera | Medium |
| Underwater, front view | Kick symmetry, core stability | Underwater camera | High |
Setting Up the Four Key Filming Angles
1. Above-Water Side View
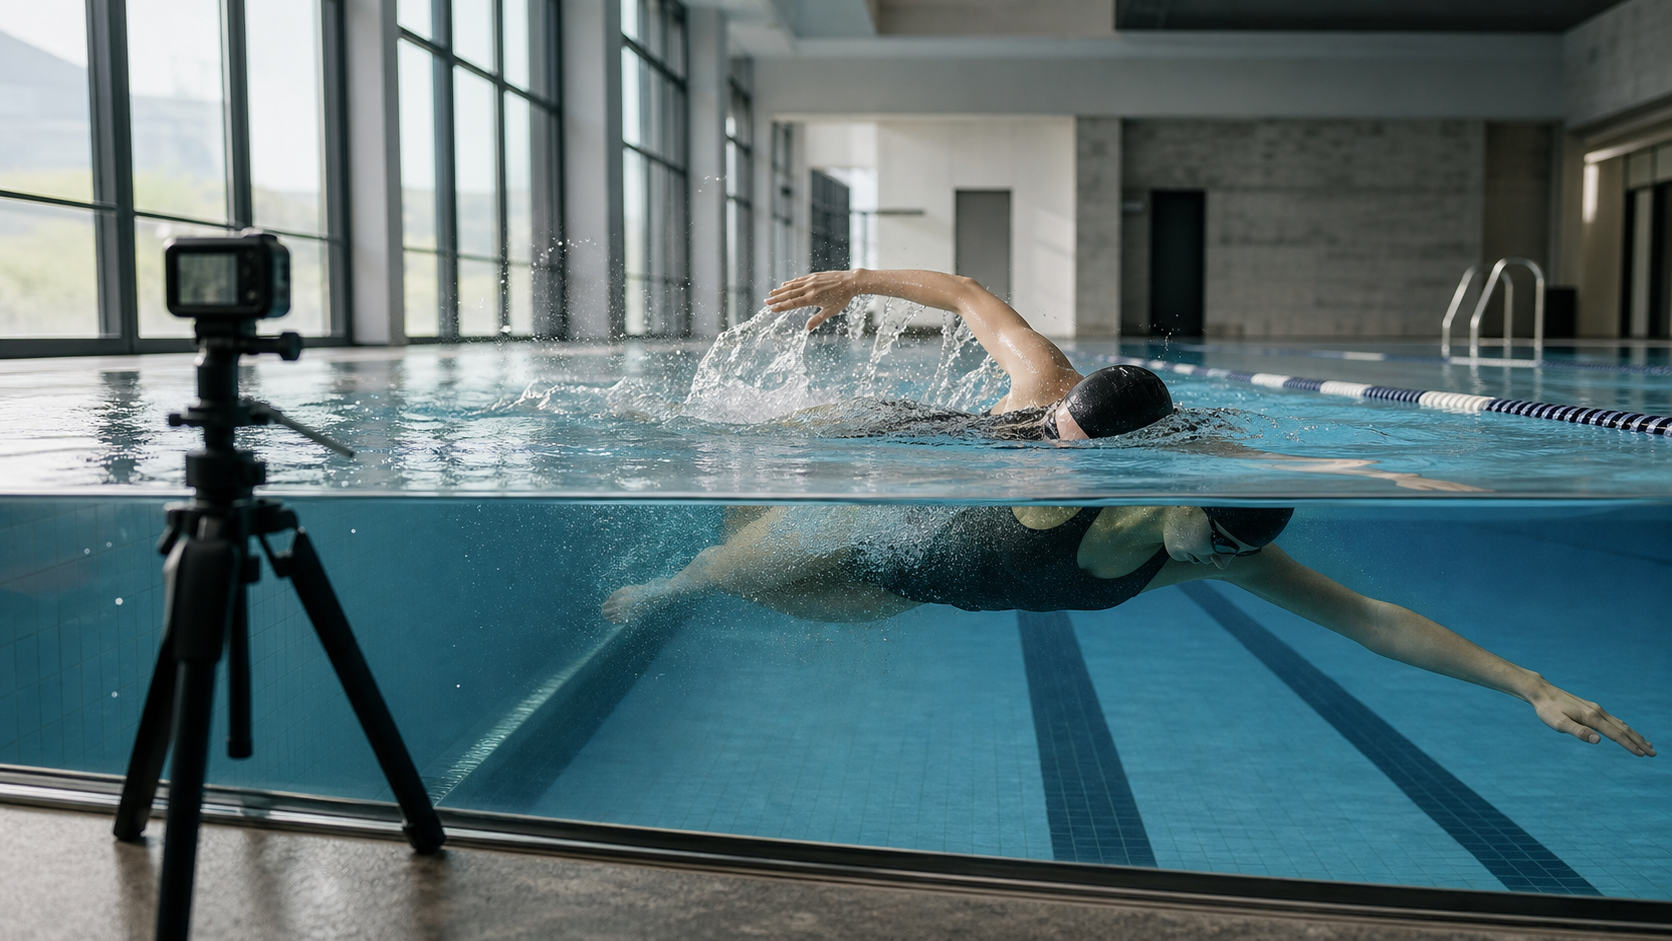
Setup: Mount the camera at the side of the pool, lens at water level, aimed at the spot where the swimmer will pass.
Filming tips:
- Footage only counts once the swimmer is 3–5 meters in front of the lens
- If the pool has underwater viewing windows, you can capture both above- and underwater in one shot (best angle)
- Recording length: at least 3–4 full stroke cycles per movement
2. Underwater Side View
Setup: Place the camera in the water (using a waterproof housing or a dedicated underwater camera), secured below the lane line.
Filming tips:
- Best results when the camera is at the same height as the swimmer’s waist
- You can have an assistant hold the camera and follow the swimmer (requires a partner)
- Alternatively, fix the camera in place and have the swimmer swim past it repeatedly
3. Head-On Front View
Setup: Mount the camera at the front of the lane (toward the starting blocks), with the swimmer swimming toward the camera.
Filming tips: Make sure the camera is waterproof and positioned at or slightly below water level to capture entry symmetry.
Technical Diagnosis Analysis Framework
Once you have the footage, analyze it systematically using the framework below to avoid the situation of “watching a lot but not knowing what the problem is”:
Freestyle Diagnosis Checklist
Entry Phase
- Does the hand enter the water directly in front of the shoulder (not crossing the midline, not too wide)?
- Is there a forward extension after entry (about 10–15 cm)?
- Is the elbow higher than the wrist (high-elbow entry)?
Catch Phase
- Is the palm in front of the elbow joint (high-elbow position)?
- Is the palm surface area maximized and facing backward?
Pull Phase
- Does the pull extend all the way to the thigh (wrist higher than elbow when the hand exits)?
- Body rotation angle (side view: 30–40 degrees is ideal)
Recovery Phase
- Is the elbow high when the arm exits the water (elbow leads the exit)?
- Is the arm path through the air relaxed?
Kick
- Kick depth (heels should not break the water surface too high)
- Is kick frequency coordinated with stroke rhythm?
- Is the kick amplitude symmetrical between both legs?
Breathing
- Head rotation angle during breathing (too high disrupts body streamline)
- Timing of the breath within the stroke cycle
Analysis Tools and Techniques
- Slow-motion playback: Most phone video apps support 0.5× or even 0.25× slow-motion playback
- Coach’s Eye, Hudl Technique: Professional sports video analysis apps that support frame-by-frame review and angle marking (available on iOS/Android)
- Screenshot annotation: Capture key frames and draw lines on your phone to mark problem areas—clearer than verbal descriptions
- Before-and-after comparison: Play corrected and pre-correction footage side by side to confirm improvement
Building a Personal Technical Diagnosis Log
After each recording session, fill in the following table and save it:
| Filming Date | Problem 1 | Problem 2 | Problem 3 | Corrective Drills | Next Review Date |
|---|---|---|---|---|---|
| Date of recording | Most severe technical issue | Secondary issue | Minor issue | Corresponding drill training | About 3–4 weeks later |
Record a maximum of 2–3 problems per session. Do not try to fix too many things at once, or your attention will be scattered and none will improve properly.
Practical Tips
- Don’t demand a perfect setup for your first recording: Even just a phone placed on the pool deck is better than no footage at all
- Notify pool management before filming: Some pools have rules about recording; check in advance
- Ask a coach or experienced swimmer to help with analysis: Self-diagnosis has blind spots; pair it with an experienced eye in the early stages
- Record at least once a month: Technical changes are gradual; too low a frequency makes progress impossible to track
- Compare footage from the same angle: Corrective effects are only meaningful when compared under identical filming conditions
Conclusion
Video self-analysis breaks down the biggest barrier in swimming technique improvement: “inaccurate feel.” The above-water side view and underwater side view, combined with a systematic technical diagnosis checklist, are enough for swimmers to accurately identify their technical bottlenecks. From footage to corrective plan, and then to the next recording for verification, building this cycle is the most worthwhile training habit for anyone serious about improving their swimming technique.
Related Reading
- Swimming Technique Video Analysis: How to Use Underwater Filming to Identify Your Flaws
- Swimming Video Analysis: Key Observation Points for Above- and Underwater Filming
- Video Training for Swimmers: Practical Applications of Underwater Filming Analysis
- Swimming Technique Video Analysis: Using Your Phone to Spot Technical Flaws
[教學] Premiere 影片 手震 修正 教學 防抖 單眼 影像 GoPro 穩定 Video Stabilization
8 年前
iPhone 13 Pro 電影級 VLOG 實拍測試!優缺點 原理分析! 夜間效果對決 GoPro10!蘋果沒有說的超強錄影體驗!? | CT Yeh
4 年前
教學) 如何做出專業 慢動作 影片 Slow Motion 120fps GoPro 7 ActionCam AX700 A99II
7 年前
如何把 GoPro 影片 翻轉 批次 轉正?
6 年前
[八甲田滑雪] 攝影器材介紹篇 DJI OSMO Mavic Pro ActionCam X3000 Insta360
7 年前
類空拍神器 Feiyu Pocket 2s (有優惠連結)三軸穩定 運動攝影機 開箱!比GoPro 還強的滑順視角!三小時長時間錄影 行車記錄器 | 環花東365實測 | 公路車 CT Yeh
4 年前
Rouvy 影片路線製作及上傳 教學
6 年前
CT 喇低賽) 單車 比賽總是沒照片? 攝影師的觀點大公開 姿勢就是力量! 請加速1.25倍收看
7 年前