The Complete Guide to Swim Training Resistance Tools: Strategies for Using Paddles, Resistance Parachutes, and Resistance Bands
Introduction
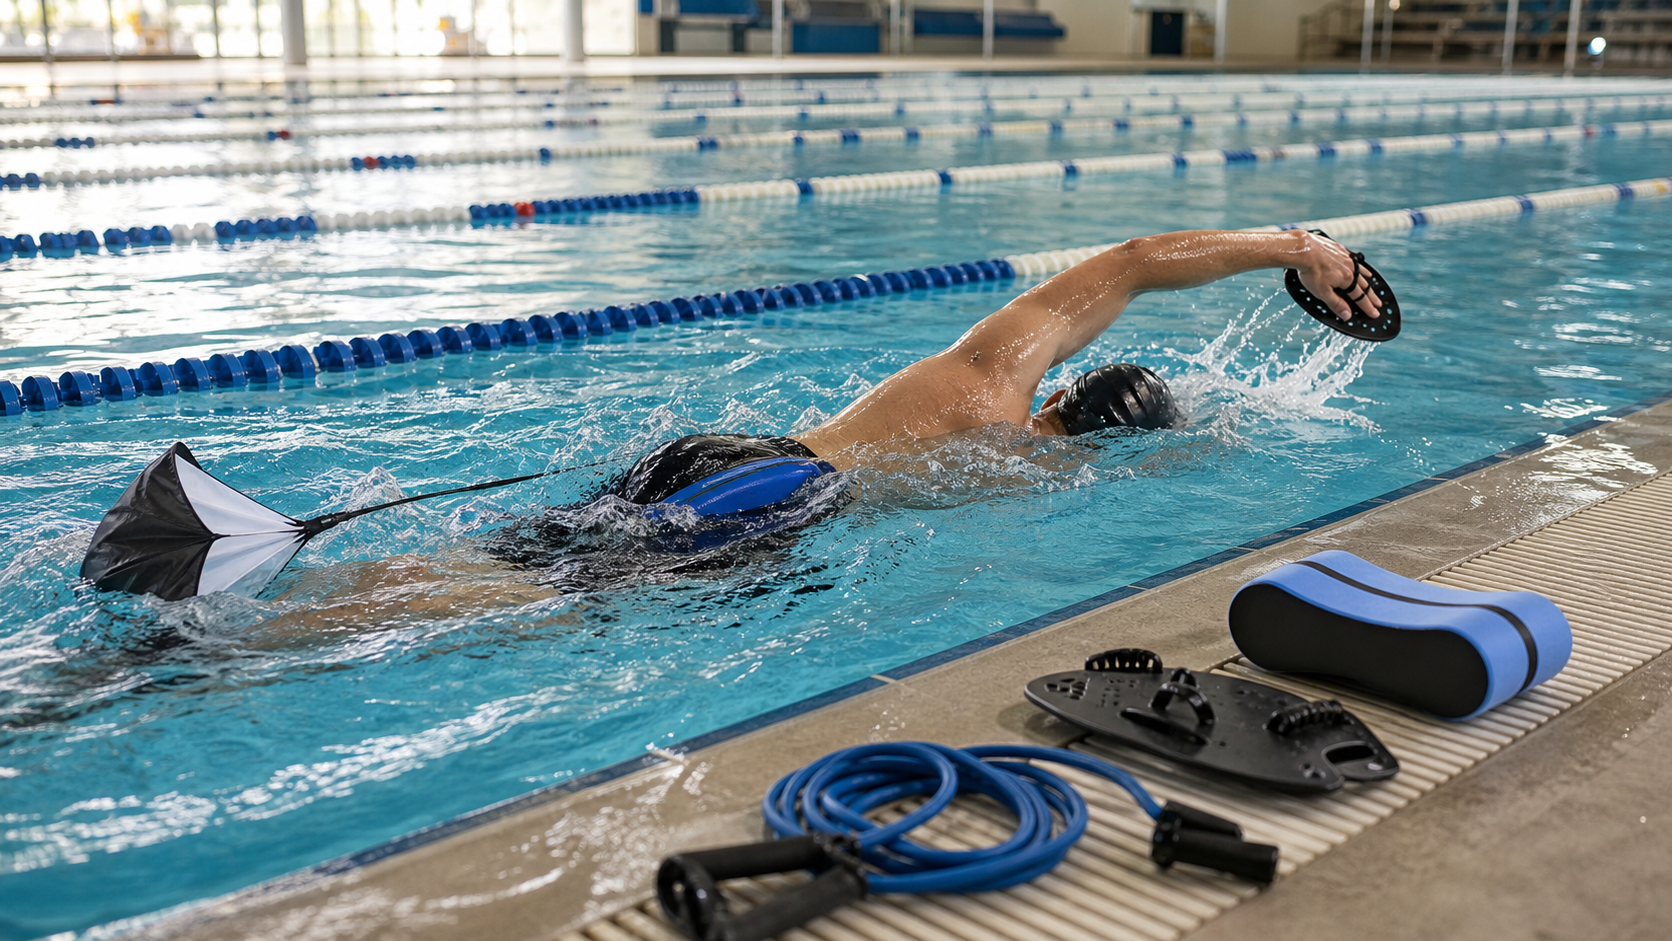
The market for swimming training tools is vast, ranging from basic kickboards and pull buoys to professional hand paddles, drag parachutes, and resistance cords. Each tool serves a specific training purpose. However, many swimmers do not understand the design logic behind these tools, and using them indiscriminately may reinforce poor technique or lead to injuries. This article systematically introduces the application strategies for three primary resistance training tools.
Hand Paddles
Tool Principles and Types
Hand paddles increase the effective propulsive surface area of the hands, amplifying the water pressure feedback to help swimmers “feel” the water’s resistance and strengthen the shoulder and back musculature.
| Paddle Type | Size | Purpose | Suitable For |
|---|---|---|---|
| Finger Paddles | Small (covers only the fingers) | Improve water feel without adding much resistance | Beginners, technique training |
| Standard Paddles | Medium (slightly larger than the palm) | Strength training + technique training | Intermediate swimmers |
| Large Paddles | Large (significantly larger than the palm) | Power training | Advanced swimmers |
| Fist Paddles (Fist Swimming) | Not a tool (closed fist) | Forces elbow-driven pull, trains forearm water feel | All levels |
Proper Usage of Hand Paddles
Prerequisite: Use paddles only after technique is sound
Hand paddles amplify the effects of all technique—good technique becomes better, but flawed technique is also magnified and accelerates injury risk. If the catch technique is incorrect, using large paddles can cause shoulder tendinitis in a short period.
Recommended training ratio:
Paddle usage should not exceed 25% of total training volume and should be interspersed between technical drills rather than used continuously in large volumes.
Combining with a Pull Buoy:
Hand paddles are most commonly paired with a pull buoy (a flotation device held between the legs), allowing the swimmer to focus on upper-body technique while eliminating leg interference.
Common Mistakes in Paddle Training
- Using paddles that are too large (exceeding 150% of palm area), leading to excessive shoulder load
- Using paddles for too long; continuing after technical fatigue sets in accelerates the entrenchment of faulty movement patterns
- Not suitable for swimmers with shoulder injuries; consult a medical professional before use
Drag Parachute
Tool Principles
The drag parachute is attached behind the waist, and while swimming, the canopy opens in the water, providing continuous resistance load. Unlike hand paddles, the drag parachute primarily trains whole-body propulsion and explosive power rather than specific technique.
Training Benefits of the Drag Parachute
- Enhanced propulsive power: Swimming under resistance requires greater force output on every stroke and kick, equivalent to “weighted swimming”
- Contrast speed training: Swimming with the parachute first, then removing it and swimming the same distance, makes the swimmer feel significantly faster (known as the “contrast method”), which is particularly effective for explosive power development
- Core strength for posture maintenance: The added rearward resistance from the parachute requires the core to work harder to prevent the body from being pulled backward, indirectly strengthening core stability
Drag Parachute Usage Strategies
Basic resistance training:
- Distance: 25–50 meters per set
- Intensity: Swim at maximum effort while maintaining technique quality
- Sets: 4–6 sets with full rest between sets (1–2 minutes)
Contrast training method (most effective):
- First lap: Swim 50 meters with the parachute (feel the resistance)
- Remove the parachute
- Immediately: Swim 50 meters (feel “lightness,” the nervous system recruits more muscle fibers)
- Perform 2–4 rounds of each contrast set
Cautions:
- Parachute size should be selected based on body size and swimming ability; an overly large parachute will severely compromise technique
- Parachute training should be performed after technical training and is not suitable as a tool for learning technique
Resistance Cord (Tethered Swimming)
Tool Principles
One end of the resistance cord is attached to the swimmer’s waist, and the other end is secured to the pool wall. As the swimmer attempts to swim forward, the cord’s elasticity provides continuous resistance, keeping the swimmer “swimming in place” (tethered swimming).
Three Training Modes with the Resistance Cord
Mode 1: Fixed-point resistance training (tethered swimming)
The cord is fixed, and the swimmer swims in place. This allows high-intensity movement to be maintained for extended periods, and coaches can directly observe technique from the side—making it an excellent tool for technique diagnosis.
Mode 2: Assisted training
The cord is instead anchored in front, providing forward assistance to the swimmer, enabling super-speed swimming to train the nervous system to adapt to high stroke rates.
Mode 3: Progressive resistance training
The coach holds the other end of the cord and adjusts the resistance level based on the swimmer’s technical state, providing immediate feedback.
Applications of Resistance Cord Training
Explosive power training sets:
- Swim against the resistance cord at maximum effort for 15–20 seconds
- Rest for 45–60 seconds
- Repeat for 6–8 sets
Technique diagnosis applications:
- Under resistance, technical flaws become more apparent (e.g., inefficient kicking, non-streamlined body position)
- Coaches can observe from a safe distance and provide immediate guidance
Recommendations for Combining the Three Tools
Based on different training goals, the three tools can be combined as follows:
- Improving technique and water feel: Fist swimming → finger paddles → standard paddles (progressive order)
- Building strength and explosive power: Tethered swimming with resistance cord → parachute contrast training
- Comprehensive training combination: Hand paddles (technique) → drag parachute (power) → normal swimming (integration), performed sequentially within the same training session
Conclusion
Swimming resistance tools are powerful aids for improving training efficiency, but “the power of the tools lies in their correct use.” Before introducing any resistance tool, ensure that foundational technique is established and begin with low-resistance versions for gradual adaptation. Combined with clear training goals and adequate rest, these tools can make your swimming training far more effective, accelerating dual progress in both technique and physical conditioning.
Related Reading
- Proper Usage of Resistance Assistive Devices (Hand Paddles/Resistance Pants)
- Swimming Resistance Training: Integrating Paddles, Drag Parachutes, and Pull Buoys into Workouts
- In-Water Resistance Training: Transferring Swimming Aids to Land-Based Functional Training
- Swimming Resistance Training: Training Design with Ankle Bands, Drag Chutes, and Resistance Bands
西進武嶺 免費訓練分析服務 Intervals | 練不夠還是練過頭?你哪一種類型選手?AI模型告訴你! | 備戰神器 | 公路車 訓練 | CT Yeh
4 年前
訓練台體驗) 2019台北自行車展 三大家 訓練台體驗 Tacx Neo Flux 2 Xepdo Apx Wahoo Kickr
7 年前
3D 列印車褲墊 / 舒適改善? / 無痕 x 分區壓縮 / ATK & Decider系列 / JE22黑科技 / #公路車 #CTYEH
11 個月前
[教學] Premiere 影片 手震 修正 教學 防抖 單眼 影像 GoPro 穩定 Video Stabilization
8 年前
洗單車神器 吹水機! 實際洗車用用看 暴力洗鍊條大法 | 公路車 | CT Yeh
4 年前
CT 喇低賽) 武嶺牽車 才是王道 西進牽車四小時內秘訣 攝手位置 如何判斷 防抽筋小秘訣
7 年前
碟煞公路車 銑面器 !? 原來銑完差這麼多! 降低蹭碟機率! | TIME 公路車 保養小記錄 | CT Yeh
3 年前
一起升級!海鷗盃LSD團練...JJSC Zone2招待 騎到手抖 / 公路車 / CT Yeh
2 天前