MTB Downhill Technique: The Three Essentials of Braking Points, Weight Shifting, and Vision Control
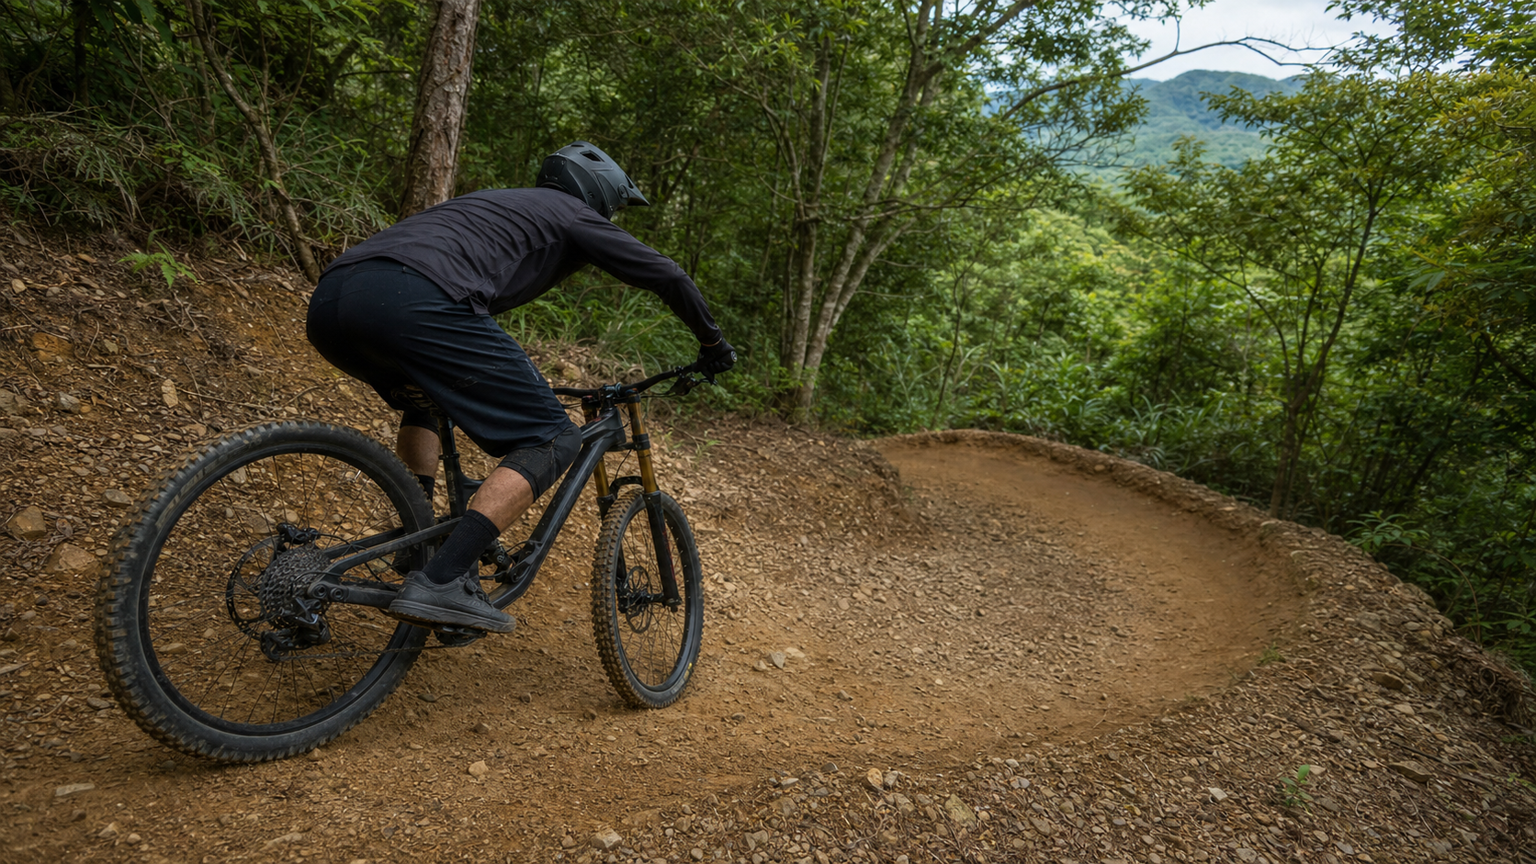
MTB Downhill Technique: The Three Elements of Braking Points, Weight Shifting, and Vision Control
Many MTB beginners in Taiwan think that downhill technique is a matter of talent: some people are naturally bold and fast, while others are forever slow. But from observations in teaching settings, what is called “being bold and fast” is often just confidence built on a foundation of correct technique. When a rider masters the correct braking points, body weight positioning, and vision control, speed is not something that requires summoning courage—it happens naturally.
This article breaks down the three core elements of MTB downhill technique. Each can be practiced independently, and when combined, they form a complete system for safe and fast descending.
Element One: Choosing and Controlling Braking Points
The most common downhill mistake among beginners is braking in the middle of a corner. Braking mid-corner on gravel or technical terrain adds longitudinal braking force to tires that are already under lateral load, significantly increasing the risk of losing control.
Correct braking logic:
Divide braking for each corner into three phases:
- Braking zone: 5–15 meters before the corner, complete 80% of speed control
- Release zone: 2–3 meters before the corner, fully or almost fully release the brakes
- Corner-exit acceleration zone: After passing the apex, gradually resume pedaling
The actual braking distance depends on your speed, gradient, and trail conditions, but the principle remains the same: finish braking before the corner, enter the corner at a stable speed, rely on gravity and tire traction to maintain speed through the turn, then accelerate after exiting.
Brake force distribution:
| Trail Condition | Front Brake Ratio | Rear Brake Ratio |
|---|---|---|
| Gentle slope, straight line | 50% | 50% |
| Steep slope, straight line | 40% | 60% |
| Technical terrain | 30–40% | 60–70% |
| Wet/slippery surface | 20–30% | 70–80% |
Many people ask: why use a higher rear brake ratio when descending? The reason is that inertia on steep slopes naturally shifts the rider’s weight forward; too much front brake can easily lock the front wheel and cause an endo. A locked rear wheel only results in a slide, which is easier to control.
Element Two: Dynamic Execution of Weight Shifting Back
Shifting weight back is a foundational MTB downhill technique, but “shifting back” is not a static position—it is a dynamic adjustment process.
Basic weight-shift movement:
The saddle should be lowered when descending (modern MTBs are commonly equipped with dropper posts—this is exactly why they exist). After lowering the post, the hips can move behind the saddle or even directly above the rear axle, significantly shifting weight rearward.
If your bike does not have a dropper post, lower the saddle to its minimum on steep descents, or maintain only light contact with the saddle by gripping it with your legs, shifting weight back with your hips hovering off the saddle.
Quantified benchmarks for weight shifting:
- Gradient 15–25%: hips move to the rear of the saddle
- Gradient 25–35%: hips extend beyond the saddle, hovering above the rear wheel
- Gradient above 35%: full standing position, weight shifted as far back as possible to directly above the rear axle
The role of the knees:
Many tutorials emphasize bending the arms to absorb shock, but the knees are equally important. Keep the knees bent at 30–40°, allowing the thighs to act as shock absorbers during forward impacts. When hitting an impact, actively bend the knees to absorb the shock rather than letting the entire body get bounced up.
Element Three: Vision Control and Psychological Mechanisms
Vision control is the hardest element to describe in words and the most overlooked technical aspect.
The neural mechanism of “you go where you look”:
The human body has a deep-seated reflex: the body automatically moves toward the focal point of your vision. In MTB downhill, this means that if you stare at a big rock in front of you, the subtle shift in your body’s center of gravity will actually steer you into that rock.
This is why descending requires deliberate practice of “looking at the intended line rather than at obstacles.”
Vision hierarchy training:
- Near-field scanning (2–3 meters ahead of travel direction): confirm immediate trail conditions, identify tire contact points
- Mid-field planning (8–15 meters ahead): plan the line, decide braking points and cornering lines
- Far-field warning (20–30 meters and beyond): detect large obstacles or trail changes in advance
Skilled MTB riders rapidly switch their vision among these three levels, but primarily dwell on the mid-field, using peripheral vision for the near field and intermittent glances to confirm the far field.
The relationship between speed and vision:
The faster you go, the farther your focal point should be. At 20 km/h, the focal distance is about 10 meters; at 40 km/h, it needs to extend to 25–30 meters. This requires deliberate training, because human instinct when moving fast is to look at what is immediately in front, which actually shortens the visual distance.
Integrated Practice Methods for the Three Elements
After practicing the three elements separately, they need to be integrated. Recommended integration drills:
- Choose a familiar technical downhill section
- First pass at low speed, focusing only on correct braking points (finish braking before entering the corner)
- Second pass 10% faster, keeping braking points unchanged, and add vision control practice
- Third pass another 10% faster, while also paying attention to dynamic weight-shift adjustments
- Add only one focus point at a time—do not try to correct all techniques simultaneously
Common Mistakes and Corrections
- Locked arms: When tense, the arms stiffen and lose shock-absorbing ability. Remind yourself to maintain a “light grip,” around 30–40% grip strength—do not white-knuckle the bars
- Looking down at the front wheel: When anxious, the habit is to look down, shortening visual distance to 2–3 meters. Deliberately lift your head and keep your eyes on the mid-field ahead
- Never releasing the brakes: Continuously braking through the entire corner. Practice the deliberate action of “releasing the brakes before entering the corner”
Conclusion
Progress in MTB downhill technique is non-linear. A single key technical breakthrough—such as the first time you truly feel the freedom of fully releasing the brakes before a corner—can bring a leap in speed and confidence. Be patient, focus on one element at a time, and the technique will suddenly mature when you least expect it.
Related Reading
- MTB Downhill Technique: Body Position, Weight Transfer, and Shock Absorption
- MTB Downhill Braking Technique: Key Knowledge on Front/Rear Brake Ratio
- The Complete Downhill Technique Guide: Secrets to Descending Safely and Fast
- Downhill Technique After Climbing: Safe Riding with Brake Control and Cornering Lines
CT 喇低賽) 單車 比賽總是沒照片? 攝影師的觀點大公開 姿勢就是力量! 請加速1.25倍收看
7 年前
CT 喇低賽) 武嶺牽車 才是王道 西進牽車四小時內秘訣 攝手位置 如何判斷 防抽筋小秘訣
7 年前
單車 梅山36灣 坡度介紹 路段介紹 空拍 (相關遊記影片,請參考說明或我的頻道喔,歡迎訂閱)
6 年前
一日北高常見問題大集合 | 攻略 | 路線 | 訓練 | 補給 | 自行車 單車 | 一日雙城 | 雙塔 | TWB北高360 | 屁股痛
6 年前
一日北高/長距離團騎 常見問題補充篇 / 組團或跟團的眉角 / 壯車友容易被瘦車友慢性拉爆 / 原來屁股痛可能是這個原因...? / 風場配速法 / 公路車 / CT Yeh
2 年前
DJI OSMO 360單車攝影 教學&技巧分享 / 概念、攝影手法、架設、後製 / 公路車 / CT Yeh
10 個月前
#公路車 #Fitting 靠人工智慧APP 幫你調整單車
6 年前
公路車 爬坡 破PR 紀錄 小技巧 分享
6 年前