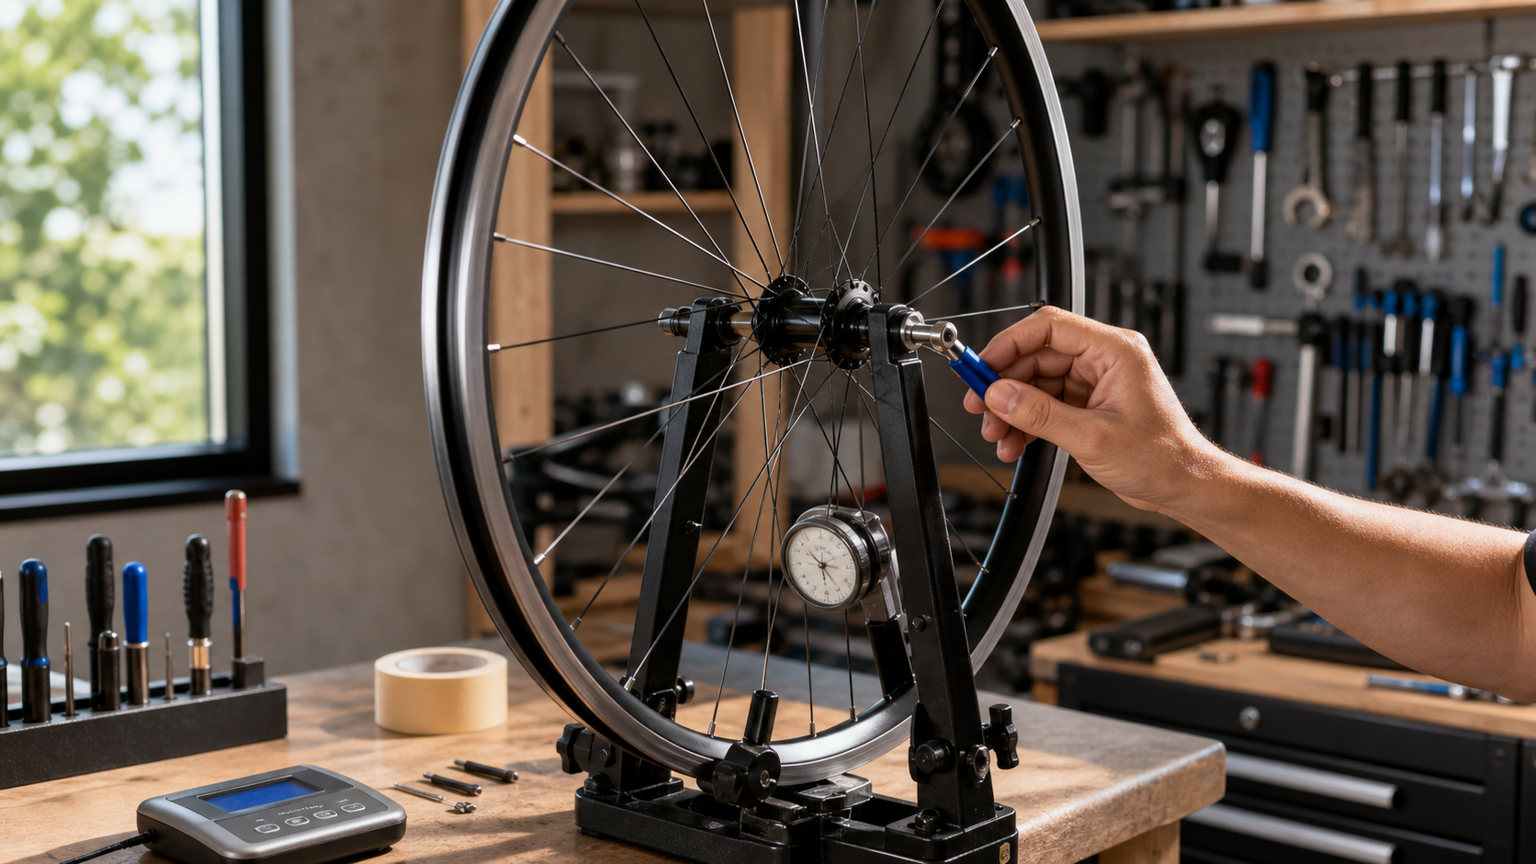
The Complete Home Wheel Truing Guide: Fix Radial and Lateral Runout Yourself
The wheel is the most critical rotating component on a bicycle. Even a small amount of runout can affect ride quality and braking performance, and in the worst cases create a safety hazard. Many riders take their bike straight to the shop the moment a wheel goes out of true, but with a basic understanding of the principles and the right tools, most wheel truing work can actually be done at home.
Why Do Wheels Go Out of True?
Runout has several common causes. Understanding them helps with both prevention and diagnosis:
| Type of Runout | Common Causes | Severity |
|---|---|---|
| Lateral runout (side-to-side wobble) | Impacts, loose spokes, natural loosening over time | Moderate, most common |
| Radial runout (up-and-down wobble) | Severe impact, rim deformation | Higher, needs careful attention |
| Rotor/disc runout | Brake overheating, collision | Low to moderate |
Essential Tool List
To true a wheel at home, you’ll need the following tools:
- Truing stand (entry-level around NT$1,500–3,000; professional-grade NT$5,000+)
- Spoke wrench: confirm the correct size — common sizes are 3.23mm, 3.30mm, and 3.45mm
- Tension meter: not strictly required, but strongly recommended for precisely measuring spoke tension
- Truing indicator: usually built into the truing stand
- Marker or tape: to mark the sections that need adjustment
Budget alternative: No truing stand? You can mount the wheel back on the frame and use the brake pads or a zip tie as a reference point to judge runout. It’s less precise, but good enough for a quick fix in a pinch.
Basic Principle: The Relationship Between Spoke Tension and Runout
Understanding how spokes affect rim position is the core of truing:
- Each spoke belongs to one side or the other, connecting to the left or right flange of the hub
- Increasing tension on a spoke on one side pulls the rim toward that side
- Decreasing tension on a spoke on one side lets the rim move toward the opposite side
- Adjustments should follow the principle of “symmetric adjustment” — avoid making the tension in one spot too high or too low relative to its neighbors
Spoke Wrench Turning Direction
This is the part that trips people up most often — remember it well:
- Viewed from the top of the rim, turning the nipple clockwise = increases tension (spoke gets tighter)
- Viewed from the top of the rim, turning the nipple counterclockwise = decreases tension (spoke gets looser)
Step One: Inspect and Assess
- Mount the wheel on the truing stand and make sure it’s held securely
- Slowly spin the wheel and observe the lateral runout
- Adjust the truing indicator so it lightly touches the rim at the worst point of the wobble
- Mark the wobbling section with a marker
- Also check for radial runout (roundness) at the same time
Assessment guidelines:
| Degree of Runout | Lateral Runout | Radial Runout | Recommended Action |
|---|---|---|---|
| Minor | < 0.5mm | < 0.3mm | Minor adjustment is enough |
| Moderate | 0.5–2mm | 0.3–1mm | Needs careful truing |
| Severe | > 2mm | > 1mm | May need professional service or rim replacement |
Step Two: Correcting Lateral Runout
This is the most common truing task. Follow this process:
- Locate the worst section of the wobble
- Confirm the direction of the wobble: suppose the rim pulls toward the right at that point
- At the center of the wobble, find the spoke connecting to the left flange and turn it clockwise 1/4 turn to increase tension
- At the same time, find the adjacent spoke connecting to the right flange and turn it counterclockwise 1/4 turn to decrease tension
- Spin the wheel and check how much it has improved
- Repeat the above steps, turning only 1/4 turn at a time
Key reminder: Never turn more than 1/2 turn at once! Small, repeated adjustments are the golden rule of wheel truing. Rushing into large adjustments only makes the problem harder to fix.
Step Three: Correcting Radial Runout (Roundness)
The logic for correcting radial runout is different:
- Move the truing indicator to the top outer edge of the rim
- Find the “high spot” (where the rim sits farther from the axle)
- At that section, increase tension on the spokes on both sides at the same time (1/4 turn each)
- Find the “low spot”
- At that section, decrease tension on the spokes on both sides at the same time (1/4 turn each)
Step Four: Balancing Overall Tension
After correcting the runout, you must check that overall tension is even:
- Use a tension meter to measure each spoke individually
- Tension differences among spokes on the same side should be within ±10%
- On the rear wheel, drive-side tension is normally higher than non-drive-side tension (this is expected)
- On the front wheel, tension on both sides should be roughly equal
Common reference tension values:
| Rim Type | Recommended Tension Range |
|---|---|
| Aluminum alloy rim | 100–130 kgf |
| Carbon fiber rim | Per manufacturer spec, typically 80–120 kgf |
| Hand-built wheel | Calculated based on spoke and rim specifications |
Step Five: Stress Relieving
This is a step many people skip, but it’s extremely important:
- Once truing is done, grip each pair of adjacent spokes with both hands and squeeze them gently
- Work your way around the wheel, doing this for every pair of spokes
- This releases torsional stress in the spokes and lets them settle into their natural position within the nipples
- After stress relieving, check the runout again — you’ll often see a small change
- Do one final fine adjustment
Common Mistakes and Troubleshooting
- Turning too much at once: only 1/4 turn each time — patience is key
- Adjusting only a single spoke: work section by section, usually involving 3–5 spokes
- Ignoring tension balance: fixing runout without balancing tension means the wheel will go out of true again soon
- Nipple seized: put a drop of lubricant where the nipple meets the rim and wait a few minutes before trying again
- Forgetting to stress relieve: a wheel trued without stress relieving will go out of true again after just one ride
When Should You Take It to a Professional Shop?
In the following situations, it’s best to leave it to a professional technician:
- The rim has a visible dent or crack
- Multiple spokes are broken
- Runout exceeds 3mm and can’t be improved through adjustment
- A carbon fiber rim is making unusual noises
- The hub bearings show noticeable play
Mastering wheel truing not only saves you money on shop fees — more importantly, it gives you a deeper understanding of your bike’s most essential component. There’s nothing quite like the satisfaction of taking a wobbly wheel and truing it to perfection with your own hands.
Related Reading
如何把 GoPro 影片 翻轉 批次 轉正?
6 年前
#公路車 #Fitting 靠人工智慧APP 幫你調整單車
6 年前
再一組! 全碳幅條 碟煞/無內胎輪組 開箱! 到底好騎嗎? UNAAS X40 | 公路車 | CT Yeh
4 年前
Insta 360 One 超級防手震技術實測
7 年前
碟煞公路車 銑面器 !? 原來銑完差這麼多! 降低蹭碟機率! | TIME 公路車 保養小記錄 | CT Yeh
3 年前
DJI OSMO 360單車攝影 教學&技巧分享 / 概念、攝影手法、架設、後製 / 公路車 / CT Yeh
10 個月前
鉅齒紋輪組!? ControlTech MEG-T50 EVO 碳纖維幅條輪組/ 功率對比實驗 / 公路車 / CT Yeh
2 年前
Nepest NOVA 碳條輪組:輕量、空力、舒適一次滿足!/ 公路車 / CT Yeh
7 個月前