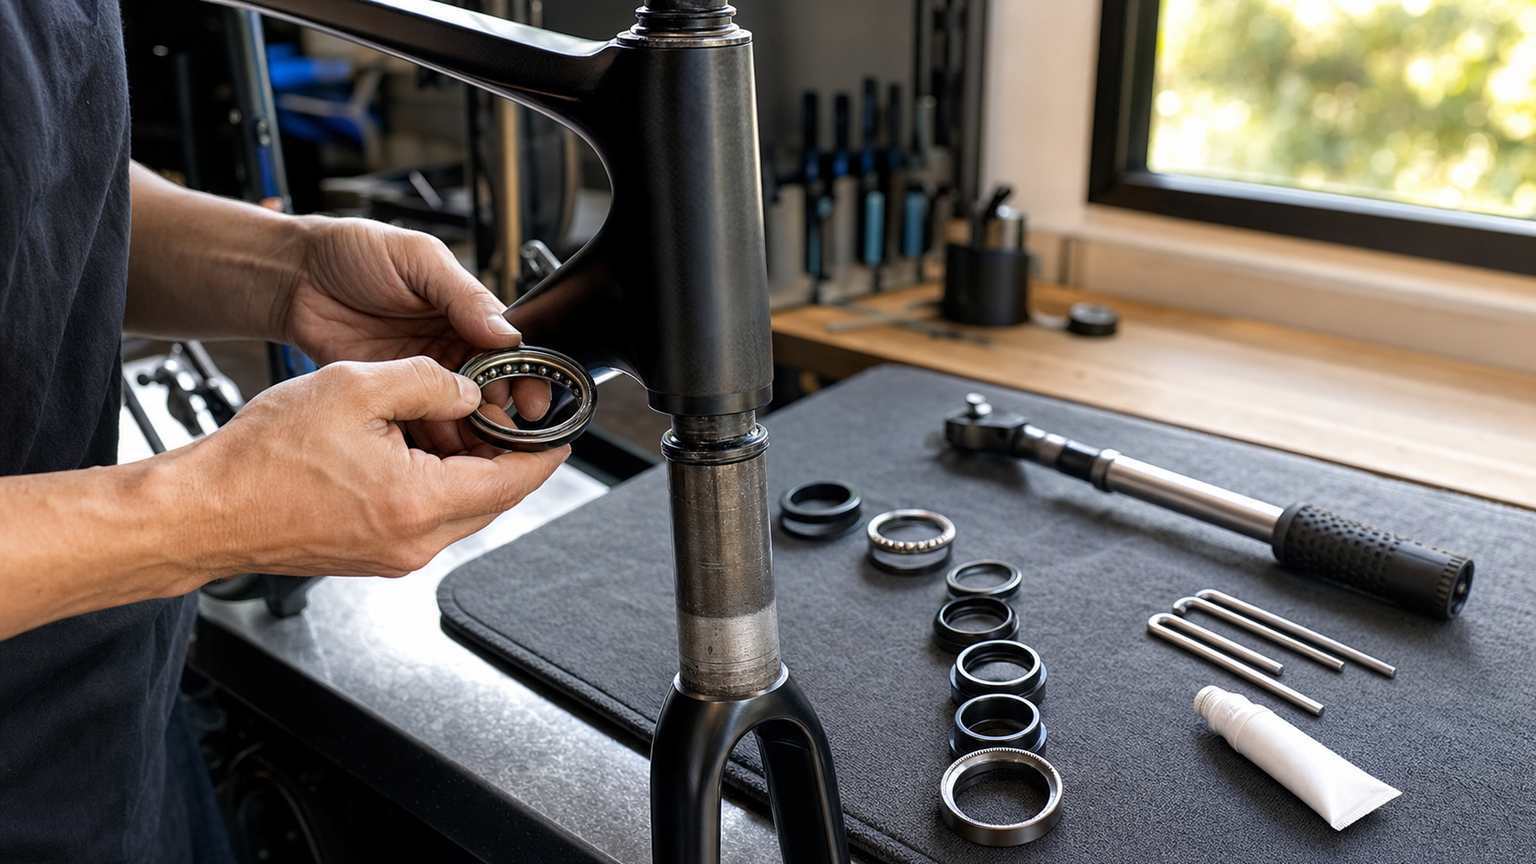
Headset Bearing Replacement Hands-On Guide: The Complete Process from Removal to Installation
The headset is the bearing system that connects the fork to the frame’s head tube, responsible for allowing the front end to turn smoothly. Once this often-overlooked component wears out, you may experience a gritty feeling when steering at best, or compromised handling safety at worst. Learning to replace headset bearings yourself is an important milestone in advanced maintenance skills.
Types of Headset Bearings
Before getting started, you must understand which headset system your bike uses:
| Type | English Name | Characteristics | Common Bikes |
|---|---|---|---|
| External | External (EC) | Cups exposed outside the head tube | Older road bikes, some mountain bikes |
| Zero Stack | Zero Stack (ZS) | Cups recessed into the head tube, bearings exposed | Most modern road bikes |
| Integrated | Integrated (IS) | Bearings placed directly into the head tube | High-end road bikes, aero models |
| Tapered | Tapered | Upper and lower cups are different sizes (e.g., 1-1/8" top, 1-1/2" bottom) | Mainstream on modern road and mountain bikes |
How to confirm the specification? Check the frame specification sheet, or measure the head tube inner diameter. Common specifications include: 1-1/8" (28.6mm), 1-1/4" (31.8mm), 1-1/2" (38.1mm).
Determining Whether the Headset Needs Replacement
Perform the following checks to assess the headset’s condition:
Quick Test Method
- Lock the front brake, rock the handlebars back and forth, and feel for any play
- Lift the front wheel, slowly turn the handlebars left and right, and feel for any grittiness or catching
- While riding, pay attention to any abnormal vibration or “clicking” sounds from the front end when braking
Advanced Diagnosis
- After removing the front wheel and fork, spin the bearings with your fingers; they should feel smooth with no resistance
- Check the bearing balls or rollers for indentations (Brinelling)
- Inspect the cup seating surfaces for scratches or corrosion
Essential Tools
- Headset cup remover (Crown Race Remover)
- Headset press: This is the most important tool. Never use a hammer to tap components in
- Crown Race installation tool
- Hex wrench set (4mm, 5mm, 6mm)
- Torque wrench
- Bearing-specific grease
- Degreaser and clean rags
- Anti-seize compound (use carbon-specific paste for carbon fiber frames)
Removal Process
Phase 1: Disassembling the Front End Components
- Remove the stem bolts: Loosen the fixing bolts on the side of the stem (usually 4mm or 5mm hex)
- Remove the top cap bolt: Remove the bolt from the top cap
- Remove the spacers: Note the order and orientation of the spacers; taking a photo is recommended
- Pull out the fork: Carefully pull the fork out from below, being careful not to scratch the head tube
- Collect all parts: Upper headset cover, dust cover, compression ring, etc., and arrange them in order
Phase 2: Removing the Old Headset
Removing the cups inside the head tube:
- Insert the headset cup remover from inside the head tube
- Position the expanding end of the remover against the edge of the cup
- Strike alternately and evenly so the cup is pushed out with uniform force
- Both the upper and lower cups need to be removed
Removing the crown race on the fork:
- Use a Crown Race removal tool or a flathead screwdriver
- Insert the tool into the gap between the Crown Race and the fork crown
- Apply force evenly to avoid damaging the fork
Carbon fiber fork caution: Removing the Crown Race on a carbon fiber fork requires extra care, as excessive force can damage the fork. Some newer headsets use a split Crown Race that does not require pressing; it simply slides on.
Phase 3: Cleaning and Inspection
- Thoroughly clean the inside of the head tube with degreaser
- Inspect the head tube inner wall for scratches, corrosion, or deformation
- Clean the fork steerer tube
- For carbon fiber frames, check the head tube for cracks
Installation Process
Installing the New Cups
This is the most critical step; incorrect installation can damage the frame!
- Apply a thin coat of grease to the outer wall of the cup (metal frame) or carbon paste (carbon fiber frame)
- Align the cup with the head tube opening, confirming the correct orientation
- Use a headset press, slowly and evenly pressing the cup into place
- Once fully seated, confirm the cup is completely flush with the head tube end face, with no gaps
Headset press usage tips:
- Ensure the press plates are the correct size, covering the cup but not pressing on the bearing
- When pressing both ends simultaneously, make sure both sides progress evenly
- The pressing process should be smooth; if it feels abnormally difficult, stop immediately and check the alignment
Installing the Crown Race
- Apply a thin layer of grease to the crown race seat on the fork
- Slide the Crown Race over the top of the fork steerer tube
- Use a Crown Race installation tool to drive it into position
- Confirm the Crown Race is fully seated against the fork crown
Assembling the Front End
- Apply an ample amount of bearing grease to the bearing surfaces
- Insert the fork from below into the head tube
- Install in order: compression ring → dust cover → upper headset cover → spacers → stem
- Install the top cap bolt, but do not tighten the stem yet
Adjusting Preload
Correct preload adjustment is critical:
- Tighten the top cap bolt: Turn it slowly until you feel the bearings have no play
- Test method: Lock the front brake and rock the handlebars back and forth; there should be no play
- Steering test: Lift the front wheel and turn left and right; it should be smooth with no catching
- Once confirmed, tighten the stem fixing bolts to the specified torque
Common torque values:
| Component | Torque Value |
|---|---|
| Top cap bolt | 1-2 Nm (used only for preload adjustment) |
| Stem fixing bolts (carbon steerer) | 4-5 Nm |
| Stem fixing bolts (aluminum steerer) | 5-7 Nm |
Post-Installation Checklist
- [ ] Handlebars turn smoothly, with no catching or grittiness
- [ ] No play when locking the front brake and rocking the handlebars
- [ ] Handlebars fall freely to either side from center position (indicates no excessive preload)
- [ ] All bolts tightened to the specified torque
- [ ] Stem aligned with the front wheel
Troubleshooting Common Issues
Q: Still has play after adjustment?
Possible causes: Insufficient preload on the top cap bolt, cups not fully pressed in, steerer tube cut too long.
Q: Gritty feeling when steering?
Possible causes: Insufficient bearing lubrication, excessive preload, new bearings need a break-in period.
Q: Difficulty pressing in the cups?
Possible causes: Size mismatch, burrs on the head tube inner wall that need filing down, no grease used.
Headset replacement may seem complex, but with the right tools and careful steps, anyone can do it at home. Most importantly, always use a proper press tool; hammering is the most common source of disaster.
Related Reading
- Bicycle Headset Maintenance: The Critical Component You May Have Never Noticed
- Headset Preload Adjustment: The Precision Technique to Eliminate Stem Play
- Complete Guide to Road Bike Headset Standards: Differences Between IS, ZS, EC and How to Choose
- Bicycle Headset Maintenance: Bearing Cleaning and Replacement Steps
碟煞公路車 銑面器 !? 原來銑完差這麼多! 降低蹭碟機率! | TIME 公路車 保養小記錄 | CT Yeh
3 年前
西進武嶺 自製新版AI配速表產生器 x 賽前攻略 抱佛腳! 沒有功率計也可以產生配速表嗎?有什麼其他眉角賽前要注意的呢? | 西進武嶺 / 東進武嶺 KOM 攻略 | 公路車 | CT Yeh
4 年前
碟煞公路車 優缺點?換車一年半實際經驗分享 / 公路車 / CT Yeh
2 年前
再一組! 全碳幅條 碟煞/無內胎輪組 開箱! 到底好騎嗎? UNAAS X40 | 公路車 | CT Yeh
4 年前
Canyon 公路車斷把手 五年老車特規還能修嗎? 維修保養全記錄 feat. 501單車監理站 | 公路車 | CT Yeh
4 年前
CT 喇低賽) 武嶺牽車 才是王道 西進牽車四小時內秘訣 攝手位置 如何判斷 防抽筋小秘訣
7 年前
SRAM FORCE E1 首發!/ 改成短腿了 / 煞車升級有感嗎? / TIME ADH 變速大升級 / 公路車 / CT Yeh
1 年前
邁金 T500 訓練台開箱!有下坡輔助、路感模擬、不用插電、直驅電機 !兩萬級距頂規享受新選擇!/ 公路車 / 室內訓練 / CT Yeh
1 年前