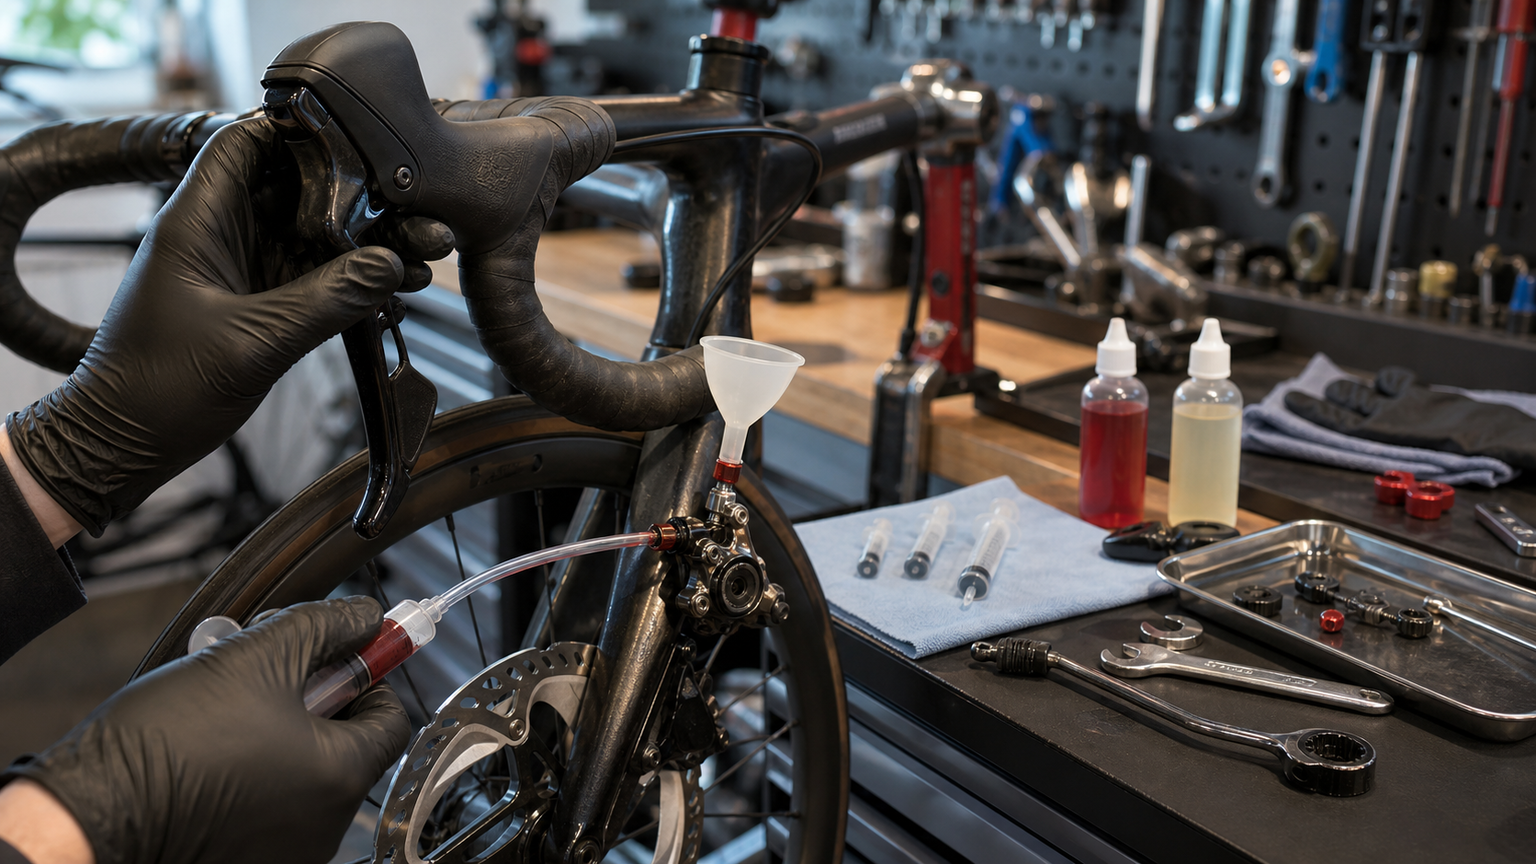
Hydraulic Disc Brake Bleeding Guide: Complete Shimano and SRAM Walkthrough
Hydraulic disc brakes are the most effective braking system on modern bicycles, but they need regular maintenance to keep performing at their best. When you notice your brake lever feeling “spongy,” the throw getting longer, or needing more force to brake effectively, it’s probably time for a bleed.
Why Do You Need to Bleed Your Brakes?
A hydraulic brake system is a sealed circuit that, in theory, shouldn’t need maintenance. But in real-world use:
- Air intrusion: tiny leaks at hose connections, or air accidentally getting in when swapping pads
- Fluid degradation: over time, brake fluid absorbs moisture (DOT systems) or oxidizes
- Service needs: rebleeding is required after replacing a hose, caliper, or lever
| Symptom | Likely Cause | Fix |
|---|---|---|
| Lever throw gets longer | Air in the system | Bleed and purge air |
| Spongy lever feel | Significant air in the system | Full bleed |
| Insufficient braking power | Degraded or low fluid | Replace fluid |
| Slow lever rebound | Changed fluid viscosity | Replace fluid |
| Fade under high heat | High water content in fluid (DOT) | Replace fluid |
Shimano vs. SRAM: Key Differences
The two brands use completely different brake fluids, and you must never mix them:
| Item | Shimano | SRAM |
|---|---|---|
| Brake fluid | Mineral Oil | DOT 5.1 or DOT 4 |
| Bleed direction | Caliper to lever (push upward) | Lever to caliper (push downward) |
| Tools | Shimano bleed funnel | SRAM Bleeding Edge syringe kit |
| Fluid color | Usually red or green | Clear to pale yellow |
| Fluid properties | Non-hygroscopic, won’t harm paint | Hygroscopic, will corrode paint |
Serious warning: DOT brake fluid will seriously damage frame paint and carbon fiber. When bleeding a SRAM system, always protect the frame with rags and wipe up any spills immediately. Shimano mineral oil is comparatively safe.
Shimano Hydraulic Brake Bleeding Process
Tools Needed
- Shimano mineral oil (genuine oil recommended)
- Shimano bleed funnel (TL-BR001 or TL-BR002)
- 7mm open-end wrench
- 2.5mm hex wrench
- Syringe (with hose)
- Bleed block (pad spacer)
- Clean rags
- Waste oil container
Step-by-Step
Preparation:
- Remove the wheel and take out the brake pads
- Install the bleed block in the caliper (to prevent the pistons from being pushed out)
- Adjust the brake lever to a horizontal position so the bleed port faces up
- Remove the bleed port screw on the lever
- Install the bleed funnel and fill it about 1/3 full with fresh mineral oil
Bleeding (bottom to top):
- Fit a 7mm open-end wrench onto the caliper’s bleed nipple
- Attach the syringe (filled with fresh mineral oil)
- Open the caliper bleed nipple (turn counterclockwise 1/4 turn)
- Slowly push the syringe to push fresh oil from the caliper into the system
- Watch for bubbles emerging in the funnel
- Keep pushing oil until no more bubbles appear in the funnel
- Close the caliper bleed nipple
Purging Air:
- Squeeze the brake lever repeatedly, 10-15 times
- Watch for any new bubbles appearing in the funnel
- If bubbles appear, keep squeezing until they’re completely gone
- Lightly tap along the hose to help any trapped bubbles rise
Finishing Up:
- Confirm the oil level in the funnel is normal
- Remove the funnel and install the bleed port screw (don’t over-tighten)
- Wipe up any spilled oil
- Remove the bleed block and install the pads
- Reinstall the wheel
Shimano Bleeding Tips
- Lever flick method: after squeezing the lever fully, flick the lever blade with your finger — this helps small bubbles break free
- Hose massage: massage along the hose from caliper to lever to help push bubbles upward
- Gravity assist: make sure the hose routing rises continuously from caliper to lever, avoiding low points where air can collect
SRAM Hydraulic Brake Bleeding Process
Tools Needed
- SRAM DOT 5.1 brake fluid
- SRAM Bleeding Edge kit (includes two syringes)
- Torx T10 wrench
- Bleed block
- Plenty of rags (to protect frame paint)
- Rubber gloves (DOT fluid irritates skin)
- Waste oil container
Step-by-Step
Preparation:
- Remove the wheel and take out the brake pads
- Install the bleed block
- Wrap the frame in protective cloth (DOT fluid will corrode paint!)
- Adjust the lever to an angle that makes the bleed port easy to work with
Syringe Preparation:
- Fill both syringes with fresh DOT 5.1 fluid
- Purge air from the syringes (hose pointing up, push out bubbles)
- Connect one to the lever end (Bleeding Edge fitting), the other to the caliper end
Bleeding (top to bottom):
- Attach the syringe to the lever-end bleed port (using the Bleeding Edge fitting)
- Attach the other syringe to the caliper bleed port
- Push fluid from the lever-end syringe while receiving it at the caliper-end syringe
- Watch for bubbles in the caliper-end syringe
- Push through roughly 10-15ml of fluid
- Reverse the process: push back from the caliper end to the lever end
- Repeat 2-3 times until completely free of bubbles
Finishing Up:
- While maintaining slight pressure on the lever-end syringe, close off the caliper end
- Remove the caliper-end syringe
- Maintain pressure at the lever end, then close it off
- Remove the lever-end syringe
- Immediately wipe up any DOT fluid that may have contacted the frame
- Install the pads and wheel
SRAM System Notes
- DOT fluid shelf life: once opened, DOT fluid absorbs moisture from the air, so it’s best used within a year of opening
- Different DOT grades: SRAM Code/Guide use DOT 5.1, while some older models use DOT 4. DOT 5 (silicone-based) is completely different and must not be used
- Bleeding Edge: newer SRAM systems use the Bleeding Edge fitting, which is easier to work with than older designs
Post-Bleed Checklist
Whether Shimano or SRAM, check the following once the bleed is complete:
- [ ] Lever feels firm, with no sponginess
- [ ] Lever throw is appropriate and doesn’t bottom out
- [ ] Pad-to-rotor clearance is normal (about 0.25-0.5mm per side)
- [ ] No fluid leaks
- [ ] Test brake performance in a safe environment before riding
Recommended Bleeding Frequency
| Usage Intensity | Shimano (Mineral Oil) | SRAM (DOT) |
|---|---|---|
| Light riding | Every 12-18 months | Every 12 months |
| Moderate riding | Every 6-12 months | Every 6-9 months |
| Heavy use/racing | Every 3-6 months | Every 3-6 months |
| After riding in rain | Check lever feel | Bleeding recommended (DOT absorbs water) |
Once you’ve mastered bleeding your brakes, you’ll find it’s actually a deeply satisfying piece of maintenance. That crisp, direct lever feel after a perfect bleed is a quality you might not even get from paying a bike shop.
Related Reading
- Complete Hydraulic Disc Brake Bleeding Steps: Restore That New-Bike Lever Feel
- Road Bike Braking Evolution: Mechanical Disc vs. Hydraulic Disc vs. Rim Brakes Compared
- Bicycle Disc Brake Technology: The Braking Science and Maintenance of Hydraulic Disc Brakes
- Disc Brake vs. Rim Brake Adjustment: A Complete Maintenance Guide for Both Systems
碟煞公路車 銑面器 !? 原來銑完差這麼多! 降低蹭碟機率! | TIME 公路車 保養小記錄 | CT Yeh
3 年前
碟煞公路車 優缺點?換車一年半實際經驗分享 / 公路車 / CT Yeh
2 年前
SRAM FORCE E1 首發!/ 改成短腿了 / 煞車升級有感嗎? / TIME ADH 變速大升級 / 公路車 / CT Yeh
1 年前
單車胎壓觀察到的有趣現象,SRAM Quarq TyreWiz 2.0 無內胎胎壓計 / 裝了有哪些幫助? / Tubeless / 公路車 / CT Yeh
1 年前
換車囉! TIME ADH 2023 全內線碟煞公路車 開箱實錄!/ Dyneema 碳纖維真的太猛了 / 曜越單車 / CT Yeh
3 年前
再一組! 全碳幅條 碟煞/無內胎輪組 開箱! 到底好騎嗎? UNAAS X40 | 公路車 | CT Yeh
4 年前
洗單車神器 吹水機! 實際洗車用用看 暴力洗鍊條大法 | 公路車 | CT Yeh
4 年前
公路車 BB培林大升級! / 備戰海鷗繞圈賽 Canyon Aerod & TIME 一起改 / MIT大廠 CEMA對鎖式陶瓷培林BB & 導輪 / 公路車 / CT Yeh
2 年前