【Equipment Analysis】Essential for Advanced Full Marathon: Carbon Frame Geometry and Stiffness Selection Indicators, Drivetrain Efficiency, and Quantitative Evaluation of Vertical Vibration Absorption Performance (Part 2) Practical Guide
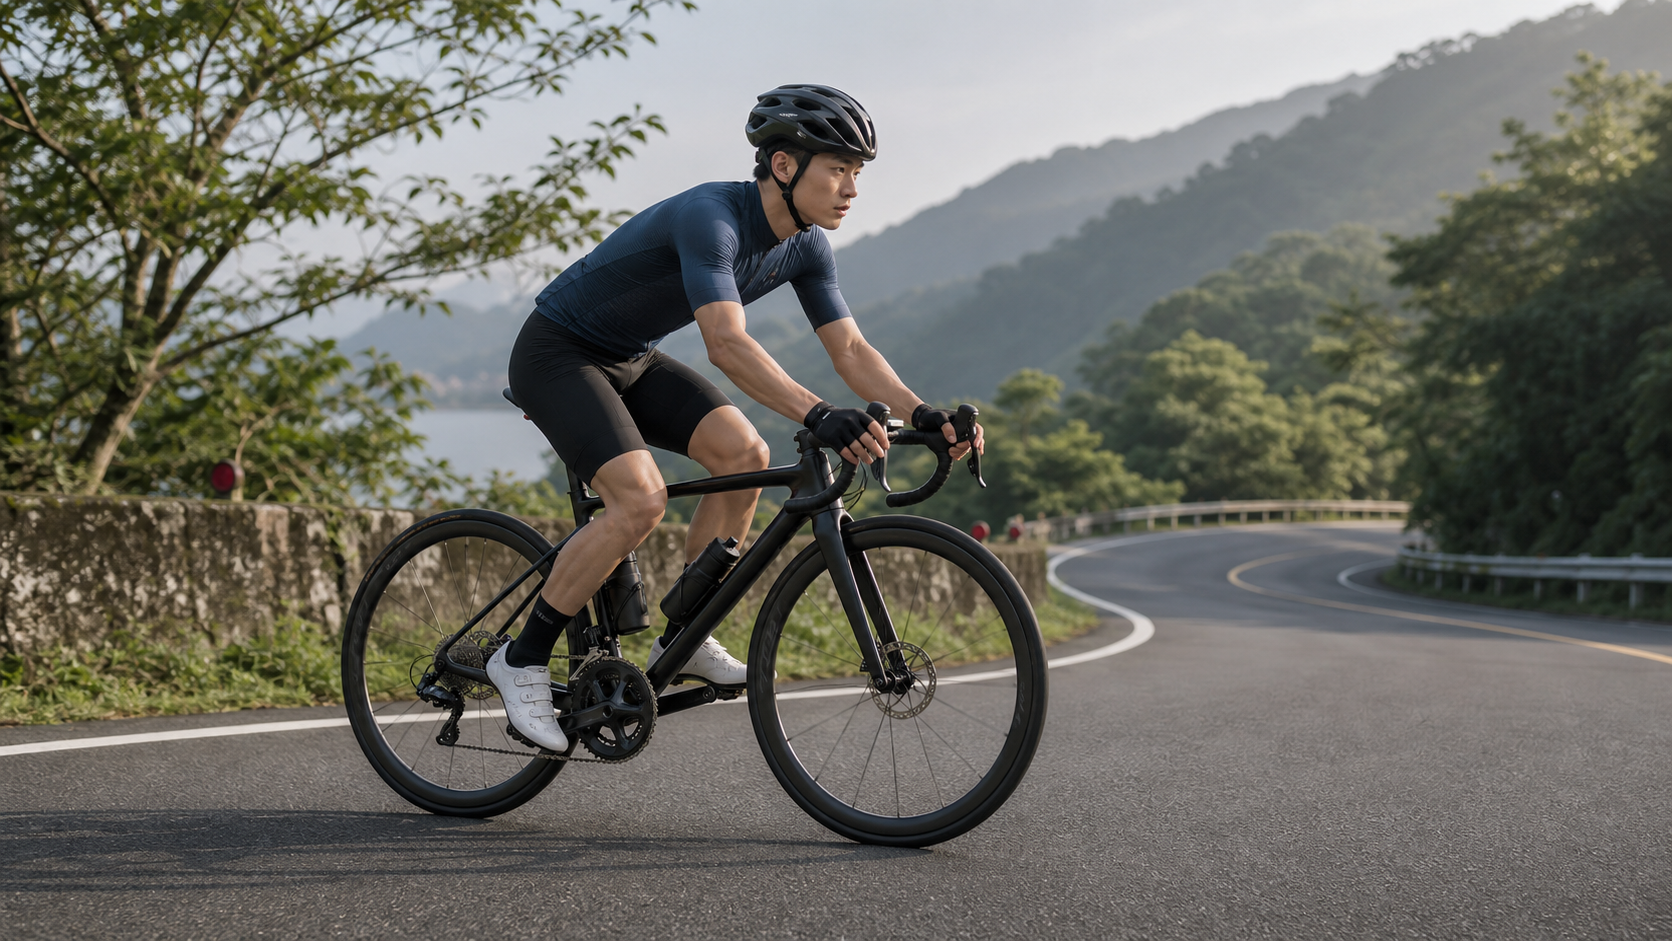
If we translate this topic into plain language, it’s really asking a very practical question: for long-endurance athletes, how should one choose a carbon road bike so that, during 3 to 6 hours of sustained output, it can simultaneously preserve pedaling efficiency, upper-body comfort, steering stability, and fatigue management in the latter stages? This question is easily distorted because market discussions are often dominated by half-truths like “carbon is plush,” “stiffer frames are faster,” and “more aggressive geometry means more race-oriented.”
A truly mature bike-selection logic must treat the frame as a mechanical system, not a material label. What you actually need to evaluate are five things: first, whether the geometry can place you in a position that sustains power output over long durations; second, whether lateral and torsional stiffness are sufficient to handle your output; third, whether vertical compliance and vibration transmission will slow you down through accumulated road feel over time; fourth, whether drivetrain efficiency is being stolen by incorrect gearing, chainline, and maintenance; and fifth, whether the overall bike design truly fits you as a “long-distance endurance rider” rather than a short-burst, explosive athlete.
1. Establish the Correct Evaluation Framework First: Geometry, Stiffness, Compliance, and Efficiency Are Four Distinct Dimensions
Most riders, when test-riding, only ask “is this bike stiff” or “is this bike comfortable,” but both questions are too crude. That’s because “stiff” at minimum breaks down into lateral stiffness, bottom bracket torsional stiffness, front-end head tube stiffness, and vertical stiffness; and “comfortable” isn’t just about frame material, but the combined result of frame, fork, seatpost, wheels, tires, tire pressure, handlebar, and rider position.
Therefore, the truly useful first step is not to look at brand stories, but to break the evaluation items into four quantifiable dimensions:
| Dimension | Core Question | Common Metrics |
|---|---|---|
| Geometry Fit | Can you maintain a long-duration power position without compensation | stack, reach, seat tube angle, head tube angle, trail, wheelbase |
| Structural Stiffness | Does the frame deform excessively under power, affecting pedaling and handling | Lateral stiffness k_lat, torsional stiffness k_t |
| Vertical Compliance | Does prolonged road vibration cause fatigue and stability loss | Vertical stiffness k_vert, acceleration RMS, contact-point vibration |
| Drivetrain Efficiency | How much of the power you put in actually reaches the rear wheel | η = P_wheel / P_crank |
If these four dimensions are not separated, you will make classic mistakes: mistaking “high torsional stiffness” for “definitely comfortable over long distances,” or mistaking “feels plush” for “pedaling efficiency must be poor.” In reality, these variables not only can coexist, they often pull against each other.
2. Geometry Always Comes Before Material: Without a Proper Fit, No Carbon Layup Can Save You
For long-duration endurance output, geometry takes priority over material. The reason is simple: material affects the structural characteristics within the same position, but geometry determines whether you can get into the right position in the first place. If the stack/reach is wrong, the seat tube angle shifts your pelvis position, and the head tube and trail make front-end control overly tense, then any discussion of “high-modulus carbon” afterward is mostly solving the wrong problem.
The first things to look at are always stack and reach. They correspond respectively to the “height” and “length” of the front end:
Stack = Vertical distance from BB center to top of head tube
Reach = Horizontal distance from BB center to top of head tube
For long-distance endurance riding, a higher stack and relatively conservative reach typically reduce lumbar and neck-shoulder tension, making it easier to maintain steady breathing and relaxed scapular control after 3 hours. This doesn’t mean shorter and taller is always better; it means you need “a position that can stably produce power,” not a showroom-aggressive stance.
Next, look at the seat tube angle (STA). Although often overlooked, it directly affects your pelvis position, the division of labor between quads and glutes, and hip extension strategy during pedaling. Research shows that when the seat tube angle is increased from 72° to 82°, subjects could maintain power output while reducing biceps femoris activation, indicating that changing the seat tube angle doesn’t necessarily make you stronger, but it can significantly alter muscle group recruitment. For long-distance riders, this matters because you’re not after a 30-second peak; you need to still be pedaling steadily after hours.
The third thing to examine is front-end stability geometry, namely head tube angle, fork offset, and trail. Using the head tube angle relative to the ground α and fork offset f, mechanical trail can be approximated as:
trail ≈ (R × cos α - f) / sin α
where R is the wheel radius. Generally speaking:
- Larger
trailmeans higher straight-line stability, but less agile low-speed steering. - Steeper head tube angle and larger offset mean quicker front-end response, but less patience at high speed.
- Longer wheelbase and lower bottom bracket drop generally lean toward stability and endurance purposes.
If your primary tasks are long-distance road riding, Gran Fondo, Twin Cities rolling hills, long group rides, or middle-to-long distance triathlon, then the geometry should lean toward stability, low fatigue, and easy position maintenance, rather than short-wheelbase, low-trail, high-neural-sensitivity setups.
3. Stiffness Is Not About “More Is Better”: You Need “Enough,” Not “Infinite”
Frame stiffness is the most commonly misled topic in the market. From an engineering standpoint, stiffness describes the ability to resist deformation under load. The two most meaningful types of stiffness for road bikes are typically:
Lateral stiffness k_lat = F / δ_lat
Torsional stiffness k_t = T / θ
where F is lateral load, δ_lat is lateral displacement; T is torque, and θ is the torsional angle. These two types of stiffness correspond to different riding sensations:
- When lateral stiffness is insufficient, sprinting out of the saddle, climbing while rocking the bike, or hard efforts will feel like the rear end or bottom bracket area “goes soft.”
- When torsional stiffness is insufficient, high-torque pedaling degrades the axial alignment feel between front and rear wheels, affecting pedaling directness and handling sharpness.
But this doesn’t mean you should chase maximum stiffness. Because for long-distance endurance riders, as long as stiffness has reached the threshold where “under your actual power output, there is no significant deformation loss,” the marginal benefit of adding more stiffness drops rapidly. Instead, it may make road vibration more likely to transmit to contact points, increasing upper-body fatigue and localized numbness.
The real question should be: “Given my weight, power, route, and riding style, what counts as enough?”
| Rider Profile | Structural Priority |
|---|---|
| 55–65 kg climber type | No need to chase extreme stiffness; prioritize geometry and comfort |
| 65–78 kg all-rounder | Balance bottom bracket stiffness and front-end stability |
| 78 kg+, high-torque cruiser or sprinter | Needs higher torsional and lateral stiffness to avoid deformation feel under hard output |
| Long-distance endurance / pace-line group rider | Stiffness just needs to be sufficient; prioritize vertical compliance and position maintenance |
So when shopping, don’t be led around by advertising phrases like “12% increase in stiffness.” Without corresponding test conditions, rider weight, and load scenarios, such percentages usually cannot be directly translated into real-world gains for you.
4. Vertical Vibration Absorption Is Not Mysticism: It Is Essentially Vertical Compliance and Vibration Transmission Control
In long-duration endurance riding, what many people actually lose is not FTP, but localized fatigue from accumulated vibration. Numb hands, tight shoulders, stiff lower back, increased sit-bone pressure, and calves kept tense by high-frequency vibration—all of these degrade output quality in the latter stages. This is why vertical compliance deserves to be quantified.
The simplest definition is:
Vertical stiffness k_vert = F / δ_vert
Vertical compliance C_vert = δ_vert / F = 1 / k_vert
Springer 2020 research points out that under identical structure and load conditions, materials with lower Young’s modulus bring higher compliance; simultaneously, reducing tube wall thickness also increases compliance, and in that study’s model, seatpost wall thickness changes are the most sensitive factor for vertical comfort. The practical translation of this is very direct: long-distance comfort isn’t just about whether the frame “is carbon,” but where the designer places the flex characteristics in the structural nodes.
On the other hand, vibration research from MIT and Cambridge also reminds us of two important things:
- Different frames do indeed exhibit different vibration frequency spectrum characteristics and acceleration responses.
- But vibration perception is extremely influenced by test conditions, rider position, hand placement, hand force, and wheel setup.
Cambridge’s testing showed that hand position, wrist angle, handlebar force, and rider mass all significantly change measured vibration values; MIT’s short-duration testing showed that vibration responses of frames made from different materials can be distinguished, but no clear performance difference could be proven within a short time, only that stiffer frames might carry a long-duration energy cost. This tells us one thing: comfort is a real engineering problem, but it cannot be substituted with a single marketing term.
Therefore, if you want to improve long-distance vertical comfort, you should not only look at the frame itself, but also consider together:
- Seatpost setback and deformable designs.
- The vibration-filtering path of the fork and front end.
- Wheel stiffness and the rim-tire system.
- Tire width and pressure.
- Handlebar drop and hand load distribution.
5. The Real Drivetrain Efficiency Loss Is Often Not in the Frame, but in Chain Condition and Gear Selection
Many people mistake “direct pedaling feel” for “high drivetrain efficiency.” These two are not entirely the same. True drivetrain efficiency can be written as:
η_drivetrain = P_wheel / P_crank = 1 - P_loss / P_crank
That is, of the power you input at the crank, how much actually reaches the rear wheel after losses in the chain, chainrings, cassette, jockey wheels, and bearings. The classic Spicer chain-drive study points out that chain tension and the number of teeth on the chainring/cassette are the primary factors affecting efficiency; the larger the tooth count, the smaller the chain-link articulation angle, and generally the higher the efficiency. A 2025 Sports Engineering technical paper further used a test rig to show that efficiency is highly linearly correlated with a combined metric of cadence and torque, and in the traditional model, efficiency is positively correlated with 1/τ_crank, meaning that under otherwise identical conditions, low cadence, high torque tends to lower drivetrain efficiency more than higher cadence, lower torque.
This has enormous practical significance for long-distance riders:
- Don’t spend extended time on extreme small or extreme large cassette cogs, which makes the chainline too oblique.
- At the same power, try to avoid locking yourself into a high-torque, low-cadence pedaling style.
- Big chainring with mid-range cassette cogs is often more efficient than small chainring with extreme cassette cogs.
- Chain cleaning and lubrication condition matters far more than you probably think.
You can understand drivetrain efficiency selection and setup as “reducing unnecessary wattage leakage.” For full-endurance riding, if you waste 3 to 6 W less per hour, it seems small, but multiplied over 4 hours, it amplifies not just average speed, but also localized muscle fatigue and fueling pressure.
6. Practical Purchase Workflow: Pick Geometry First, Then Stiffness, Then Verify Compliance and Efficiency
If you’re really going to buy a carbon endurance road bike, the process should go like this, rather than looking at the brand first and then the paint job:
1. Reverse-Engineer Geometry from Position Needs
First decide what you want:
- A more upright endurance position that stays relaxed for 5 hours.
- A lower, more aero all-rounder position that maintains group speed but can still be held for long durations.
- A more race-oriented geometry that accepts upper-body load in exchange for a lower front end and speed.
The corresponding first screening metrics are not “frame size 54 or 56,” but:
stackreach- Head tube length
- Seat tube angle
- Wheelbase
2. Reverse-Engineer the Stiffness Threshold from Weight and Output
If you are a high-power, heavy-pedaling rider who likes to get out of the saddle, bottom bracket and front-end torsional stiffness matter more; if you are a long-distance cruiser around 60 kg, the benefit of excessive stiffness is usually far lower than the comfort loss.
3. Then Check Whether the Vertical Comfort System Is Complete
It’s not just the frame, but the whole package:
- Does the seatpost have compliance design
- Can the fork and handlebar disperse high-frequency vibration
- Does tire clearance support 28c, 30c, or even wider
- Does the geometry allow you to avoid bracing your body with your arms
4. Finally, Drivetrain Configuration and Maintenance Costs
No matter how good the frame is, if you long-term use wrong gearing, a dirty chain, a skewed chainline, or high-resistance jockey wheels, the overall feel can still be poor.
7. A Quantitative Bike-Selection Matrix for Long-Distance Endurance Riders
If you want to do this more engineering-driven, I suggest using a scoring approach like this:
| Item | Weight | Evaluation Question |
|---|---|---|
| Geometry Fit | 35% | Can you maintain the target position for 3+ hours without compensation |
| Vertical Comfort | 25% | Does it reduce accumulated high-frequency load on hands, hips, and lower back |
| Structural Stiffness | 20% | Is it sufficient for your power and handling needs |
| Drivetrain Efficiency Potential | 10% | Does it allow better gearing, chainline, and maintenance conditions |
| Configuration Flexibility | 10% | Can it accommodate 28–32c tires, different seatposts/handlebars/spacers |
If you are an endurance rider primarily doing long-distance riding, the combined weight of geometry fit and vertical comfort should clearly outweigh ultimate stiffness. Conversely, if you are a criterium, short-climb sprinter, or high-explosive rider, the weights can be redistributed.
8. The Five Most Common Misjudgments
-
Carbon is definitely more comfortable than aluminum
In reality, comfort depends on structural design, tube cross-sections, seatpost, fork, tires, and position—not the material name itself. -
Stiffer is more efficient
For your actual output, stiffness beyond the threshold is often diminishing returns, and can even dump vibration costs back into your body. -
Just looking at frame reach tells you if it fits
A true fit requires looking atstack, handlebar drop, seat tube angle, stem length, and saddle setback together. -
Drivetrain efficiency is mainly determined by premium bearings
Chain condition, tooth count, chainline, and lubrication are usually more direct. -
If a 10-minute test ride feels fast, it's suitable for long distance
Feeling stiff and lively in the short term doesn’t mean it’s still efficient after 4 hours. Endurance equipment’s worst trait is “looks great for the first 20 minutes, exhausting for the last 2 hours.”
9. Conclusion: The Truly Suitable Carbon Frame for Long Distance Is Not the Stiffest, but the Most Balanced
For long-distance endurance riders, the correct answer to frame selection is almost never “the stiffest, lightest, most race-oriented bike on the market.” A better answer is usually: under correct geometry, a balanced frame with sufficient but not excessive torsional and lateral stiffness, while getting vertical compliance, vibration control, and drivetrain configuration right together.
If we condense this entire article into one purchasing principle, it would be:
First use geometry to get your position right, then match stiffness to your power, and finally use compliance and drivetrain efficiency to reduce the fatigue cost of long distances.
A frame that can achieve these three steps truly deserves the label “essential for advanced endurance.” Otherwise, no matter how beautiful the carbon layup, it’s just amplifying your wrong position and wrong mechanics.
Related Reading
- 【Equipment Analysis】Essential for Advanced Full Marathon: The Golden Rules of Carbon Frame Geometry and Stiffness Selection Metrics, Drivetrain Efficiency, and Quantitative Vertical Vibration Absorption Assessment
- In-Depth Carbon Road Frame Review: Comprehensive Comparison of Stiffness, Weight, and Vibration Absorption
- Road Bike Carbon Frame Buying Guide: Balancing Stiffness, Weight, and Budget
- Carbon Wheelset Stiffness Testing: Quantitative Comparison of Pedaling Stiffness, Lateral Stiffness, and Vertical Damping
CT 喇低賽) 武嶺牽車 才是王道 西進牽車四小時內秘訣 攝手位置 如何判斷 防抽筋小秘訣
7 年前
Unaas X50 全碳纖幅條輪 數據實測對比PK | Lun Hyper 的高階版 | 板輪爬坡也可以很厲害? ! 武嶺2小時大師一起親測! CP值超高 | 公路車 | CT Yeh
4 年前
換車囉! TIME ADH 2023 全內線碟煞公路車 開箱實錄!/ Dyneema 碳纖維真的太猛了 / 曜越單車 / CT Yeh
3 年前
Garmin Edge 1040 重大韌體更新!! / 1050功能全下放!? / 坡度反應變快了嗎?/ 快速對比實測 / 公路車 / CT Yeh
1 年前
再一組! 全碳幅條 碟煞/無內胎輪組 開箱! 到底好騎嗎? UNAAS X40 | 公路車 | CT Yeh
4 年前
Garmin Edge 1050 旗艦車錶 全台首測!/ 環法冠軍指定 / 對比Edge 1040改進哪些? / 公路車 / CT Yeh
2 年前
一日北高/長距離團騎 常見問題補充篇 / 組團或跟團的眉角 / 壯車友容易被瘦車友慢性拉爆 / 原來屁股痛可能是這個原因...? / 風場配速法 / 公路車 / CT Yeh
2 年前
西進武嶺 自製新版AI配速表產生器 x 賽前攻略 抱佛腳! 沒有功率計也可以產生配速表嗎?有什麼其他眉角賽前要注意的呢? | 西進武嶺 / 東進武嶺 KOM 攻略 | 公路車 | CT Yeh
4 年前