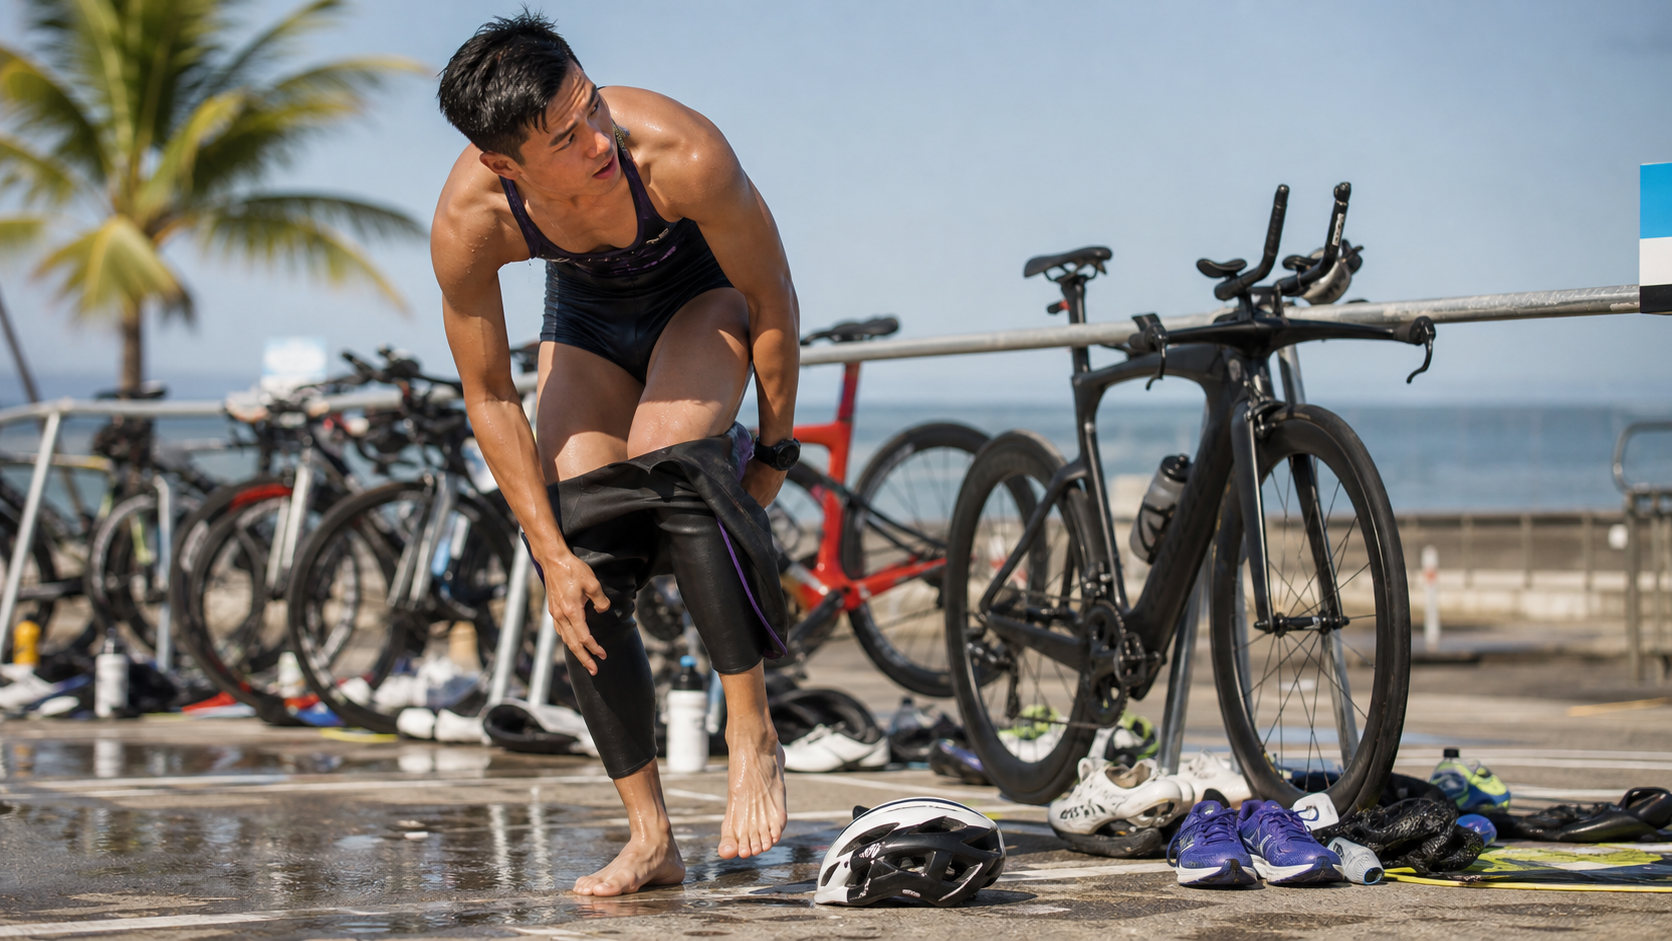
In the sport of triathlon, there’s a harsh truth I often tell my athletes: You spend six months training swimming, cycling, and running, yet the part that eats up the most time from your race result—while being the least seriously trained by most people—is often those two blank stretches with no mileage, no pace, and no heart-rate curve to show off: the Transition Zone.
I once coached an athlete aiming for a Kona slot at the 226 distance in Taitung—let’s call him A-Jhe. His swim, bike, and run were all dialed in; fitness wasn’t an issue. But the first time he came to me for a pre-race review, I watched his race footage. In T1 (swim-to-bike) alone, he stood in front of his gear “zoning out” for nearly three minutes—getting stuck with the wetsuit at his ankles, fumbling for his race number belt, buckling his helmet three times before it clicked, and then squatting down to slowly put on his cycling shoes and tie the straps before mounting. Combined, his two transitions took him a full six and a half minutes.
I told him: “A-Jhe, you know what? If you could compress those six and a half minutes down to two and a half, you wouldn’t need to train an extra day. Your swim, bike, and run fitness stays exactly the same, and your finish time drops by four minutes. Four minutes—at the threshold of fighting for a Kona slot in your age group—could be the difference between standing on the podium and watching someone else get the award.”
That’s the value of the transition zone. It’s called the “fourth discipline” of triathlon for good reason—it doesn’t require a stronger engine or bigger thighs. It requires process design, muscle memory, and a calm mind that can follow a script even in a chaotic state of oxygen debt with your heart rate spiking above 160 bpm. In this article, I’ll break down every single action in T1 and T2 down to the “second,” showing you where you can save time, where you shouldn’t take risks, and how athletes of different levels should train it in phases.
1. Build the Mindset First: Why the Transition Zone Is the “Highest ROI” Training
Let’s start with the most important concept for age-group athletes: The time you spend in the transition zone is the part of your race with the highest “return per unit of effort.”
Think about it. To save two minutes on the run, you might need to push your pace from 5:30 per kilometer down to 5:10—that’s months of interval training to earn, and you still have to execute it on race day while carrying fatigue. But saving two minutes in transition? You just need a few dedicated practice sessions to streamline the process and lay out your gear correctly. On race day, it requires zero additional physical output—and your heart rate can even settle slightly in the process.
I often run the numbers with my athletes: in a standard-distance race (51.5, i.e., Olympic distance), a mid-pack athlete’s combined time in both transitions averages 3 to 6 minutes. What about elites?
Based on observations from international race data, pro athletes’ T1 typically falls between 45 and 90 seconds, and T2 can be compressed to 30 to 60 seconds. Looking at the world’s best as examples, Kristian Blummenfelt’s splits in his Ironman-distance world-best performance were approximately 1:52 for T1 and 1:37 for T2 (that’s the 226 ultra-distance, with a full wetsuit to peel off and a full change of kit); the legendary female Chrissie Wellington’s corresponding splits were about 1:56 for T1 and 1:17 for T2. In comparison, mid-pack age-group athletes often have T1s of 2 to 4 minutes and T2s of 1 to 2 minutes.
This gap comes almost entirely from “process” and “proficiency,” not fitness. That’s why I say it has the highest ROI—the cost you put in is extremely low, but the payoff can be several minutes.
The Composition of Transition Time Can Actually Be Broken Down
Many people think of the transition as just “run in, change, run out”—a blur of chaos. Wrong. It’s actually a series of discrete actions that can each be timed and optimized independently. I like to break it down like this:
T1 (Swim → Bike) Action Chain:
- Run from the water toward the transition area (can start peeling the wetsuit top simultaneously)
- Arrive at your gear station
- Remove the wetsuit lower half
- Put on helmet, buckle the strap (rules require the chin strap to be fastened before touching the bike)
- Put on sunglasses (optional)
- Run with the bike to the Mount Line
- Mount → accelerate → put feet into cycling shoes
T2 (Bike → Run) Action Chain:
- Before approaching the dismount line, unstrap cycling shoes and pull feet out, resting them on top of the shoes to coast
- Dismount before crossing the dismount line, run with the bike back to your rack
- Rack the bike, remove helmet
- Put on running shoes (lace-free system)
- Grab nutrition/cap/race number belt
- Run toward the exit
See—every step is an independent unit that can be practiced, timed, and optimized. Once you break it down this way, the “transition is chaotic and panicked” feeling disappears, replaced by a checklist you can follow step by step.
2. T1 Action-by-Action Optimization: From Exiting the Water to Stepping on the Pedal
The First Run After Exiting the Water: Peel the Wetsuit “While Running”
Most triathlons in Taiwan—such as Puyuma Ironman, Challenge Taiwan (Taitung’s Living Lake), LAVA, and IRONMAN 70.3 Taiwan (Kenting)—require a wetsuit whenever the open water is cold enough. The wetsuit is the biggest time variable in T1; how smoothly you get it off can make a difference of 30 seconds or more.
The iron rule I give my athletes: As soon as you’re out of the water, unzip and get the top half down to your waist while running—never stop and peel it off slowly standing still.
- The moment you’re stable on your feet, reach for the pull cord on your back, pull it up, and unzip.
- While running, pull both arms out of the sleeves, letting the wetsuit drop to your waist.
- This entire segment is done simultaneously while “running toward the transition area,” meaning zero extra time.
Handle the lower half once you reach your rack spot. Here’s a small trick that helps a lot: apply a bit of petroleum jelly or baby oil on the inside of your ankles beforehand (especially at the wetsuit cuffs and leg openings), allowing the wetsuit to slide off quickly and avoiding that ankle-stuck hop-around situation that wastes the most time and is most prone to cramping. When removing the lower half, use one foot to step on the other leg’s cuff and pull down—much faster than bending over and pulling with your hands.
The Helmet: The One Action You “Can’t Skip and Can’t Get Wrong”
I want to single out the helmet because this is a rules issue, not a speed issue.
In nearly all triathlon race rules, you must have your helmet chin strap buckled before you can take the bike off the rack. Get the order wrong, or leave the strap unbuckled, and you’ll face anything from a time penalty to outright disqualification (DQ). I’ve seen too many athletes who trained their hearts out get caught by officials for pulling their bike without the strap fastened in transition, then stand there serving a penalty—wiping out every second they’d saved and then some.
So my advice is: Spend that one second on the helmet properly, and practice until you can buckle it once, perfectly, with your eyes closed. This isn’t an action you can “optimize away”—it’s a red line.
Sunglasses Placement: A Small Time-Saving Trick
If you’re wearing sunglasses, here’s a detail that’s often overlooked: pre-open the glasses, spread the arms, and place them upside down or hooked onto the vents of your helmet. That way, when you put the helmet on, you can grab the glasses in the same motion—no bending down to look for them, no opening the arms one-handed. It might only save 3 to 5 seconds, but these kinds of “do it in one fluid motion” integrations add up to the difference.
Mounting Technique: Should You Learn the Flying Mount?
This is a question every advanced athlete asks. Let me state the conclusion upfront: The flying mount doesn’t actually save that much time (usually just a few seconds), and its risks and appropriate contexts are far more important than many people realize.
Let me first explain what a flying mount is: you pre-clip your cycling shoes onto the pedals (usually using thin rubber bands to hold the shoes horizontal so they don’t dangle and drag on the ground), then after crossing the mount line, you jump directly onto the saddle, initially pedaling with your feet on top of the shoes “outside” to accelerate. Once your speed stabilizes and your balance is solid, you slip your feet into the shoes one at a time and tighten the Velcro. The benefit is: you’re putting your shoes on “while moving” rather than standing still; and since the shoes are already clipped to the pedals, you don’t waste time clicking in.
Sounds cool, right? But as a coach, I want to give you an honest risk assessment:
| Scenario | Is the flying mount suitable? | Coach’s advice |
|---|---|---|
| Elite/Pro, racing for the podium | Yes | Worth practicing; a few seconds can decide your placing; draft-legal races are even more time-critical |
| Age-group advanced, chasing a Kona slot | Depends | Only if you’ve practiced it to a reliable level; if unsure, it’s better to give up those few seconds |
| General amateur, aiming for finish or PB | Mostly not needed | Risk outweighs benefit; a stationary mount is safer |
| First triathlon, first race | Absolutely not | Focus on getting the “helmet first, then bike” rule right |
| Rainy conditions, congested mount line, slippery ground | No | The cost of a crash far exceeds the three seconds saved |
The most common mishap with the flying mount happens when the mount line is crowded, the ground is slippery, or the athlete’s heart rate is spiking and they’re fumbling—one loss of balance and you crash—not only injuring yourself but potentially taking down the athletes behind you. International coaching articles put it bluntly: the flying mount is actually “not necessary” in most non-drafting races, and amid the chaos and adrenaline of competition, there are many things that can go wrong.
When I was coaching A-Zhe, he was eager to learn the flying mount at first. I had him practice on grass, in a low-pressure environment, for two weeks, and found that three out of ten attempts he’d miss the pedal or the shoe would fly off. I told him: those three seconds aren’t worth the risk of crashing and DNF-ing. Instead, we switched to a compromise: “mount while stationary, then put shoes on after getting on the bike”—still leaving the shoes on the pedals and slipping into them while coasting after mounting, but the mount itself is done from a stable standing position. His T1 still improved to around 1:40, with zero risk. That’s the core message I want to convey: technique serves your performance, not your ego.
三、T2 逐動作優化:從下車到起跑
很多人以為 T2 很簡單,「不就是下車換跑鞋嗎」,但其實 T2 藏著幾個能省不少時間的關鍵點,而且它有一個 T1 沒有的挑戰:你的腿剛騎完幾十公里,血液都在下肢,一下車那種「腿不是自己的」的橡皮腿感(jelly legs),會讓所有動作都變鈍。
下車前的「預備動作」:進站前就要開始拆
高手跟新手的 T2 差距,通常在還沒到下車線之前就決定了。
- 提早鬆卡鞋、把腳抽出來。 大約在接近下車線前 200 到 400 公尺(看路況與你的熟練度),一邊踩踏一邊把魔鬼氈鬆開,把腳跟先抽出來、踩在鞋子「上面」滑行。這樣鞋子留在踏板上,你光腳(穿襪或不穿襪)下車,直接就能跑。
- 這個動作能省下你在架位彎腰脫卡鞋的時間,而且光腳跑進轉換區比穿卡鞋「喀喀喀」地跑安全也快得多。
- 下車前把檔位降到適合起步的齒比,避免下次上車(如果是多圈賽制)或重新加速時卡檔。
換跑鞋:免綁鞋帶系統是業餘選手 CP 值最高的投資
如果我只能推薦一個裝備給想進步的業餘選手,我會說:去買一組彈性免綁鞋帶(elastic laces / lock laces)。
它的原理很簡單:用有彈性的鞋帶取代原本的綁帶,配一個束緊扣。你只要把腳伸進去、腳跟一頓,鞋子就緊了,完全不用蹲下來綁蝴蝶結。這個小東西,能讓你的 T2 直接省下 15 到 30 秒,而且售價通常就一兩百塊台幣,是整個鐵人三項裡投報率最誇張的裝備之一。
換鞋的時候還有幾個小細節:
- 鞋子事先把鞋舌拉開、鞋口撐大,甚至可以塞一點爽身粉在裡面,濕腳也能快速滑進去。
- 如果賽事天氣熱、你選擇不穿襪(很多菁英短距離選手都這樣),一定要在平常訓練就測試過,確認你的腳不會在跑步段磨出水泡。台灣夏天的墾丁 70.3、台東的賽事都很熱很潮濕,磨破皮的風險不低,這件事務必在賽前的模擬訓練驗證,不要在比賽當天第一次嘗試。
抓補給、戴帽子:一次搞定,別來回跑
T2 出去就要開始跑,所以把跑步需要的東西集中放在一個點、按拿取順序排好:號碼帶(如果 T1 沒戴,這裡要戴上,跑步段號碼一定要在身體正面)、跑步帽或遮陽帽、太陽眼鏡(如果要換)、能量膠、鹽錠。
我教學員用一個口訣式的擺法:「腳邊鞋、鞋上帶、帶上帽、帽邊膠」——從下往上、從近到遠疊放,你蹲下去換鞋起身的那個動作軌跡,剛好把每樣東西順手帶走,不用來回彎腰第二次。
四、轉換區佈置:你的「地圖」決定你的速度
講完動作,我要回頭講一個更根本、卻最多人偷懶的環節:轉換區的佈置(Setup)。 這是你唯一可以在賽前、心跳平靜、頭腦清楚的時候就做好的功課。等你出水、缺氧、心跳 160 bpm 的時候,你沒有腦力去思考「我的鞋子勒?」——你只能靠肌肉記憶和事先擺好的佈局。
佈置的黃金原則
- 極簡主義。 轉換區的地墊上,只放你「真的會用到」的東西。東西越少,你找的時間越短、踢翻的機率越低。多帶的補給、外套、拖鞋,通通放進背包收起來,不要攤在地上。
- 按使用順序擺放。 從「你會第一個拿的」到「最後一個拿的」,由近到遠、由下到上排好。T1 要用的(安全帽、太陽眼鏡)在上層,T2 要用的(跑鞋、帽子)如果同一個位置就分區放。
- 善用地標記憶你的架位。 台灣的轉換區動輒上百上千個車架,出水後那種缺氧狀態下,你很容易找不到自己的車。事先數好「從入口進來第幾排、第幾個」,或找一個固定的地標(大樹、廣播台、旗子)當參考。有些選手會綁一條顏色鮮豔的毛巾或氣球在自己車架上(前提是賽事規則允許),這一招在大場子救過很多人。
- 賽前一定要「走一遍」動線。 賽前熱身時,實際從「出水口 → 你的架位」走一遍,再從「架位 → 上車線」走一遍,T2 再走「下車線 → 架位 → 跑步出口」。這個動作花你五分鐘,比賽當天可能救你一分鐘。
A Transition Area Setup Checklist You Can Copy Directly
| Item | T1 Needed | T2 Needed | Placement Key Points |
|---|---|---|---|
| Helmet (straps loosened, ready to buckle) | ✔ | Place on handlebars or top of the mat; sunglasses with arms opened, perched on the vents | |
| Cycling shoes | ✔ (if not pre-clipped to pedals) | Advanced athletes pre-attach them to the pedals | |
| Sunglasses | ✔ | Open the arms in advance; put them on together with the helmet | |
| Race number belt | Per rules | ✔ | Run segment number must face the front |
| Running shoes (lace-free, opening stretched open) | ✔ | Closest position on the mat; tongue pulled open | |
| Running cap/sun visor | ✔ | Stacked on top of running shoes | |
| Energy gels, salt tablets | ✔ | Top layer; grab and go while running out | |
| Small towel | ✔ | Wipe sand off feet to prevent grit in socks causing blisters | |
| Petroleum jelly/baby oil | ✔ | Apply to ankles to aid wetsuit removal (apply before the race) |
Special reminder for Taiwanese athletes: Many of our races start from beaches, grass, or gravel areas, so your feet will definitely pick up sand when you exit the water. Placing a small mat or towel in transition to wipe your feet and brushing off the sand before changing shoes is key to preventing blisters on the run. I always remind my athletes about this at Taitung’s Living Lake and Kenting.
5. Common Mistakes and Fixes: My Athletes Have Hit Every One of These
In over a decade of coaching athletes, transition area mistakes are highly repetitive. I’ve compiled the most common ones—check if any apply to you:
Mistake 1: Taking Off the Wetsuit While Standing Still
- Symptoms: After exiting the water, you run to your rack spot and only then start peeling the wetsuit off your shoulders, fighting with it while standing in place.
- Fix: Unzip immediately upon exiting the water, peel the top half down to your waist while running; use oil on your ankles and step on the legs to pull them off. Practice method: Before race day, find opportunities to do 3–5 timed “fast exit and strip” drills in your wetsuit. You’ll be amazed at how quickly you improve.
Mistake 2: Buckling the Helmet Last / Mounting the Bike Without Buckling the Strap
- Symptoms: Busy with other things, you grab the bike and only then remember the helmet, or the strap isn’t even tightened.
- Fix: Make “buckle the helmet strap” your first fixed action after entering T1. Buckle and tighten it before touching the bike. This is a hard rule—violations can result in time penalties or even DQ.
Mistake 3: Sitting on the Ground to Put on Cycling Shoes or Tie Laces
- Symptoms: In T1, you squat down to slowly put on cycling shoes and clip in; in T2, you squat to tie running shoe laces.
- Fix: Pre-clip cycling shoes to the pedals and put them on while gliding after mounting; switch to lace-free running shoes. Combined, these two tricks save most amateur athletes 40 seconds to a minute.
Mistake 4: Too Much Gear, Too Messy
- Symptoms: Your mat is covered with nutrition, a jacket, two pairs of shoes, a phone… and you spend ages hunting for things.
- Fix: Minimalist setup—only essentials, arranged in order.
Mistake 5: Not Knowing the Course Layout, Can’t Find Your Bike After the Swim
- Symptoms: Wandering aimlessly among hundreds of bike racks while oxygen-deprived.
- Fix: Walk the course beforehand, note landmarks, and (if rules allow) hang a highly visible marker.
Mistake 6: Trying Untested Skills for the First Time on Race Day
- Symptoms: You learned flying mounts from YouTube, saw others race sockless, and decide to try it for the first time on race day.
- Fix: Every transition skill and piece of gear must be repeatedly validated in training before it goes to the race. Race day is not a laboratory. Engrave this in your mind.
6. Actionable Advice for Athletes of Different Levels
Transition optimization isn’t one-size-fits-all. I prescribe different approaches based on my athletes’ levels. Honestly assess where you fall, then follow the corresponding advice.
First-Timers / First Race Athletes
Your primary goal isn’t speed—it’s “no penalties, no panic, finish successfully.”
- Understand the rules thoroughly, especially “buckle helmet first, then grab bike,” “number on the front,” and “mount/dismount lines.”
- Walk the full course at least once before race day.
- Keep your setup as simple as possible; leave anything non-essential behind.
- Don’t attempt a flying mount. Mount standing still—safety first.
- Mentally, allow yourself 3–4 minutes for each of T1 and T2. Doing each action correctly matters more than doing it fast.
Mid-Pack Amateurs Chasing a PB
You’ve finished several races and have stable fitness. Now the transition area is your easiest place to gain time.
- Invest in lace-free shoes (a must-buy), practice pre-clipping cycling shoes, and putting them on after mounting.
- Practice “stripping the wetsuit while running,” with oil on your ankles.
- Rearrange your setup to “sequential and minimalist,” and do 5–10 timed T1 and T2 rehearsals before race day.
- Goal: Cut combined transition time from 5–6 minutes down to under 3 minutes.
Advanced Athletes Chasing Qualifying Spots or Podiums
You’re fighting for seconds, so every detail must be scrutinized.
- Evaluate the flying mount: practice in a safe, controlled environment (grass, closed road) until you achieve 90%+ consistency before using it in a race; if unsure, use the compromise of “standing mount + glide-in shoe wear.”
- In T2, unclip early and glide to the dismount line barefoot.
- Integrate sunglasses into the helmet and grab all nutrition in one pass.
- Do specific simulations for the actual race venue (sand/grass/sloped mount-dismount lines).
- Goal: T1 under 90 seconds, T2 under 60 seconds.
A Ready-to-Use “Transition-Specific Training” Weekly Schedule Example
Transitions must be trained, not improvised on race day. Here’s a typical specialty week I give to mid-level and above athletes (can be woven into a normal training week):
| Training Day | Content | Focus |
|---|---|---|
| Monday | Wetsuit fast-strip × 5 sets (practice after actually swimming or getting wet) | Strip while running after exit, oil on ankles |
| Wednesday | Pre-clipped shoes + mount-and-wear × 8 reps (grass or closed course, short accelerations) | Balance on mount, wear shoes while gliding, unclip to dismount |
| Friday | Full T1→short ride→T2 scenario simulation × 3 sets, fully timed | Linking actions, execution under elevated heart rate |
| Weekend | Incorporate into a long session: one mini-brick of “swim→T1→bike→T2→run,” mirroring race setup | Realistic rehearsal under fatigue and rubbery legs |
The point isn’t how long you train, but “repeating until it becomes muscle memory.” When you’re oxygen-deprived, fatigued, and flooded with adrenaline on race day, and you can execute every action from the script without thinking—that’s when you’ve mastered it.
7. Local Taiwan Race Nuances: Climate, Terrain, and Diet All Factor In
Transition optimization can’t rely solely on foreign textbooks, because Taiwan’s race environment has its own temperament. Coaching athletes for years, I’ve learned that ignoring local factors will break even the most polished plan on race day.
Humid Heat: The Chain Reaction of Sweat, Sunscreen, and Nutrition
Taiwan’s triathlons are concentrated in spring and summer—like IRONMAN 70.3 Taiwan in Kenting and Challenge Taiwan in Taitung—where race-day feels-like temperatures often push past 30°C with high humidity. The impact on transitions is a chain reaction:
- More sweat, slippery hands: Heat and humidity make your hands slip more easily when buckling helmet straps or pulling Velcro. So designs that simplify actions—like “lace-free shoes” and “stretched-open shoe openings”—matter more in Taiwan than in cooler climates.
- Reapply sunscreen in transition: I usually advise athletes to do a quick sunscreen touch-up in T1 or T2 (use a stick, not a spray, to avoid hitting others). Under Kenting’s sun, hours of riding and running will cause peeling. Keep a sunscreen stick next to your nutrition and swipe it on your neck, arms, and ears as you go.
- Rapid salt loss: In humid heat, electrolytes deplete quickly. Keep salt tablets within reach in T2 and take them while running out. This affects whether you cramp later—don’t skimp on these seconds.
Terrain Differences: Strategies for Sand, Grass, and Gravel
Transition areas in Taiwan vary widely. Taitung’s Living Lake is relatively flat, but in many races where the swim starts from the beach, you’ll be walking on sand or gravel after exiting the water.
- Beach exit: Your feet will be covered in sand. Place a wrung-out wet towel or a small mat on the transition mat, and wipe your feet clean before putting on your shoes. This is the golden rule for preventing blisters on the run. I’ve seen too many people skip this step and end up with bloody blisters after 21 kilometers.
- Grass racking: Grass often has morning dew, and cycling shoes or running shoes left directly on the ground can get damp. Place your shoes on a towel or plastic bag to keep them elevated.
- Sloped mount line: Some races have a short climb or a curve right after the mount line. Don’t try a flying mount in these spots—stopping to mount and then starting is safer. When you walk the course before the race, pay special attention to the road conditions after the mount line.
Pre-Race Eating Out and Routine: Don’t Let Your Gut Ruin Your Transition Rhythm
This may seem unrelated to the transition area, but it’s actually very relevant. Races in Taiwan are often held away from home, so the night before usually involves eating out. I always remind my athletes: Don’t eat recklessly the night before the race, especially avoiding foods you’ve never tried, overly greasy or spicy dishes, and raw or cold seafood. The reason is, if your stomach acts up on race day, every bend and every core engagement in the transition area becomes more uncomfortable, throwing off your entire rhythm—you might even have to find a restroom mid-race.
My advice: For the 24 hours before the race, stick to the same combination of foods you’ve eaten before training and confirmed your gut handles well, focusing on familiar, easily digestible carbohydrates. A smooth transition actually starts with what you eat the night before.
8. Mindset and Rhythm: Staying Calm Amid the Chaos
Finally, I want to address an aspect few people talk about, yet it determines success or failure: the mental game.
The transition area is prone to mishaps not just because of technical issues, but because of mental state. You’ve just exited the water—oxygen-deprived, dizzy, heart rate spiking above 160 bpm, adrenaline through the roof, with people jostling around you and cheers ringing in your ears. In this state, fine motor skills and judgment decline—which is why movements you practice perfectly at home fall apart at the race.
I teach my athletes three principles for steadying their rhythm:
- Take “two breaths” before touching anything in the transition area. This sounds counterintuitive—aren’t you supposed to be fast? Why stop? But those two seconds of deep breathing switch your brain from “chaos mode” back to “script mode,” preventing you from fumbling your helmet strap or grabbing the wrong item out of panic, which would actually make you slower. Haste makes waste, and that’s especially true in transition.
- Think only about the “next action,” not the whole race. Don’t think in transition about “will my legs give out on the run” or “can I catch up ahead”—that only makes you more anxious. Your brain should hold only one thing: this step, right now. Helmet on, grab bike, mount, accelerate—one at a time.
- Accept imperfection and keep moving. If your goggles fall or your shoe doesn’t go on right the first time, don’t stop to dwell on it. Pick it up, fix it, keep going. Small mistakes at a race are inevitable; the ones who can quickly stop the bleeding and get back into rhythm are the ones who’ve truly trained.
This ability—to calmly execute a script amid physiological chaos—is itself trainable. That’s why I insist my athletes do transition practice under elevated heart rate (the brick simulations in the earlier training plan). What you want your body to remember isn’t “the movement in a comfortable state,” but “the movement when you’re exhausted and gasping for air.” These two are worlds apart.
9. FAQ
Q: Should I wear socks in the transition area?
A: It depends on distance, weather, and your skin. For short distances (51.5 and under) in hot weather, many athletes skip socks for speed, but you must verify in training that you won’t get blisters. For long distances (113, 226), I usually recommend socks—the run is so long that one blister can ruin your entire race. Taiwan’s summers are hot and humid, and individual differences are large, so be sure to test for yourself.
Q: Do I have to pre-clip my cycling shoes to the pedals?
A: Not necessarily. Pre-clipping saves time, but it requires practicing the balance skill of “putting shoes on while riding.” If you’re not comfortable with it yet, it’s perfectly fine to put your cycling shoes on at your rack spot, walk your bike to the mount line, stop, and mount—it’s just a bit slower. Safety always comes before those few seconds.
Q: Can I drink water or take nutrition in the transition area?
A: Yes, and I encourage it. T1 and T2 are moments when your heart rate can catch a breather, and a sip of water or an energy gel can really help later on. Just place your nutrition where you can grab it easily.
Q: Is the flying mount really unnecessary?
A: For the vast majority of age-group athletes aiming to finish or set a PB, it really isn’t necessary. It saves limited time but carries considerable risk. It mainly matters for those competing for podium positions, especially in draft-legal races. Master the fundamentals first; consider it only if you have capacity to spare.
Q: How fast can I get in transition?
A: For mid-pack age-group athletes, a few weeks of serious practice can realistically bring both transitions combined under 3 minutes. Advanced athletes can hit under 90 seconds in T1 and under 60 seconds in T2. Pros often have T1s between 45 and 90 seconds and T2s between 30 and 60 seconds—that’s years of accumulated muscle memory. Use those as reference benchmarks, not something to achieve overnight.
Conclusion: Turn the “Fourth Discipline” into Your Weapon
Back to A-Zhe’s story from the beginning. That season, we didn’t add a single extra interval session. We just cleaned up his transition from six and a half minutes to two minutes forty seconds—organizing his setup, using elastic laces, stripping his wetsuit while running, and putting on his shoes after mounting. At the Taitung race, he saved nearly four minutes across both transitions combined—and those four minutes were exactly what moved him from fourth in his age group to second, earning the qualification he wanted.
He told me afterward: “Coach, I always thought getting faster meant training harder. I never expected the biggest chunk of improvement to come from a place I’d completely ignored.”
That’s the message I want to leave you with: Physical fitness gains have a ceiling, and they’re expensive. Transition improvements cost almost nothing, yet they’re often completely overlooked. It doesn’t require talent or a bigger VO₂ max. It only requires you to spend a few afternoons breaking down the process, setting up your gear correctly, and drilling the movements until they become instinct.
Swim, bike, run—those are your three martial arts. The transition is the breath that strings them into one complete form. Don’t let it remain that unnoticed stretch on your results sheet that silently eats away at your placing. Starting today, train it seriously as the fourth discipline—you’ll find the podium is sometimes closer than you think.
Next time you enter transition, take a deep breath and follow the script you’ve practiced a hundred times. You’ve got this.
This article is for educational purposes and does not replace individual assessment by a physician, physical therapist, or nutritionist. Transition techniques (especially flying mounts, going sockless, etc.) involve individual differences and risks. Please verify thoroughly in training and adjust according to actual race rules and your own abilities.
References
- Triathlon Budgeting — What Is a Good Triathlon Transition Time?: https://triathlonbudgeting.com/what-is-a-good-triathlon-transition-time-factors-tips-and-the-dos-donts/
- Triathlete — How to Mount and Dismount Your Bike in a Triathlon: https://www.triathlete.com/training/race-tips/how-to-mount-and-dismount-your-bike-in-a-triathlon/
- Triathlete — Pro Transition Tricks: Save Seconds By Setting Your Bike Like A Pro: https://www.triathlete.com/gear/pro-transition-tricks-save-seconds-by-setting-your-bike-like-a-pro/
- VeloVetta — How to Do a Flying Mount in a Triathlon: https://www.velovetta.com/blogs/velovetta-blog/how-to-do-a-flying-mount-mount-in-a-triathlon
- 220 Triathlon — How to mount and dismount your bike smoothly in transition: https://www.220triathlon.com/training/beginners/how-to-mount-and-dismount-your-bike-smoothly-in-transition
Related Reading
- Triathlon Transition Zone Fully Broken Down: T1, T2 Course Design, Gear Placement, and Every Minute You Can Save
- Triathlon Transition Training: Speed Drills for T1 (Swim→Bike) and T2 (Bike→Run)
- Triathlon Transition Zone (T1/T2) Guide: Every Second Counts Transition Tips
- Triathlon Transition Zone Strategy: How to Save Every Second in T1 and T2
西進武嶺 免費訓練分析服務 Intervals | 練不夠還是練過頭?你哪一種類型選手?AI模型告訴你! | 備戰神器 | 公路車 訓練 | CT Yeh
4 年前
福隆鐵人團練隨拍
8 年前
#東進武嶺 全程實況錄影 5小時半 #夏季KOM #太魯閣 Taiwan KOM Challenge Reality Video Taroko scenery
7 年前
FTL 與 SYB 車隊專訪 西進武嶺 實用攻略分享! 2小時 如何練?!你不知道的眉角!新手準備武嶺必看 EP1 | 實力派女車友 | 精華版 | 公路車 | CTYeh
4 年前
CT 喇低賽) 武嶺牽車 才是王道 西進牽車四小時內秘訣 攝手位置 如何判斷 防抽筋小秘訣
7 年前
2019 夏季KOM 5小 完賽心得 準備攻略 東進武嶺 夏季登山王之路 Taiwan KOM Challenge
7 年前
單車AI教練!全新 ChatGPT4o 幫你分析訓練成果!排武嶺課表,分析騎車姿勢! 太神了! / 公路車 / CT Yeh / feat. 緯緯
2 年前
2016 桐花飛舞 單車挑戰 精華片段
10 年前