Open Water Racing Fully Explained: Sightline, Buoy Turns, Pack Swimming, and Rolling Start Strategies
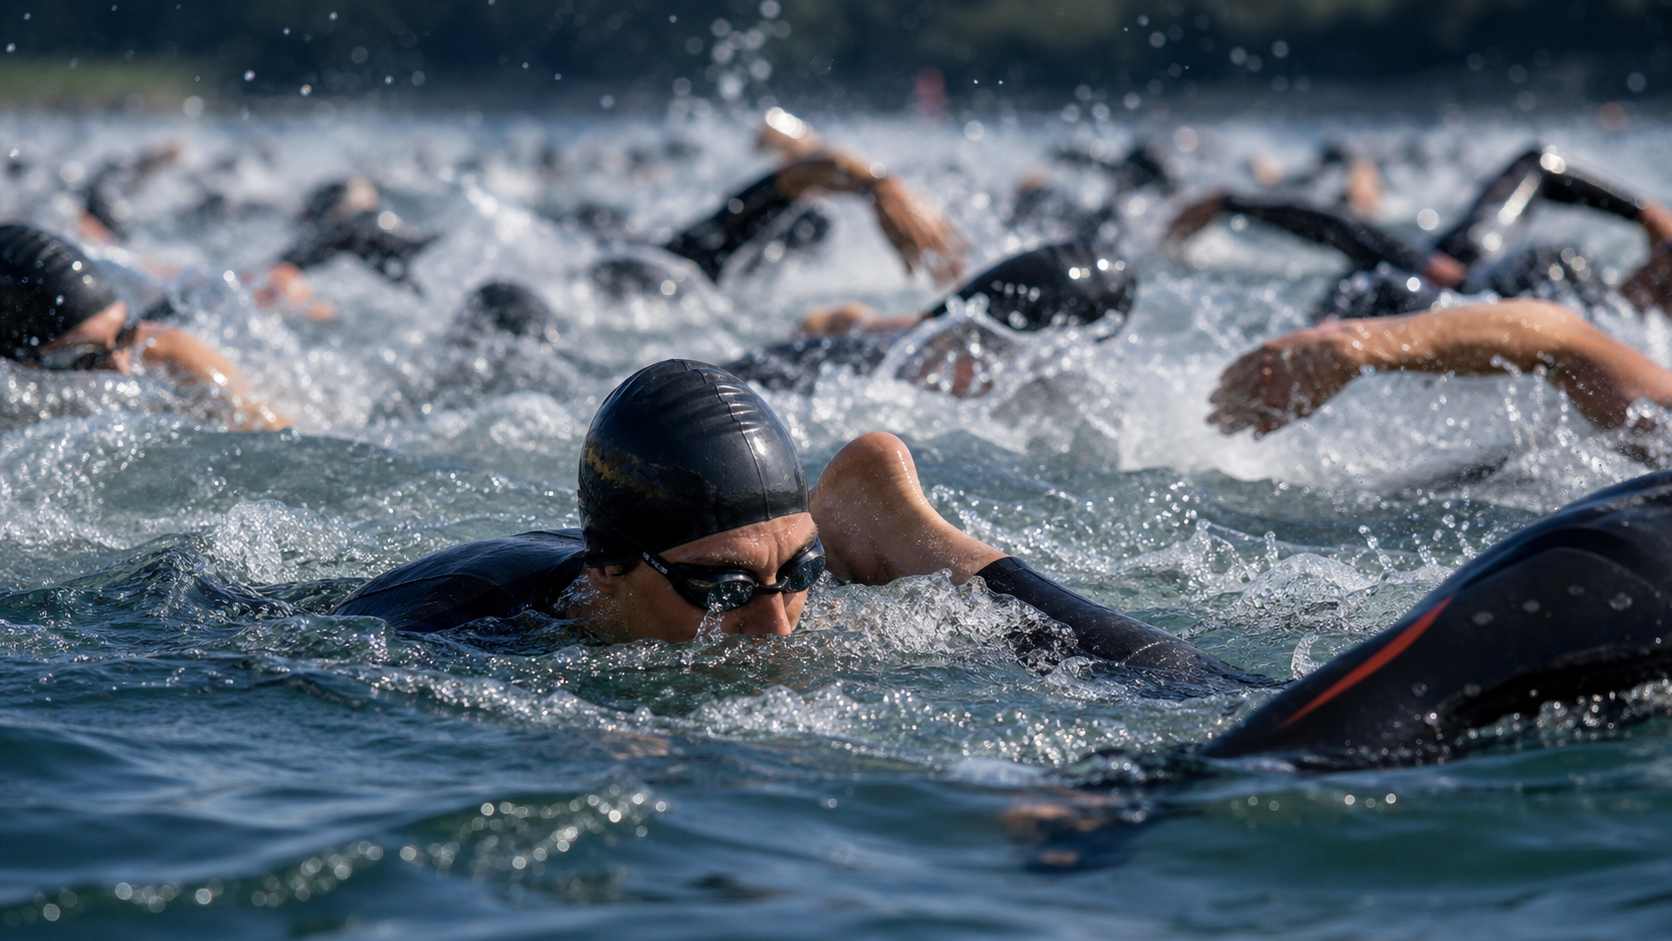
Coach’s Opening: Why Swimmers Who Break 100 Seconds in the Pool Fall Apart in the Open Water
In fifteen years of coaching triathlon, the line that stuck with me most came from an athlete. He could swim 1500 meters in the pool in under 24 minutes—solidly front-of-the-pack for his age group. The first time I took him to the open water off Fulong Beach for a test, he came ashore pale-faced and said: “Coach, halfway through the swim, I had no idea where I was or how much farther I had to go. My heart rate spiked to nearly 170 bpm, and I was breathing harder than during a pool sprint.”
That day, his actual pace was nearly 12 seconds per 100 meters slower than in the pool. The problem wasn’t fitness, and it wasn’t stroke technique—his issue was that he had transplanted his pool technique unchanged into the sea. No lane lines to follow, no wall to push off, no black T-mark on the bottom to see, and a crowd of people churning water and creating chaos around him. None of this had ever been taught to him in the pool.
Open water is the first leg of triathlon, and the one most people underestimate. It’s not just “being able to swim”—it’s an independent technical system: head-up sighting, buoy turns, pack drafting, and pace control for a rolling start. Master these four things, and you don’t just save time—you save a massive amount of oxygen and lactate, keeping your legs alive when you hit T1 for the transition. In this article, I’ll lay out the practical methods I’ve accumulated over years of coaching athletes, all in one place.
Concepts and Scientific Foundations: What’s Actually Happening in the Sea
Why Open Water Is More Exhausting Than the Pool
Let’s start with the physiology. At the same speed, open water costs more energy than the pool, for four reasons:
- Off-course distance: If you don’t swim straight, the actual distance gets longer. The consensus in research and coaching is that poor sighting adds roughly 15% to your actual swim distance—if you planned 1500 meters, you might actually swim 1725. Those extra 225 meters are energy spent for nothing.
- Energy cost of head-up sighting: Every time you lift your head to sight, your hips drop, your body position breaks down, and drag spikes instantly. Lifting too often or too forcefully is like continuously letting air out of a tire.
- Turbulence and splashing: Waves and spray created by others in the pack disrupt your stroke rate and breathing rhythm, forcing your heart rate up.
- Psychological stress: Not seeing the bottom, not seeing the finish—your sympathetic nervous system kicks in, breathing becomes shallow and rapid. This is especially pronounced in beginners and can directly add 10 to 15 bpm to your heart rate.
Stack these four factors together, and that’s the truth behind “breaking 100 seconds in the pool, then falling apart in the sea.” The good news is that all four can be suppressed with technique.
The Science of Drafting: It’s Not Just a Little Saving
The most underestimated technique in open water is drafting. Many people think it’s exclusive to cycling, but in the water, drafting is just as remarkably effective.
Based on the research and coaching summaries I’ve reviewed, under controlled conditions, proper drafting can deliver the following benefits:
- Oxygen uptake drops by roughly 10% to 25%, depending on your position and precision.
- Lactate accumulation decreases, and perceived exertion (RPE) drops noticeably.
- Directly behind the lead swimmer (at their feet), drag can drop by up to ~40%; positioned at the hip, drag drops by ~30%.
Converted to race time, it’s even more tangible: data suggests that effective drafting can save about 90 seconds over 1900 meters (half-distance 226) and about 3 minutes over 3.8 kilometers (full 226). For an age-group athlete, 3 minutes is enough to change your position in the rankings.
I often tell my athletes: “If you can’t draft in the water, it’s like riding into the wind alone while laughing at everyone hiding in the pack.” This is legal, rule-permitted energy saving (there’s no drafting ban in the swim leg, unlike cycling)—why not use it?
The Economics of Sighting Frequency
Sighting is a classic return-on-investment problem. Every time you lift your head, you pay the cost of a broken body position to gain the benefit of a course correction. Sight too little and you drift off course; sight too much and you leak energy. The key is finding the balance.
A common coaching recommendation is sighting every 6 strokes, but that’s a starting point, not a hard rule. The actual frequency depends on three variables:
- Sea conditions: Big waves, poor visibility—sight more often; a calm lake swim allows longer intervals.
- Reference points: If there’s a large buoy or a tall building on shore ahead, you can sight less; if the buoy is small and far away, you need to check more.
- How straight you swim: Some people naturally drift to one side (often related to their preferred breathing side). The worse the drift, the more often you need to sight.
Here’s a key detail: good sighting is “crocodile eyes”—lift only your eyes just above the water, like a crocodile exposing its eyes for a quick scan, rather than lifting your whole head to breathe. The higher your head goes, the deeper your hips sink, and the greater the drag. The ideal rhythm is “eyes up for a scan → immediately turn your face to the side to breathe → head returns to centerline,” all in one fluid motion.
Breathing Rhythm Is the Real Foundation for a Stable Heart Rate
Sighting aside, there’s one thing more fundamental than technical movement: breathing. The number-one culprit behind a spiking heart rate and broken form in open water is often not a lack of fitness, but “breathing falling apart.” The moment you panic, breathing becomes shallow and rapid, you don’t take in enough oxygen, your body thinks it’s hypoxic and panics more—a vicious cycle.
I require my athletes to practice “exhaling” rather than “inhaling” before they hit the sea. Many people think the key to breathing is to inhale forcefully, but the real key is continuous, slow, complete exhalation underwater, clearing the carbon dioxide from your lungs so that when you turn your head out, you naturally fill up. This habit of “continuous underwater exhalation” pulls rapid breathing back into a stable rhythm—it’s the single most effective way to control heart rate and avoid panic.
Race-day reminder: if your breathing falls apart and your heart rate spikes at the start, don’t push through it. Deliberately slow down for two or three strokes and take a few deep, long underwater exhales to find your rhythm again. Spending those few seconds stabilizing your breathing is far better than swimming an entire stretch with an out-of-control heart rate.
Practical Method One: Breaking Down and Training Sighting Technique
The Four-Beat Rhythm of Crocodile-Eye Sighting
I break sighting down into four beats for my athletes, and it can be practiced in the pool:
| Beat | Action | Common Mistake |
|---|---|---|
| Beat 1 | As your hand pushes through the water, lift your chin slightly so your eyes just break the surface | Lifting your whole head with your nose, like a breaststroke head-up |
| Beat 2 | Quickly lock onto the reference point ahead, scan only, don’t linger | Staring too long, body stalls and sinks |
| Beat 3 | Turn your head naturally toward the breathing side to complete one breath | Lifting your head, then forcing it back to the front to breathe, missing the air |
| Beat 4 | Return your face to centerline, resume a streamlined position | Never putting your head back in the water, dragging resistance the whole way |
Combining “sighting” and “breathing” into one continuous motion is the key to saving energy. Doing them separately means you pay the cost of a broken body position twice on every length.
How to Practice Sighting in the Pool
Open-water skills don’t have to wait until you hit the sea. Here’s the pool sighting workout I give my athletes, scheduled 1 to 2 times a week:
Sighting Technique Workout (Pool, ~60 minutes)
| Segment | Content | Volume | Key Focus |
|---|---|---|---|
| Warm-up | Easy freestyle | 400 meters | Focus on stroke rhythm, keep heart rate in a low zone |
| Technique A | Sight every 6 strokes, look at a fixed object at poolside | 6 x 50 meters | Practice the crocodile eye, don’t lift your head too high |
| Technique B | Sight every 4 strokes (simulating rough water) | 6 x 50 meters | Combine sighting and breathing into one motion |
| Main Set | Swim 3 to 5 strokes with eyes closed, then sight to correct | 8 x 50 meters | Feel which way you drift, build directional awareness |
| Main Set | Tempo swim, sight every 25 meters | 400 meters | Push heart rate to race intensity, practice sighting under pressure |
| Cool-down | Easy swim | 200 meters | Relax, review today’s drift direction |
The “eyes closed” set is my secret weapon. Close your eyes and swim 3 to 5 strokes, then open them to see how far off you’ve drifted. You’ll quickly discover your drift habits—most people drift toward the side they breathe on. Once you know your drift direction, you can compensate in advance during a race.
Practical Method 2: Route Choice for Buoy Turns
A Buoy Turn Isn’t a Circle, It’s a Tangent
The buoy turn is where the biggest gaps open up in open water, and also where you’re most likely to get bumped, kicked, or boxed out. Most age-group swimmers make one mistake at buoys: they swing too wide. Afraid of hitting the buoy, they pass three or four meters away, swimming extra distance and getting overtaken by people cutting the inside line.
The correct mindset is: the buoy is a point on your path, and you want the shortest tangent through that point. Ideally, your body should pass right along the outside edge of the buoy, close enough to almost touch it. Of course, in a crowd, getting too close can get you squeezed, so adjust based on density—but your mental target line should always be “hug the turn.”
Three Buoy Turn Techniques
Depending on the turn angle and the crowd, I teach my athletes three ways to round a buoy:
- Standard tangent turn (turn angle within 90 degrees): Start moving toward the inside of the buoy 15 to 20 meters early, pass close to the buoy, and immediately re-sight the next buoy after exiting the turn.
- Stroke-steered turn (turn angle over 90 degrees, few people): Slow down one or two strokes before the buoy, use the inside arm for extra pulls while the outside arm acts as a pivot, rotating your body like paddling a canoe, then accelerate away immediately after the turn.
- Head-up breaststroke transition (crowded): If you get bunched up approaching the buoy, briefly switch to head-up breaststroke for two or three strokes to keep your vision, avoid getting your arms stepped on, and spot gaps to slip through, then switch back to freestyle after passing.
Many hardcore swimmers look down on the third option, but I always teach it to first-time triathletes. Safety comes first—protecting your head and hands in a pack is far more important than saving two seconds.
Pacing Around the Buoy
There’s a detail often overlooked around buoy turns: slightly ease off before the turn, and actively accelerate after it. Many people do the opposite—charging into the turn and getting stuck, then slacking off on the exit. The correct approach is to adjust your position and breathing before the turn, hug the line through it, and immediately use a 5 to 8 stroke burst of acceleration to break away from the pack and get into clean water, then settle back into cruise pace. This “exit sprint” is the golden opportunity to gap the group and secure a good draft position.
Practical Method 3: Pack Swimming and Draft Position Selection
Two Core Draft Positions
As mentioned earlier, drafting can save 10% to 25% of your oxygen uptake, but only if your position is right. There are two main draft positions in open water:
Position 1: Behind the feet (behind draft)
Swim directly behind the lead swimmer, with your fingertips landing roughly 0 to 0.5 meters behind their toes. This is the most energy-efficient position, reducing drag by about 40%. The downsides are blocked vision, more water splash, and the risk of accidentally touching their feet (unavoidable in a crowd, but try not to keep tapping them).
Position 2: Hip draft
Swim beside the lead swimmer’s hip, slightly behind, with your head roughly aligned with their hip or thigh. Drag reduction is about 30%, slightly less than behind the feet, but it offers several practical advantages: better vision, the ability to observe the lead swimmer while breathing, less water splash, and fewer sighting strokes needed because you can rely on the lead swimmer’s navigation.
I personally recommend the hip draft more often to age-group athletes, especially on the breathing side. The reason is that its energy savings are already substantial, while it retains tactical flexibility—you can easily decide whether to overtake or switch targets at any moment.
Draft Position Comparison Table
| Position | Drag Reduction | Vision | Water Splash | Sighting Load | Suitable For |
|---|---|---|---|---|---|
| Directly behind feet | ~40% | Poor | High | Low | Those seeking maximum efficiency and can tolerate blocked vision |
| Hip draft (breathing side) | ~30% | Good | Low | Low | Most age-group athletes, high tactical flexibility |
| Hip draft (non-breathing side) | ~30% | Fair | Moderate | Moderate | When you need to protect your breathing space |
| Swimming solo | 0% | Good | None | High | When no group matches your pace |
How to Find the Right Pack
Finding a draft isn’t about latching onto just anyone—the key is finding a lead swimmer whose pace matches yours and who swims straight. Follow someone too fast and you’ll burn out early; follow someone too slow and you’re wasting your ability; follow someone who swims like a snake and you’ll be dragged off course, better off swimming alone.
In practice: observe for the first 200 meters after the start, using your peripheral vision and glances during breathing to lock onto one or two targets with similar pace, stable splash, and a straight line, then slot into their hip. If the lead swimmer slows down or drifts mid-way, decisively switch targets or take over yourself. Following is a means, not an end—your goal is always to reach T1 using the least amount of effort.
A Real-World Drafting Case Study
I coached an age-group female athlete with solid swimming ability who always lost ground in the swim leg, exiting the water at the back of the pack. After reviewing several race videos, I spotted the problem: she swam straight and steady, but she was solo the entire time—too focused on her own rhythm, afraid to get close to others, so she fought water resistance alone the whole way.
We spent a month focusing on pack swimming. The method was simple: find two teammates with similar pace, line up in open water, take turns leading, each leading 100 meters before rotating to the back. At first, she was uncomfortable getting splashed in the face and having her vision blocked, but by the third week, she started feeling that “my arms really feel lighter when I’m in the hip position.” At the next sprint triathlon, she stayed in the middle of the pack for the entire 1500 meters for the first time, exiting the water nearly 90 seconds faster than before. She said, “My legs felt completely different when I got out—still strong.”
That’s the value of drafting—it’s not just about saving seconds in the swim; it’s about the energy bank you carry into the bike leg.
Troubleshooting Common Drafting Scenarios
Issues are bound to come up while drafting. Here’s how to handle a few common situations:
- The lead swimmer suddenly slows down: Don’t slow down with them. Overtake from the side and either become the leader yourself or find a new target.
- The lead swimmer starts drifting: A meter or two of drift is tolerable, but if they’re clearly heading the wrong way, break off immediately, sight and correct on your own. Better to briefly swim solo than to be led off course.
- Stuck in the middle of a pack and can’t move: Briefly switch to head-up breaststroke to spot a gap, slip out toward the less crowded side, and find clean water and a new drafting target.
- Keep hitting the feet of the swimmer ahead: That means you’re too close. Drop back slightly or move to the side into the hip position, keeping your fingertips about half a meter from their feet.
Practical Method 4: Handling the Rolling Start
What Is a Rolling Start
In recent years, many races in Taiwan—especially high-participation events—have adopted the rolling start. Athletes enter the water in small waves, spaced a few seconds apart, based on their self-reported finish times, rather than the traditional mass start. This approach is safer and reduces crowding, but it also changes race tactics.
A traditional mass start is a short sprint plus physical jostling—the first 100 meters decide where you slot into the pack. A rolling start is comparatively more relaxed, but it brings a new issue: your actual placing is only known after results are tallied, and someone passing you in the water isn’t necessarily faster (they may simply have started earlier).
Three Principles of a Rolling Start
- Honestly report your pace and line up in the right wave: When registering or being seeded, fill in your estimated swim time truthfully. Start too far forward and you’ll be run over by genuinely faster swimmers, wrecking your mindset; start too far back and you’ll spend the whole swim weaving through people, burning extra energy. Line up correctly, and those around you will have similar paces, making it easiest to form an effective draft group.
- Don’t sprint in the first 50 meters: Because you enter in waves, you don’t need to fight for position like in a mass start. Swim out steadily at about 80% effort, keeping your heart rate in a sustainable zone, and avoid spiking above 175 bpm right at the start—otherwise you’ll be paying off that debt for the rest of the swim.
- Ignore apparent position and focus on your own pace and drafting: Under a rolling start, the “ranking” you see in the water is an illusion. Don’t panic and speed up just because people keep passing you—they may be faster swimmers who started later, or slower ones who started earlier and are fading. Hold your own rhythm and find a good draft; that’s the real answer.
Handling a Mass Start (Some Races Still Use It)
If you’re in a traditional mass start, the strategy is different. The first 100 to 150 meters are the critical “break out of the crowd” phase:
- Pick a side: If you’re not an elite swimmer, don’t stand in the central conflict zone on the front row. Shift slightly to one side—the course may be a bit longer, but you’ll avoid the worst jostling and save more mental energy.
- Accept a high heart rate early: In the first 1–2 minutes of a mass start, a high heart rate is normal; the goal is to secure a good position. Once you’ve got it, deliberately ease the pace, settle your breathing, and enter cruise mode.
- Find a draft immediately after positioning: As soon as you clear the most chaotic zone, latch onto a suitable pair of feet or a hip ahead of you, and gradually earn back the energy you burned with drafting.
Common Mistakes and Fixes
Having coached many athletes, open-water mistakes are highly repetitive. Here are the six most common ones, along with their fixes:
Mistake 1: Lifting Your Head Too High
Symptoms: Every time you sight, your entire head and nose come out of the water, your hips instantly sink, and you look like you’re swimming head-up breaststroke.
Fix: Practice the crocodile eye—expose only your eyes; combine sighting with breathing by turning your head to breathe immediately after lifting your eyes. Repeat this against a fixed object at the pool edge until it becomes muscle memory.
Mistake 2: Fixed Sighting Frequency
Symptoms: Regardless of wave size or buoy distance, you sight every 6 strokes—either veering off course or running out of breath.
Fix: Treat sighting frequency as a variable. Sight more often in big waves or when the reference point is small; sight less in calm conditions or when the target is clear. Learn to use the route of swimmers ahead as a sighting aid to reduce your own head lifts.
Mistake 3: Rounding Buoys Too Wide
Symptoms: Afraid of hitting the buoy, you swing around it 3–4 meters out, swimming extra distance while someone cutting the inside line passes you.
Fix: Treat the buoy as a point on your path, take the shortest tangent through it, and pass close along its outer edge. Adjust based on crowding, but your target line should always hug the buoy.
Mistake 4: Not Using Drafts
Symptoms: You swim solo the whole way, laugh at others hiding behind swimmers, then finish exhausted and still slow.
Fix: Actively find a leader with a similar pace who swims straight, and slot into their hip or feet position. This is legal energy saving—use it.
Mistake 5: Sprinting at the Start
Symptoms: You go all-out at the gun, your heart rate spikes to 180 bpm in the first 200 meters, then you fade and pay the price for the rest of the swim.
Fix: In a rolling start, ease out at 80% effort; in a mass start, a high heart rate early is acceptable for positioning, but once positioned, immediately drop the pace, settle your breathing, and enter cruise mode.
Mistake 6: Only Training in the Pool, Never in Open Water
Symptoms: You can swim 100m repeats in the pool, but once in open water—no bottom in sight, waves, and crowds—your heart rate spikes and your form falls apart.
Fix: Schedule at least 3–5 open-water sessions before race day to adapt to water temperature, wave conditions, visibility, and crowds. In Taiwan, venues like Fulong, Sun Moon Lake, and Chengcing Lake are available; practice in a safe environment with lifeguards or a coach present.
Actionable Advice for Different Athlete Levels
First-Timer Finish Group (First Open-Water Challenge)
Your primary goal is safety, no panic, and a smooth finish—speed is secondary.
- Prioritize building a sense of safety: Get at least 3 open-water practice sessions before race day to overcome the psychological hurdle of not seeing the bottom. Start in shallow water near shore to adapt, then gradually move deeper.
- Learn head-up breaststroke as a backup: When tired, panicked, or stuck in a crowd, switching to head-up breaststroke to stabilize your breathing and vision is a lifesaving skill.
- Sight for stability, not efficiency: Better to lift your head a few extra times to confirm direction than to veer off course and swim wasted distance. Build your sense of direction first, then talk about efficiency.
- The rolling start is your friend: If the race offers it, honestly report a slower wave—you’ll be surrounded by fellow beginners and won’t get run over.
Advanced Age-Group (Want to Improve and Race for Rankings)
You can already finish; now it’s about squeezing out time.
- Practice drafting systematically: Find training partners and take turns leading to truly feel the difference between drafting at the feet versus the hip, making following instinctive.
- Practice buoy turns on tangents: Use real buoys in open water to practice hugging the line and accelerating out of turns, turning buoy rounding from a weakness into a weapon.
- Make sighting efficient: The goal is to minimize sighting frequency without veering off course, and learn to borrow the routes of swimmers ahead.
- Add pressure to intensity sessions: Your main pool sets should train you to sight reliably at race intensity, so your form doesn’t fall apart when fatigued.
Competitive Group (Racing for Age-Group Podiums and Qualifying Slots)
Details decide outcomes.
- Specialize in start sprinting: For mass starts, train the anaerobic sprint-and-position ability for the first 100 meters, plus the skill of quickly dropping your heart rate back to cruise after the sprint.
- Tactical drafting: Don’t just follow—learn to judge when to lead, when to follow, and when to surge ahead to claim clean water.
- Zero-loss buoy turns: Hug every turn and accelerate out of every corner; the cumulative seconds add up significantly.
- Pre-race reconnaissance: If possible, get into the actual race venue before race day to familiarize yourself with buoy positions, current direction, and sun angle (glare can make buoys invisible).
Practical Tips for Racing in Taiwan
Taiwan’s open-water environments have their own characteristics. A few practical reminders:
- Watch currents and waves in sea swims: At venues like Fulong and Dapeng Bay, be mindful of rip currents and swells. Always practice in environments with lifeguard coverage, and never swim alone.
- Lake swimming is friendlier but don’t let your guard down: The Sun Moon Lake crossing is a classic entry-level lake swim with relatively calm water, ideal for a first open-water experience—but long-distance endurance and sighting still demand respect.
- Water temperature and wetsuits: Taiwan’s summer seas are warm, and most races won’t require a wetsuit; but for early-morning or cooler events, a well-fitted wetsuit provides buoyancy and warmth worth considering.
- Sunlight and glare: Most Taiwanese races start at dawn, so pay attention to the sun’s angle. If buoys are in the glare direction, they’ll be hard to see—note landmarks during pre-race reconnaissance as backup references.
- Post-race food and recovery: After finishing a triathlon, Taiwan’s convenient food environment is a great recovery ally. Aim for a carbohydrate-plus-protein combination, such as onigiri with unsweetened soy milk, or braised snacks with rice, to replenish glycogen and support muscle repair; also top up fluids and electrolytes.
A Complete Eight-Week Open Water Race Preparation Block
Many students ask me: “I know these techniques, but how exactly do I fit them into my training plan?” Here is a commonly used eight-week race preparation block for you to reference. This isn’t the only solution, but the logic is clear: build technical movements in the early phase, add pressure in the middle phase, and simulate real racing in the final phase. Assume you have 3 to 4 swim sessions per week, with at least 1 to 2 of them in the open water.
| Week | Pool Focus | Open Water Focus | Heart Rate Reference |
|---|---|---|---|
| Weeks 1-2 | Crocodile eye sighting drills, closed-eye swimming to build directional awareness | Adapt to water temperature and visibility, back-and-forth in shallow water near shore | Low to moderate zone, build a sense of safety |
| Weeks 3-4 | Combine sighting with breathing, land drills for buoy turns | Practice hugging the line around physical buoys, accelerate out of turns | Primarily moderate zone |
| Weeks 5-6 | Sighting under pressure (maintain form at race intensity) | Draft with two or more swimmers taking turns leading, practice drafting at the feet and hip position | Moderate to high zone |
| Week 7 | Main set simulates race distance, including buoy turns | Full simulation: start + sighting + buoy turns + drafting all strung together | Close to race intensity |
| Week 8 | Taper, short distances to maintain feel | One easy course familiarization, no added volume | Low zone, conserve energy |
The spirit of this block is: first train each individual skill until you don’t have to think about it, then combine them to withstand race pressure, and finally taper. Do not try to pile on high volume the week before your race—you will only show up at the start line carrying fatigue.
Frequently Asked Questions (FAQ)
Q1: I swim well in the pool. Do I really need to specifically train in open water?
Yes. Pool speed does not equal open water speed—the student who broke 100 minutes mentioned earlier is a living example. Open water adds variables that don’t exist in the pool: sighting, buoy turns, pack swimming, wave conditions, and psychological pressure. Schedule at least 3 to 5 open water sessions before your race to adapt both your technique and your mind.
Q2: I’m terrified when I can’t see the bottom and panic as soon as I get in the open water. What should I do?
This is a very common psychological response, and there’s no shame in it. The approach is to progress gradually: first adapt in a near-shore environment with chest-deep water and lifeguards on duty, where you can stand up anytime you’re tired. Next, practice “head-up breaststroke” as a safety backup—whenever you feel panic, switch to it to stabilize your breathing and vision. Once you make “I always have an escape route” an instinct, the panic will gradually subside.
Q3: Is drafting legal? Will I get penalized?
Drafting in the swim leg is completely legal and permitted by the rules—this is completely different from the bike leg, where drafting is prohibited. So don’t be shy: actively find a lead swimmer with a similar pace and follow them. The only thing to watch is sportsmanship—don’t continuously kick, grab, or pull at the feet of the swimmer ahead of you, as that constitutes harassment. Keep your fingertips a reasonable 0 to 0.5 meters behind their feet.
Q4: In a rolling start, I keep getting passed. Should I speed up?
Don’t panic. In a rolling start, the positions you see in the water are an illusion—the people passing you may simply be faster swimmers who entered the water later than you. Stick to your own pace and drafting plan; your actual result won’t be known until the final timing is calculated. Blindly accelerating to follow others will only cause you to blow up early.
Q5: How many strokes should I take between sighting lifts? Is there a standard answer?
There is no fixed standard. Every 6 strokes is a common starting point, but you should adjust it as a variable: sight more often when waves are big, the buoy is small, or you tend to drift off course; sight less often when the water is calm, the target is clear, or you have a swimmer ahead to follow. The principle is “use the fewest number of head lifts while maintaining a straight course,” and learn to use the route of the swimmer ahead of you as a sighting aid.
Conclusion: Every Second in the Ocean Is a Trainable Skill
Let’s return to that pale-faced student from the opening. Over the following two months, we spent two pool sighting sessions per week and four open water sessions, building up his crocodile eye sighting, hugging the line around buoys, hip-position drafting, and rolling start rhythm one by one. In his next 51.5 standard-distance triathlon swim leg, not only did he not fall apart, he exited the water nearly a minute faster than his pool-estimated time—because he learned to draft and learned not to swim wasted distance.
I want to tell every triathlete reading this: open water swimming is never about brute force; it’s about technique and strategy. Head-up sighting is economics, buoy turns are geometry, drafting is fluid dynamics, and the start is psychology. None of these are innate—all of them can be trained. Treat this article as your training blueprint, go into the water and verify each item one by one, and you’ll find yourself reaching T1 with your legs still fresh and ready.
Stop just imagining it in the pool. Take this blueprint and go train in the open water—see you out there.
This article is for educational purposes only and does not replace individual assessment by a physician, physical therapist, or nutritionist. Open water training must be conducted in a safe environment with lifeguard provisions. Wear a highly visible swim cap and a safety buoy to increase visibility, inform friends or family of your entry time and location in advance, and never swim alone. If you have a history of cardiovascular or respiratory conditions, consult a qualified medical professional before entering the water.
References
- Umara Sports — How to Save Energy with Drafting in Swimming: https://umarasports.com/en-SE/how-to-save-energy-with-drafting-in-swimming
- BestTriathletes — Open Water Swimming Technique for Triathlons: Sighting & Drafting: https://besttriathletes.com/open-water-swimming-technique/
- TrainingPeaks — How To Swim Straight in Open Water: https://www.trainingpeaks.com/blog/how-to-swim-straight/
- Strava Stories — Master Open-Water Swimming for Triathlon: https://stories.strava.com/articles/master-open-water-swimming-for-triathlon
- MySwimPro — Open Water Drafting Technique: https://blog.myswimpro.com/2018/07/18/open-water-drafting-technique-whiteboard-wednesday/
Related Reading
- Turn and Kick Rhythm in the Triathlon Swim Leg: Energy Distribution for Open Water 1500m
- Triathlon Swim Training: Overcoming Fear and Improving Efficiency in Open Water
- Open Water Swimming Techniques: Advanced Training from Pool to Sea
- The Complete Guide to Open Water Sighting: The Crocodile Eye Sighting Method Every Triathlete Must Learn
戰略) Zwift Race 如何咬在第一集團 如何評估自己要開多少推力 (請開1.5倍速看)
7 年前
CT 喇低賽) 武嶺牽車 才是王道 西進牽車四小時內秘訣 攝手位置 如何判斷 防抽筋小秘訣
7 年前
一起升級!海鷗盃LSD團練...JJSC Zone2招待 騎到手抖 / 公路車 / CT Yeh
1 天前
西進武嶺 免費訓練分析服務 Intervals | 練不夠還是練過頭?你哪一種類型選手?AI模型告訴你! | 備戰神器 | 公路車 訓練 | CT Yeh
4 年前
FTL 與 SYB 車隊專訪 西進武嶺 實用攻略分享! 2小時 如何練?!你不知道的眉角!新手準備武嶺必看 EP1 | 實力派女車友 | 精華版 | 公路車 | CTYeh
4 年前
備戰 戀戀197 賽前關門點分析 西濱團練 #公路車 4K高畫質
6 年前
#公路車 #西進武嶺 配速配瓦實驗 坡度分析 四小時內攻略 建大盃 NeverStop #西進武嶺攻略
6 年前
2023桃園團體繞圈賽 / 海鷗繞圈賽 | 全程空拍數據版 | 公路車 | CT Yeh
2 年前