文章導覽
- Coach's Opening: The Shoe Without Laces
- Core Concept: Why a "Checklist" Beats "Memory"
- Race-Day Cognitive Load Makes You Dumber
- Triathlon's Gear Complexity Is Triple That of a Single Sport
- "Brought It" Doesn't Equal "It Works"
- Breaking the "Checklist Paradox": The More Experienced You Are, The More You Need It
- Core Tool: Complete Gear Checklist (One Table)
- Table 1: Complete Triathlon Race Day Gear Checklist
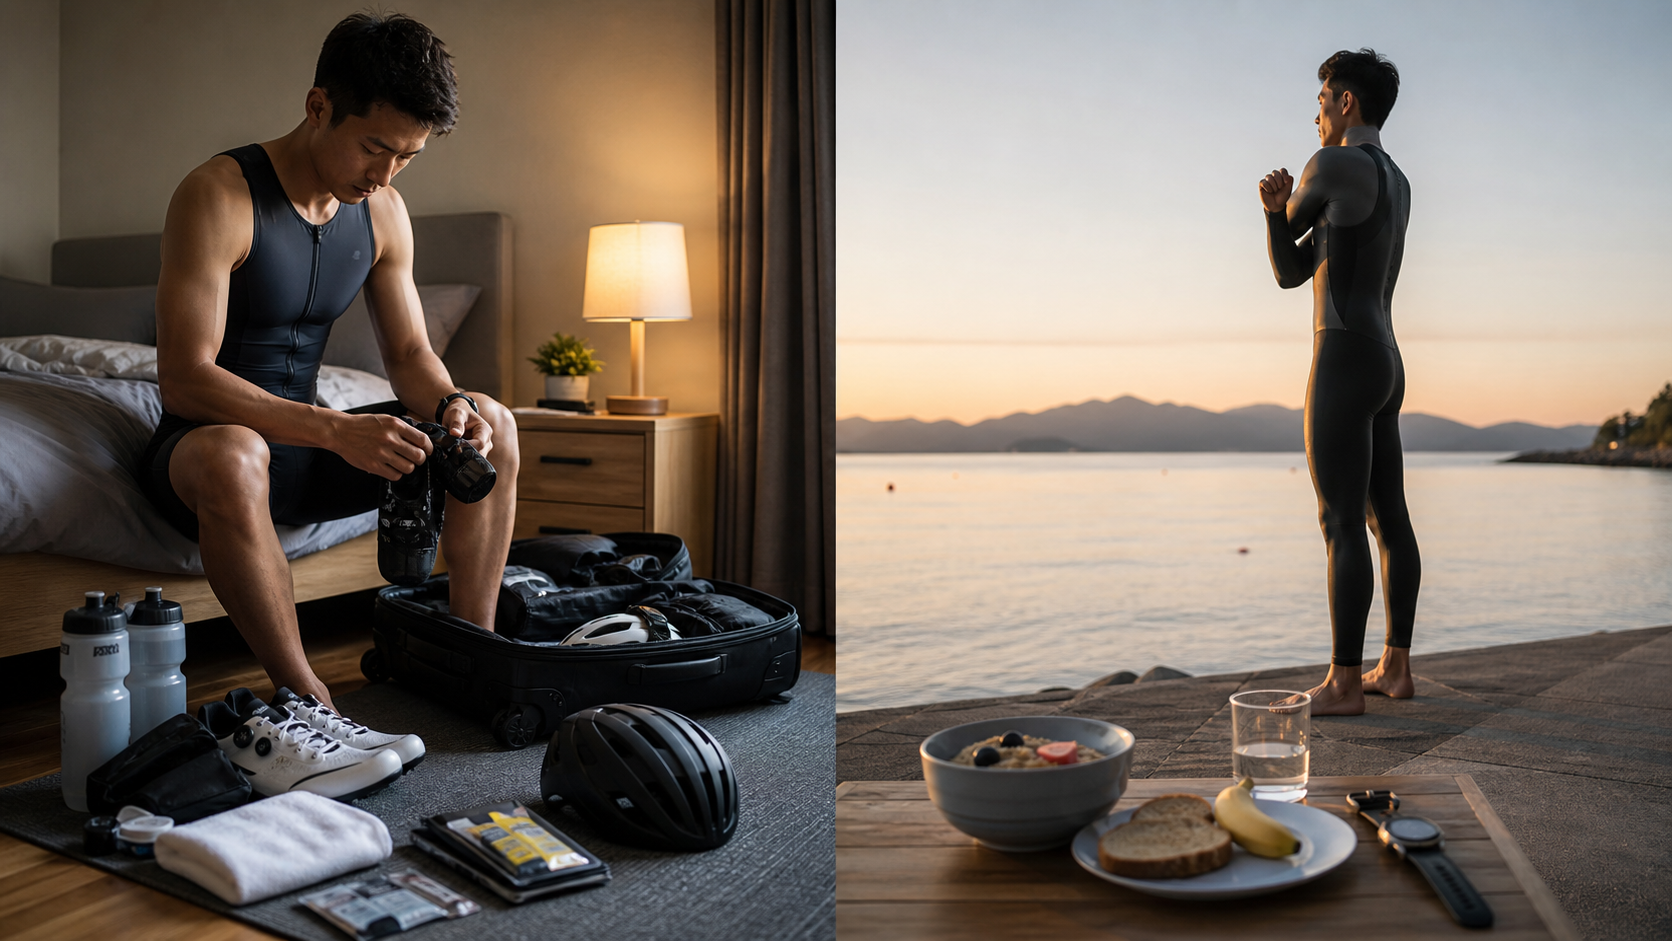
Coach’s Opening: The Shoe Without Laces
Let me start with a real scenario (the athlete’s story is fictional, but I encounter this every year). At the 2023 Plum Lake Triathlon, one of my first-time triathletes, A-Zhe, had trained for a full six months—swimming continuously for 1500 meters in the pool, holding a steady 40 km cycling pace, and building up his run pace too. The night before the race, he messaged me: “Coach, I’m ready, super excited!”
But on race day, he crouched in the transition area for nearly two minutes at T2 (bike-to-run)—because his running shoes still had the factory laces. With wet hands and nerves, he just couldn’t tie them properly. He finally gave up and ran out with them untied, and at the 3 km mark his shoe came loose and he nearly twisted his ankle. A NT$120 pair of elastic no-tie laces would have solved it, but it ruined both his mood and his performance for the entire race.
In 15 years of coaching athletes—from first-time finishers to helping athletes chase Kona slots—I’ve reached one brutal conclusion: what ruins a race on race day is almost never a lack of fitness, but gaps in your preparation process. Fitness is the asset you’ve built with six months of hard training, and a poorly executed gear checklist can zero out that asset in 30 seconds.
What I’m giving you here isn’t a “checklist copied from the internet.” It’s a layered packing and check process that I’ve repeatedly revised through actual team management and that genuinely prevents disasters. You’ll get two tables: one complete gear checklist, one tally of the most commonly forgotten items, plus a pre-race-night packing SOP, a race-morning routine, and how to organize your transition bags (T1/T2). Follow it all, and your race day becomes nothing but the race itself—all your mental energy stays on the course.
Core Concept: Why a “Checklist” Beats “Memory”
Race-Day Cognitive Load Makes You Dumber
That’s not an insult; it’s a physiological fact. Waking up at 4:30 AM on race day, adrenaline spiking, possibly sleep-deprived, in the dark, surrounded by hundreds of nervous people—in that state, your working memory capacity drops significantly. People who would never forget their helmet at home genuinely do forget it in the chaos of the venue.
Aviation, surgery, and race-car mechanics—fields where the cost of error is extremely high—all use checklists, and specifically the kind you read aloud and check off item by item, not from memory. The reason is identical: human memory is unreliable under pressure, but a piece of paper doesn’t get nervous. Race-day gear management in triathlon is, at its core, a high-pressure, multi-item checklist problem where one miss can be catastrophic.
Triathlon’s Gear Complexity Is Triple That of a Single Sport
For a plain marathon, your core gear is basically shoes, a race number, and nutrition. But triathlon is swim + bike + run strung together, and each discipline has its own gear, its own transition, plus you have to consider:
- Apparel and accessories for three disciplines (wetsuit, cycling kit, run accessories)
- The flow and packing for two transition zones
- A full-course nutrition and hydration strategy
- Weather variables (Taiwan summer races are hot and may bring afternoon thunderstorms)
The more items you have, the probability of forgetting something grows multiplicatively. That’s why triathletes need a systematic checklist, not the self-satisfied feeling of “I probably brought everything.”
“Brought It” Doesn’t Equal “It Works”
I want to emphasize one concept: the purpose of a checklist isn’t just to confirm “the item is in the bag,” but to confirm “the item is in usable condition.”
- Brought a tire, but it’s not inflated, pressure is off → same as not bringing it
- Brought nutrition gels, but they’re expired or a flavor your stomach can’t handle → could cause mid-race stomach issues
- Brought a heart rate strap, but the battery is dead → zero data all race
- Brought a GPS watch, but it’s not charged or the race mode isn’t set → black screen at the critical moment
So my checklist process is split into two layers: “packing confirmation” and “function confirmation.” The tables and SOP below all follow this principle.
Breaking the “Checklist Paradox”: The More Experienced You Are, The More You Need It
There’s a myth I have to bust: many veterans think, “I’ve done over a dozen races—do I still need a checklist? That’s for beginners.” Quite the opposite. The more experienced you are, the more automated your movements become, and the easier it is to skip steps in “autopilot” mode—because you’re so familiar that your brain thinks, “Do I really need to check this?” and skips it. In human factors engineering, this is called “complacency from proficiency.”
In my 15 years of coaching, I still take the same sheet and check off every single item before every race, without missing one. It’s not because my memory is bad; it’s because I know “thinking you won’t forget” is exactly the most dangerous state. A checklist isn’t a crutch for beginners; it’s the standard operating procedure for all professionals. A captain with tens of thousands of flight hours still runs the checklist before takeoff—the logic is exactly the same. Your race deserves the same rigor as a pilot’s.
Core Tool: Complete Gear Checklist (One Table)
This is the master table. I’ve arranged it by “category zone” because you pack by zone, use it by zone on race day, and the flow is smoothest. I recommend printing this table out, or saving it to your phone, and checking off each item.
Table 1: Complete Triathlon Race Day Gear Checklist
| Zone | Item | Function Check Focus | Forget Risk |
|---|---|---|---|
| Credentials/Check-in | Athlete ID / Registration confirmation | Digital + paper copy each | ★★ |
| Credentials/Check-in | ID document | May be needed for chip pickup | ★ |
| Credentials/Check-in | Safety pins or race number belt | For attaching race number | ★★★ |
| Credentials/Check-in | Timing chip and ankle strap | Pick up on-site or bring your own | ★★ |
| Swim | Wetsuit / swimsuit / tri suit | Confirm if wetsuit is allowed for the race | ★ |
| Swim | Goggles (+ one spare pair) | Anti-fog, strap intact | ★★★ |
| Swim | Swim cap | Race-provided cap is usually given on-site | ★ |
| Swim | Anti-fog spray / petroleum jelly | Prevents chafing at wetsuit collar | ★★ |
| Transition Shared | Large towel / mat | Mark your spot, wipe feet | ★★ |
| Transition Shared | Nutrition / water bottles (transition area) | Refill before start | ★★ |
| Bike | Bicycle (the bike itself) | Check shifting, brakes, quick releases | ★ |
| Bike | Helmet | Touching the bike without a fastened helmet = disqualification | ★★ |
| Bike | Cycling shoes | Cleats tightened, straps intact | ★★ |
| Bike | Bike computer / speedometer | Charged, race mode set | ★★★ |
| Bike | Spare tube / CO2 / tire levers | Know how to change a tire on-site | ★★★ |
| Bike | Pump | Inflate tires to correct pressure before start | ★★ |
| Bike | Sunglasses | Bug, wind, and UV protection | ★★ |
| Bike | On-bike nutrition (gels, salt tablets) | Attach to top tube or store in bike bag | ★★ |
| Run | Running shoes (+ elastic no-tie laces) | No-tie laces are a lifesaver | ★★★ |
| Run | Race number belt (waist style) | No pins needed, quick to rotate to front | ★★ |
| Run | Running socks (if worn) | Prevents blisters | ★★ |
| Run | Hat / sun protection | Essential for Taiwan summers | ★★ |
| General | Sunscreen | SPF50, apply before leaving | ★★★ |
| General | Anti-chafe balm (petroleum jelly / dedicated) | Inner thighs, underarms, feet | ★★★ |
| General | Personal nutrition (pre-race breakfast) | Tested, stomach-friendly | ★★ |
| General | Warm jacket / change of clothes | For post-race and early morning warmth | ★★ |
| General | Cash / EasyCard / phone | Transportation, emergency contact | ★ |
Forget risk key: ★ = occasional, ★★ = common, ★★★ = highest risk. For the three-star items, do one extra check when packing.
Why Have a “Backup” Column
You’ll notice I’ve specifically marked backups or improvements for items like goggles and running shoes (lace-free). This comes from my experience leading teams: a single point of failure is the biggest invisible killer in a race. If a goggle strap snaps right before you get in the water and you don’t have a backup, you might have to swim the entire leg squinting—this isn’t hypothetical, I’ve seen it with my own eyes. Carrying an extra pair of goggles doesn’t weigh much or take up space, but it buys you peace of mind for the entire race.
Statistics on Commonly Forgotten Items: A Ranking Earned Through Hard Lessons
This section is something many checklist articles won’t give you: what do people actually forget the most? I’ve combined years of team-leading observations with the general consensus of the triathlon coaching community into the comparison table below, “Forgetting Frequency and Consequences.” International triathlon resources also consistently point out: forgetting your helmet, not switching to lace-free shoes, and not pre-attaching nutrition are the most typical race-day error sources.
Table 2: Most Commonly Forgotten Items and Severity of Consequences
| Rank | Commonly Forgotten Item | Consequence of Forgetting | Severity | Difficulty of Remedy |
|---|---|---|---|---|
| 1 | Race number belt / pins | Without a number, timing may fail or you could be stopped | High | Hard to borrow on-site, may have spares |
| 2 | Sunscreen | Summer sunburn in Taiwan, physical breakdown later in the race | Medium-High | Almost impossible to remedy |
| 3 | Nutrition (gels / salt tablets) | Hitting the wall, cramping, DNF later in the race | High | Barely manageable with aid stations |
| 4 | Sunglasses | Wind-blown insects and poor visibility on the bike leg | Medium | Impossible to remedy |
| 5 | Anti-chafe balm | Chafing and bleeding on inner thighs and armpits | Medium-High | Only discovered mid-race, too late |
| 6 | Lace-free shoelaces (not modified) | Wasting 30-90 seconds tying shoes in T2 | Medium | Cannot be fixed on-site |
| 7 | Bike computer charging / setup | No data the entire race, pacing out of control | Medium | Impossible to remedy |
| 8 | Spare tube / CO2 | Flat tire on the bike leg leads directly to DNF | High | Rely on teammates or race technical support |
| 9 | Towel / mat | Can’t find your spot in transition, sand on your feet | Low-Medium | Barely manageable |
| 10 | Helmet | Cannot start at all, disqualification | Extremely High | Almost impossible to remedy |
What You Should Learn from This Table
Look closely at this table and you’ll notice a pattern: items with “high difficulty of remedy” tend to be the smallest and most easily overlooked. A helmet is bulky, so you’re less likely to forget it (but if you do, it’s a disaster); the truly insidious ones are “small items” like sunscreen, anti-chafe balm, and lace-free shoelaces—they have a low presence in daily life, yet they remind you in the most painful way in the latter half of the race.
When I coach first-time triathletes, I always say: “You won’t forget the big things; it’s the small things that will kill you.” So the value of a checklist lies precisely in forcing you to distribute your attention evenly across every item, rather than just staring at that beautiful road bike.
Practical Method: Pre-Race Night Packing SOP
Once you have the checklist, the next step is the process. The packing method I teach athletes is called the “Three-Pile Sorting Method”—divide all gear into three piles according to usage sequence, corresponding to “Morning Check-in,” “T1 (Swim to Bike),” and “T2 (Bike to Run).” This way, when you’re setting up in the transition area on race day, everything falls into place naturally without panic.
Pre-Race Night Packing Process (Recommended to complete 3 hours before bed, don’t put it off until right before sleep)
- Empty and lay flat: Take all gear out of the closet and spread it on the floor or bed so you can see everything at a glance. This step is for “inventory,” to avoid thinking you’ve packed something that’s still sitting in a bag.
- Check off item by item against the master list: Take out Table 1 and confirm “present + functional” for each item. This is when you check the key functional confirmation fields—have you sprayed anti-fog on your goggles? Is the bike computer charged? Have the nutrition gels expired?
- Sort into three piles:
- Pile A (Morning check-in): Athlete ID, ID card, timing chip, sunscreen, pre-race breakfast, warm jacket, cash, phone.
- Pile B (T1 swim-to-bike): Helmet, sunglasses, cycling shoes, on-bike nutrition, towel, mat.
- Pile C (T2 bike-to-run): Running shoes, race number belt, running cap, running nutrition.
- Bag and label: Pack the three piles into bags of different colors or with markers to avoid mixing. In the transition bag, I habitually put T1 items on top and T2 items on the bottom (since T1 comes first).
- Final bike check: Inflate tires to target pressure, shift through all gears once, confirm brakes, confirm quick releases, and mount the bottle cages. Position the bike where it’s easiest to grab and won’t get bumped on the way out.
- Set two alarms: Phone plus another device to avoid oversleeping. I list this in the SOP seriously—oversleeping is the dumbest and most painful DNS (Did Not Start).
Small Reminder: Breakfast Should Be “Practiced”
At Taiwanese race venues, early morning often means only convenience stores nearby. Your pre-race breakfast must be something you’ve eaten during training and that your stomach has confirmed it tolerates—don’t buy a random landmine on-site that morning. I usually recommend athletes finish eating 2.5-3 hours before the race, focusing on easily digestible carbohydrates (e.g., white toast, bananas, a small amount of energy drink). Don’t aim for quantity; aim for stability.
Practical Method: Race Day Morning Routine and Transition Bag Packing
Morning Timeline (Using a 7:00 AM Start as an Example)
| Time | Action | Key Point |
|---|---|---|
| 04:00 | Wake up, eat breakfast | Practiced meal, eat slowly |
| 04:30 | Final check of Pile A before leaving | ID, timing chip, sunscreen |
| 05:00 | Arrive at venue, park | Allow buffer for traffic |
| 05:15 | Check-in, collect race kit, attach chip | Set up pins and number belt first |
| 05:30 | Enter transition area and set up | Position according to three-pile sorting |
| 06:00 | Apply sunscreen, anti-chafe balm, warm up | Cover everything that needs covering |
| 06:30 | Change into wetsuit / swimsuit, warm up in water | Final anti-fog check on goggles |
| 06:50 | Enter start area | Deep breaths, lower heart rate |
| 07:00 | Start gun | Enjoy the race |
The spirit of this timeline is: complete all “preparation actions that could go wrong” before the start gun, leaving only the race for the race. Many people make mistakes because of time compression—arriving at the venue at 6:00, still looking for pins at 6:30—in that state, your brain is guaranteed to miss something.
How to Arrange the Transition Area (Gear Bag) for Smooth Flow
The golden rule of the transition area is: arrange items from top to bottom and left to right, in the order you’ll use them.
- T1 (swim-to-bike) your path after exiting the water: Remove wetsuit → put on sunglasses → put on helmet and buckle it (remember: you must buckle your helmet before touching the bike, or you’re disqualified) → put on cycling shoes → grab bike and go. So the arrangement order: sunglasses and helmet on top where they’re easiest to grab, cycling shoes next, and nutrition already on the bike.
- T2 (bike-to-run) your path when you return: Rack the bike, remove helmet → change into running shoes → grab the number belt and rotate it to the front → put on cap → go. So running shoes and the number belt should be pre-positioned at the bottom, with laces already in lace-free mode.
I always have athletes do a “dry run” in the transition area: close your eyes and imagine the moment you exit the water—what will your hand touch first? If the flow is smooth, you won’t even need to think; muscle memory carries you through. This is why the three-pile sorting the night before is so important—it determines your transition area layout logic.
Common Mistakes and Corrections
After years of leading teams, I’ve seen the same mistakes countless times. Here are the most frequent ones, along with corrections.
Mistake 1: The Checklist Exists Only in Your Head, Not on Paper
Symptom: “I’ve thought it through in my head.”—This sentence is the prelude to disaster.
Correction: You must have a physical checklist, whether paper or phone, and you must check off each item one by one, not just skim through it. Thinking it through in your head doesn’t count—under high pressure, your brain will automatically skip things it assumes it’s already done.
Mistake 2: Using New Gear for the First Time on Race Day
Symptoms: A new wetsuit, new energy gels, new cycling shoes—all used for the first time on race day.
Fix: The golden rule—Nothing new on race day. All gear and nutrition must be tested during training. New cycling shoes might cause blisters, new nutrition might upset your stomach, and a new wetsuit collar might chafe your neck raw. On race day, use only what your body is already accustomed to.
Mistake 3: Nutrition Not Pre-Calculated and Pre-Portioned
Symptoms: Stuffing a bunch of gels into your pockets and eating by feel during the race, resulting in either bonking from eating too little or nausea from eating too much at once.
Fix: Based on verified sports nutrition consensus, for longer endurance events, the general recommendation is to consume approximately 60 to 90 grams of carbohydrates per hour (most sources indicate not to exceed roughly 100 grams per hour, and when exceeding about 60 grams per hour, it’s recommended to mix glucose and fructose to improve absorption). For shorter distances (1-2 hours), about 30-60 grams per hour is sufficient; only for events over 2 hours should you increase to 60-90 grams. Convert this number into “how many gels, how many salt tablets, and at what intervals,” write it on paper and tape it to your top tube, and follow the schedule during the race—don’t rely on feel. These are general principles; actual amounts vary greatly depending on individual gut tolerance, so be sure to test them in training first.
Mistake 4: Morning Routine Too Rushed
Symptoms: Cutting your time too close, arriving at the venue near the start gun, everything in a frantic hurry.
Fix: Push all your times earlier. Parking and check-in at popular Taiwanese races can be congested. Better to arrive an hour early and wait around than to arrive ten minutes late in a panic. That extra hour lets you calmly apply sunscreen, warm up, use the restroom, and settle your nerves—all prerequisites for a good performance.
Mistake 5: Ignoring Taiwan’s Climate Variables
Symptoms: Only preparing “sunny-day” gear.
Fix: Summer races in Taiwan (such as those commonly held in Yilan, Taitung, and Pingtung) are hot and humid, with the possibility of afternoon thunderstorms. Sunscreen, a visor, and adequate electrolyte replenishment are standard; also, the morning venue can be cool, so a post-race warm jacket prevents you from getting chilled while waiting or after finishing. Weather is a variable; your checklist needs to cover both scenarios.
Mistake 6: Stuffing Everything into One Big Bag and Digging Through It On-Site
Symptoms: Throwing all gear into one oversized backpack, then dumping the entire bag out on the ground in transition on race day to rummage through it.
Fix: Go back to the “three-pile sorting method” mentioned earlier. The point of sorting isn’t tidiness; it’s about being able to “grab the right thing without thinking” under high pressure. One big bag pushes all the cognitive load onto the most stressful moment of race day; three piles shift that load to the night before when your mind is clear. The same items, handled at different times, yield vastly different results. This is also a general principle of process optimization: Make difficult decisions when you’re at your best.
Actionable Advice for Athletes of Different Levels
First-Timer Finish Group (First Race)
Your primary goal is “not to get stuck in transition or DNF due to equipment issues” —speed is not the focus.
- Print out Table 1 completely and check off each item the night before; don’t skip anything.
- Pay extra attention to the three-star frequently forgotten items (race belt, sunscreen, elastic laces, spare tube, bike computer).
- Definitely switch to elastic no-tie laces on your running shoes—this is the highest value-for-money upgrade.
- Use nutrition you’ve trained with; be conservative and prioritize finishing.
- Follow the morning timeline, arrive early, and prepare calmly.
Advanced Age-Group Group (Chasing Results, Breaking PBs)
Your gear checklist logic stays the same, but add the “transition efficiency” layer.
- Practice “fast transitions”: pre-clip cycling shoes on the pedals for a flying mount, flip the race belt to the front in one motion, slip on no-tie running shoes and go. Each of these saves 10-30 seconds, potentially 1-2 minutes over the whole race.
- Calculate nutrition down to the gram and minute, write it on the top tube, and follow it throughout.
- Set up race mode and alerts on your bike computer/power meter (e.g., a reminder every 20 minutes to fuel), use data for pacing, and avoid blowing up on the bike and ruining your run.
- Build your personal checklist, incorporating pitfalls from past races, and iterate year after year.
- Do a few “dry runs” of the transition flow a week before the race: lay out your gear, time yourself through the process of stripping, helmet on, shoe change, and identify and optimize any bottlenecks. Real transition speed is built at home, not improvised on race day.
Long-Distance/Certification Race Group (70.3, 226, or Chasing Points)
The longer the distance, the higher the weight on nutrition and gear reliability—the cost of any single point of failure is amplified.
- Nutrition strategy must be very precise: carbohydrates (possibly mixing glucose and fructose to increase hourly absorption), electrolytes, and fluids—all quantified and validated in long training sessions.
- Mechanical reliability on the bike must be maxed out: spare tube, CO2, basic tools, and even a backup plan for dropped nutrition—all thought through.
- Establish “Plan A/Plan B”: how to adjust nutrition in heat, how to handle visibility and braking in rain—all written into your pre-race brief.
- At this level, the checklist is no longer just packing; it’s a complete risk management system.
- If the race has a “bag drop” system (swim bag, bike bag, run bag delivered separately), be sure to read the race rules in advance, understand which bag holds what, when to drop them off, and where to pick them up. The bag drop process for long-distance certification races is more complex than regular races; if you don’t read the rules beforehand and discover a mistake at the bag drop area on race day, it will be very chaotic. This is where your personal brief should include a page on “this race’s bag drop process,” with the venue’s flow map attached.
Coach FAQ: The Gear Questions Athletes Ask Me Most
These are the questions athletes most often DM me in the week before a race. Here they are, all in one place.
Q1: Should I lay down a towel in transition? Will it be confiscated?
Yes, you can, and I recommend it. A brightly colored small towel serves three functions: marking your spot (with hundreds of bikes in a row, without a marker it’s hard to spot yours at a glance after the swim), wiping sand off your feet after the swim (sand on your feet while running in shoes is a major cause of blisters and chafing), and giving you a psychological “home base.” As long as you don’t encroach on others’ space or block the aisle, it’s usually fine. What you really need to watch is not placing gear beyond the boundaries of your assigned rack space—in age-group certification races, this can get you a warning or even a penalty from officials. Also, I recommend using the same towel color you consistently use in training; when looking for your spot after the swim, “find that familiar color” is much faster than “count the rows and racks,” and you’re less likely to mistake another spot in the chaos.
Q2: I have a sensitive stomach. How should I approach nutrition?
Let’s cover the principle first, then the method. The principle is: For those with sensitive stomachs, prefer small, frequent amounts and familiar products over forcing down “theoretical gram targets.” Earlier I mentioned the general recommendation of about 60 to 90 grams of carbs per hour for long distances, but that’s an “upper reference,” not a “must-hit target.” I’ve coached athletes with very sensitive stomachs; instead, we started at 40 grams per hour and gradually increased week by week in training to find their personal ceiling without nausea or diarrhea. On race day, use only that training-validated number. This is highly individual; if you have a history of gastrointestinal issues, please consult a sports nutritionist or physician—don’t copy someone else’s nutrition plan.
Q3: Do I have to buy a wetsuit? Can I rent one?
It depends on race rules and water temperature. Some races with warmer water prohibit or don’t mandate wetsuits; others with cooler open-water morning temperatures recommend them. For your first race with a limited budget, renting is perfectly fine—many bike shops and triathlon communities offer rental services. But remember the golden rule: Nothing new on race day. Even if it’s rented, you must find a chance to try it in the water before race day, confirming the collar doesn’t chafe your neck, the zipper works smoothly, and it doesn’t get stuck when taking it off. I’ve seen more than once the disaster of someone wearing a rental for the first time on race day and the collar chafing their neck bloody.
Q4: Should you “clip in and mount the bike mid-flight” or “put your shoes on in transition and run with the bike”?
This depends on your level and goals. For first-timers or those prioritizing stability: put your cycling shoes on and buckle them in transition, then run with the bike to the mount line before getting on. The motion is simple and you won’t crash. For advanced athletes or those chasing speed: pre-clip your cycling shoes to the pedals at the horizontal position with rubber bands, run barefoot with the bike, mount mid-flight, then slip your feet into the shoes while riding. This saves the time spent walking and putting on shoes in transition, but you must practice it until it’s second nature in training—otherwise, trying it for the first time on race day is a great way to crash in front of everyone. Technique serves your goals; don’t take unnecessary risks just to look cool.
Q5: What if your GPS watch or bike computer freezes or loses signal?
This is why I emphasize “functional verification” rather than just “bringing it along.” Prevention beats remedy: charge it fully the night before, set up race mode in advance, and head to an open area early before the race to lock in satellite signals. But even so, electronics can still fail, which is why I always teach athletes “don’t outsource your pacing entirely to the device”—you need the ability to pace by feel (RPE, Rate of Perceived Exertion) and breathing. The watch is just a tool; when it goes black, your body needs to take over. This sense of feel is built through training without looking at the watch.
Advanced: Turn your checklist into a “pre-race brief”
Finally, here’s an upgraded approach for advanced athletes. After you’ve raced a few times, the checklist shouldn’t just be a one-off “packing tool”—it should evolve into a personal, year-by-year accumulated pre-race brief (operations briefing).
Every experienced athlete I coach has their own Google Docs version of a personal brief. Beyond the gear checklist from Table 1, it includes several additional fields:
- This race’s weather forecast and countermeasures: predicted temperature, chance of rain, and whether that means bringing extra electrolytes or preparing a wet-weather braking strategy.
- This race’s fueling plan: how many hours the race lasts, target grams of carbs per hour, converted into how many gels and salt tablets, and at what minute to take the first one—all written down precisely.
- This race’s pacing targets and red lines: bike leg power/heart rate ceiling (to avoid blowing up and ruining your run), and target pace for the run leg.
- Review of the last race: which segment went wrong last time? How will you fix it this time?
The value of this document is that it turns every race experience into accumulated assets, rather than starting from zero with memory each time. This echoes the core spirit of the entire article: turn unreliable memory into a reliable system.
Conclusion: A checklist is your respect for six months of training
Let’s return to A-Zhe’s story from the beginning. After that race, I had him do one thing: write down every point where he got stuck that day and turn it into his own checklist. At the same race the following year, his T2 took less than 40 seconds, he ran the whole race smoothly, and he even set a PB by nearly four minutes. His fitness hadn’t skyrocketed—only the process had changed.
I often tell my athletes: A good gear checklist is the most basic respect you can show for six months of hard training. Getting up at dawn to swim, dragging your tired body onto the trainer after work, and doing long weekend runs until you’re sunburned and peeling—the value of all that sweat shouldn’t be erased by an unadjusted shoe strap, a forgotten bottle of sunscreen, or an expired gel.
So, do one thing right now: print out Table 1 from this article and stick it where you pack. The night before your next race, check off each item one by one. You’ll find that once the checklist catches all the “things that could go wrong,” all that’s left on race day is truly just you and the course you’ve prepared for so long.
Do every small thing well, and the big things will take care of themselves. Those who are well-prepared are the calmest when they step onto the start line. See you on the course.
This article is educational content and does not replace individual assessment by a physician, physical therapist, or nutritionist. For fueling amounts, wetsuit use, and injury prevention, please test thoroughly in training under professional guidance and apply to racing based on your personal circumstances.
References
- USA Triathlon — Carbs and Fluids: Fueling Tips for Triathletes: https://www.usatriathlon.org/articles/training-tips/carbs-and-fluids-fueling-tips-for-triathletes
- Precision Hydration — How much carbohydrate do athletes need per hour?: https://www.precisionhydration.com/performance-advice/nutrition/how-much-carbohydrate-carbs-athletes-per-hour/
- Triathlete — Your Step-By-Step Guide to Triathlon Transitions: https://www.triathlete.com/training/race-tips/how-to-triathlon-transition/
- Tri247 — Essential triathlon transition tips and advice for beginners: https://www.tri247.com/beginner-triathlon/essential-triathlon-transition-tips-advice-beginners
Related Reading
- The Week-Before Race Checklist: Don’t Let Details Ruin Eight Months of Training
- The 15 Most Common Race Mistakes Beginners Make in Triathlon and How to Fix Them: A Coach’s Step-by-Step Breakdown
- Designing Your 24-Hour Pre-Race Routine: From Pre-Race Dinner to the Starting Gun
- Triathlon Race Day Strategy: A Complete Plan from the Week Before to the Finish Line