Coach’s Opening: That Afternoon by the Pool
I’ve been coaching triathletes for fifteen years now. Over that time, from office workers aiming to finish their first race to age-groupers who’ve earned Kona (World Championship) slots, the three questions I get asked most are always the same: “Coach, how do I push my FTP higher?” “Why is my pace dropping off so fast?” “Why does my swim stroke keep catching?”
But deep down, I know this: a huge part of the answer to those three questions isn’t in training volume at all—it’s in a place almost no one is willing to seriously work on: mobility.
Let me start with a real scenario (the person is a composite, but the situation happens every year). There was an athlete, A-Zhe, a park engineer. He trained four times a week, his power numbers were impressive, he loved to suffer on Zwift, and he could run a 5K under 20 minutes. But every time he went to Sun Moon Lake for swim practice, his freestyle just wouldn’t open up. On one side, his shoulder hiked up during breathing; on the other, it felt stuck. Coming off the bike into the run transition, his stride visibly shortened for the first two kilometers, as if his ankles were tied up. He thought it was “lack of strength,” so he hammered weights; he thought it was “lack of aerobic capacity,” so he hammered intervals. After six months, his results were stagnant, and he’d developed a hip flexor so tight on one side that even walking hurt.
I had him drop every idea of adding more volume and spend three weeks doing only one thing: opening up mobility in three joints—ankle dorsiflexion, thoracic rotation, and the hip flexors. By the fourth week back at the pool, his stroke was noticeably smoother; the first two kilometers of his transition run had their pace back. He asked me, “Coach, did I waste those six months?” I said, “No, you just built the engine first but forgot to install the steering wheel and the tires.”
This article is about making this “most overlooked work” clear.
Why Do Triathletes Especially Need Mobility?
Triathlon isn’t the sum of three sports; it’s a relay of three sports in the same body, the same race, over several consecutive hours. That means your joints have to switch repeatedly between three completely different postural demands:
- Swimming: prolonged prone position, large circular shoulder movements, and a torso that needs to roll along its long axis (body roll).
- Cycling: prolonged hip flexion with forward lean, anterior pelvic tilt, and ankles working through a relatively fixed range of motion in repetitive pedaling.
- Running: upright posture, hip extension driving the stride, and ankles that need to absorb and rebound.
Have you noticed a brutal contradiction? The cycling position’s “fixed hip flexion” is exactly what degrades the “hip extension” running needs; cycling’s “small ankle range” is exactly what dulls the “ankle dorsiflexion” running needs. That’s why so many people come out of T2 (bike-to-run transition) looking like robots for the first few kilometers—it’s not a fitness issue, it’s the body being “locked up” by the previous posture.
First, Let’s Clarify: Flexibility ≠ Mobility
Many athletes use these two terms interchangeably, but they’re different:
- Flexibility: how long a muscle can be passively stretched. Like when you relax and let someone push your leg down—that’s passive length.
- Mobility: the usable range a joint can move through under your own active control, including the joint space itself, the sliding of surrounding soft tissue, and whether you can produce force within that range.
Triathlon needs the latter. You don’t need to do the splits; you need to be able to freely reach the required joint angles during pedaling, stroking, and striding—and still produce force there. That’s also why “just stretching” has limited results for many people—you lengthen the muscle, but you haven’t taught the body to control and generate force in that new range.
How Does Poor Mobility Steal Your Performance?
I often use the “leaky hose” analogy with athletes. Your engine (aerobic capacity, strength) works hard to pump water through, but if there are a few “pinch points” of restricted mobility along the hose, the water leaks out. A triathlon lasts several hours, and these leaks get magnified over time:
- Decreased economy: The joints can’t reach their most efficient angles, so every step, every stroke, every pedal stroke costs a little extra effort. Individually negligible, but multiplied by tens of thousands of repetitions, it’s a significant waste of energy—showing up as late-race fading.
- Compensatory injury accumulation: When one joint doesn’t move, the neighboring joint has to move more to make up for it. Insufficient ankle dorsiflexion puts more stress on the knees, a non-rotating thoracic spine overworks the shoulders, and tight hip flexors cause excessive lumbar lordosis. These compensations feel harmless early in training, but they collectively erupt in the late season or during long-distance races.
- Lower technical ceiling: A coach wants to fix your technique but finds you “can’t make that movement”—not because you don’t know how, but because the joint physically can’t reach that position. Mobility is the foundation of technique; if the foundation isn’t there, no matter how high you stack technique, it won’t go up.
So when you feel like “I’m training hard but my results are stuck,” don’t rush to add more volume. First ask yourself: is the hose leaking?
The Triathlon-Specific Demands of Three Key Areas
Here’s the core of this article. I’ll break down the three areas that matter most for triathlon mobility and are most often neglected: ankle dorsiflexion, thoracic rotation, and the hip flexors.
1. Ankle Dorsiflexion: The Invisible Brake in Running
Ankle dorsiflexion is the movement of “pulling the toes up and driving the shin forward.” It sounds basic, but it’s the key to running economy.
During running, there’s a phase called the “ankle rocker”—the process from foot strike to maximum shin forward lean, until the heel starts to lift. This is the critical moment when the body switches from absorbing impact to propelling forward. According to sports science literature, the ankle dorsiflexion range needed for daily functional movements is roughly 5 to 15 degrees, and it’s generally accepted that at least 10 degrees is needed to support a normal gait (see references at the end). When your ankle dorsiflexion is insufficient, the body is forced to compensate in other ways: the movements of the pelvis, hip, knee, and foot all change, forward propulsion decreases, and injury risk rises.
For triathletes, insufficient ankle dorsiflexion has three specific consequences:
- Shortened transition-run stride: Fresh off the bike, the ankles “can’t wake up,” and your stride is visibly shorter for the first 2 kilometers.
- Impact forces travel upward: The load the ankle can’t absorb goes to the knees, hips, and lower back, planting seeds for long-term injury.
- Bigger dead spot in pedaling: Stiff ankle angles mean you lose effective force application at the 6 o’clock position of the pedal stroke.
There’s another often-overlooked point: insufficient ankle dorsiflexion also affects saddle height and pedaling efficiency on the bike. Many people unconsciously set their saddle too low or pedal with a “toe-down” style to accommodate a stiff ankle, which over time increases pressure on the front of the knee. Once you open up your ankle dorsiflexion, your bike fit has room to be adjusted to its optimal position. That’s also why, before I do a bike fit, I always check the athlete’s ankle dorsiflexion first—if the joint can’t reach the angle, no matter how expensive the fit, it can’t be dialed in.
Self-test (knee-to-wall test): Barefoot, place your toes about one palm-width from the wall (start with 10 cm). Keep your forefoot and heel on the ground, and push your knee forward to touch the wall. If it touches, move your foot back a bit and try again, until you find the distance where it just barely touches—that’s your reference value. Test both sides and record it. Re-test every 4 weeks, and you’ll see a concrete improvement curve.
| Knee-to-Wall Distance | Ankle Dorsiflexion Status | Interpretation for Triathletes |
|---|---|---|
| < 5 cm | Significantly restricted | Transition run is likely compromised; prioritize this |
| 5–9 cm | Tight | Include ankle rocking in warm-ups, especially on race day |
| 10–12 cm | Sufficient | Maintain; monitor through the season |
| > 12 cm | Good | Don’t over-chase more; stable control matters more |
(This table is a practical grading reference used in the field, not a diagnostic standard. There’s often a difference between the two feet, so test both sides.)
2. Thoracic Rotation: The Engine of the Swim Stroke and Breathing
The thoracic spine is the 12 vertebrae in the middle of the spine (the section connected to the ribs). It is inherently designed for “rotation,” and a large part of freestyle’s core power comes from the torso rolling along the body’s long axis.
According to swimming biomechanics research, the recovery phase of freestyle involves a roll of at least approximately 45 degrees along the body’s long axis. If thoracic rotation is insufficient and the body doesn’t roll enough, the shoulder joint must compensate with a greater range of horizontal abduction, directly increasing mechanical stress on the shoulder. Research also indicates that full-range overhead arm elevation requires about 15 degrees of thoracic extension; when this is lacking, overuse shoulder injuries become more likely—and the prevalence of shoulder pain in swimmers has been reported to be quite high (see references at the end). In other words: If your thoracic spine can’t rotate, your shoulders are working overtime for it.
For triathletes, insufficient thoracic rotation can cause:
- Asymmetric stroke: One side feels smooth, the other feels stuck; the longer the swim, the more you veer off course.
- Labored breathing: Turning your head to breathe actually requires thoracic participation. A stiff thoracic spine forces you to lift your head and roll your shoulder, disrupting horizontal streamlining.
- Discomfort in the aero position on the bike: The TT position requires the thoracic spine to “extend and hold.” A stiff thoracic spine means you can’t hold the aero bars for long and your neck gets sore.
There’s a frequently overlooked chain reaction here: Prolonged sitting and the forward-leaning posture of cycling keep the thoracic spine in a state of “flexion,” degrading both its rotation and extension capabilities. Many tech-industry triathlon enthusiasts sit 40 hours a week and then ride 6 hours, leaving their thoracic spine almost no chance to open up—this is a common ailment among Taiwan’s science-park crowd.
Thoracic rotation also affects something often ignored: breathing. The thoracic spine connects to the ribs. When the thoracic spine is stiff and the upper back is stuck in flexion, ribcage expansion is restricted. At the point in a swim or run when you most need to take deep breaths, you can’t get enough air. I once coached an athlete who always “got increasingly winded” while swimming. We traced the issue back and finally found the root cause: his thoracic spine and upper back were too stiff, preventing his ribcage from opening. Only after we worked on thoracic rotation and extension did his breathing rhythm stabilize. So don’t think of the thoracic spine as just a “stroke” issue—it’s also part of your breathing engine.
3. Hip Flexors: The Battleground Where Cycling and Running Clash
The hip flexor group (primarily the psoas major and iliacus, together known as the iliopsoas, plus the rectus femoris) is responsible for lifting the thigh upward. The problem is: Cycling keeps the hip flexors shortened and repeatedly engaged for long periods; running, however, requires full hip extension. These two demands are inherently at odds.
After a long bike session, your hip flexors are in a “shortened and fatigued” state. When you then start running, hip extension is limited, and your body compensates by increasing lumbar lordosis (anterior pelvic tilt)—the result is what many people complain about: “tight lower back during the transition run, posture sitting back, and cadence won’t go up.”
Three typical signs of tight hip flexors:
- When lying flat, your lower back arches noticeably off the ground, and you instinctively want to put something under your knees to relax.
- Your running stride is short and lacks extension; it feels like you can’t push off.
- The first few steps after getting off the bike feel stiff, as if the front of your hip is being pulled.
Self-Test (Modified Thomas Test): Lie on the edge of a bed or a sturdy table. Hug one knee to your chest and let the other leg hang down naturally. If the thigh of the hanging leg cannot rest flat (staying noticeably above horizontal), or you have to straighten the knee to let it drop, your hip flexors (iliopsoas/rectus femoris) are tight.
How the Three Areas Connect: Not Independent of Each Other
I’ve discussed these three areas separately for clarity, but in a real race, they form a single kinetic chain. Here’s an example: If your thoracic spine can’t rotate, your body roll in the swim is insufficient, so you rely on harder kicking and greater shoulder abduction to maintain your streamline—your shoulders tire first. Then, entering the bike leg, you’re already on the aero bars with a fatigued neck and shoulders, and your thoracic flexion worsens. When you dismount to run, tight hip flexors cause anterior pelvic tilt and lower-back compensation, while stiff ankle dorsiflexion gives you poor shock absorption on landing—you see, a restriction in one link travels down the entire chain, and all the bills come due together in the latter part of the run.
This is why I oppose a “treat the symptom” approach. When an athlete complains of lower-back pain during running, the source is often the hip flexors or even further upstream, the thoracic spine. Approach mobility training with a global perspective, viewing the body as a chain, not as isolated muscles.
Mobility and Strength: Teammates, Not Opponents
Many people think “getting flexible means losing strength, and getting strong means getting tight.” This is a misconception. Training strength through a full available range of motion is the ideal combination. Someone with good ankle dorsiflexion can squat deeper and generate force more completely; someone with balanced hip flexor and hip extension can push off more powerfully when running. Mobility “gives you a bigger stage,” and strength lets you “perform better on that stage”—the two complement each other.
In practice, I arrange it this way: first use dynamic warm-ups to open up the range, then immediately follow with the strength workout, letting the body “load and generate force within the new range.” This way, the body truly “claims” that range as its own. If you simply stretch without ever exerting force in that range, the body thinks “this isn’t safe” and pulls you back to where you started.
Dynamic Warm-Up Routine: Opening All Three Areas at Once
Enough theory—here’s something you can use right away. The dynamic warm-up I use before races and training sessions is designed around these three areas. Note the order: dynamic warm-ups go before training; prolonged static stretching is reserved for after training or on rest days. Doing too much static stretching before training can actually temporarily reduce explosive output.
Here’s the “10-Minute Triathlon Dynamic Warm-Up” I actually use with my athletes:
| Order | Exercise | Target Area | Reps/Time | Coach’s Cue |
|---|---|---|---|---|
| 1 | Brisk walking or light jumping in place | Whole-body warm-up | 1–2 minutes | Get the heart rate up first; don’t skip this |
| 2 | Ankle rocker lunge (knee over toes) | Ankle dorsiflexion | 8 per side | Heel stays down, drive the knee forward |
| 3 | World’s Greatest Stretch | Hip flexors + thoracic spine | 4 per side | Sink low into the front leg, drop the elbow, rotate the top hand toward the ceiling |
| 4 | Quadruped thoracic rotation (thread the needle) | Thoracic rotation | 8 per side | Reach one arm through, then open up; follow the hand with your eyes |
| 5 | Kneeling hip flexor dynamic stretch | Hip flexors | 6 per side | Squeeze the glute, tuck the pelvis; don’t cheat by arching the lower back |
| 6 | Walking leg raises (progressively larger stride) | Hip + ankle integration | 20 meters | Use active control to move into a large range |
| 7 | Alternating high knees and butt kicks | Movement integration | 20 meters | Keep a light, quick rhythm; finish and transition into the main workout |
There’s a design logic to this routine: warm up first, then open up individual joints, and finally integrate the opened range into movement. If you just stretch without integrating, the body quickly “falls back into old habits,” so the integration drills in items 6 and 7 are absolutely essential.
Pre-Race Shortened Version (When Time Is Tight)
On race day, with crowded transition areas and limited time, I give my athletes a 4-minute condensed version:
- Ankle rocker lunge: 6 per side
- World’s Greatest Stretch: 3 per side
- Quadruped thoracic rotation: 6 per side
- Walking leg raises + high knees: 15 meters each
The goal isn’t to complete everything, but to “unlock” the three key joints before the gun goes off.
Execution Details of the Five Core Movements
The table only lists the movement names, so here I’ll clarify the key execution points for several critical movements, because “doing them correctly” matters far more than “doing a lot of them.”
Ankle Rocking Lunge: Step forward into a lunge position, keeping the front foot’s ball and heel firmly on the ground throughout. Push your knee slowly forward and past your toes, feeling the back of your calf and the front of your ankle joint open up. Hold for 1 to 2 seconds before returning. The most common mistake is letting the heel sneak off the ground—then you’re training calf tendon elasticity, not ankle dorsiflexion range. Imagine your shin “falling toward a wall” while your heel is glued to the floor.
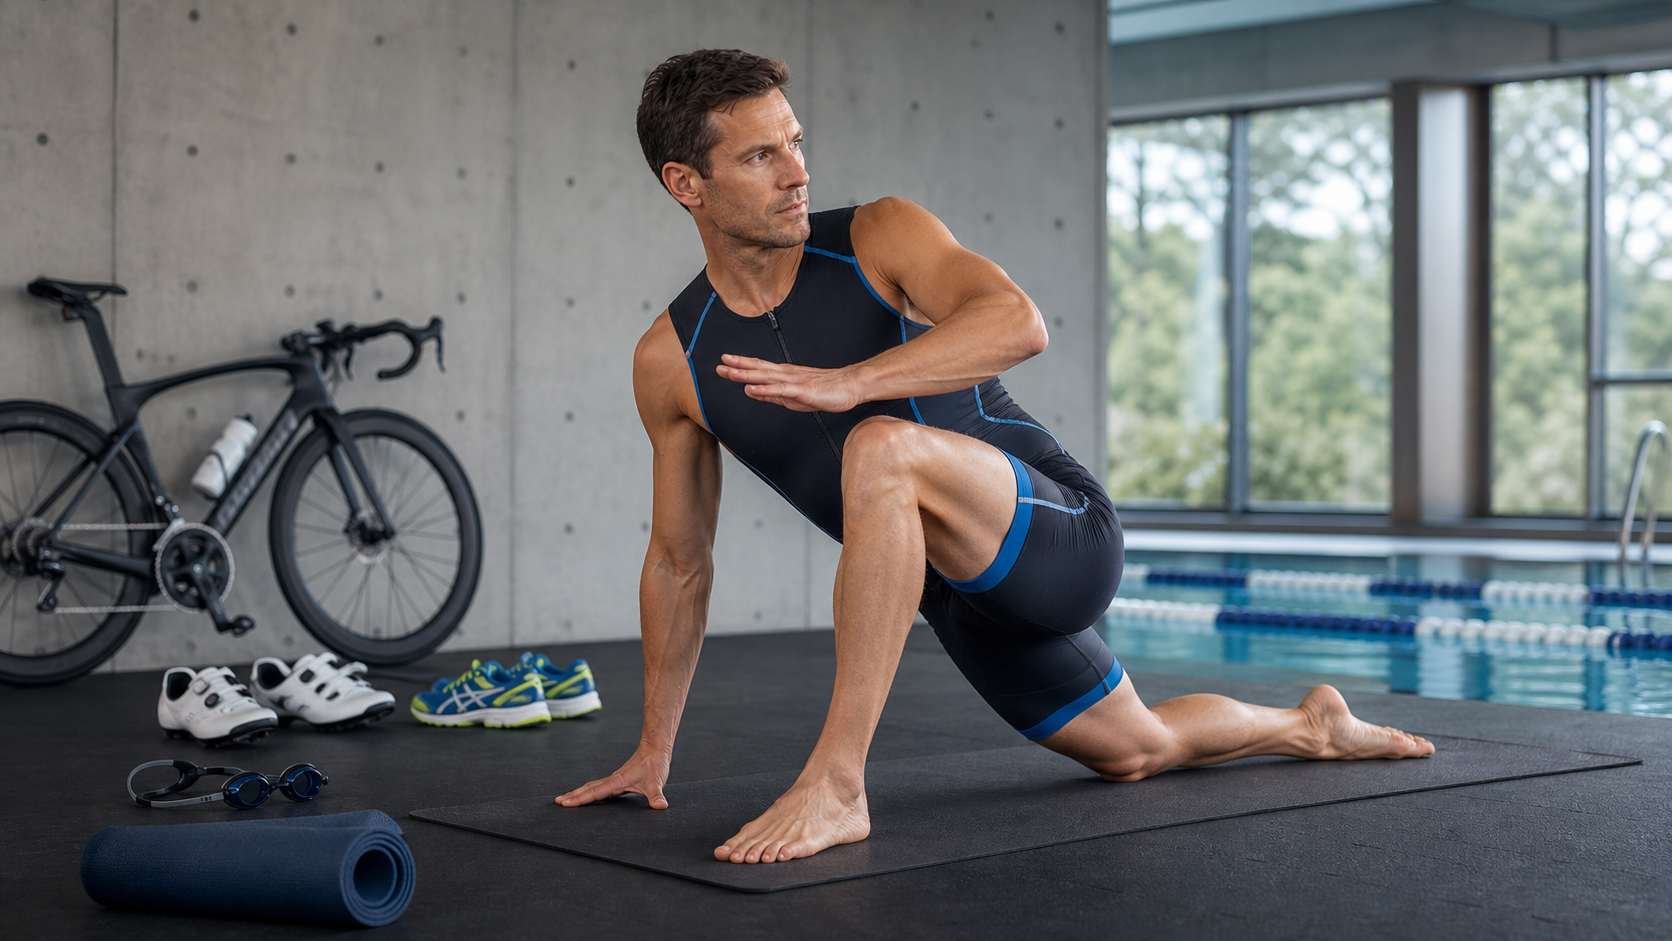
World’s Greatest Stretch: Start in a high plank. Step your right foot to the outside of your right hand into a low lunge. Place your left hand on the ground and sink your right elbow toward the floor (opening the hip flexors and adductors). Then rotate your right hand toward the ceiling (driving thoracic spine rotation), following your hand with your eyes. This single movement addresses both hip flexors and the thoracic spine—extremely high value, which is why it’s my go-to for athletes short on time.
Quadruped Thoracic Spine Rotation (Thread the Needle): On all fours, place one hand behind your head or reach it toward the ceiling. Let your elbow carry your upper back into rotation and opening on the same side, then thread it under the opposite arm and return to the center. Keep your pelvis stable throughout—don’t let it twist along. If your hips are swaying side to side, you’re compensating with your lower back, and your thoracic spine isn’t truly rotating.
Kneeling Hip Flexor Dynamic Stretch: Kneel on the back leg in a half-kneeling position. First, “squeeze your glutes and tilt your pelvis posteriorly” (imagine tucking your tailbone in), then shift your weight slightly forward, feeling the front of the back hip stretch. The key is to find the stretch through posterior pelvic tilt, not by arching your lower back and pushing forward—the latter just dumps stress onto your lower back without actually stretching the hip flexor.
High-Knee Walks: While walking, actively drive your knees up and open your hips, gradually increasing your stride as your joints warm up. This step integrates the “opened range” back into actual movement patterns—don’t underestimate it.
Case Study Extension: From 3 cm to 9 cm on the Knee-to-Wall Test
Let’s return to A-Zhe. When he first did the knee-to-wall test, his left leg reached 3 cm and his right leg 6 cm—not only tight, but severely asymmetrical (he’s right-leg dominant, and his left ankle was noticeably stiff). This explained his odd habit of “drifting left” during transition runs.
My prescription for him was simple: before every run, do ankle rocking lunges—3 sets on the left leg and 2 on the right (extra volume on the tight side)—and after runs, static stretches for the calves and front of the ankles, 30 seconds each. Three weeks later, his left leg reached 8 cm and his right 9 cm, narrowing the gap from 3 cm to 1 cm. His own words: “The first kilometer of transition runs no longer feels like stepping on bricks.”
This case highlights two things: first, progress can be quantified—don’t rely only on feel; second, address asymmetry first, because triathlon is a sport with tens of thousands of repetitions, and even a small left-right difference can be amplified into injury.
Frequently Asked Questions (FAQ)
After years of coaching, these are the questions nearly every athlete asks. Let me answer them all at once:
Q1: Will mobility training make me “too loose” and lose strength?
No—provided you’re training “actively controlled mobility” rather than just passively stretching ligaments loose. What we’re after is getting joints to the required range and being able to produce force within that range. What you should truly avoid is uncontrolled, excessive passive stretching. For the vast majority of triathletes, the problem is always “too tight,” not “too loose.”
Q2: Does foam rolling count as mobility training?
Foam rolling is an excellent “support tool”—it can temporarily relax soft tissue and make it easier to reach your range—but it doesn’t “teach” your neuromuscular system to control and generate force in that new range. My advice: use the roller as an appetizer (30 to 60 seconds), then always follow it with active movements or dynamic stretching to “lock in” the effect. Roll without training, and you’ll be tight again the next day.
Q3: I really have very little time and can only train one area. Which should I pick?
Look at your weakest link. If you’re a desk-bound office worker with stiff swimming, prioritize the thoracic spine; if transition runs are painful and your running form feels robotic, prioritize ankle dorsiflexion; if your lower back is tight after cycling and your hip front feels stuck, prioritize the hip flexors. Use the three self-assessments above to find your worst area and focus your efforts there.
Q4: Can I do this when injured or sore?
Don’t push through acute pain, swelling, or obvious inflammation—have a professional assess you first. Mobility training is work done “within a pain-free range.” You should feel “tightness and a stretch,” not sharp, stabbing pain. Distinguishing between “tight” and “painful” is the first step in protecting yourself.
Q5: How long until I feel results? When is it considered “mastered”?
If you’re initially very tight, consistent practice for 3 to 4 weeks usually brings noticeable improvement (the measurable kind). But mobility, like fitness, regresses when you stop—especially since you’re continuously engaging in activities like cycling and sitting that tighten you up. So the answer is: there’s no “mastered” day, only a “keep maintaining” habit. The good news is that maintenance is cheap—10 minutes a day is enough.
Weekly Mobility Schedule: Making It a Habit
Many people ask me: “How long do I need to train this before I feel it?” In my experience, if you’re initially very tight, consistent practice for 3 to 4 weeks typically brings noticeable change (A-Zhe’s case was three weeks), but truly “keeping” the range requires long-term maintenance. Below is a sample weekly plan I give to age-group athletes (adjust it to fit your triathlon training schedule):
| Day | Main Workout | Mobility Arrangement | Focus Area |
|---|---|---|---|
| Monday | Swim technique | 10-min dynamic warm-up pre-training | Thoracic spine, shoulders |
| Tuesday | Bike intervals | 8-min hip flexor stretch post-training | Hip flexors |
| Wednesday | Easy run | Ankle rocking pre-run + ankle stretch post-run | Ankle dorsiflexion |
| Thursday | Rest or core | Full 20-min mobility session | All three areas |
| Friday | Bike endurance | Dynamic warm-up pre-training | Hips, ankles |
| Saturday | Long run or transition practice | Full dynamic warm-up pre-training | All three areas |
| Sunday | Long ride | Hip flexor + thoracic spine stretch post-ride | Hip flexors, thoracic spine |
There are three key principles:
- Small but frequent—8 to 20 minutes daily beats one hour once a week.
- Attach it to your existing schedule—dynamic before training, static after training, no need to find extra time.
- Add extra volume to your tightest areas—use the self-assessments above to identify your weak links.
Common Mistakes and Corrections
After years of coaching, I’ve seen the same mistakes far too many times. Here are the five most common ones and how I correct them:
Mistake One: Long Static Stretching Before Training
Many people sit on the ground and press their legs for five minutes before a race, thinking “stretching out makes it safer.” But prolonged static stretching before training can temporarily reduce muscular explosive output, which is counterproductive for the opening swim and sprints. Correction: Do only dynamic warm-ups before training; save static stretching for after training or rest days.
Mistake Two: Only Stretching Muscles, Not Training Control
Stretching only gives you “passive length,” but competition demands “actively usable range.” Correction: Follow each stretch with an active movement—for example, after a hip flexor stretch, do a set of single-leg bridges to “teach” the new range to your neuromuscular system.
Mistake Three: Compensating for the Thoracic Spine with the Lumbar Spine
When doing thoracic spine rotations, many people are actually twisting their lower back—the thoracic spine isn’t moving at all. Correction: Use a “lumbar-locked” position (e.g., side-lying with hips and knees flexed to fix the lower body, or quadruped with the pelvis stabilized) to force rotation to occur in the thoracic spine.
Mistake Four: Only Training the Flexible Side
Everyone has a dominant side. The tight side feels uncomfortable to work, so you subconsciously do less of it. The result is that asymmetry gets worse over time, and your swimming gets more crooked. Correction: Test and record both sides, and do one extra set on the tight side—pursue balance, not total volume.
Mistake Five: Treating Mobility as a Race-Day-Only Activity
Only thinking about mobility during race-day warm-ups, with zero practice in between, is like cramming at the last minute. Correction: Treat it like swim, bike, and run—a “daily training” component—and schedule it into your weekly plan.
Mistake Six: Ignoring Transition-Specific Preparation (T1/T2)
The most unique aspect of triathlon is the transition, yet almost no one “warms up” for it. The stiffness in those first two kilometers after getting off the bike can actually be pre-adapted to in training. Correction: Schedule “brick training” regularly—ride then immediately run a short segment to let your body adapt to the hip flexors switching from shortened to lengthened states. On race day, before starting the run out of T2, do a few quick high-knee walks and ankle rocks to “reboot” your joints. When I coach athletes through bricks, I specifically remind them to pay attention to the feeling at the front of the hip on the first step off the bike—that’s real-time feedback on hip flexor mobility.
Actionable Advice for Athletes of Different Levels
Athletes at different stages have different priorities. Here are my tiered recommendations:
Beginner Triathlon Finisher Group (Primary Goal: Finish Safely, Stay Injury-Free)
Your best investment right now is mobility, because it offers the highest return on investment and the lowest risk. Recommendations:
- Daily 10 minutes of dynamic warm-up, establishing a fixed pre-training ritual.
- Focus on ankle dorsiflexion (the most direct benefit for brick runs) and hip flexors (a common issue for those who sit for long periods).
- Don’t rush to chase a large range of motion; first aim for left-right symmetry and correct form.
Advanced Age-Group Group (Goal: Set a New PB, Improve Economy)
You already have training volume; mobility is the piece that helps you “truly deliver your engine’s power to the ground.” Recommendations:
- Make mobility targeted: use self-assessments to identify weaknesses and address them specifically.
- Thoracic rotation is often the biggest hidden bottleneck for this group (especially desk-bound office workers), making it worth prioritizing.
- Post-training static stretching plus active control exercises to consolidate range of motion.
High-Level Race-Prep Group (Goal: Qualifying Races, Long Distance)
The longer the distance, the longer you must hold your position, and the cost of insufficient mobility is magnified to its greatest extent. Recommendations:
- Treat mobility as part of recovery and injury prevention; be sure to schedule it after long sessions.
- Pay special attention to the hip flexor conflict between cycling and running; hip flexor recovery after long rides cannot be skipped.
- Regularly (e.g., every 4 weeks) re-test your measurements, monitor with data, and don’t rely on feel.
Three Reminders for the Taiwan Context
Finally, here are a few practical reminders tailored to Taiwan’s training environment:
- Desk-bound park/office workers should pay special attention to the thoracic spine and hip flexors. Many Taiwanese triathlon enthusiasts work in the tech industry, sitting for dozens of hours a week. Their thoracic spine is chronically flexed and hip flexors chronically shortened—these two areas are almost always weaknesses. Don’t rush to hop on the trainer after work; spend 8 minutes opening them up first.
- In summer’s heat and humidity, don’t skimp on the warm-up, but don’t overdo it either. Taiwan’s summers are like a triathlon (e.g., races around Northeast Coast, Kenting) with muggy weather; the body heats up quickly, but you also dehydrate and fatigue faster. An 8-to-10-minute dynamic warm-up is enough; make sure to top up fluids and electrolytes.
- Those who eat out frequently need to manage basic recovery. Maintaining mobility also depends on good sleep and recovery. Eating out is convenient in Taiwan, so remember to get enough protein and adequate fluids after long sessions (daily water intake varies by person; proactively replenish electrolytes when sweating heavily in hot weather). Don’t let poor recovery undermine the mobility you worked hard to build.
- Course characteristics also affect mobility demands. Many popular triathlon and cycling routes in Taiwan feature climbs (e.g., mountain areas in central/southern Taiwan, hilly terrain in the east). Climbing requires greater hip flexion angles and places higher demands on hip flexors and ankle dorsiflexion; descents and prolonged aero positions test thoracic endurance. Before race day, open up the relevant areas a bit more based on the specific course you’ll be racing—you’ll feel the difference.
Monitor Your Left-Right Balance with a Table
Here’s a tool you can track long-term. Fill in your self-assessment results every 4 weeks. The key isn’t just the absolute numbers—it’s the left-right difference. Triathlon is a sport with tens of thousands of repetitions; asymmetry gets amplified into injury and technical bottlenecks.
| Assessment Item | Left Side | Right Side | Left-Right Difference | Tracking Focus |
|---|---|---|---|---|
| Knee-to-Wall Test (Ankle Dorsiflexion) | ___ cm | ___ cm | Target < 2 cm | If the gap is too large, prioritize the tighter side |
| Thomas Test (Hip Flexors) | Flat / Elevated | Flat / Elevated | Both sides consistent is ideal | Add more work to the elevated side |
| Thoracic Rotation (Head Turn Range Left/Right) | ___ | ___ | Visually assess symmetry | Do more on the restricted side |
The very act of filling in the table forces you to “face the data honestly” rather than self-soothing with how you feel. Among the athletes I coach, those willing to fill in this table once a month make especially solid progress.
Conclusion: Install the Steering Wheel First, Then the Engine Matters
Back to the opening line: mobility is like the steering wheel and tires. You can have the most powerful engine on the field (FTP, VO₂max), but if your joints can’t reach the angles they need to, that power can’t be transmitted—and it can even bite back (injury).
Ankle dorsiflexion keeps your run from being dragged by invisible brakes; thoracic rotation keeps your shoulders from working overtime for your spine; hip flexor mobility resolves the inherent conflict between cycling and running. These three things require no expensive equipment, no extra hours—just 10 minutes a day, attached to your existing training plan, done consistently.
A-Jhe later told me that his biggest regret wasn’t the six months without progress, but “learning how important this was too late.” I wrote this article so you don’t have to take the same detour. Starting with your next training session, make the dynamic warm-up part of your plan. Stick with it for three to four weeks, and I believe you’ll personally feel the difference in the first two kilometers of your brick run and in the feel of your pull in the pool.
Next session, we’ll start with your knee-to-wall test.
This article is educational content and cannot replace individual assessment by a physician, physical therapist, or nutritionist. If you have a history of injury, joint pain, or significantly limited mobility, please consult a professional before training.
References
- Effects of peak ankle dorsiflexion angle on lower extremity biomechanics and pelvic motion during walking and jogging: https://www.ncbi.nlm.nih.gov/pmc/articles/PMC10867967/
- Restoring ankle dorsiflexion range of motion in athletes: an individualized clinical decision-making system: https://pmc.ncbi.nlm.nih.gov/articles/PMC12585996/
- Reliability and concurrent validity of the iPhone Compass application to measure thoracic rotation range of motion: https://pmc.ncbi.nlm.nih.gov/articles/PMC5845564/
- The importance of thoracic mobility in swimming and tennis: https://www.springphysio.com.au/blog/the-importance-of-thoracic-mobility-in-swimming-and-tennis
Related Reading
- The Complete Guide to Strength Training for Triathletes: Periodization, Squats, Deadlifts, and In-Season Maintenance Doses
- Mobility Assessment and Improvement for Athletes: A Coach’s Complete Practical Guide from Screening to Correction
- Triathlon Strength Training — Core, Single-Leg, and Posterior Chain Training Prescriptions for Triathletes
- Strength Training for Triathlon: A Strength Program That Improves All Three Disciplines
西進武嶺 免費訓練分析服務 Intervals | 練不夠還是練過頭?你哪一種類型選手?AI模型告訴你! | 備戰神器 | 公路車 訓練 | CT Yeh
4 年前
福隆鐵人團練隨拍
8 年前
Live) 備戰2019彰化經典百K 賽前攻略 (已完賽請看新影片
7 年前
FTL 與 SYB 車隊專訪 西進武嶺 實用攻略分享! 2小時 如何練?!你不知道的眉角!新手準備武嶺必看 EP1 | 實力派女車友 | 精華版 | 公路車 | CTYeh
4 年前
JE22 百里任務體驗,心跳不能過150,三小時內有可能...? 沒有天時地利難度有多高? / 公路車 / CT Yeh
1 年前
一個測試有沒有認真練車的方法😂 #公路車
10 個月前
CT 喇低賽) 武嶺牽車 才是王道 西進牽車四小時內秘訣 攝手位置 如何判斷 防抽筋小秘訣
7 年前
2019 夏季KOM 5小 完賽心得 準備攻略 東進武嶺 夏季登山王之路 Taiwan KOM Challenge
7 年前