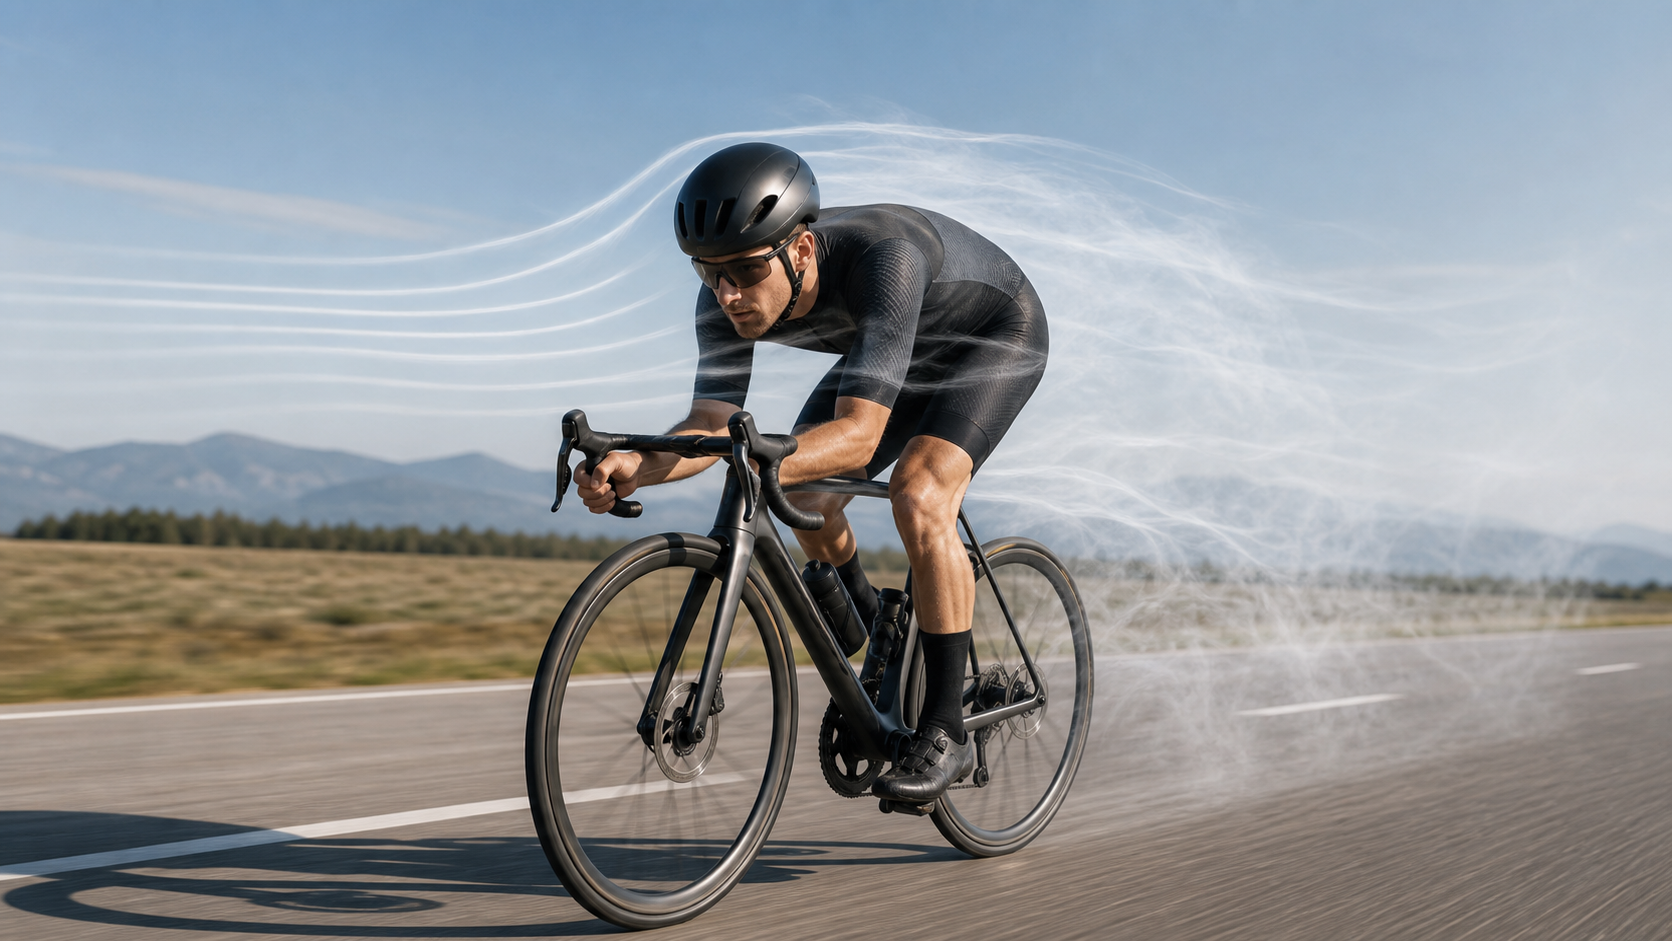
Coach’s Opening: The Student Who Spent NT$80,000 on Wheels but Was Two Minutes Slower
I once coached a student named A-Hong, a tech executive in his early forties, a textbook “gear-first” rider. When he came to me that year, he had just dropped nearly NT$80,000 on a set of deep-section carbon wheels and excitedly told me, “Coach, the manufacturer says these wheels can save almost a minute over 40 km—I’m definitely breaking my PB this time.”
But at that age-group time trial in Taitung, not only did he fail to break his PB, he was more than two minutes slower than his previous race.
He was devastated and felt cheated by the brand. But I pulled up his ride footage from that day and went through it frame by frame—I understood immediately: To look sharp at the photo spots, he rode the entire race with his chest up, hands on the tops, back ramrod straight, catching wind like a sail. No matter how expensive those wheels were, the few watts they saved had already been eaten up—and then some—by his own “human sail.”
I still use this as a teaching case to this day. Because it reveals the most counterintuitive yet most important truth in aerodynamics: Before you spend a single dollar, the biggest source of drag on your body is something you can adjust for free—yourself.
In this article, I’ll use wind tunnel testing and sports science data to lay out a clear ranking of where your effort-saving priorities should go. By the end, you’ll know exactly where your next budget dollar or next training session should go to get the most value.
Foundational Concepts: Why the Faster You Go, the More the Air Becomes Your Enemy
A Brutal Square Relationship
First, a physics fact you must remember: Air resistance is proportional to the square of your speed, and the power required to overcome it is proportional to the cube of your speed.
In plain language: when you want to go from 30 km/h to 40 km/h, your speed only increases by a third, but the extra effort you need to pedal is far more than a third—it’s close to double. That’s why many people feel that once they reach a certain speed, “why is going just a little faster so exhausting”—it’s not that you’re not trying hard enough; physics is collecting a toll from you, and it’s a progressive tax.
According to multiple wind tunnel and power measurement datasets, at 40 km/h on flat roads—a common cruising speed for Taiwanese age-group riders—air resistance accounts for roughly over 90% of your total power output (some sources give a range of 82% to 92%). In other words, out of every ten watts you grind out, about nine go toward pushing air aside, and less than one watt goes to overcoming rolling resistance and drivetrain losses.
This also explains a common misconception. Many people think “climbing is where real skill shows; anyone can ride flats,” but from an energy perspective, flat roads and slight descents are where aerodynamics truly decides the outcome. On steep climbs where speed drops to around ten-something km/h, air resistance takes a back seat, and gravity (i.e., the weight of you and your gear) becomes the main character. That’s why you’ll notice: on long climbs like the westbound Wuling ascent, weight reduction is more noticeable; but on relatively flat, rolling courses like the Sun Moon Lake loop or the North Coast, aerodynamics is the invisible game-changer.
The Give-and-Take of Three Types of Drag
To give you a clearer picture, I’ll use a conceptual table to show how the relative importance of the three main types of drag (air resistance, rolling resistance, and gravity) shifts at different speeds. These are rough trends, not exact numbers, but the direction is correct:
| Scenario | Main Opponent | Importance of Aerodynamics | Coach’s Advice |
|---|---|---|---|
| Steep climb (10–15 km/h) | Gravity (body weight) | Low | Prioritize weight reduction and body weight management |
| Gentle slope or rolling terrain (20–28 km/h) | Gravity vs. aero tug-of-war | Medium | Work on both position and fitness |
| Flat cruising (35–45 km/h) | Air resistance | Extremely high | Position and aero are the deciding factors |
| Descending (50+ km/h) | Air resistance | Nearly everything | Tuck in; safety first |
I often tell my students, you need to first figure out, “In today’s race, who is my main opponent?” If it’s something like Wuling where you’re climbing the whole way, focusing on aerodynamics is the wrong direction; but if it’s a mostly flat bike leg of a triathlon, then aerodynamics is your highest-ROI homework. Understand this table, and you’ll know where to put your limited attention in every race.
Why “Saving Watts” Beats “Training More Watts”
Here’s a brutal but practical logic. To squeeze an extra 10 watts out of your Functional Threshold Power (FTP), an amateur rider who already has a base might need to train hard for months—and still might not get there. But—by adjusting your position to save 20 to 40 watts, you can do it this afternoon, without breaking a sweat.
This isn’t telling you not to train your fitness; fitness is always the foundation. Rather, it’s a reminder: when you’re obsessing over “how to get faster,” don’t forget that “saved watts” and “trained watts” are completely equivalent on the clock. A watt is a watt. So isn’t it reasonable to pick up those free, immediately available watts first? That’s the greatest gift aerodynamics gives amateur riders: it lets you trade “cleverness” for “hard training.”
CdA: The Key Number You Need to Know
To talk about aerodynamic effort savings, you can’t avoid the term CdA.
- Cd is the “drag coefficient,” describing how “blunt” or “streamlined” your shape is.
- A is the “frontal area,” i.e., the projected area of you and the bike blocking the wind when viewed from directly ahead.
- Multiply them together and you get CdA, measured in square meters.
You can think of CdA as your overall score for “how much you get in the air’s way.” Smaller is better.
Based on multiple wind tunnel datasets and coaching community measurements, typical CdA values for different positions roughly fall in these ranges (everyone’s body is different; these are approximate):
| Riding Position | Typical CdA Range (m²) | Plain-Language Description |
|---|---|---|
| Hands on tops, torso upright | 0.35 – 0.40+ | Most comfortable, and most like a sail |
| Hands on hoods | 0.30 – 0.35 | Most common cruising position on a road bike |
| Hands in drops | 0.26 – 0.30 | Serious sprint/headwind position |
| Aero bars TT position | 0.20 – 0.24 | Time trial/triathlon-specific position |
Look closely at this table: just going from “upright torso” to “tucked into aero bars” can cut CdA by nearly 40%. That’s a massive change no set of wheels or jersey can give you. And—it’s completely free.
Where Does the Drag Hide? The Ranking of Effort Savings by Component
Your Body Is the Biggest Piece
This is the point I most want to hammer into your head in this entire article.
According to the general consensus from wind tunnel studies: of the total aerodynamic drag, the rider’s body (including helmet, jersey, and other worn gear) accounts for roughly 60% to 80% (different sources give a range of 64% to 82%, depending on body size and position), while the entire frame, wheels, and components combined account for only about 30% to 40%.
Let me put it another way to make this more vivid:
When you’re riding, the area blocking the wind when viewed from directly ahead is mostly your torso, head, arms, and thighs—the bike itself is a minor supporting player.
So now it’s clear where A-Hong, the guy with the NT$80,000 wheels, went wrong: he spent big money optimizing the minor player that accounts for only 30–40%, while letting the major player that accounts for 60–80% (himself) flap in the wind like a sail. It’s like trying to save electricity on an air conditioner by not adjusting the main unit that’s running at full blast, but instead changing the batteries in the remote.
Breaking It Down: Torso Angle Is the Key of Keys
Within the broad category of “body position,” if you break it down further, the biggest factors, in order, are roughly:
- Torso angle (how low your back is) — This is the biggest variable. The closer your upper body gets to horizontal, the more your frontal area drops.
- Head and neck position — Many people get low but habitually lift their heads to look ahead. The moment your head comes up, it’s like opening an umbrella in the airflow.
- Arm and shoulder width — Tucking your elbows in and narrowing your shoulders can significantly reduce your frontal projection.
- Thigh and knee placement — Knees flaring outward during the pedal stroke increases turbulence; tucking them in closer to the top tube is smoother.
Research has shown that body position alone—including torso angle, head, and arm spacing—can account for the vast majority of aerodynamic drag. This is why professional bike fits and wind tunnel testing always start with “adjusting posture” first, rather than telling you to buy parts.
The Example of Another Student of Mine, Xiao-Ting
Here’s a comparison case. Xiao-Ting is a petite female racer, only 155 cm tall. At first she was quite self-conscious, thinking, “I’m so small—am I at a disadvantage?” I told her the opposite: Your frontal area is naturally smaller than a tall guy’s—that’s your aero advantage, and you should use it.
We didn’t buy her any expensive equipment. We only did three things: first, we fine-tuned her handlebar position so she could naturally flatten her back; second, we taught her to tuck her elbows in so her forearms were nearly parallel to the ground; third, we repeatedly practiced the visual technique of “head down, but eyes looking up.”
Three months later, in a circuit race in northern Taiwan, with the same fitness level, her average speed improved by nearly two kilometers per hour. She told me, “Coach, I used to save up to buy a better bike. Turns out I already had the natural advantage—I just didn’t know how to use it.”
This example is to show you: Aerodynamics doesn’t care whether you’re rich or poor, big or small. It only cares whether you’re willing to spend time understanding your own body. Smaller riders should exploit their smaller surface area; larger riders must rely even more on posture to pull that area back in. Everyone has room to improve.
An Easily Overlooked Detail: Water Bottles and Race Numbers
Many people chasing CdA only focus on the big picture and ignore a bunch of “small turbulence generators.” For example: a race number flapping in the wind, a pump loosely strapped to the seatpost, rear pockets bulging and exposed, even shoelaces swaying as you ride.
Individually, these seem like nothing, but added together, they’re real, tangible drag. In time trials or triathlons where every second counts, I have my athletes do a “full-bike inspection”: pin the race number flat at all four corners, tidy up pocket contents, tuck in shoelaces, and choose the right position for water bottles. These are all free details, yet they’re often the final seconds that decide your placing. In many age-group races in Taiwan, the podium is often separated by just ten-odd seconds—these details are where those seconds are clawed back.
A Real-World Power Comparison
Let the numbers speak for themselves. Based on published data from a wind tunnel test, using one rider as an example, at the same speed:
- Switching from the baseline road cruising position to hands on the drops yields an aerodynamic improvement roughly equal to saving 24 watts; in a 40 km time trial at 375 watts output, that translates to roughly 72 seconds saved.
- Going further into a full time trial (TT) position saves an additional ~16 watts; relative to the original baseline position, that’s about 124 seconds saved over 40 km (or roughly another 52 seconds compared to the drops position).
Do you see it now? Just by changing your position from an upright cruise to a TT position, you gain over two minutes in a 40 km effort. That’s bigger than the claimed benefit of A-Hong’s NT$80,000 wheelset—and adjusting your position costs nothing.
Price Per Watt: A Ranking for Spending Your Budget Wisely
As a coach, the most common question I get is: “Coach, I have a budget of NT$20,000 (or 50,000, or 100,000)—what should I buy first to feel the biggest difference?”
I always answer with the concept of “price per watt.” Meaning: for every dollar you spend, how many watts of savings do you get back? Once you rank the cost-performance, the answer is often the complete opposite of what people expect.
Here’s my “cost-performance ranking for saving watts,” compiled from wind tunnel data and market prices. The watt figures are rough estimated ranges relative to an upright cruising position at roughly 40 km/h; actual results vary by individual:
| Item | Approx. Savings (W) | Cost | Cost per Watt | Coach’s Comment |
|---|---|---|---|---|
| Adjusting riding position | 20 ~ 40+ | NT$0 | Nearly free | King of the ranking—do this first |
| Tucking elbows / narrowing shoulders | 5 ~ 15 | NT$0 | Free | Just practice; the more you do it, the more natural it gets |
| Aerodynamic / form-fitting jersey or skinsuit | 3 ~ 8 | Hundreds to thousands | Very low | Don’t ride fast in a baggy cotton tee |
| Aero helmet | 5 ~ 10 | Thousands to over ten thousand | Moderate | Noticeable in TT/triathlon; depends on the situation on the road |
| Shoe covers | 1 ~ 3 | Hundreds | Low | Marginal gains for time trials |
| Aero bars (clip-on) | Large | Thousands to over ten thousand | Moderate | The key that makes a TT position possible |
| Aero deep-section wheels | Single digits to teens | NT$30,000 to 100,000+ | Extremely high | Most expensive, and the benefit is most easily negated by posture |
How to Read This Table
Here’s the key takeaway:
- The top of the ranking (position, narrowing your profile, form-fitting clothing) is nearly free, yet delivers the biggest benefit. That’s why I always tell my athletes, “Max out the free stuff first, then talk about spending money.”
- Aero helmets and form-fitting jerseys fall into the “small money, big results” category—in my view, the second-best value group. The cost per watt of an aero helmet is far lower than that of a wheelset.
- Deep-section wheels rank last—not because they’re useless, but because they’re “the most expensive, highest cost per watt, and the most fragile benefit.” As mentioned earlier, the few watts a wheelset saves are immediately lost the moment your posture falls apart or you lift your head. They’re for advanced riders who’ve already dialed in their position and want to claw back those final seconds—not the first thing a beginner should sink money into.
I often joke with my athletes: if you buy deep-section wheels before fixing your position, that’s called “helping the manufacturer’s sales figures,” not “helping your own results.”
The Wind in Taiwan Is Not What You Think
Here’s a very local insight I need to add: the performance of deep-section wheels in crosswinds is a variable many Taiwanese cyclists don’t consider.
Taiwan has several classic wind-exposed routes—the coastal highway from New Taipei to Yilan, the West Coast Expressway from Changhua to Tainan, and the northern coast during the northeast monsoon season. Crosswinds there are often strong and gusty. Deep-section wheels (especially high-profile rims over 60mm) get blown around like sails in strong crosswinds, handling deteriorates, and novices can get spooked and hesitate to push hard. In that situation, the aero savings from those deep wheels are canceled out by you “not daring to ride fast and constantly correcting your line.”
So my practical advice for Taiwanese riders is: if you frequently ride the West Coast Expressway or coastal routes with strong crosswinds, mid-profile wheels (40–50mm) are often a more practical choice than high-profile ones, balancing aerodynamics with handling confidence. Equipment should match the conditions—more expensive, deeper, and more extreme isn’t always better. This is another hidden cost to factor in beyond “price per watt”—the cost of handling and confidence.
Don’t Forget Tires and Tire Pressure—the “Invisible Freebie”
To wrap up the aero discussion, I want to throw in something that’s technically not aerodynamics but has equally high cost-performance: tire choice and tire pressure.
Rolling resistance may not be a huge percentage at high speeds, but it’s nearly “free” to optimize—choose a low-rolling-resistance tire and inflate it to the sweet spot for your weight and the road surface (too high or too low both make you slower). These cost far less than a wheelset, yet are often ignored. I’m putting it here to remind you: saving energy is a full-spectrum effort. Don’t stare only at aerodynamics while an old, rock-hard tire with random pressure quietly steals your speed from behind.
Common Mistakes and Fixes: The Pitfalls I See on Taiwanese Race Courses
After all these years of coaching, I’ve seen the same mistakes countless times. Avoid the ones below, and you’ll already be ahead of half the field.
Mistake 1: Buying Aero Bars but Not Being Able to Hold the Position
Many triathlon beginners install aero bars but don’t train enough, so their core gives out during a race. Before long, they’re slumped over or constantly sitting up. In that case, that expensive TT position is essentially wasted.
Fix: A position only matters if you can “hold it.” The prerequisite for getting low is having the core strength and flexibility to support it. I give my athletes a daily routine of core stability and hip flexor stretches, and gradually build up from “5 minutes at a time” to let the body adapt. Being low but unable to hold it is worse than being moderately low but maintaining it steadily the whole way.
Mistake 2: Only “Trying Hard” at Photo Spots, Coasting the Rest of the Time
Ahong is exactly this type. People are funny—the moment they spot a photographer, they subconsciously sit up tall and try to look good. But aerodynamic drag doesn’t take a discount just because you’re being photographed.
Fix: Turn good posture into muscle memory, making it your “default setting that requires no thought.” Train in your race position during workouts—don’t relax in training and only look professional on race day. The real savings happen on the stretches of road where nobody is watching.
Mistake 3: Head Too Low, Can’t See the Road
This is overcorrection. Some athletes hear me say “keep your torso low” and then bury their entire head staring at the front wheel. The result: zero visibility, extremely dangerous, and the neck hunches up, disrupting the airflow.
Fix: The goal is “low torso, eyes up.” Ideally, you look up with your eyes rather than lifting your whole head to see the road. Safety always comes before that one or two watts. With Taiwan’s road conditions, plus the feed zones and turns common in races, visibility must never be sacrificed for aerodynamics.
Mistake 4: Obsessing Over Equipment While Ignoring Weight and Fitness
Some people obsess over shaving 200 grams off the bike or saving a few watts on wheels, yet turn a blind eye to their own excess body fat and weak aerobic engine.
Fix: For most amateur athletes, the potential for improvement in fitness and body weight far exceeds the marginal gains equipment can provide. Spending the money you’d put toward deep-section wheels on a professional bike fit, or signing up for a structured training block, is usually the better deal.
Mistake 5: Wearing Non-Breathable “Aero Suits” in Taiwan’s Humid Heat
Taiwan summers routinely feel like 35°C or more with extreme humidity. Some people insist on wearing airtight skinsuits for aerodynamics, only to have their core temperature spike and cooling fail—the few watts saved by aerodynamics are paid back several times over by heat exhaustion.
Fix: In Taiwan, aerodynamics and heat dissipation must be considered together. Choosing form-fitting clothing that also breathes is more practical than chasing the absolute lowest drag. Speed comes from your legs—provided you don’t overheat first.
Actionable Advice for Athletes of Different Levels
After all that science, let me turn it into three checklists you can execute immediately. Find where you fit.
If You’re a Beginner / Just Getting Started (Limited Budget)
Your first priority: Don’t spend a single dollar—first, perfect your position.
- Find a mirror or have a friend take a side-on photo of you riding. Check if your torso is too upright.
- Practice resting your hands naturally on the hoods, with a slight bend in your elbows and a flat back. Feel how your frontal area shrinks.
- When riding into a headwind or wanting to accelerate, practice moving to the drops.
- Buy a form-fitting jersey (not so tight you can’t breathe, but one that doesn’t flap). This is your first and most cost-effective aero investment.
- Focus your training on aerobic fitness and core strength—that’s the foundation of your speed.
If You’re Intermediate / Race Frequently (Some Budget)
Your first priority: Invest in one professional bike fit to “lock in” your position.
- Get a complete fit from a fitter you trust, balancing aerodynamics, power output, and comfort to avoid injury.
- If you do triathlons or time trials, consider adding aero bars, and simultaneously schedule core and aero-position adaptation workouts.
- Buy an aero helmet—in my opinion, this is one of the highest value-for-money purchases for intermediate athletes.
- Start using a power meter to monitor yourself. Learn to compare speed differences between positions while holding the same power.
If You’re Advanced / Racing for Results (Willing to Invest for Seconds)
Your first priority: Only after you’ve done everything above does it become time for deep-section wheels and details.
- The prerequisite is that your position is stable enough to hold the entire race, with core strength sufficient to support a TT position.
- Only then are aero wheels, skinsuits, shoe covers, and even sock details worth chasing one by one.
- If you get the chance, do a wind tunnel test or outdoor CdA measurement. Use data to find your personal optimal position rather than copying someone else’s.
- Remember: every optimization you make is fragile—if your position collapses, all of it is wasted. The ability to hold your position is itself a piece of aero equipment.
- Don’t forget heat management: in Taiwan’s summer races, cooling failure is more deadly than aero losses. Factor breathability into your equipment choices.
One final reminder for all levels: aero optimization has an order. You always max out the free stuff—position and body shape—first, then spend a little on form-fitting clothing and an aero helmet, and only last do you get to the most expensive wheels and details. Any approach that skips ahead and throws money at the most expensive item first is putting the cart before the horse. This order applies to everyone from beginner to expert; the only difference is which step you’re on.
A Sample “Aero Awareness” Weekly Training Plan You Can Follow
Many people think aerodynamics can only come from equipment or wind tunnels, but you can actually “practice your position” in everyday training. Here’s a one-week sample I give to intermediate athletes for reference (intensity based on personal feel and power zones, not mandatory):
| Day | Main Workout | Aero Focus |
|---|---|---|
| Monday | Easy recovery ride, 60–90 min | Deliberately maintain a low torso position the entire time to build the habit |
| Tuesday | Core + stretching, 30–40 min | Strengthen the muscles that hold the aero position; release the hip flexors |
| Wednesday | Tempo ride, including 3–4 efforts of 8–10 min at steady output | Use race position for every effort; feel what “holding it” means |
| Thursday | Rest or very easy ride | Let the body recover |
| Friday | Intervals, several high-intensity efforts | Practice moving to the drops and narrowing your profile during surges |
| Saturday | Long endurance ride, 2–3 hours | Practice “maintaining good posture for a long time without collapsing” |
| Sunday | Race simulation or group ride | Use race position the whole time—don’t only get serious at photo spots |
The core spirit of this table is one sentence: train good posture until you don’t have to think about it. Because during a race, your attention is divided between pacing, fueling, and competitors. Only a posture that has become instinct will hold up.
Advanced: You Can Estimate Your CdA Without a Wind Tunnel
Wind tunnel testing is expensive and hard to book, but the good news is—you can roughly estimate your CdA without ever entering a wind tunnel. This is very useful for athletes who want to optimize seriously.
There are two most practical methods:
- Outdoor field testing (coast-down test / out-and-back method): Find a flat, straight, low-traffic road. Ride out and back at a fixed power or by coasting to cancel out the effects of grade and wind, then use power meter and speed data to back-calculate CdA. Some software and sensors on the market can calculate this automatically. Taiwan’s closed circuits or early-morning riverside bike paths are great locations for this kind of testing.
- A/B comparison method: This is what I most recommend for amateur athletes. You don’t need to calculate an exact CdA number. Just compare “Position A” vs. “Position B” on the same stretch of road, in the same weather, with the same perceived effort—whichever is faster, or uses less power, tells you whether the change worked. Simple, free, and close to real racing conditions.
When doing this kind of testing, I need to warn you about three key points—otherwise the data will lie to you:
- Control the variables: Wind, grade, road surface, tire pressure, and weather should all be as consistent as possible. Otherwise, you’re measuring noise, not position.
- Repeat multiple times: A single run’s data is not trustworthy. Do at least three out-and-back runs and average them before trends become meaningful.
- Change only one thing at a time: If today you’re adjusting torso angle, don’t also change your helmet and wheels at the same time—otherwise you’ll have no idea which one is having an effect. This is the iron rule of all experiments, and it applies equally to bike setup.
I often tell my athletes that you don’t need an expensive wind tunnel—you just need a fixed stretch of road, a bit of patience, and the discipline to “change one thing at a time.” The personal data accumulated from this kind of grassroots testing is often more relevant to your own body than copying a pro’s setup.
FAQ
Q: I only ride recreationally on weekends—do I really need to care about aerodynamics?
A: If you enjoy riding and don’t care about speed, comfort always comes first, and a more upright position is fine. But the moment you start thinking, “How can I ride faster and more easily?” aerodynamics is the most cost-effective place to start—and free position adjustments work for everyone.
Q: Should I actually buy deep-section wheels?
A: Whether to buy them isn’t the point—the order of operations is. If your position is already dialed in, your core can hold up, and you’ve had a bike fit, then deep-section wheels are a great “last mile” upgrade. But if you haven’t done those things yet, don’t rush to spend that most expensive money.
Q: Why do I feel more tired when I follow your position adjustments?
A: A low position uses different muscle groups, especially challenging your core and hip-flexor flexibility, so it will definitely feel unfamiliar at first. This is an “adaptation” issue, not a “wrong position” one. Progress gradually, start with short durations, and your body will catch up.
Q: Taiwan is hot and humid—how do I balance aerodynamics and heat dissipation?
A: Health and safety are the bottom line. Aerodynamics saves “seconds,” but heatstroke costs you “the whole race or even your health.” Choose breathable, form-fitting gear, and pay attention to hydration and cooling during races. Don’t push through for a few watts.
Q: Without a power meter, how do I know if my position is working?
A: The most low-tech but effective method—pick a flat stretch of road, keep a constant perceived effort, and compare your speed or time across different positions. Do it several times and average the results; the trend will be clear. Taiwan has plenty of riverside bike paths (like Dajia, Xindian River, and Erchong Floodway) that are great for this kind of “DIY testing”—flat roads, little traffic, and easy to mark fixed points.
Q: Does the tail of an aero helmet actually work?
A: Provided your position is stable and your head angle is fixed, the aero tail does help guide airflow along your back and reduce turbulence. But its benefit also depends heavily on your position—if you’re constantly turning your head or holding it at odd angles, that tail can actually catch the air and create turbulence. So like wheels, it’s something that only delivers value once “your position is dialed in first.”
Q: I’m a bigger build—does that mean I’m hopeless when it comes to aerodynamics?
A: Not at all. Larger riders do naturally have a bigger frontal area, but that also means you have more room for improvement. For the same change in torso angle, a bigger rider often saves more absolute drag than a smaller one. Don’t be discouraged—your advantage is the “magnitude of progress.”
Q: Does drafting count as an aero technique?
A: Yes, and it’s the most powerful move in team races or road races. Hiding behind the rider in front can dramatically reduce air resistance. However, in the bike leg of a triathlon, drafting is usually prohibited (drafting penalty), so you must follow the race rules. But in legal group rides and road criteriums, knowing how to draft and rotate through is absolutely a skill worth more than any equipment.
Conclusion: Max Out the Free Stuff First, Then Talk About Spending Money
Back to A-Hong from the beginning. In the end, I didn’t have him return the wheels. Instead, I spent three months helping him rework his position, train his core, and build up his ability to hold an aero tuck. The following year at the same Taitung time trial, with the same wheels and the same fitness level, he was nearly four minutes faster.
He told me: “Coach, it turns out I’ve been fighting my own body all along.”
I want to pass that sentence on to every one of you reading this. Aerodynamics sounds very high-tech and expensive, but what wind-tunnel data keeps telling us is actually something quite simple:
The biggest drag on your body is free to fix; and the most expensive equipment’s benefit is most easily eaten away by your own position.
So next time before you reach for your wallet, ask yourself: Have I maxed out the free stuff?
Max out the free stuff first, then talk about spending money. That’s the energy-saving hierarchy I most want to teach you after fifteen years of coaching athletes.
This article is for educational purposes and does not replace individual assessment by a physician, physical therapist, or nutritionist.
References
- What Is CdA? Aerodynamic Drag in Cycling Explained — Best Bike Split
- Bike Position, Minimising Aerodynamic Drag & Wind Tunnel Testing — Bicycling Australia
- How Air Resistance Affects Cycling: Watts, Drag, and Resistance Split — RaceYourTrack
- Cyclist aerodynamics through time: Better, faster, stronger — ScienceDirect
- Aerodynamic Efficiency in Road Positioning — Adaptive Human Performance
Related Reading
一日北高前的西濱集訓 | 跟著11小時軍團 | 300W踩不動的大逆風 | 輪車破風差幾瓦?
6 年前
風櫃嘴時間 預測西進武嶺時間?13000名車友統計數據分析告訴你 !
5 年前
風櫃嘴! 現實與虛擬騎乘 會有誤差嗎? 背著iPad邊騎一趟風櫃嘴實際測試一次 | 公路車 | CT Yeh
3 年前
#公路車 #Vo2Max #最大攝氧量 測驗 體驗 | 心肺測試
6 年前
西進武嶺 8000名單車友數據分析 PART1 | 從新手到高手數量/瓦數/推力比/FTP推力比/功率計使用率 大解析 | 公路車 | CTYeh
5 年前
西進武嶺 免費訓練分析服務 Intervals | 練不夠還是練過頭?你哪一種類型選手?AI模型告訴你! | 備戰神器 | 公路車 訓練 | CT Yeh
4 年前
Unaas X50 全碳纖幅條輪 數據實測對比PK | Lun Hyper 的高階版 | 板輪爬坡也可以很厲害? ! 武嶺2小時大師一起親測! CP值超高 | 公路車 | CT Yeh
4 年前
鉅齒紋輪組!? ControlTech MEG-T50 EVO 碳纖維幅條輪組/ 功率對比實驗 / 公路車 / CT Yeh
2 年前