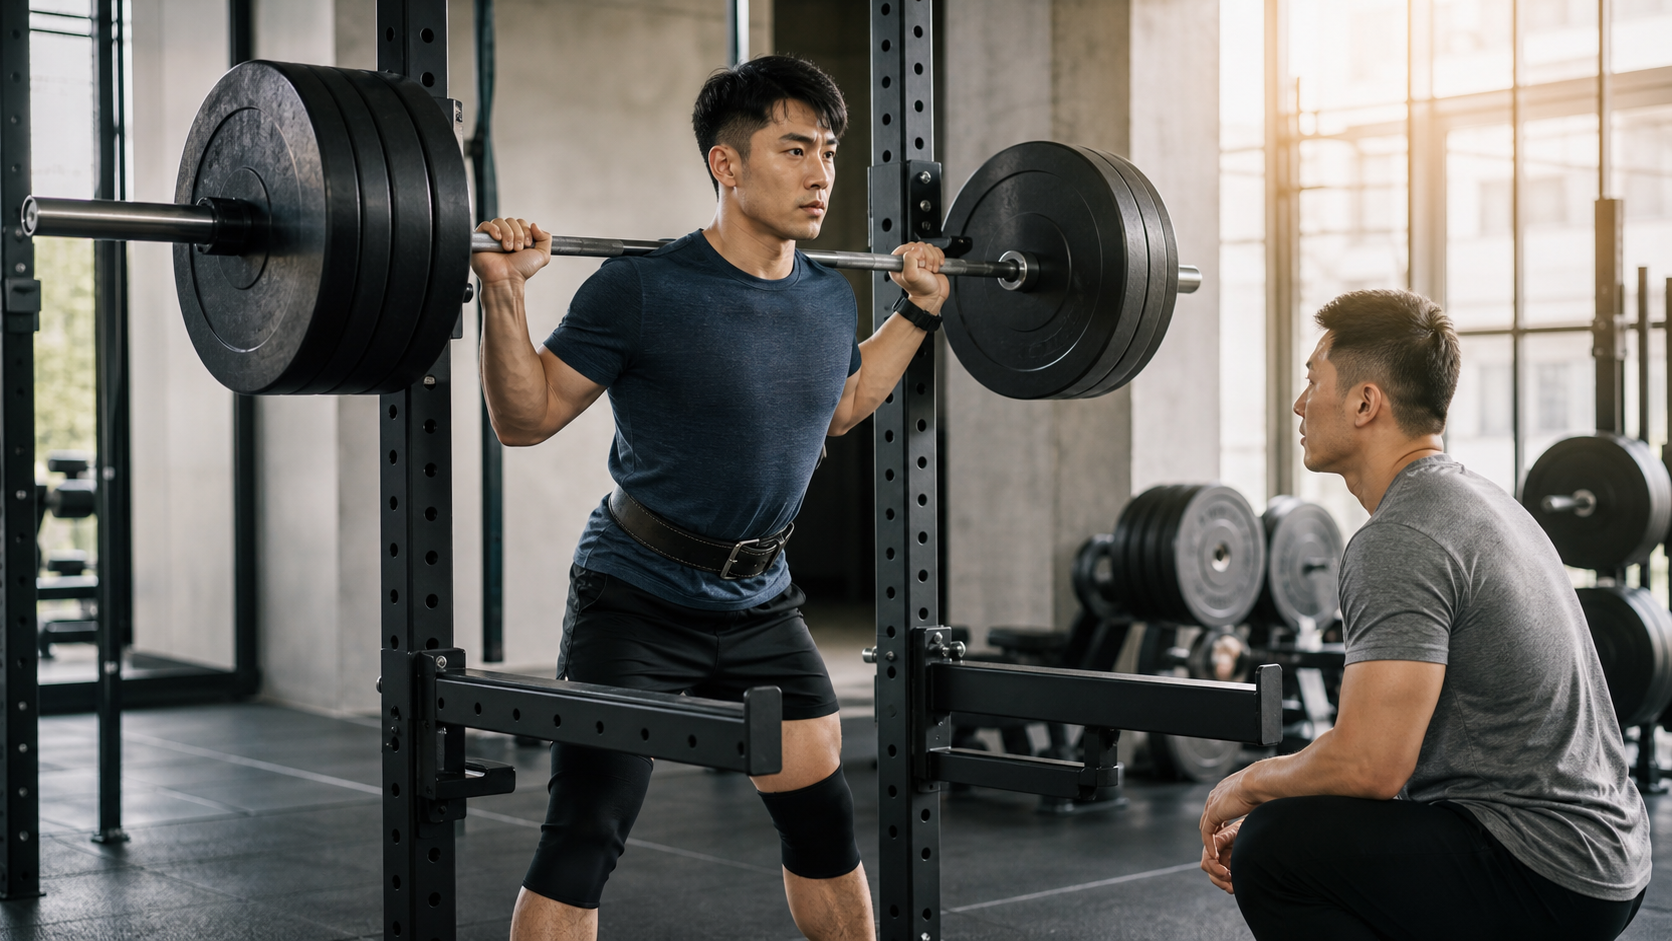
Starting with a Trainee Whose Hands Were Shaking
I still remember a few years ago, a road cyclist named A-Hong came to see me. The moment he sat down, he asked: “Coach, my friend said that to be considered ‘trained,’ you need to squat 1.5 times your body weight for a 1RM. Last week I tried it myself at the gym, and on the very first rep I got stuck at the bottom and couldn’t get up. Luckily someone nearby helped me re-rack the bar. Am I just not good enough?”
I asked him first: “Did you warm up that day? How did you decide to jump to that weight?” He said: “I just… went for it. I kept adding weight until I could only do one rep.”
That’s the problem right there. A 1RM (One-Repetition Maximum) is not about “just adding weight until you can’t lift it anymore”—it’s a testing protocol with scientific steps. If you test it wrong, the number is unreliable, and worse, you could get injured. In this article, I want to compile my decade-plus of experience testing athletes of all levels and general populations, along with the sports science literature I’ve read over the years, into a guide you can actually use.
Whether you want to build a strength-training foundation for your cycling, or you’re simply curious about “how strong am I, really,” by the end of this article you’ll know: what a 1RM is, why it matters, how to measure it accurately, when you should use an estimation formula instead of testing directly, and the most common pitfalls Taiwanese people run into when testing at the gym or at home.
Why the 1RM Matters So Much
It’s the “Reference Point” for Your Entire Program
Almost all strength-training intensity prescriptions are written as percentages of your 1RM. You’ll see things like “Squat 5 sets x 5 reps @ 80% 1RM” in a program, which means using 80% of your 1RM weight.
If your 1RM number is off, the intensity of your entire program goes sideways:
- Overestimating your 1RM: The 80% you think you’re doing is actually your real 90%. You’re grinding near your limit every set, fatigue accumulates too fast, form breaks down, and injury risk goes up.
- Underestimating your 1RM: The 80% you think you’re doing is actually only 65%. Training feels too easy, strength gains are slow, and you’re wasting time.
So “measuring it accurately” directly determines the quality of your training for the next several weeks.
Different Intensity Zones Correspond to Different Training Goals
Here’s a common intensity reference table so you understand why getting your 1RM right matters. The values below are generally accepted principles in sports science, but individual variation is large—use them as a reference only:
| Training Goal | Intensity (%1RM) | Typical Reps | Rest Between Sets |
|---|---|---|---|
| Maximal Strength | 85–100% | 1–5 reps | 3–5 minutes |
| Hypertrophy (Muscle Growth) | 67–85% | 6–12 reps | 1–3 minutes |
| Muscular Endurance | ≤ 67% | 12+ reps | ≤ 1 minute |
| Power (Movement Depends on the Lift) | 30–80% | 1–5 reps (fast) | 2–5 minutes |
See, even a small error in that “%1RM” number can push you into a completely different training zone with a completely different stimulus. That’s why I often tell my trainees: instead of chasing an impressive 1RM number, first chase a “credible” number.
It Also Matters for Endurance Athletes (e.g., Cyclists)
Many cyclists think, “I’m not a powerlifter—why would I test a 1RM?” In reality, strength is the foundation of endurance performance. Riders with better lower-body maximal strength can, on long climbs when standing to sprint or in a final surge, output the same watts using a lower percentage of their max force—making them relatively more efficient and more durable. Knowing your lower-body 1RM helps you write your strength-training intensity prescriptions more precisely, instead of spinning your wheels with the same “feels about right” weight every session.
I once coached a trainee named Xiao-Chen who was preparing for the Wuling climb race. During the winter off-season, I set up an 8-week maximal strength program for him, starting with a 1RM test for squats and leg presses. With an accurate baseline, every week’s weight landed precisely in the 85–90% 1RM zone. After that season, he told me that on long climbs, his legs held up noticeably better when “standing to sprint.” That’s the value of using a 1RM for endurance sports—not to show off a number, but to make sure every strength session hits the right intensity.
A Bit of Science: What Actually Determines Maximal Strength
To understand “why the 1RM test is designed this way,” you need to know the two main mechanisms behind maximal strength. This section is a bit denser, but once you understand it, many of the testing details will make obvious sense.
Neural Recruitment: It’s Not That You’re Weak, It’s That You Can’t “Call Them Up”
Human muscle is made up of thousands of muscle fibers, but in daily life you can’t use all of them at once. A large part of maximal strength depends on whether your nervous system can “recruit” enough large motor units in an instant and fire them synchronously. This is also why beginners often severely underestimate their 1RM on the first test—it’s not that the muscle isn’t there, it’s that the nervous system hasn’t learned to “go all out” yet. After a few weeks of heavy training, even without visible muscle gain, the 1RM often jumps significantly—and almost all of that improvement comes from neural adaptation.
This explains two practical testing points: first, the near-maximal warm-up sets (2–3 reps) before testing are crucial—their role isn’t just to warm up, but to “wake up” the nervous system and pre-recruit large motor units; second, beginners should use estimation formulas first and test directly only after neural adaptation, so they don’t end up needlessly underestimating themselves.
Muscle Cross-Sectional Area and Leverage
The other major determinant is, of course, the size of the muscle itself (cross-sectional area) and your body’s leverage structure (bone lengths, attachment points). This part changes slowly, requiring weeks to months of hypertrophy training to become visible. Leverage varies from person to person, which is why “someone else can squat 1.5x body weight and you can only do 1.2x” doesn’t mean you’re weaker—your body structures are simply different. A 1RM should only be compared against your past self.
How Fatigue Ruins a Test
Maximal effort relies primarily on the phosphocreatine (ATP-PCr) system for energy. This system is explosive but depletes quickly, requiring 2–5 minutes for substantial recovery. That’s why between near-limit attempts, you must rest a full 2–4 minutes. If you don’t rest enough, what you measure isn’t maximal strength—it’s “residual strength under fatigue.” Keep this concept in mind, and the common mistakes section later will hit harder.
Three Gates You Must Pass Before Testing a 1RM
Before I teach you how to test, I want to make it clear: not everyone, and not every moment, is suitable for directly testing a 1RM. This is a safety issue, and I break it down into three gates.
Gate One: Movement Quality
If you can’t even perform a squat, deadlift, or bench press at 60% of your working weight without wobbling, knees caving in, or excessive lumbar extension or flexion, then the last thing you should do right now is test a 1RM. Maximal loads magnify every flaw in your technique. In this case, I always recommend: spend 4–8 weeks stabilizing your form, and use the “estimation method” (explained later) to get a rough number for your program.
Gate Two: Training Experience
For complete beginners with no resistance training experience, the neuromuscular system hasn’t learned to “recruit a large number of muscle fibers at once,” so the 1RM they test is often severely underestimated—and the next day they may be so sore they question their life choices. For beginners, I almost always recommend using a multi-rep estimation formula, and only consider a direct test after 2–3 months of training with stable technique.
Stage 3: Health Status
This stage is especially important, so I’ll speak in a more cautious tone. Before testing 1RM, the following groups are strongly advised to consult a physician or physical therapist for an individualized assessment:
- High blood pressure or cardiovascular disease: Maximal exertion triggers the Valsalva maneuver, which can cause a sudden spike in blood pressure and place stress on the cardiovascular system.
- History of lumbar spine, knee, or shoulder injuries: Maximal loads tend to cause problems at the site of old injuries.
- Chronic conditions such as diabetes or heart disease: An individualized assessment is essential; don’t simply copy someone else’s program.
- Pregnancy, early postpartum period, and those at risk for osteoporosis.
Accessing healthcare in Taiwan is actually very convenient. Under the National Health Insurance (NHI), visiting a rehabilitation or sports medicine clinic is not expensive. If any of the above applies to you, spending the registration fee to get a professional opinion first is far more cost-effective than dealing with a sports injury afterward.
The Standard 1RM Direct Testing Protocol
Alright, let’s assume you’ve passed all three stages: your form is solid, you have a training base, and you’re healthy. Now let’s look at how it’s done properly. The following protocol integrates the widely adopted testing logic from the National Strength and Conditioning Association (NSCA), adapted to the real-world context of gyms in Taiwan.
Core Principles
According to widely adopted NSCA testing guidelines, an ideal 1RM should be determined within 3 to 7 attempts. If you’ve tried more than a dozen times without finding it, it means your warm-up was poorly arranged or your load increments were off. By that point, your body has accumulated too much fatigue, and the number you get will be artificially low and the process more dangerous.
Full Warm-Up and Progressive Loading Protocol
| Step | Content | Rest |
|---|---|---|
| 0. General warm-up | 5–10 minutes of light cardio + dynamic stretching, joint mobility work | — |
| 1. Light load | Use a weight you can easily do for 5–10 reps, perform 5–10 reps | ~1 minute |
| 2. Moderate load | Add 5–10% for upper body, 10–20% for lower body, perform 3–5 reps | ~2 minutes |
| 3. Near-maximal load | Add another 5–10% for upper body, 10–20% for lower body, perform 2–3 reps | 2–4 minutes |
| 4. First 1RM attempt | After a conservative estimate, load a weight you “should be able to lift for one rep” | 2–4 minutes |
| 5. If successful, increase load | After success, add 5–10% for upper body, 10–20% for lower body and try again | 2–4 minutes |
| 6. If failed, decrease load | After failure, reduce the weight and try again | 2–4 minutes |
Repeat step 5 or 6 until the maximum weight you can lift is locked in. That weight—where you can complete one full, textbook rep but absolutely cannot do a second—is your 1RM.
A Concrete Example
Let’s say a trainee, Xiao-Mei, wants to test her bench press. She normally uses 40 kg for 8 reps. Her actual protocol might look like this:
- Light load: 20 kg x 8 reps, rest 1 minute
- Moderate load: 30 kg x 4 reps, rest 2 minutes
- Near-maximal load: 37 kg x 2 reps, rest 3 minutes
- First attempt: 45 kg x 1 rep (success), rest 3 minutes
- Increase load: 50 kg x 1 rep (success but very hard), rest 3 minutes
- Increase load again: 52.5 kg x 1 rep (stuck, needed a lift-off from the spotter → failed)
So Xiao-Mei’s 1RM for the bench press this session is 50 kg. The whole process was locked in within 3 attempts—very clean.
You Must Have a Spotter
I want to emphasize this point. For movements like the bench press, squat, and overhead press, you absolutely must have a partner who knows proper spotting technique when testing your 1RM. Many people in Taiwan are used to training alone, but testing maximal loads solo is extremely dangerous—getting pinned by the bar across your chest or neck on the bench press can be fatal. If you don’t have a reliable spotter available, use a Smith machine (with safety catches) or set the safety bars to the correct height in a squat rack. Better safe than sorry.
Using Estimation Formulas: A Safer, Often Smarter Choice
In many cases, I actually recommend against “brute-force testing” your 1RM. Instead, use a “submaximal weight you can do for several reps” to back-calculate it. This is called an RM estimation formula. It’s much friendlier for beginners, for the general population just wanting to write a program, and for those who can’t easily find a spotter.
Two Common Formulas
The most widely used are the Epley and Brzycki formulas:
- Epley formula: 1RM = Weight x (1 + Reps / 30)
- Brzycki formula: 1RM = Weight x 36 / (37 − Reps)
Example: You squat 60 kg for 5 clean reps (the kind where you absolutely couldn’t do a 6th):
- Epley: 60 x (1 + 5/30) = 60 x 1.167 ≈ 70 kg
- Brzycki: 60 x 36 / (37 − 5) = 60 x 36 / 32 ≈ 67.5 kg
The two results are very close, giving you a credible estimated 1RM range.
When Are the Formulas Most Accurate?
This is the most critical point. Based on a compilation of sports science data, these formulas are most accurate at low rep ranges and their accuracy drops significantly beyond roughly 10 reps. Once reps get high, whether you can complete the lift is dominated by “muscular endurance and fatigue tolerance” rather than “maximal strength.”
| Reps Performed | Estimation Accuracy | Coach’s Recommendation |
|---|---|---|
| 1–5 reps | High (Epley and Brzycki differ by only ~2–3%) | Most recommended; use this for programming |
| 6–10 reps | Moderate to good (error often around 5%) | Usable, but try to stick to 6–8 reps |
| 11–15 reps | Low | Treat as a rough reference only, don’t take it seriously |
| 15+ reps | Not recommended | Switch to a heavier weight and retest |
So my practical rule is simple: If you’re going to use a formula to estimate your 1RM, use a weight you can only do for 3 to 6 reps. This range is both safe enough and accurate enough. Using a weight you can do for 15 reps to estimate your 1RM is basically fantasy.
A Common Misconception: You Can’t Cross-Apply Between Different Lifts
Some trainees ask me: “If I calculate my bench press 1RM this way, can I just multiply it by a factor to get my squat?” No. Different lifts involve different muscle groups, leverages, and technical complexity, and the formulas’ accuracy varies slightly between the squat, deadlift, and bench press. Each main lift must be tested and estimated individually; they cannot be converted from one to another.
A %1RM Reference Chart You Can Post Directly in the Gym
Once you know your 1RM, you can look up “roughly how many reps a certain percentage corresponds to.” This chart combines the general relationship between RM and %1RM, and it’s one I most often ask my trainees to save on their phones. A reminder again: individual variation is large; this is a general reference, not an exact value.
| %1RM | Approximate Reps | Primary Training Purpose |
|---|---|---|
| 100% | 1 rep | Testing, maximal strength |
| 95% | 2 reps | Maximal strength |
| 90% | 3–4 reps | Maximal strength |
| 85% | 5–6 reps | Strength / hypertrophy crossover |
| 80% | 7–8 reps | Hypertrophy |
| 75% | 9–10 reps | Hypertrophy |
| 70% | 11–12 reps | Hypertrophy / muscular endurance crossover |
| 65% | 14–15 reps | Muscular endurance |
| 60% | 16–20 reps | Muscular endurance |
With this chart, you’ll see why using a weight you can do for 15 reps to estimate your 1RM means extrapolating from the flat, imprecise 65% zone—no wonder it’s inaccurate. Conversely, using 3–6 reps (85–90%) puts you in the steep, stable part of the curve, which naturally gives you much better accuracy.
Test Reminders for Different Movements
Each main lift has specific points to watch when testing 1RM:
| Movement | Testing Key Points | Safety Backup |
|---|---|---|
| Squat | Must descend until thighs are parallel to the floor (or your personal standard depth) to count | Set safety bars on the squat rack slightly below the lowest point |
| Bench Press | Bar must touch the chest, hips stay on the bench | Always have a spotter, or use a Smith machine |
| Deadlift | No rounded-back grinding; lock out hips and knees to count | Just drop the bar if you fail—risk is relatively manageable |
| Overhead Press | Keep torso stable throughout, no excessive back extension for leverage | Lighter weight, but still recommended to have someone nearby |
| Leg Press (Machine) | Full range of motion, knees not locked out | The machine itself is very safe, suitable for solo testing |
Advanced Option: The RPE / RIR Method for Gauging Intensity Without Testing 1RM
In recent years, sports science has increasingly embraced “autoregulation”—an approach that lets you control intensity well without calculating %1RM every day. This is especially practical for many office workers in Taiwan who eat out often, have irregular schedules, and experience fluctuating performance.
What Are RPE and RIR
- RIR (Reps In Reserve): How many more reps you “could still do” after finishing a set. RIR 2 means “you could do 2 more reps before failure.”
- RPE (Rate of Perceived Exertion): Strength training commonly uses a 1–10 scale. RPE 8 roughly corresponds to RIR 2, RPE 9 to RIR 1, and RPE 10 means complete failure.
Why This Works for You
The key point is: your 1RM isn’t the same every day. After poor sleep, high work stress, or several consecutive workdays, a weight that’s normally 80% of your 1RM might feel like 90% today. If you rigidly stick to %1RM, you risk overtraining or injury on bad days. By switching to RPE/RIR, you can say “stop at RPE 8 today,” letting your body’s real-time feedback dictate the load—intensity automatically matches your daily condition.
| Goal | Suggested RPE | Corresponding RIR | Plain Explanation |
|---|---|---|---|
| Accumulating volume | 6–7 | 3–4 | Plenty in reserve, prioritize movement quality |
| Main working sets | 8 | 2 | Challenging but stable, most commonly used |
| Heavy attempts | 9 | 1 | Near your limit, use occasionally |
| Testing / Max effort | 10 | 0 | Complete failure, use sparingly and with caution |
My usual recommendation: use RPE 8 (RIR 2) as your main training intensity, and only schedule a formal 1RM test day when you truly want to know your limit number. Combining both keeps you safe while allowing long-term progress. This also echoes the core spirit of this article—rather than pushing your limit every day, be smart about testing at the right time and training at the right intensity.
The Five Most Common Mistakes I See, and How to Fix Them
Having coached many trainees, inaccurate 1RM results almost always come down to a few reasons. Check how many apply to you.
Mistake 1: Insufficient or Excessive Warm-Up
Too little warm-up means your muscles and nervous system aren’t ready—results come out low and you risk strains. But if you do too many heavy sets during warm-up and burn your energy, you’ll have nothing left for the actual attempts. Fix: Follow the warm-up table above—decrease reps and increase weight across warm-up sets. The goal is to activate the nervous system, not create fatigue.
Mistake 2: Jumping Weight Too Aggressively
Someone succeeds on their first attempt, then jumps straight from 50 kg to 60 kg. Of course they fail, then get discouraged and end the session. Fix: As you approach your limit, reduce the jump size. For lower-body lifts, add 5–10% or even less per attempt, letting your body gradually approach the true max.
Mistake 3: Counting Reps with Broken Form
Squats not reaching the required depth, bench press bar not touching the chest, deadlifts yanked up with a rounded back—these “cheated” weights don’t count. Fix: Agree with yourself on the movement standards beforehand; any rep that doesn’t meet them counts as a failure. A 1RM measures “maximum strength under proper form,” not “the heaviest weight you can move by any means.”
Mistake 4: Insufficient Rest
After maximal effort, the phosphocreatine system needs time to recover. Resting only 1 minute before adding weight is like challenging your limit with a half-recovered body. Fix: Between near-max attempts, honestly rest 2–4 minutes. Don’t rush.
Mistake 5: Testing on a Bad Day
Poor sleep the night before, a recent cold, training fasted, or being in a bad mood—all of these significantly reduce your maximal strength performance that day. Life in Taiwan is busy; eating out, overtime, and sleep deprivation are the norm. Pick a day when you’re well-rested, well-fed (but not right after a big meal), and feeling good physically to test your 1RM. Only then will the number be representative.
A Complete “Test Day” Protocol You Can Copy
Principles alone can feel abstract, so here’s a minute-by-minute breakdown of a typical “Squat 1RM Test Day” from walking into the gym to leaving. You can follow this exact rhythm. Assume this trainee normally squats 80 kg for 8 reps.
| Timeline | What to Do | Notes |
|---|---|---|
| 0–8 min | General warm-up: 5 min easy on the bike or treadmill + dynamic hip/knee/ankle mobility | Raise core temperature, lubricate joints |
| 8–12 min | Empty bar (20 kg) x 8 reps, rest 1 min | Establish movement rhythm |
| 12–16 min | 45 kg x 5 reps, rest 2 min | ~56% of estimated 1RM |
| 16–20 min | 65 kg x 3 reps, rest 2 min | ~68%, activate the nervous system |
| 20–24 min | 80 kg x 2 reps, rest 3 min | ~84%, final warm-up set |
| 24–28 min | First attempt: 90 kg x 1 rep | If successful, this is a credible baseline |
| 28–32 min | Add weight: 97.5 kg x 1 rep | ~8% increase |
| 32–36 min | Add more: 102.5 kg x 1 rep | If stuck → the previous successful weight is your 1RM |
| 36–40 min | Cool-down: easy cycling, lower-body stretching | Aid recovery |
You’ll notice the core of the test takes under 40 minutes, with about 3 attempts—fully matching the “find your 1RM within 3–7 attempts” principle. With the right pacing, testing is actually quick and safe. Tests that drag on too long or involve too many attempts are usually a sign of poor warm-up or loading strategy.
Another Case Study: Turning “Afraid to Test” into “Testing Accurately”
I’d like to share another case, different from Ahong’s. Trainee Ah-shan, in her 40s, an office-working mom who commuted on a U-Bike for years and wanted to start strength training. Her issue wasn’t getting injured from pushing too hard—it was being “too afraid.” Every time she neared her limit, she’d give up early. She clearly had more in the tank, but her mind surrendered first.
In this situation, I wouldn’t push her to test a 1RM directly. Instead, we took the estimation-formula route: first, on the safe leg press machine, we found a weight she could do for exactly 5 clean reps. That day she did 5 reps at 100 kg. Using the Epley formula: 100 x (1 + 5/30) ≈ 117 kg. Even she was shocked when she saw that number—her lower-body strength was far greater than she thought.
With that objective number as a foundation, I could confidently program heavier loads afterward. Three months later, she came back for a real test, and her leg press 1RM landed right around 120 kg—almost exactly matching the original estimate. There are two things I really want to emphasize from this case: first, estimation formulas are an excellent psychological bridge for people who are afraid to test their limits; second, an accurate number is itself the best source of confidence—once you know your true strength, you stop being held hostage by other people’s standards.
Practical Reminders for Taiwan
Climate and Hydration
Taiwan’s summers are humid and hot. Even in an air-conditioned gym, heavy sweating can affect grip strength and how you feel. Remember to hydrate before and after testing your 1RM. For grip-intensive movements like deadlifts and pull-ups, having some chalk on hand (if the facility allows it) is very helpful. In winter, extend your general warm-up time. When it’s cold, muscle viscosity is higher, and jumping straight to heavy weights makes strains more likely.
Venue Selection
If you’re at a chain gym or community fitness room near home, first confirm whether they have a squat rack, safety bars, and enough weight plates. Some venues’ fixed machines (like leg presses) can also be used for testing and are relatively safer, making them a good option for testing lower-body strength if you can’t easily find a spotter.
Medical Consultation and Check-ups
Once again, under Taiwan’s National Health Insurance, seeing a rehabilitation specialist, family medicine doctor, or sports medicine clinic is very convenient. If you fall into the high-risk categories mentioned earlier, or if you experience persistent joint pain, chest tightness, or dizziness after testing, don’t tough it out on your own—seek medical evaluation as soon as possible.
Action Plans for Readers of Different Levels
Finally, here’s the entire article condensed into three actionable plans.
Complete Beginner (Weight Training Experience < 3 Months)
- Don’t test your 1RM directly yet. Spend 4–8 weeks building solid form on squats, deadlifts, bench presses, and rows.
- If you want to write a program, use “a weight you can do for 5 reps” with the Epley formula to get a conservative estimated 1RM.
- Start training at 65–75% of your estimated 1RM. If it feels too light, gradually increase.
- Always have someone nearby, or use equipment with safety features.
Intermediate (Consistent Training for 3 Months to 2 Years)
- You can attempt direct 1RM tests on your main lifts, but be sure to have a spotter and use safety bars.
- Test every 6–12 weeks (or track using estimation formulas) to observe strength progress trends.
- Use estimation methods for regular training. You don’t need to test your true max every time; save your body for accumulating training volume.
Advanced / Competitive Athletes
- Combine direct testing with estimation formulas for cross-validation to find the most accurate number.
- Deload appropriately the week before testing so your body is well-recovered; the numbers will better reflect true strength.
- Record your state on each test day (sleep, diet, mood). Over time, you’ll better understand your body’s rhythms.
FAQ
These are the questions I get asked most often in class and via direct messages, compiled here for you.
Q1: How often should I test my 1RM?
For the general fitness population, my recommendation is that testing every 8–12 weeks is sufficient. Testing your max too frequently isn’t worth it—first, your body’s recovery isn’t well-served, and second, strength gains take time to accumulate. Testing too often just shows you noise. For regular progress tracking, estimation formulas (recording “how many reps you did with a certain weight”) can give you a good sense of the trend without maxing out every time.
Q2: Can I test alone?
For movements where “the weight is on top of you,” like squats, bench presses, and overhead presses, I strongly advise against testing alone. If you truly have no spotter, switch to a Smith machine with safety catches, safety bars on a squat rack, or test on fixed machines (like a leg press or chest press machine). Deadlifts are relatively safer since you can just drop the bar on a failed rep, but please clear the area and make sure the floor is stable.
Q3: Which is correct—estimation formulas or direct testing?
There’s no absolute right or wrong; it’s about “which fits your current situation.” Beginners, those who can’t easily find a spotter, or those just wanting to write a program → use estimation formulas (derived from a 3–6 rep weight). Competitive athletes, those wanting to know their true max, or those with safety equipment and a spotter → test directly. Advanced lifters can even cross-validate: use an estimation to set a target, then test to see if it matches.
Q4: Is it normal to be very sore the day after testing?
Mild delayed onset muscle soreness (DOMS) is normal, especially if you haven’t tested in a while. But if it’s sharp pain or swelling in the joints (knees, lower back, shoulders), or if soreness persists and worsens beyond 4–5 days, that’s not just training soreness—seek medical attention promptly. Seeing a rehab specialist in Taiwan is easy; don’t just endure it.
Q5: Can I still test my 1RM as I get older?
Age itself isn’t an absolute contraindication. Strength training is very important for middle-aged and older adults to maintain bone density and muscle mass. However, older individuals or those with chronic conditions (hypertension, heart disease, diabetes) must first get a doctor’s evaluation and prioritize estimation formulas with more conservative submaximal weights, rather than chasing a one-rep max. Safety and individualization always come before the number.
Q6: Is testing a 1RM different for women?
The testing principles and procedures are exactly the same. One thing to note is that the relative strength difference between upper and lower body is typically more pronounced in women than in men, so you can use smaller weight increments for upper-body lifts (like the bench press) to avoid missing reps due to too large a jump. Additionally, if you’re experiencing menstrual discomfort or specific physiological states, you can flexibly postpone the test by a few days and test on a day when you feel good.
Conclusion: Credibility Matters More Than Looking Good
Back to A-Hong from the beginning. Later, I guided him through the standard protocol again: a proper warm-up, gradual weight increases, and me as his spotter. It turned out his true 1RM squat was actually higher than the weight he “failed” on that day—he just hadn’t warmed up and the weight jumps were too large, so he never got to show his real strength. After testing, he laughed and said, “So it’s not that I can’t do it; I just didn’t know how to test.”
I love that quote. The science of 1RM testing, at its core, comes down to this: give your body the right preparation and the right protocol, and let it honestly show its true strength. Don’t chase a number that looks good but isn’t credible. A number that is solid, repeatable, and usable for writing your program is what truly helps your training.
Wishing you a credible maximum strength number that’s truly yours. Next time you hit the gym, warm up first, then talk about limits.
This article is for educational purposes and cannot replace individual diagnosis and treatment advice from physicians, physical therapists, or nutritionists. If you have cardiovascular disease, hypertension, diabetes, a history of joint injuries, or other chronic conditions, please consult a qualified medical professional for an individualized assessment before performing maximal strength testing.
References
- 1 Repetition Maximum (1RM) Testing Protocol (NSCA):http://www.intervalathlete.com/blog/1-repetition-maximum-1rm-testing-protocol-nsca
- One-Repetition Maximum (1RM) Testing — Science for Sport:https://www.scienceforsport.com/1rm-testing/
- Epley & Brzycki 1RM Formulas Explained — Arvo:https://arvo.guru/resources/one-rep-max-formulas
- Test–Retest Reliability of the One-Repetition Maximum (1RM) Strength Assessment: a Systematic Review (PMC):https://pmc.ncbi.nlm.nih.gov/articles/PMC7367986/
Related Reading
- The Effect of Squat 1RM on Running Economy: What the Research Says
- Max Strength Phase: Why You Should Train at 85%+ of Your 1RM
- Max Strength vs. Muscular Endurance Training: Which Weight Training Mode Should Endurance Athletes Choose
- Home Strength Training Without the Gym: The Limits and Breakthroughs of Bodyweight Training
#公路車 #Vo2Max #最大攝氧量 測驗 體驗 | 心肺測試
6 年前
戰略) Zwift Race 如何咬在第一集團 如何評估自己要開多少推力 (請開1.5倍速看)
7 年前
#公路車 #Fitting 靠人工智慧APP 幫你調整單車
6 年前
實景訓練台) 彰化經典百K 高強度喵團 90分鐘 跟著一起練功 2019 Indoor workout Changhua Classic 100 Taiwan
7 年前
西進武嶺 免費訓練分析服務 Intervals | 練不夠還是練過頭?你哪一種類型選手?AI模型告訴你! | 備戰神器 | 公路車 訓練 | CT Yeh
4 年前
一日北高常見問題大集合 | 攻略 | 路線 | 訓練 | 補給 | 自行車 單車 | 一日雙城 | 雙塔 | TWB北高360 | 屁股痛
6 年前
Vision Metron RS 37碳幅條輪組 (非SL)官網沒有的 低調開箱 / 這重量太銷魂了 / 公路車 / CT Yeh
6 個月前
2019 柯P 超越北高 第一集團實錄 (11小時實錄請參考另一部影片) 一日雙城 一日北高 NeverStop Taiwan Long Distance Cycling Challenge
7 年前