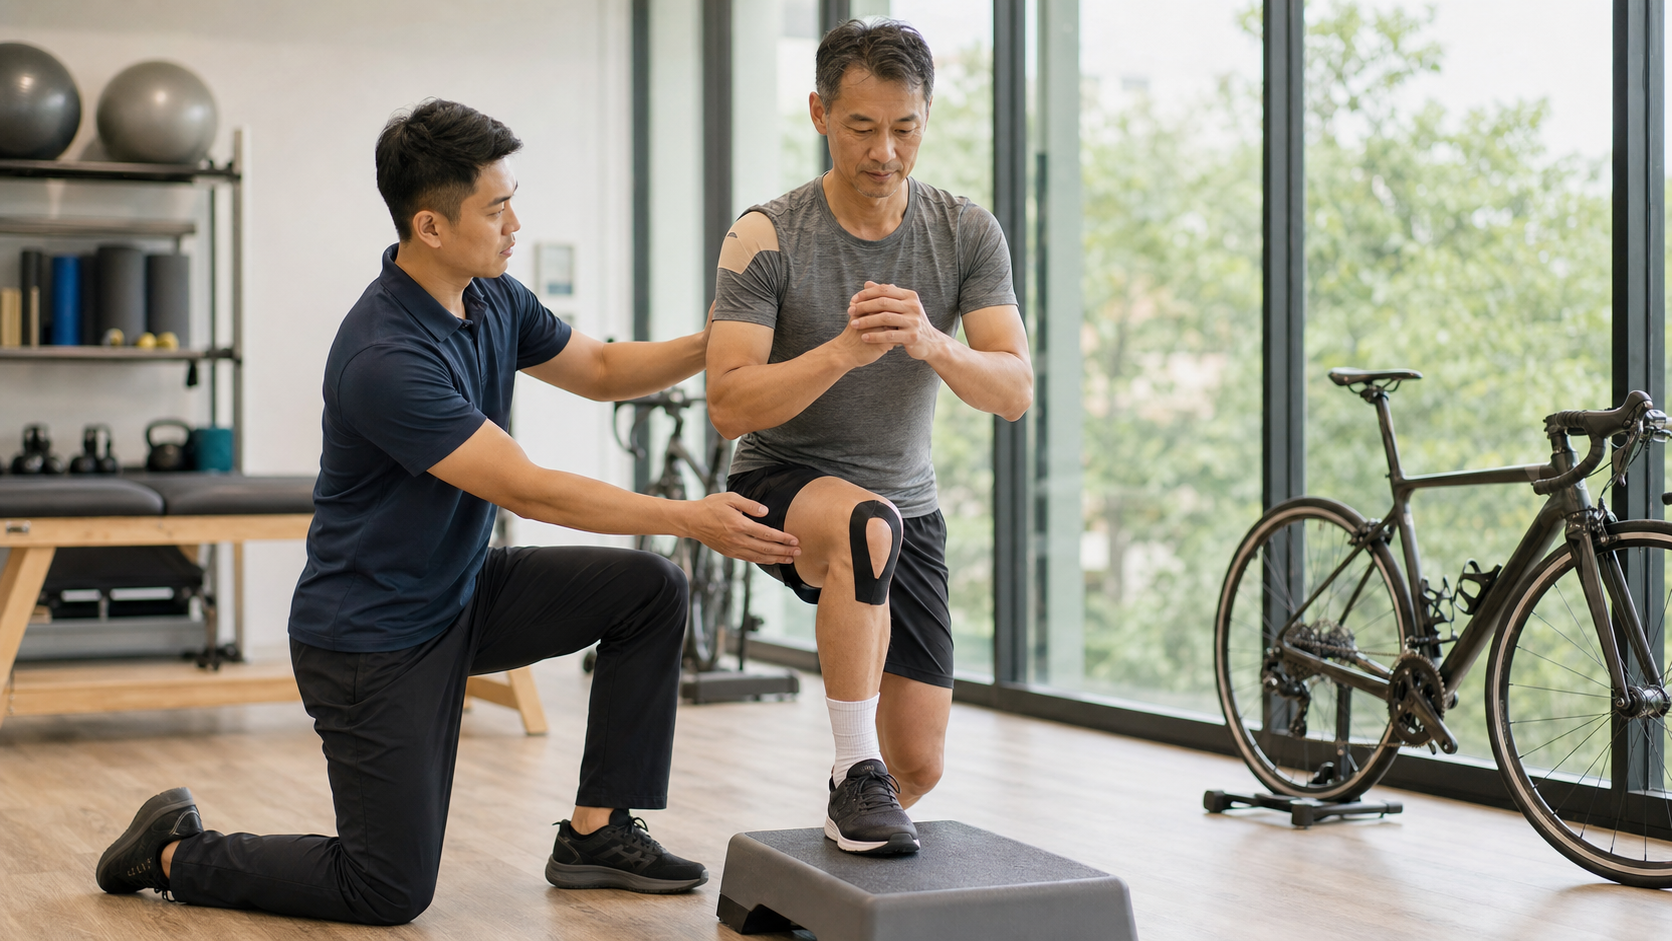
It Starts with a Crumpled Training Plan
I still remember that student sitting across from me. His name was A-Zhe (pseudonym), in his early forties—the kind of die-hard cyclist who had to ride 80 kilometers every weekend and treated Yangmingshan like his own backyard. Three months earlier, he’d crashed on a descent, fracturing his right collarbone (surgically plated), and straining the outside of his knee. That day, he spread a stack of printed training plans on the table, the paper crumpled from his grip. His first words were: “Coach, am I done for? Will I ever ride at my old level again?”
In fifteen years of coaching athletes and everyday fitness enthusiasts, I’ve heard that sentence too many times. From national team members to office workers who just want to ride for health, the first reaction after injury is almost always the same—fear. Fear of never getting back, fear of the pain returning, fear that the once-strong body has betrayed them. And my answer is always the same: “You’re not done for. You just need a new map—and that map is actually much clearer than you think.”
This article is that map, for everyone currently on the road to recovery. It’s not a medical prescription, but a practical framework built from my experience as a coach and consultant, helping you understand what role exercise actually plays in rehab, how to progress, and the most overlooked yet critical psychological dimension. Whether it’s a fracture, ligament injury, tendonitis, or simple overuse, these principles apply.
Reframing the Concept: Rehab Isn’t “Rest Until Healed,” It’s “Load Until Healed”
The biggest myth—and the one I always have to spend the most effort correcting—is that “if you’re injured, you should rest completely.”
In many cases, this idea is wrong, even harmful. Human tissues—muscles, tendons, ligaments, bones—are all living tissues that respond to mechanical load. Give them appropriate mechanical stimuli, and they initiate repair and adaptation: tendons increase collagen synthesis, improve fiber alignment, and boost stiffness and cross-sectional area; bones increase density along lines of force; muscles re-recruit neurons and regain strength. Conversely, if you do nothing and just lie around waiting, tissues don’t get stronger—they rapidly degrade through detraining: strength loss, reduced joint mobility, and dulled proprioception.
This is the core statement of modern rehab medicine: Exercise is medicine, and progressive loading is the key that unlocks repair.
How Tissues Respond to Load: Walking a Fine Line
The key is “dosage.” Too little load, and tissues don’t receive the repair signal; too much, too fast—beyond what the tissue can currently handle—and you risk re-injury or prolonged inflammation. The art of rehab is giving tissues, each week, a stimulus that is “slightly beyond current capacity but not overwhelming,” allowing them to build up step by step.
Take tendons, for example. Nearly three decades of research have established progressive tendon loading as the first-line treatment for tendinopathy. Systematic loading programs—from isometric contractions, to slow heavy resistance training, to later plyometric movements—have been shown to increase tendon stiffness and cross-sectional area, improve neuromuscular coordination, and reduce re-injury risk. The point is: all of this is achieved through “movement,” not “immobility.”
Why “Moving” Heals Better Than “Not Moving”: The Mechanism Explained
Students ask me: “Isn’t it logical to rest and let the tissue repair undisturbed?” On the surface, it sounds reasonable, but the body actually works the opposite way. Tissues are mechanosensitive—cells “feel” the forces applied to them and convert those mechanical signals into biochemical responses, deciding how much collagen to synthesize, in which direction to align it, and whether to increase density. This process is called “mechanotransduction.”
In other words, mechanical load is the language the body uses to “command” the repair system. If you don’t move at all, you’re essentially silent to the repair system the whole time. It receives no instructions on “where to grow or how strong to become,” so it patches things up in the laziest way possible—resulting in disorganized fiber alignment, insufficient strength, and high re-injury risk. In contrast, appropriate progressive loading clearly tells the tissue: “I need you to withstand this kind of force in this direction—please grow back to that specification.” The repaired tissue naturally becomes stronger and better suited to your sport’s demands.
This also explains why rehab can’t stop at “no pain.” Being pain-free only means inflammation and symptoms have subsided—it doesn’t mean tissue strength and quality have returned to a level that can handle your athletic demands. Symptom improvement often outpaces actual tissue repair—and that gap is exactly why so many people “feel better, return too soon, and immediately get re-injured.”
Pain Isn’t the Enemy—It’s the Dashboard
During rehab, many people pull back at the slightest pain, thinking “pain = worsening injury.” But in the progressive loading framework, we treat pain as a reading on the dashboard, not a red alert.
A common clinical tool is the “pain monitoring principle”: using a 0–10 pain scale, assess pain during exercise, after exercise, and the next morning.
| Time Point | Acceptable Pain Range (0-10) | Meaning & Action |
|---|---|---|
| During exercise | 0-4 (tolerable, doesn’t compromise movement quality) | Green light, maintain current load |
| Within 24 hours post-exercise | Returns to pre-exercise baseline | Green light, dosage is appropriate |
| Next morning | No more stiffness or pain than the day before | Green light, consider progressing next week |
| Pain persists > 24 hours or worsens the next day | — | Yellow light, step back one load level |
| Sharp, stabbing pain, joint catching, or swelling | — | Red light, stop and seek medical attention |
The meaning of this framework: during rehab, some “tolerable soreness” is normal—even necessary. What you should truly watch for is the signal of “waking up tomorrow feeling worse than yesterday.” Once you learn to read this dashboard, you won’t be paralyzed by every twinge of discomfort.
Practical Approach: Breaking “From Injury to Return” into Four Phases
When guiding students, I habitually break the entire rehab journey into four phases. This isn’t a rigid timeline—everyone’s injury, age, and recovery speed differ—but a criterion-based progression based on “meeting exit criteria” rather than “days elapsed.” In other words, you don’t advance because “it’s been three months since surgery”; you advance because “you’ve met this phase’s exit criteria.”
Four-Phase Overview
| Phase | Primary Goal | Typical Timeframe Reference | Exit Criteria (Examples) |
|---|---|---|---|
| Phase 1: Protection & De-swell | Control inflammation, restore basic range of motion, wake up muscles | 0-2 weeks post-injury/surgery | Swelling significantly reduced, pain-free isometric contractions possible, basic joint range of motion restored |
| Phase 2: Restore Mobility & Base Strength | Full joint range of motion, rebuild unilateral strength | ~2-8 weeks | Affected side strength reaches 60-70% of healthy side, pain-free daily activities |
| Phase 3: Functional Strength & Sport-Specific Prep | Bilateral strength symmetry, introduce sport-specific movements | ~8 weeks to several months | Affected side strength ≥ 80-90% of healthy side, stable single-leg movements |
| Phase 4: Return to Sport | Full load, sport-specific intensity, psychological readiness | Varies by injury; can range from months to over a year | Pass functional tests, psychological readiness achieved |
Note that the “typical timeframe reference” is just a scale for your psychological expectations—what truly determines whether you move forward is the exit criteria. Some people with fractures reach Phase 3 in six weeks; others with ACL reconstruction need a full year. Pushing yourself forward by the calendar is one of the most common causes of rehab failure.
Using Anterior Cruciate Ligament (ACL) Reconstruction as an Example: Time and Criteria Matter Equally
Many people ask me how long it really takes to return to sport. Let me use ACL reconstruction, which has the most complete data, as an example. The internationally more consensus-based return-to-sport threshold typically recommends at least 9 months post-surgery, and you must also pass a series of objective tests simultaneously to minimize re-injury risk. Common return-to-play criteria include:
- Quadriceps strength symmetry ≥ 90% (affected side relative to healthy side)
- Various single-leg hop tests (single/triple/crossover/6-meter timed) ≥ 90%
- Knee joint effusion (swelling) approaching zero
- Full active and passive extension and flexion range of motion
- Psychological readiness reaching the threshold (e.g., confidence to return assessed by tools like ACL-RSI)
Research also reveals a harsh reality: at 9 months post-surgery, the proportion of patients who actually meet all return criteria simultaneously is quite low. This precisely illustrates why “meeting criteria” matters more than “counting days”—too many people rush back to the field the moment their time is up, only to suffer a second injury.
A Progressive Program You Can Reference Directly (Using Lower Limb Tendon/Knee Injury Rehab as an Example)
The table below is a progressive loading framework I commonly use. You can feel the rhythm of “building up step by step.” Actual weights and repetitions must be adjusted based on your individual condition and your therapist’s recommendations; what’s provided here is principle-based relative intensity.
| Week | Loading Type | Example Exercises | Intensity/Set Reference | Monitoring Focus |
|---|---|---|---|---|
| Weeks 1-2 | Isometric Contractions | Wall sit, quadriceps isometric holds | 30-45 sec × 4-5 sets | Pain ≤ 4, no chasing load |
| Weeks 3-4 | Slow Concentric/Eccentric | Shallow bilateral squats, seated leg raises | Moderate resistance, slow tempo, 8-12 reps | No aggravation the next day |
| Weeks 5-6 | Unilateral Loading | Split squats, single-leg bridges | Gradually add load, 8-12 reps × 3-4 sets | Left-right symmetry |
| Weeks 7-8 | Higher-Load Strength | Bulgarian split squats, deadlift variations | Moderate-high resistance, 6-10 reps | Movement quality > load |
| Weeks 9-12 | Speed and Elasticity | Countermovement jumps, box jumps, direction changes | Low volume, high quality, adequate rest | Landing control, no compensation |
| After Week 12 | Sport-Specific Integration | Return to cycling, running, sport-specific movements | Progressively restore training volume | Psychological confidence, fatigue management |
Note two easily overlooked details: First, both concentric (shortening under force) and eccentric (controlled lengthening) work should be trained—eccentric loading is especially important for tendon remodeling. Second, the later the phase, the more you need to incorporate “speed” and “elasticity” components—many people regain their strength but, because they skipped plyometric training, get re-injured the moment they return to the court or a descent, as their body hasn’t yet learned to “absorb impact quickly.”
For Cyclists Specifically: A Progressive Map from the Indoor Trainer Back to Wuling
Since many readers here are cyclists, I want to specifically break out the progressive path for “returning to cycling after a lower limb injury.” Cycling has a great advantage—it’s a low-impact sport with precisely controllable intensity, making it an excellent bridge back to sport-specific activity in the later rehab phase. But the common mistake many cyclists make is: as soon as they feel better, they directly arrange a mountain ride with friends, using long-distance climbing as rehab, and the knee flares up again.
The table below is the ladder I commonly guide cyclists through, emphasizing “control first, then add volume, and only finally add gradient and intensity.”
| Phase | Venue and Method | Intensity Control | Progression Criteria |
|---|---|---|---|
| A: Indoor Trainer | Trainer with low resistance, flat-road mode | Easy spinning, no chasing watts, monitor knee sensation | 30 minutes pain-free, no aggravation the next day |
| B: Short Flat Rides | Flat routes like riverside bike paths | Short distance, light and quick cadence, avoid grinding big gears | Multiple consecutive rides without discomfort |
| C: Gentle Climbs and Volume Increase | Add gentle uphill sections, gradually extend distance | Change only distance OR gradient at a time | Affected-side strength near symmetrical, stable movement |
| D: Sport-Specific Intensity | Return to familiar mountain roads, add intervals | Progressively restore training volume and intensity | Adequate psychological confidence, manageable fatigue |
The most overlooked point for cyclists is “saddle and cleat setup.” Post-injury, your body’s compensation patterns may have changed, and a fitting that was once appropriate may no longer be. In the early return phase, re-check saddle height, fore-aft position, and cleat angle to avoid repeatedly accumulating stress in a distorted position—this is often the hidden culprit behind recurring knee issues in cyclists.
The Three Pillars of Progressive Principles
If I had to distill progressive rehab into a few words, it would be these three pillars. Understand them, and you’ve grasped the skeleton of the entire logic.
Pillar One: Change Only One Variable at a Time
Training load is composed of many variables: load, repetitions, sets, movement speed, range of motion, frequency, and complexity. When you progress, change only one at a time. If you add load today, don’t also add reps; if you add jumping exercises this week, don’t simultaneously increase training frequency. If you change too many variables at once and something goes wrong, you won’t know which component overloaded the tissue, and you won’t know what to back off from.
I often tell my athletes: “Rehab is like turning the knobs on a stereo—turn one notch at a time, listen carefully, then turn the next. Don’t crank all the knobs to max at once; that’s not bravery, that’s recklessness.”
Pillar Two: Weekly Load Progression Should Be Gradual
In sports science, there’s a widely discussed concept called the “Acute:Chronic Workload Ratio (ACWR).” In plain terms, it means your training volume this week shouldn’t spike too far above the average of the previous few weeks. Although the precise number for this ratio is still debated in academia and shouldn’t be treated as an iron law, the principle behind it is very solid: load progression should be gradual, avoiding sudden spikes. A practical rough guideline is to keep weekly training volume increases around 10% or so, and every three to four weeks, schedule a “deload week” to let the body absorb and adapt.
Pillar Three: Symmetry and Quality Take Priority Over Absolute Strength
The most common trap in the later stages of rehab is rushing to chase “how much I used to lift or how fast I used to ride.” But before returning to sport, what I care about more is left-right symmetry and movement quality. If your affected-side strength is still at 70% of the healthy side and you return to full-load activity, it’s like supporting your entire body on one bad leg—compensation will inevitably shift elsewhere, and problems will eventually arise. The earlier ACL example lists “≥90% symmetry” as a hard criterion precisely for this reason.
Different Tissues, Different Clocks: First Understand What Your Injury Is Racing Against
Many people worry, “Why did someone else recover in three weeks, while I’m still in rehab after three months?” The answer is often simple: you injured different tissues, and the repair clocks for different tissues vary enormously. One of the most critical factors affecting repair speed is blood supply—tissues with rich blood flow heal faster, while those with poor blood flow heal slowly. Understanding this helps you set more reasonable psychological expectations for your rehab timeline, so you’re not comparing apples to oranges.
| Tissue Type | Blood Supply | Typical Repair Clock (Principle-Based) | Rehab Focus |
|---|---|---|---|
| Muscle (strain) | Rich | Relatively fast; mild cases take weeks | Early gentle activity, progressive eccentric loading |
| Bone (fracture) | Moderate | Callus formation takes weeks; full remodeling takes longer | Progressive weight-bearing after protection phase, stimulate bone density |
| Tendon (tendinopathy) | Poor | Often takes months; patience is key | Long-term progressive loading, eccentric emphasis |
| Ligament (e.g., ACL) | Poor | After reconstruction, often nearly a year before return | Criteria-based progression, symmetry, psychology |
| Cartilage | Extremely poor, almost no blood flow | Limited repair capacity, exceptionally slow | Avoid excessive impact, control loading |
This table isn’t meant for self-diagnosis; it’s to help you build “reasonable expectations.” When you know tendons naturally have poor blood flow and inherently heal slowly, you’re less likely to fall into the panic of “is something wrong with me?” when you’re not fully healed by week eight. Slow doesn’t mean wrong; it may simply be that tissue’s normal rhythm.
Using A-Zhe’s Collarbone Fracture as an Example: How Bone Heals Step by Step
Back to A-Zhe’s collarbone. Fracture healing generally progresses through several overlapping stages: the initial inflammation and hematoma right after injury, followed by the formation of soft callus, which gradually calcifies into hard callus, and finally the prolonged bone remodeling phase, during which the bone realigns into the most efficient structure along the lines of daily mechanical stress. This is why appropriate weight-bearing actually promotes bone healing—bone “listens” to mechanical signals to decide where to grow. Of course, this presupposes that the protective period has passed and that loading is increased progressively only after the physician confirms progress on imaging.
What A-Zhe couldn’t understand at the time was: “If surgery put in a plate, shouldn’t it be immobilized? Why did you tell me to start moving my shoulder early?” My explanation was: the plate provides “stability,” allowing the bone to heal in a safe environment, but stability does not equal immobility. Within the limits permitted by the orthopedic surgeon, we had him start gentle range-of-motion exercises for his shoulder joint as early as possible, to prevent joint adhesions and surrounding muscle atrophy; once the callus was mature enough, we progressively added load back, stage by stage. As a result, his shoulder range of motion recovered quickly and completely—this is precisely the value of “early activity within a safe range.”
Don’t Forget the Hardest Part: Psychological Rehabilitation
I’ve talked a lot about training plans, but after fifteen years, my deepest insight is this: physical injuries often heal faster than psychological ones.
A-Zhe’s collarbone looked great on imaging eight weeks post-surgery, and his knee strain had long stopped hurting. But the first time he had to ride downhill again, he stopped at the top of the slope for a full ten minutes, unable to let go of the brakes. His body was ready; his mind was still trapped in the moment of the crash.
The Fear-Avoidance Vicious Cycle
In sports medicine, this has a name: “fear-avoidance.” Injury causes the brain to link a certain movement with “danger,” so you subconsciously avoid it; the more you avoid it, the more terrifying that movement becomes in your mind, and the less familiar your body becomes with it, creating a vicious cycle. Many people “can’t return even though their body is fine”—what’s holding them back isn’t strength, but this cycle.
This is why psychological readiness scales like the ACL-RSI are incorporated into formal return-to-sport assessments—because researchers have found that people who aren’t psychologically ready, even if they pass all strength tests, have worse performance and a higher risk of re-injury after returning. Psychology is a tangible rehabilitation metric, not an optional soft factor.
Practical Methods I Use to Help Athletes Rebuild Confidence
- Break the feared movement down to its smallest unit and expose progressively. A-Zhe was afraid of descending, so we first practiced emergency braking on flat ground, then moved to very gentle slopes, gentle slopes, medium slopes—increment by increment. Every success peeled away a bit of the “danger” label from his brain.
- Replace vague anxiety with quantifiable progress. Anxiety thrives in ambiguity. When I show athletes concrete numbers like “this month, affected-side strength improved from 75% to 85% of the healthy side,” fear is replaced by a sense of groundedness.
- Redefine “success.” Success during rehabilitation isn’t a PR (personal record); it’s “completed today’s plan without worsening symptoms tomorrow.” I ask athletes to record one sentence daily: what they did and how they felt. This small journal often becomes the most powerful evidence for rebuilding confidence.
- Allow for bad days. Rehabilitation isn’t a straight line; there will be times of two steps forward, one step back. I always tell athletes: one bad day doesn’t mean the whole plan failed—it’s just one noise point in the data. Look at the trend, not the single point.
Common Mistakes and Corrections: Pitfalls I See People Fall Into Almost Every Year
| Common Mistake | Why It’s Harmful | Correct Approach |
|---|---|---|
| Complete rest until “no pain at all” before moving | Tissues lose adaptation, muscle mass drops significantly, leaving you more fragile | Begin tolerable progressive loading as early as possible under professional guidance |
| Deciding progress by “how many weeks since surgery” | Ignores individual differences, easily leads to rushing | Base it on achievement criteria (strength, range of motion, swelling) |
| Only training strength, skipping speed and plyometric work | Body can’t absorb impact, re-injury upon return | Be sure to include plyometrics and sport-specific movements in the later phase |
| Increasing weight, reps, and frequency all at once | Can’t identify the cause of problems, and can’t regress either | Change only one variable at a time |
| Training only the affected side, neglecting the whole body and core | Compensation shifts elsewhere, creating new injuries | Maintain full-body strength and core, ensuring symmetry |
| Neglecting sleep and nutrition | Insufficient repair materials and time, slower recovery | Prioritize sleep, protein, and overall caloric intake |
| Rushing back before psychological readiness | Fear-avoidance unresolved, poor performance and higher re-injury risk | Gradual exposure, quantifiable progress, rebuild confidence |
Special Reminder: Don’t Skimp on the “Raw Materials” for Recovery
Tissue repair requires raw materials and time. Sleep is the most underrated rehabilitation tool—most tissue repair and hormonal regulation occur during deep sleep; if you’re chronically sleep-deprived, even the most diligent training plan will yield diminished results. In terms of nutrition, the body needs sufficient overall calories and protein during rehabilitation to rebuild tissue. A common reference range for protein intake is approximately 1.6 to 2.0 grams per kilogram of body weight per day (depending on individual circumstances and factors like kidney function, consulting a dietitian is recommended).
Many people in Taiwan rely on eating out, so here’s a practical reminder: at buffet restaurants or bento shops, as long as you consciously add an extra serving of protein (a braised egg, a piece of tofu, a portion of chicken breast or fish) and cut back on fried foods and sugary drinks, you can manage rehabilitation nutrition quite well without resorting to expensive supplements. Before using any supplement, especially if you have a chronic condition or are taking medication, you should always consult a physician or dietitian first.
Actionable Advice for Readers at Different Levels
Everyone’s injury situation differs, so I’ll address the three common types of readers separately.
If You’re a “General Sports Enthusiast” (weekend cycling, running, fitness)
- The first step is always getting a proper diagnosis. Medical access is convenient in Taiwan; under National Health Insurance, seeing an orthopedic, rehabilitation, or sports medicine clinic has a low barrier. Let a professional determine the extent of the injury first—don’t self-diagnose symptoms online and start training or stopping randomly.
- After the diagnosis, get a progressive home exercise program from a physical therapist and learn to self-monitor using the “pain dashboard” approach mentioned earlier.
- Don’t rush back to your original intensity. Decide progress based on “achievement criteria,” not “I could still ride 80 km last week.”
- Taiwan’s summers are hot and humid. When returning to outdoor exercise during rehabilitation, pay special attention to fatigue management in hot environments—choose early morning or evening, stay hydrated with electrolytes, and don’t let heatstroke or dehydration disrupt the rhythm you’ve worked hard to stabilize.
If You’re an “Advanced Athlete with Serious Training and Competition Goals”
- Your biggest risk is being “too knowledgeable, too impatient.” People who understand training often add extra volume or skip levels on their own, making them the most prone to re-injury.
- Treat rehabilitation as a formal training cycle—write it into your annual plan, set objective exit criteria (strength symmetry, functional tests), and only advance to the next phase when you meet them.
- Don’t ignore the psychological side. Even if you’re battle-hardened, fear-avoidance after a major injury will still find you. Face it honestly and handle it with gradual exposure.
- After returning to competition, incorporate secondary prevention (weekly preventive strength and mobility work) into your program long-term—this is the most cost-effective investment for reducing re-injury rates.
If You’re a “Sedentary Person Who Only Wants to Start Exercising After an Injury”
- The good news: even older adults or those who haven’t exercised in a long time can still produce positive adaptations to well-designed loading—you’re never too old or too late.
- Start slowly, no exceptions. Your tissues’ tolerance for load is lower than you think; start with very light weights and very few repetitions, letting your body gradually become familiar with the stimulus.
- I strongly recommend working with a professional (physical therapist or certified coach) for the first few months to establish correct movement patterns—far safer than figuring it out on your own.
- Set your goal as “pain-free recovery of daily function,” rather than comparing to your younger self or to others. Your only opponent is the person you were yesterday.
Frequently Asked Questions (FAQ)
Q: Can I train through “pain” during rehabilitation?
A: Aching that is tolerable, subsides after exercise, and doesn’t worsen the next day is generally acceptable; sharp stabbing pain, joint swelling or catching, or a clear worsening the next day means you should scale back or seek medical attention. Refer back to the “pain dashboard” table earlier.
Q: Ice or heat?
A: There’s no one-size-fits-all answer to this question—it depends on the stage and type of injury, and the thinking is constantly evolving. Rather than agonizing over ice versus heat, focus your energy on “progressive loading,” which is what actually drives healing. Follow your therapist’s instructions for the details.
Q: Can I maintain aerobic fitness while rehabbing?
A: In most cases, yes—and it’s encouraged. The key is finding alternative methods that don’t aggravate the injury—for example, lower-limb injuries can be managed with upper-body work or swimming to maintain cardiovascular fitness, and the indoor trainers cyclists commonly use can also be progressively used at low resistance in the later stages of knee rehab. This takes care of both your fitness and your mental state.
Q: How long does rehabilitation take?
A: This is the question I’m least able to give a single answer to. A minor strain might take two to three weeks; an ACL reconstruction might take over a year. Rather than asking “how long,” ask “have I met the criteria for the next stage?” If you go by criteria, you won’t be held hostage by time.
Q: Do I have to see a doctor or physical therapist for rehab? Can’t I just follow online exercises myself?
A: For minor, clear-cut soreness, you might be able to manage it yourself. But if any of the following apply—a clear impact or audible sound at the moment of injury, joint swelling or catching that prevents full bending and straightening, severe pain with weight-bearing, numbness or tingling, or pain that hasn’t improved after a week or two—you must seek medical attention. Under Taiwan’s National Health Insurance, it’s very convenient to see orthopedics, rehabilitation medicine, or sports medicine clinics. Get a diagnosis before you start; it’s far safer than guessing on your own. Online information (including this article) can give you concepts and direction, but it cannot replace an individual assessment of “this particular body” of yours.
Q: I have a chronic condition (hypertension, diabetes, heart disease). What should I watch out for with rehab exercise?
A: An extremely important question. Chronic conditions affect tissue healing rates, the safe range for exercise, and medication interactions—all of which require individualized assessment. For example, blood sugar control affects wound and tissue healing, and certain cardiovascular medications affect heart rate response during exercise. Be sure to develop your exercise and rehab plan under a physician’s evaluation and approval—nothing in this article constitutes a prescription or diagnosis.
Q: After I return to sport, how can I lower the chance of re-injury?
A: Three things give you the most bang for your buck. First, keep preventive strength and mobility work for “secondary prevention” permanently in your weekly schedule—don’t stop just because you’re better. Second, keep training volume changes gradual, and avoid sudden spikes after a long break. Third, take care of your sleep and overall recovery; accumulated fatigue is a hidden driver behind many re-injuries.
Conclusion: Injury Is Your Body’s Chance to Recalibrate
Back to A-Zhe. Six months later, he sent me a message with a photo of himself in front of the Wuling archway, smiling even brighter than before his injury. He wrote: “Coach, I not only rode back, but I feel like I understand my body better than ever.”
That sentence is what I most want to hear in this line of work. Because the end point of rehabilitation has never been just “getting back to where you were before the injury,” but rather carrying a deeper understanding of your body and more mature training wisdom toward a more durable version of yourself. The moment of injury is painful and frustrating, but if you’re willing to go through it the right way, it can become a precious recalibration in your athletic career.
Take it slow, turn the dial one notch at a time. Trust the power of progression, and trust your body. That crumpled-up training plan will one day be smoothed out again and written with new goals.
This article is educational content and cannot replace individual diagnosis and treatment advice from a physician, physical therapist, or nutritionist. If you have a fracture, significant ligament or tendon injury, or a chronic condition such as diabetes, hypertension, or heart disease, be sure to seek medical attention and obtain individualized professional assessment before starting or adjusting any exercise or rehab program.
References
- Load progression criteria in exercise programmes in lower limb tendinopathy: a systematic review (PMC) — https://pmc.ncbi.nlm.nih.gov/articles/PMC7678382/
- Evidence-Based High-Loading Tendon Exercise for 12 Weeks Leads to Increased Tendon Stiffness and Cross-Sectional Area in Achilles Tendinopathy (PMC) — https://pmc.ncbi.nlm.nih.gov/articles/PMC9768072/
- Return To Sport Following ACL Reconstruction (PMC) — https://pmc.ncbi.nlm.nih.gov/articles/PMC12446172/
- ACL Reconstruction Rehabilitation: Clinical Data, Biologic Healing, and Criterion-Based Milestones to Inform a Return-to-Sport Guideline (PMC) — https://pmc.ncbi.nlm.nih.gov/articles/PMC9460090/
- Low rates of patients meeting return to sport criteria 9 months after anterior cruciate ligament reconstruction: a prospective longitudinal study (PMC) — https://www.ncbi.nlm.nih.gov/pmc/articles/PMC6267144/
Related Reading
- A Scientific Guide to Starting Exercise from Zero: The Complete Approach to Returning After a Sedentary Period, Progression, and Injury Prevention
- Exercise and Stroke: A Complete Exercise Prescription from Prevention to Rehabilitation—Clinical Notes from a Sports Science Consultant
- Cycling Return-to-Training Plan: A Progressive Schedule for Returning to Riding After Injury
- How to Make a Comeback from Injury: A Cyclist’s Progressive Return-to-Training Plan
一日北高/長距離團騎 常見問題補充篇 / 組團或跟團的眉角 / 壯車友容易被瘦車友慢性拉爆 / 原來屁股痛可能是這個原因...? / 風場配速法 / 公路車 / CT Yeh
2 年前
靠單車減肥35公斤 心得分享與整理
7 年前
西進武嶺 免費訓練分析服務 Intervals | 練不夠還是練過頭?你哪一種類型選手?AI模型告訴你! | 備戰神器 | 公路車 訓練 | CT Yeh
4 年前
大武山後門26%歡樂陡坡!JJSC南台灣單車行Day2 / 被颱風追著跑 / 公路車 / CT Yeh
2 年前
單車 一日北高 ( 雙城 ) 肥宅雙人瘋狂行 紀錄片 REACTO
10 年前
一日北高常見問題大集合 | 攻略 | 路線 | 訓練 | 補給 | 自行車 單車 | 一日雙城 | 雙塔 | TWB北高360 | 屁股痛
6 年前
大武山20%魔王陡坡【JJSC南台灣遊騎Day2】!屁股真的要裂開了...凡士林抹滿也沒用?神秘金教堂還有超便宜夜市
3 個月前
Never Stop 西進武嶺 前後雙機 完整全程錄影 訓練台 實境
8 年前