The Athlete's Guide to Knee Pain: A Complete Breakdown of Runner's Knee, Patellofemoral Pain Causes, and Exercise Therapy
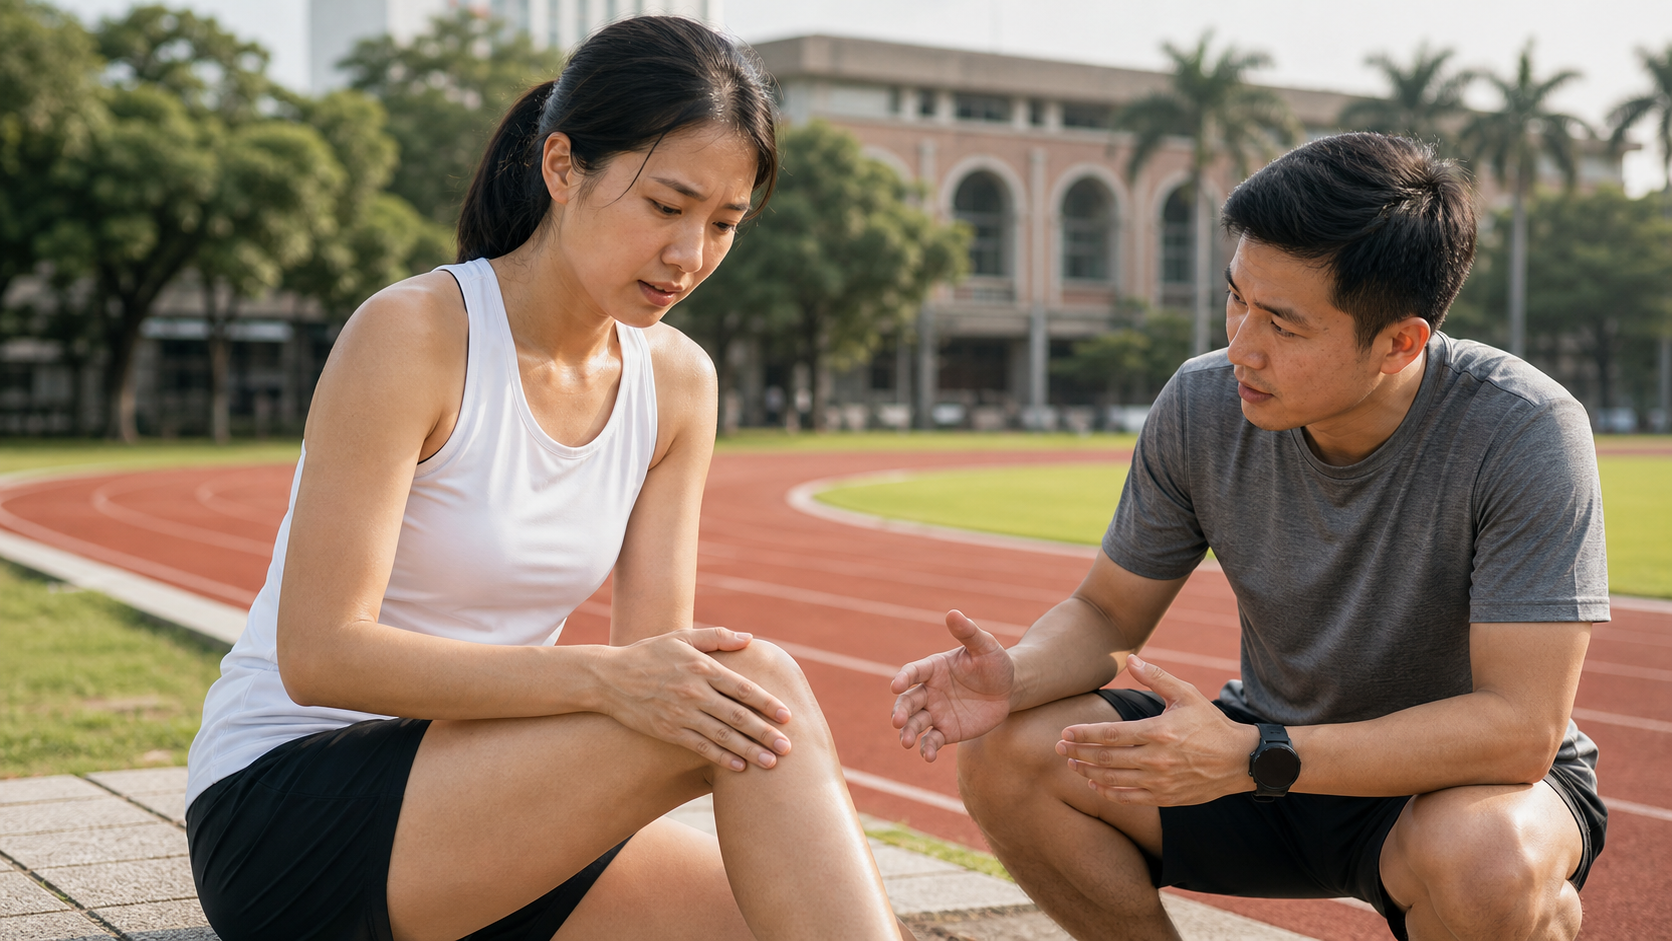
It Starts with an Afternoon by the Track at National Taiwan University
I still remember that humid June afternoon. By the track at National Taiwan University, a student in his early thirties, preparing for his first full marathon, squatted down to tie his shoelaces and suddenly let out a sharp “hiss” as he inhaled. He told me: “Coach, it’s the front of my knee—especially when going downstairs and squatting down—right here, behind the kneecap—there’s a dull ache. When I run, it starts to catch around the fifth or sixth kilometer.” As he spoke, he covered his entire kneecap with his palm. That gesture—I’ve seen it hundreds of times over the past fifteen years. It wasn’t a sharp pain at a specific point, but rather a soreness that was “spread out, hard to pinpoint”—this is almost the classic self-description of Patellofemoral Pain Syndrome (PFPS), commonly known as “runner’s knee.”
I told him: “Don’t rush to buy a knee brace online, and don’t rush to say you’re giving up on the marathon. This is probably not structural damage—it’s your knee protesting. It’s protesting that the force it absorbs with every step exceeds what it can currently handle. Let’s build it back up systematically. Most people see significant improvement within six to twelve weeks.”
In this article, I want to explain runner’s knee from start to finish, in the same tone I use with my students: what it actually is, why it happens to you, how you can do a preliminary self-assessment, when you should see a doctor, and most importantly—a truly evidence-based exercise therapy program you can follow step by step. This is not meant to replace your physician or physical therapist, but to help you understand what you’re doing and why, both before and after seeking medical care.
Building the Foundation First: What Runner’s Knee Actually Is
How Common Is It? You’re Not Alone
Let me give you a reassuring number first. According to a systematic review and meta-analysis covering data from multiple countries, the annual prevalence of patellofemoral pain in the general population is around 20 percent, and it is one of the most common running-related injuries among runners specifically; the prevalence is generally higher in female runners than in males, which is related to biomechanical factors such as a wider pelvis and a larger Q-angle (the angle between the line of pull of the quadriceps and the patellar tendon). In other words, if you’re anxious right now because of anterior knee pain, take a deep breath first—you are far from alone. This is the most common complaint among runners, and in most cases, it is reversible.
How the Patella Works
To understand why it hurts, you first need to know what the patella (kneecap) does. When you bend and straighten your knee, the patella slides up and down like a train on a track, within a “groove” (the trochlear groove) at the end of the thigh bone (femur). The quadriceps contract and transmit force through the patella—acting as a “pulley”—to the lower leg, allowing you to push off, climb hills, and go downstairs.
The problem arises when the patella “derails”—that is, when it shifts laterally or experiences uneven loading during its glide. The cartilage behind the patella and the surrounding tissues then bear abnormal pressure. As this pressure accumulates repeatedly, the front of the knee begins to ache dully. Note that this is usually not as alarming as the cartilage being “worn out”—it is a manifestation of mechanical overload and sensitization. This is also why imaging (X-rays, MRIs) often “looks fine,” yet you still hurt—because the problem lies in “how you move,” not necessarily in “structural damage.”
Typical Symptoms: How Many Do You Have?
Runner’s knee has several very classic clues. You can check yourself against them:
- A dull ache at the front of the knee, around or behind the patella, often “hard to pinpoint exactly where”
- Pain when standing up after prolonged sitting (movies, long-distance bus rides, long office sitting)—this is called the “theatre sign”
- Going downstairs or downhill hurts more than going upstairs or uphill
- Pain triggered by deep squats, squatting to use the toilet, or squatting to tie shoelaces
- Pain that starts only after running a certain distance—fine at first, but increasingly noticeable the longer you run
- Sometimes a “clicking” or grinding sensation or sound in the knee (usually harmless)
If you have three or more of these, especially including the “theatre sign” and “downstairs pain,” the likelihood of patellofemoral pain is quite high.
Don’t Treat Every Knee Pain as Runner’s Knee: Common Differential Diagnoses
Pain at the front or around the knee isn’t only patellofemoral pain. The table below helps you do a rough self-comparison first—but please remember, this is only a reference to help you communicate and assess, not a diagnosis. The real differential diagnosis should be left to a physician or physical therapist.
| Condition | Typical Pain Location | Common Triggers | Clues |
|---|---|---|---|
| Patellofemoral pain (runner’s knee) | Front of knee, around/behind patella, vague area | Downstairs, deep squats, standing after sitting, prolonged running | Can’t pinpoint exact spot, theatre sign |
| Patellar tendinopathy (jumper’s knee) | A specific point at the “lower edge” of the patella | Jumping, explosive starts, acceleration | Tenderness when pressing the tendon below the patella |
| Iliotibial band syndrome | “Outer side” of the knee | Long runs, downhill, appears after a fixed distance | Pain on the outside, common in runners who increased mileage too fast |
| Meniscus problems | “Inner/outer joint line” | Twisting, squatting all the way down, stairs | Possible catching, locking, swelling |
See the key point? “Whether you can point to the exact location of the pain” is a very useful first clue. Runner’s knee pain is usually “spread out, hard to pinpoint”; if you can precisely poke the tender spot with one finger, you should consider other possibilities instead.
A 30-Second Home Self-Check
Here’s a simple “single-leg squat test” you can do at home: stand in front of a mirror, balance on one leg, slowly squat down to about 45 degrees, then stand back up. Repeat a few times. Watch your knee—does it cave inward toward your big toe? Does one side of your pelvis drop? If you see obvious knee valgus (inward collapse) or pelvic drop, combined with the symptoms above, then patellofemoral pain caused by hip weakness becomes more likely. This test will also serve as your baseline for tracking progress: after a few weeks of training, come back and do the same movement, and you’ll notice your knee is much more stable.
Why You? The Scientific Basis of the Causes
Many students’ first reaction is: “Is it my shoes?” or “Is my knee just naturally weak?” I usually say: shoes and natural conditions are background factors, but the real key often lies where you can’t see—the hips, the core, and how you stack up your training volume.
Key Cause One: Insufficient Hip Strength (The Most Underestimated Culprit)
This is the most important conceptual shift in sports medicine over the past decade or so. In the past, everyone assumed knee pain meant “the thigh (quadriceps) isn’t strong enough,” so they trained the thigh relentlessly. But more and more evidence points out: many people with patellofemoral pain have a problem in the hips—particularly weakness in the gluteus medius (hip abductors), hip external rotators, and hip extensors.
Here’s the logic: when your gluteal muscles aren’t strong enough, your pelvis drops and your thigh unconsciously adducts and internally rotates when you run or squat. Your knee then “collapses inward” (imagine a knock-kneed posture), the patella’s tracking path gets pulled off course, and pressure on the front of the knee increases. So your knee hurts, but the real “upstream culprit” may be in your hips.
This also explains why recent clinical evidence and physical therapy guidelines emphasize that training the hip and knee together is more effective than training the knee alone. A meta-analysis pooling multiple randomized controlled trials pointed out that adding hip strengthening exercises provides significant benefits in reducing pain and improving functional mobility.
Key Cause Two: A Sudden Spike in Training Volume (Too Much, Too Soon)
This is the most common scenario I see among runners in Taiwan. You sign up for a marathon at the end of the year, so this week you run 20 kilometers, and the next week you jump straight to 35; or you go from running three times a week to suddenly running every day. Tissues need time to adapt to load. If you increase too quickly, they don’t have time to get stronger, and they protest with pain. A practical principle: keep increases in weekly mileage conservative and gradual, and be willing to step back when your body sends signals.
Key Cause Three: Running Form and Biomechanics
- Cadence too low, stride too long: Each step’s landing puts greater impact on the knee
- Knee collapsing inward on landing (dynamic valgus): often linked with hip weakness
- Unstable core: if the core can’t hold, force transmission goes off track
Key Contributing Factor 4: Flexibility and Other Factors
Overly tight iliotibial bands, quadriceps, and calves, as well as foot structures like flat feet or high arches, can all be contributing background factors. But I want to caution you: these are mostly “supporting actors,” so don’t pin all your hopes on stretching or changing insoles. Training load management and strength are the main characters.
Practical Approach: A Complete Exercise Therapy Blueprint
Alright, enough theory—let’s get down to business. I divide rehabilitation into three phases. You need to honestly assess which phase you’re in, and don’t skip ahead. Skipping phases is the most common cause of re-injury I’ve seen.
The Pain Traffic Light Principle (Applies Throughout)
Before starting any exercise, remember this “Pain Traffic Light.” It’s your core tool for self-regulation:
| Light | Pain Level (0-10) | Meaning & Action |
|---|---|---|
| Green | 0-2 | Safe zone. Train normally; you can even progressively increase load. |
| Yellow | 3-4 | Acceptable range. Mild discomfort during exercise is okay if it subsides within 24 hours; continue, but don’t increase load yet. |
| Red | 5 or above, or worse the next day | Stop or regress. This means the load exceeds your current capacity and needs adjustment. |
Key principle: Mild discomfort during rehabilitation is allowed (yellow light), as long as it returns to baseline within 24 hours after exercise and doesn’t get progressively worse. This aligns better with modern sports medicine than the “no pain at all” mindset.
Phase 1: Acute Pain Reduction and Activation (Approximately Weeks 1-2)
The goal is to reduce irritation, calm the knee down, and “wake up” the dormant glute muscles.
- Relative rest, not complete inactivity: Temporarily remove movements that trigger a red light (e.g., long-distance running, squats, steep downhill running), but keep pain-free activities (swimming; flat-road cycling can stay if pain-free)
- Managing acute inflammation and discomfort: Local ice application can provide short-term relief (about 10-15 minutes per session). If necessary, use short-term pain or anti-inflammatory medication as directed by a physician—please consult your doctor or pharmacist about medication; don’t self-medicate long-term
- Start activating the glutes: For the three beginner exercises below, keep pain within the green to yellow light range.
| Exercise | Target Muscles | Sets/Reps | Coach’s Tips |
|---|---|---|---|
| Side-Lying Clamshell | Gluteus medius, hip external rotators | 3 sets × 15 reps per side | Don’t let your pelvis roll back; feel the upper-outer glute working |
| Side-Lying Straight Leg Raise | Gluteus medius | 3 sets × 12 reps per side | Heel slightly back, toes slightly down; avoid compensating with the front of the thigh |
| Glute Bridge | Gluteus maximus, core | 3 sets × 12 reps | Squeeze glutes to push up; keep ribs down, don’t arch your lower back |
Phase 2: Strength Building Phase (Approximately Weeks 3-8)
This is the “main course” of the entire program. Enter this phase once pain is consistently in the green light range. Evidence shows that combining hip and knee strength training with a higher training volume (e.g., three sets per exercise, more reps per set, about three times per week) yields better results.
| Exercise | Target | Sets/Reps | Progression |
|---|---|---|---|
| Wall Sit | Isometric quadriceps contraction; particularly effective for pain reduction | 3-5 sets × hold 30-45 seconds | Gradually lower the squat position, increase hold time |
| Split Squat / Lunge | Quadriceps, glutes, single-leg stability | 3 sets × 10-12 reps per side | Progress from bodyweight to holding dumbbells or kettlebells |
| Mini Band Lateral Walk (Monster Walk) | Dynamic control of gluteus medius | 3 sets × 12 steps per direction | Increase band resistance, lower your center of gravity |
| Step-down | Eccentric control, correcting knee valgus (knee caving in) | 3 sets × 8-10 reps per side | Increase step height; keep knee tracking over the second toe throughout |
| Romanian Deadlift (RDL, Single-Leg) | Gluteus maximus, posterior chain, balance | 3 sets × 8-10 reps per side | Progress from double-leg to single-leg, gradually add weight |
The detail coaches care most about: the Step-down. You need to watch yourself in a mirror or have someone check you—when stepping down, your knee must not cave inward toward your big toe; it should track steadily over your second toe. This exercise directly trains your ability to “prevent the knee from caving in.” Done correctly, it’s far more useful than ten knee braces.
Phase 3: Return to Running Phase (Approximately from Week 8, varies by individual)
Only when you can complete most Phase 2 exercises pain-free and perform single-leg step-downs with stability should you gradually return to running. Don’t immediately run the same distance you did before.
Here’s a conservative “run-walk progression” example (allow at least one day between sessions, and use the Pain Traffic Light to monitor):
| Week | Content | Notes |
|---|---|---|
| Week 1 | Run 1 min / walk 2 min, repeat 6-8 rounds | Flat terrain; only progress if pain doesn’t worsen within 24 hours post-run |
| Week 2 | Run 2 min / walk 1 min, repeat 6-8 rounds | Can slightly extend if feeling good |
| Week 3 | Run continuously for 15-20 minutes | Maintain an easy pace |
| Week 4 onwards | Increase weekly mileage gradually, conservatively | Don’t stop strength training; maintain 2 sessions per week |
Key point: After returning to running, strength training isn’t done—it needs to become a long-term habit. I’ve had too many clients who ditched their training once the pain was gone, only to have the exact same pain return three months later. Glute and leg strength is your knee’s lifelong insurance policy.
How to Structure Your Week? Here’s a Sample Weekly Schedule
Many people know they “should do strength training,” but don’t know how to schedule it. Below is a sample week for Phase 2 (Strength Building). You can shift the days to fit your routine. The key is: leave recovery days between strength sessions; don’t hammer the same muscle groups every day.
| Day | Main Content | Notes |
|---|---|---|
| Monday | Strength Training A (Lower Body + Glutes) | Split squats, step-downs, band lateral walks |
| Tuesday | Cross-training or Rest | Pain-free cycling/swimming, or complete rest |
| Wednesday | Core + Glute Activation | Glute bridges, clamshells, planks |
| Thursday | Rest or Easy Walk | Let tissues recover |
| Friday | Strength Training B (Lower Body + Posterior Chain) | Wall sits, single-leg RDLs, resistance bands |
| Saturday | Depending on phase: Run-walk or Cross-training | Only add running once in Phase 3 |
| Sunday | Complete Rest | Sleep and recovery are part of training too |
Don’t overlook the “rest and sleep” row. Muscles don’t get stronger during the workout itself; they repair and supercompensate during the recovery period afterward. If you don’t sleep enough and train hard every day, progress will stall. Many Taiwanese office workers are chronically sleep-deprived, which quietly slows down their rehabilitation progress.
How to Progress Load? Don’t Just Add Randomly
The principle of progress is “progressive overload”—but it must be gradual, not sudden. Here’s an easy-to-remember order for increasing load; change only one variable at a time:
| Order | What to Adjust First | Example |
|---|---|---|
| 1 | Increase “reps” | 10 reps per set → 12 → 15 |
| 2 | Increase “sets” | 3 sets → 4 sets |
| 3 | Increase “difficulty/leverage” | Double-leg → single-leg, higher step |
| 4 | Increase “weight” last | Bodyweight → holding dumbbells or kettlebells |
Change only one variable at a time, and observe your knee’s response over 24 hours. This way, if discomfort arises, you’ll know exactly which adjustment pushed too far and can precisely step back one level, rather than scrapping everything and starting over.
Common Mistakes and Fixes: I’ve Seen These Pitfalls Too Many Times
Mistake 1: Obsessively stretching and foam rolling, but skipping strength training
Releasing tight tissues can bring temporary relief, but if the root cause is insufficient strength and load overload, relying only on stretching and foam rolling is treating the symptom, not the cause. Fix: Treat strength training as the main course, and recovery work as the side dish.
Mistake 2: Doing absolutely nothing, waiting for it to heal on its own
“It hurts, so rest until it doesn’t hurt at all” sounds reasonable, but doing nothing will cause further muscle loss, often trapping you in a “rest—return to running—pain again” cycle. Fix: Relative rest + active rehabilitation, providing progressive stimulus within a manageable pain range.
Mistake 3: Relying only on knee braces, tape, and insoles
These aids can provide short-term support during the acute phase or in specific situations, giving you more confidence to move, but they won’t build strength for you. Fix: Treat aids as “temporary scaffolding” while simultaneously rebuilding fundamental strength—don’t make them your only solution.
Mistake 4: Rushing back to your original training volume as soon as you feel better
This is the number one cause of re-injury. Tissue tolerance recovers much slower than pain disappears. Fix: After pain subsides, still increase training volume conservatively and progressively, giving your tissues time to catch up.
Mistake 5: Ignoring the “upstream” and only staring at the knee
Only massaging the knee and only training the front of the thigh, while leaving a weak gluteus completely unaddressed. Fix: Incorporate the hips and core into your training, addressing the entire kinetic chain.
Taiwan-specific context: These details are very practical
Living in Taiwan, there are certain situations you’re bound to encounter. Let me walk you through them.
Humid, hot climate and training venues
Taiwan’s summers are muggy and hot, so many runners retreat to riverside night runs or switch to track running. A word of caution: some riverside paths have arched bridges with elevation changes, and tracks involve running in one direction for extended periods, which can lead to uneven loading on both sides of the body over time. I suggest occasionally switching directions when running on a track, and paying attention to cumulative elevation gain on longer runs. If you switch to an indoor treadmill, remember to set a 1% incline to better mimic outdoor running, and avoid prolonged downhill modes that can increase stress on the front of the knee.
Nutrition and body weight for those who eat out
The load your knees bear is directly related to your body weight. Eating out in Taiwan is convenient, but it’s common to consume high-fat, high-sodium, refined-carb-heavy meals that are low in protein. During strength training, adequate high-quality protein intake is crucial for recovery and muscle building—unsweetened soy milk, tea eggs, chicken breast, and tuna rice balls from convenience stores are all convenient options. If you have weight management goals, adjusting gradually and consulting a nutritionist when necessary will preserve muscle better than aggressive dieting. Please set specific calorie and protein targets based on your individual situation and professional advice, rather than blindly applying numbers found online.
The NHI system and the medical environment
Taiwan has convenient access to healthcare—that’s an advantage, so use it. If you experience any of the following warning signs, please seek medical attention and don’t rely solely on self-rehabilitation:
- Significant knee swelling, warmth, or redness
- Hearing a “pop” at the moment of injury, or a sensation of the knee “giving way, catching, or being unable to straighten” (locking)
- Pain that persists even at rest, or nighttime pain severe enough to disrupt sleep
- Pain that is very specific and sharp (e.g., along the joint line, or at the patellar tendon insertion below the kneecap)
- No improvement—or even worsening—after six to eight weeks of serious rehabilitation
Rehabilitation medicine, orthopedics, or sports medicine clinics are all appropriate choices, and physical therapists can provide more individualized movement assessments and program adjustments. These warning signs suggest the issue may not be simple patellofemoral pain (e.g., problems with the meniscus, ligaments, or tendons) and require professional diagnosis.
Actionable advice for readers at different levels
Everyone starts from a different point, so I’ve broken the advice down for three types of readers.
If you’re an early-stage runner who “just started feeling pain but can still run”
- First, implement the “pain traffic light” system, temporarily removing activities that put you in the red zone
- Immediately begin the glute activation and strengthening exercises from phases one and two, three times per week
- Reduce your weekly mileage and slow down your pace, then observe for two weeks
- If there’s improvement after two weeks, progress back up through phases two and three sequentially; if there’s no improvement or things get worse, see a doctor
If you’re someone with a chronic issue who has “been in pain for a while, with good and bad days”
- Be honest with yourself: have you been stuck in a “return to running—pain again” loop?
- This time, commit to completing the full 8-12 week strength-building phase—don’t bail halfway through
- I strongly recommend getting a movement assessment from a physical therapist to identify your specific weaknesses (is it the hips? core? running form?)
- Make strength training a long-term habit, not just something you do when it hurts
If you’re a healthy runner who is “pain-free and wants to prevent issues”
- Congratulations—prevention is far easier than treatment
- Schedule 2 sessions per week of glute, leg, and core strength work (split squats, single-leg RDLs, bridges, planks)
- Follow the principle of progression—don’t suddenly spike your weekly mileage, and make sure to taper properly before races
- Pay attention to your running form: moderately increase your cadence and avoid your knees collapsing inward when you land
Case follow-up: What happened to that runner from the NTU track
Let’s return to the runner preparing for his first full marathon mentioned at the beginning. Here’s what we did: first, we cut his weekly plan from 35 kilometers down to 15 and slowed his pace; second, we had him diligently train his gluteus medius and single-leg stability three times a week, especially step-downs; third, we strictly enforced the pain traffic light system—if the pain worsened the next day, we regressed the exercise.
Around the fourth week, he told me the “sharp twinge” when going downstairs was gone; by the seventh week, he could run continuously for 30 minutes pain-free; and by the tenth week, we cautiously started building his long runs back up. He eventually completed that marathon—not with his fastest time, but he finished it without the pain coming back, which to me is more valuable than a PB.
He later developed a habit: no matter how busy his training got, two weekly sessions of glute and leg strength work were non-negotiable. Over the past year or so, his knee hasn’t acted up once. That’s the core message I want to convey—the solution to runner’s knee has never been some magical brace or stretch, but rather understanding your body, managing your load, and strengthening what needs to be strong.
Second case: The tech-industry mom who “got worse the more she rested”
Let me share a different type of example, because her misconception is so common. A mother of two working in the Hsinchu Science Park, running was her only escape. She’d had knee pain for nearly six months, and her approach was “if it hurts, don’t run; when it feels better, run again.” The result was that every time she resumed, the pain would return after three or four kilometers, and her mood would sink along with it.
When she first came to me, her opening line was: “Coach, is my knee already worn out—can I never run again?” The first thing I did was help her let go of that fear: most patellofemoral pain is not irreversible structural damage. The real problem was that her six months of “complete rest” had caused her glute and leg strength to steadily decline, so every time she resumed running, her knee had to bear the load of a weaker, less stable body. This is the classic “rest—return to running—pain again” vicious cycle.
Our adjustment was simple but crucial: redefine “rest” as “relative rest + active rehabilitation.” She temporarily stopped running, but did serious glute activation and strengthening three times a week, and used spare moments like her commute to do wall sits. Because she was a desk-bound worker, I specifically asked her to get up and move every hour, breaking the accumulation of the “movie theater sign.” After six weeks, her pain when going downstairs had almost disappeared, and in the ninth week she restarted with a run-walk approach—this time, she didn’t fall back into the cycle. She later told me her biggest takeaway wasn’t that her knee was better, but that she “finally understood that rest doesn’t mean doing nothing.”
These two cases—one of “increasing volume too fast” and one of “passive rest”—seem like opposites, but underneath they’re the same thing: an imbalance on the scale between strength and load. Restore that balance, and your knees will reward you.
FAQ
Q: Can I keep running through the pain?
A: It depends on the pain level. If it’s in the green zone (0-2 on the scale) and doesn’t worsen within 24 hours after running, you can usually continue at a reduced volume; if it’s in the red zone (5 or above, or worse the next day), you should stop and regress. Long-term gritting through pain will only prolong recovery.
Q: Do I need X-rays or an MRI?
A: For simple, typical patellofemoral pain, a diagnosis based on medical history and a physical exam is usually sufficient, and imaging isn’t always necessary. However, if any of the aforementioned red flags are present (significant swelling, a locking sensation, pain at rest, etc.), imaging is warranted—let your physician make that call.
Q: Should I wear a knee brace or not?
A: Wearing one short-term during the acute phase or for specific activities, if it gives you more confidence and helps you move, is fine. But don’t treat it as the only solution—rebuilding strength is the real fix.
Q: How long will it take to heal?
A: It varies from person to person. Most people see significant improvement within six to twelve weeks with a systematic exercise program; chronic cases may take longer. The key is “whether you’re on the right track and staying consistent,” not chasing quick fixes.
Q: Ice or heat?
A: For acute, clearly inflamed discomfort, ice can provide quicker short-term relief; for chronic, stiffness-dominant conditions, warmth helps with relaxation. Both are adjuncts, not the main treatment.
Q: I don’t have time for the gym. Can I just train at home?
A: Absolutely. Most of the exercises in this article can be done with just bodyweight or a resistance band—clamshells, bridges, wall sits, split squats, step-downs (your stairs at home work fine), and banded lateral walks. Equipment isn’t the key; “doing it right and consistently” is. A mini resistance band is available at supermarkets or sporting goods stores and is, in my opinion, the highest value-for-money home rehab tool.
Q: Can I use cycling or swimming to maintain my fitness?
A: That’s a great strategy. During knee rehab, if cycling or swimming doesn’t provoke pain, they can help you maintain cardiovascular fitness and some conditioning without the repetitive impact of running. When cycling, adjust the saddle to the proper height and avoid grinding heavy gears; when swimming, if breaststroke kick triggers knee pain, switch to freestyle. This kind of “cross-training” lets you avoid losing all your fitness without aggravating your knee.
Q: Do I need supplements like glucosamine or chondroitin?
A: Patellofemoral pain is fundamentally about mechanical overload and muscle weakness, not simply “missing cartilage material,” so evidence for these supplements is limited. Rather than spending money and expectations on supplements, invest in strength training and adequate daily protein. If you want to try any supplement, consult your physician or pharmacist first, especially if you have chronic conditions or are on medication.
Q: I have diabetes/hypertension. What should I watch out for with exercise rehab?
A: Regular exercise is beneficial for these chronic conditions themselves, but be sure to individualize it and discuss it with your primary care physician first. For example, if blood pressure is poorly controlled, avoid breath-holding and straining (avoid the Valsalva maneuver); if you’re on glucose-lowering medication, watch for hypoglycemia during exercise. These situations require professional oversight—the general principles in this article cannot replace your medical team’s advice.
Conclusion: Give Your Knees Back to a Prepared You
In fifteen years of coaching, my deepest insight is this: Your knees are not fragile glass; they are partners that need to be treated right. Runner’s knee is so common precisely because it reflects the most widespread problems among modern runners—training too aggressively, strength too weak, and too little sensitivity to the body’s signals. The good news is that all three of these are entirely within your control.
Treat this article as a map, not a guarantee. A map shows you the direction, but you have to walk the path yourself, and everyone’s terrain is different. If you follow it and get stuck, or if any red flags appear, be sure to seek individual assessment from a physician or physical therapist. You deserve a pair of knees that will carry you for many, many miles. Next time I see you on the NTU track, the riverside bike path, or any of Taiwan’s beautiful routes, I hope to see you running pain-free and finishing with a smile.
I’ll leave you with a phrase I often tell my athletes: “Slow down, and you’ll get there faster.” This is especially true in knee rehab—those who rush back to their original training volume often take the longest detours; those willing to spend six to twelve weeks building a solid foundation end up running farther and longer. Treat time as a friend and your body’s signals as your navigation, and you’ll find that this seemingly roundabout rehab journey ultimately brings you to a place stronger than where you were before the injury.
This article is for educational purposes and does not replace individual diagnosis or treatment advice from a physician, physical therapist, or nutritionist. If you have persistent or severe knee pain, swelling, a locking sensation, or pain at rest, seek medical attention promptly.
References
- Incidence and prevalence of patellofemoral pain: A systematic review and meta-analysis, PLOS One — https://journals.plos.org/plosone/article?id=10.1371%2Fjournal.pone.0190892
- Hip and Knee Strengthening Is More Effective Than Knee Strengthening Alone for Reducing Pain and Improving Activity in Individuals With Patellofemoral Pain: A Systematic Review With Meta-analysis, JOSPT — https://www.jospt.org/doi/10.2519/jospt.2018.7365
- Patellofemoral Pain: Guidelines from the American Physical Therapy Association, AFP — https://www.aafp.org/afp/2020/1001/p442
- Hip and Knee Exercise for Patellofemoral Pain: Using the Evidence to Guide Physical Therapist Practice, JOSPT — https://www.jospt.org/doi/10.2519/jospt.2018.0502
Related Reading
- Runner’s Knee (Patellofemoral Pain Syndrome): Causes, Self-Assessment, and Evidence-Based Rehab Pathways
- Runner’s Knee (Patellofemoral Pain Syndrome) Complete Guide: A Comprehensive Analysis from Causes to Recovery
- The Complete Prevention and Treatment Guide for Runner’s Knee (Patellofemoral Pain Syndrome)
- Runner’s Knee (Patellofemoral Pain Syndrome): Causes, Prevention, and Recovery
一日北高常見問題大集合 | 攻略 | 路線 | 訓練 | 補給 | 自行車 單車 | 一日雙城 | 雙塔 | TWB北高360 | 屁股痛
6 年前
一日北高/長距離團騎 常見問題補充篇 / 組團或跟團的眉角 / 壯車友容易被瘦車友慢性拉爆 / 原來屁股痛可能是這個原因...? / 風場配速法 / 公路車 / CT Yeh
2 年前
Never Stop 西進武嶺 前後雙機 完整全程錄影 訓練台 實境
8 年前
爬陡坡被爆胎的車友跑步超車 #cycling #里佳部落
9 個月前
2019 夏季KOM 5小 完賽心得 準備攻略 東進武嶺 夏季登山王之路 Taiwan KOM Challenge
7 年前
摔車後補裝備: 好市多新款單車安全帽& Specialized Romin 北高整路屁股都不痛的坐墊 | 一千元居然有MIPS | CT Yeh | 公路車
4 年前
單車 一日北高 ( 雙城 ) 肥宅雙人瘋狂行 紀錄片 REACTO
10 年前
iPhone內建一秒變長腿🤣 車友必備#cycling
2 年前