Don't Rush to Rest or Rush Back After a Muscle Strain: A Complete Coach's Manual from Grading and Acute Care to Progressive Return
It Starts with a Late-Night Message
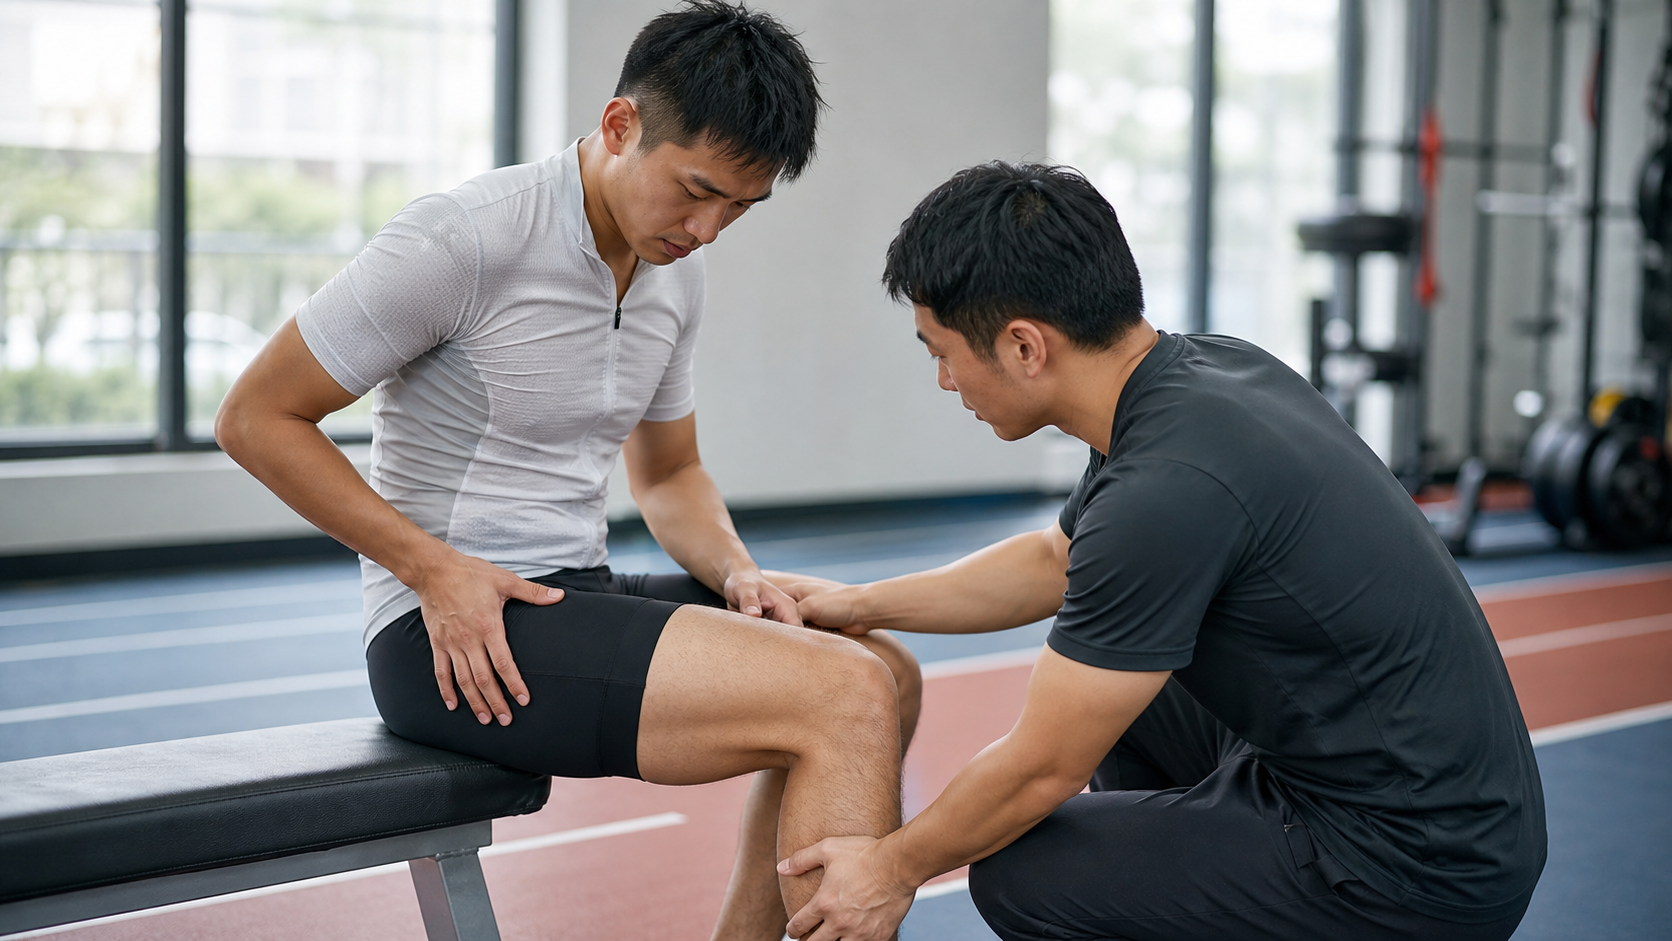
Around 11 PM that night, I received a message from my athlete, A-Kai: “Coach, I was sprinting out of the saddle on a climb just now and heard a ‘pop’ in the back of my thigh. It hurts when I walk now. Is it a strain? I have a group ride this weekend—can I still go?”
I receive dozens of messages like this every year. Someone feels a tight pull by their lower back during a heavy squat, someone’s calf suddenly seizes during intervals, someone’s thigh gives out on a basketball landing. Among athletes, muscle strains are nearly unavoidable injuries, especially for Taiwanese office workers who love cycling and running but often only push themselves to the limit once on the weekend.
In fifteen years of coaching athletes and general populations, my observation is that what really causes suffering is often not the strain itself, but how it’s handled in the two to three weeks afterward. Too many people fall into one of two camps—one is “if it hurts, don’t move at all, lie down until it stops hurting,” which results in muscle atrophy and messy scar tissue, and it hurts again the moment they move; the other is “just tough it out,” going back to hard training before the pain has subsided, which leads to repeated tearing in the same spot and eventually a chronic injury that drags on for six months.
In this article, I want to lay out the path of “strain grading, acute care, and gradual return” the way I actually guide my athletes. This isn’t about making you your own doctor, but about helping you stay calm in the moment of injury, knowing what to do, what absolutely not to do, and when you must see a physician or physical therapist.
First, Understand: What Exactly Did You Strain
A Strain Is Not a Stretch, and Not a Contusion
I often find people mixing up several types of injuries. Let’s clarify them first:
- Muscle strain: Muscle or tendon fibers are overstretched, torn by exceeding their load capacity. This most often happens during “forceful contraction,” such as sprinting, surging out of the saddle, landing from a jump, or a sudden increase in weight.
- Ligament sprain: Happens at a joint; it’s an injury to the ligaments connecting bone to bone, such as rolling an ankle.
- Contusion: Bruising caused by a direct external impact, such as a thigh being hit and “horsed.”
These three share common principles in acute care, but strains have their own rehabilitation rhythm. This article focuses specifically on strains.
Strains most commonly occur in muscles that “cross two joints and frequently perform eccentric contractions,” such as the hamstring at the back of the thigh, the gastrocnemius in the calf, the rectus femoris at the front of the thigh, and the adductor group in the groin. For cyclists, explosive out-of-the-saddle efforts and sudden gear changes are the most common triggers; for runners, sprints and downhill sections are the most dangerous.
Why “Eccentric Contractions” Are Especially Prone to Strains
Many people don’t know this. A muscle being lengthened while simultaneously exerting force (eccentric contraction) is the most injury-prone scenario. Imagine running downhill—with every footstrike, the front of your thigh is actually “braking while being lengthened.” Or think of sprinting out of the saddle to the point of exhaustion, when the muscle is both fatigued and required to produce explosive power. In this state of being both long and forceful, the fibers experience maximum tension and are most likely to exceed their threshold and tear.
This also explains why strains are especially likely when fatigued—when muscles are tired, coordination deteriorates, eccentric control declines, and the same movement becomes more dangerous. Many people in Taiwan have no time during the week and then ride 100+ kilometers or run a full marathon on the weekend. The first half is fine, but fatigue accumulates in the second half, and that’s how strains happen.
Another frequently overlooked factor is insufficient warm-up and environmental temperature. Muscles have the worst elasticity when “cold, stiff, and unawakened.” Low-temperature early-morning group rides in Taiwan’s winter, or suddenly sprinting outside after spending too long in an air-conditioned room in summer, are high-risk scenarios I’ve seen. Muscles are like rubber bands—they snap when pulled cold, but have elasticity once warmed up. So rather than thinking of warm-up as a “ritual,” think of it as genuine insurance that raises your injury threshold.
Another key point is left-right imbalance and compensation. When you habitually favor one side, or a particular muscle is especially weak, the body uses neighboring muscle groups to “fill in,” and the muscle forced to overwork is more likely to overload and tear at a critical moment. This is why I’ll keep emphasizing later: rehabilitation can’t just fix the injured muscle; you have to rebuild overall balance and stability as well.
Grading of Strains: Know Which Grade You’re In
The most commonly used clinical system is the traditional three-grade classification. Although sports medicine now has more refined imaging-based grading (e.g., using MRI to determine tear location and extent), for the general athletic population, understanding the “felt differences” among these three grades is sufficient.
Three-Grade Classification and Typical Presentations
| Grade | Degree of Damage | Pain and Swelling | Strength/Function | Typical Healing Time* |
|---|---|---|---|---|
| Grade 1 (Mild) | Minor micro-tears of a few fibers | Mild soreness, slightly tight when pressed | Barely affects force output | Approximately 1–2 weeks |
| Grade 2 (Moderate) | Partial fiber tearing | Noticeable pain, possible bruising and swelling | Clearly weakened force output, restricted movement | Approximately 3–6 weeks |
| Grade 3 (Severe) | Complete or near-complete muscle rupture | Severe pain, extensive bruising, possible palpable gap | Barely any force output, major loss of function | Several months, sometimes requiring surgery |
*Healing times are general ranges; individual variation is large and affected by age, injury location, nutrition, and rehabilitation quality. Treat these numbers as “reference magnitudes,” not “guaranteed timelines.”
How to Do a Quick Self-Assessment
I usually teach athletes to use three questions for a rapid self-evaluation:
- Can you still walk and produce force? If you can’t produce force at all, can’t even support yourself walking, or feel a clear gap or bulge in the muscle, this leans toward severe—seek medical attention immediately.
- Is there rapid swelling or extensive bruising? If it swells up significantly or bruising appears quickly within a short time after injury, it means more bleeding and a higher grade.
- Is the pain a “small point” or a “whole area”? The more localized and intense the pain point, the more defined the tear usually is.
Important reminder: Self-assessment is only to help you decide “whether to seek immediate medical care,” not to replace a diagnosis. Medical access under Taiwan’s National Health Insurance is very convenient. If any of the following applies, don’t skimp on the registration fee—an audible “pop” at the moment of injury with immediate weakness, inability to bear weight and walk, joint swelling or deformity, pain that doesn’t decrease but increases over days, or accompanying numbness and tingling (which may involve nerves). Rehabilitation medicine, orthopedics, or sports medicine clinics all work; if necessary, the physician will arrange an ultrasound or MRI.
Acute Phase Management: From RICE to PEACE & LOVE
Many people learned RICE (Rest, Ice, Compression, Elevation) as children. That framework has its merits, but sports medicine has since evolved—a 2019 viewpoint article published in the British Journal of Sports Medicine proposed PEACE & LOVE, a more complete framework covering the entire path from the moment of injury through subsequent rehabilitation. This is the framework I now use with all my athletes.
Days 1–3 After Injury: PEACE
PEACE corresponds to the acute phase, with the focus on “creating an environment for proper tissue healing while not getting in the way”:
- P — Protect: For 1–3 days after injury, moderately unload and limit movements that cause pain to reduce bleeding and secondary injury. But note: this is “relative rest,” not complete bed rest.
- E — Elevate: Elevate the injured limb above heart level to help reduce swelling.
- A — Avoid anti-inflammatories: This is the biggest conceptual update. The literature recommends avoiding routine use of anti-inflammatory painkillers (NSAIDs) in the acute phase, because inflammation is actually a necessary part of tissue repair, and excessive suppression may affect long-term healing.
- C — Compress: Use an elastic bandage for moderate compression to control swelling.
- E — Educate: Understand the natural healing process, avoid over-reliance on passive treatments (e.g., just relying on continuous icing or electrotherapy), and build the mindset for active rehabilitation.
Regarding ice, I want to be very clear: the new perspective takes a reserved stance on “prolonged, heavy icing.” Ice can help with pain relief when it’s very painful, but it’s not recommended as the main tool for accelerating healing, and you certainly shouldn’t ice to the point of frostbite. Taiwan’s summers are hot and humid, and many people ice aggressively all day after an injury—that’s unnecessary. The principle is—if it hurts, ice briefly for pain relief (about 15–20 minutes per session, with breaks in between); if it doesn’t hurt, there’s no need to keep icing.
Regarding anti-inflammatory medication, I need to be cautious with my wording here: this is a general principle, not an instruction to stop medication prescribed by your physician. If you have a chronic condition, are currently taking medication, or the pain is severe enough to affect sleep, whether and how much anti-inflammatory medication to use should follow your physician’s or pharmacist’s individual judgment.
A Few Days Later: LOVE
After the acute phase (usually 3 days post-injury, once swelling and pain begin to subside), you enter the LOVE phase, where the focus shifts from “protection” to “active recovery”:
- L — Load: Load the tissue early and progressively, without aggravating pain. Appropriate mechanical stimulation guides fiber alignment and strengthens repair. This is the core sentence of modern rehabilitation—moving is better than not moving, but it must be progressive.
- O — Optimism: Psychological state genuinely affects recovery. Excessive anxiety and catastrophic thinking make people afraid to move, dragging things out longer.
- V — Vascularisation: Engage in pain-free aerobic activity (e.g., someone with a hamstring strain can swim or ride a stationary bike within a pain-free range) to promote blood flow and support repair.
- E — Exercise: Restore strength, flexibility, and proprioception through progressive strength and mobility training.
A one-sentence summary of the acute phase: protect well for the first three days, don’t casually take anti-inflammatories, don’t ice excessively; after three days, start moving within an “acceptable pain range.” That’s the backbone of modern strain management.
Gradual Return: A Stage-by-Stage Program You Can Follow
This is what I most want to talk about, and where the most people go wrong. Returning isn’t “wait until it doesn’t hurt, then go back to hard training”—it’s a staged process where you only advance based on how your body responds.
When I guide athletes, I divide the return into four stages, each with clear “advancement criteria”—if you don’t meet them, you don’t move forward.
Four-Stage Gradual Return Framework
| Stage | Primary Goal | Example Activities | Criteria to Advance to Next Stage |
|---|---|---|---|
| Stage 1: Protection and De-swelling | Control inflammation, restore basic mobility | Pain-free gentle movement, elevation, compression, daily walking | Walking without pain, swelling clearly reduced |
| Stage 2: Restore Mobility and Light Loading | Regain joint range of motion, awaken the muscle | Pain-free stretching, light isometric contractions, pain-free cardio (stationary bike, swimming) | Full-range movement without pain, light contraction without pain |
| Stage 3: Progressive Strength and Eccentric Training | Rebuild strength, especially eccentric control | Progressive resistance training, eccentric movements, single-leg stability work | Injured-side strength close to healthy side (reaching 80–90%), movement without pain |
| Stage 4: Sport-Specific and Explosive Work | Restore speed, power, sport-specific movements | Progressive sprinting, out-of-saddle surges, jumping, intervals, finally returning to full training | Full-speed sport-specific movements without pain, no compensation, confidence restored |
Why Eccentric Training Is So Critical
Note that Stage 3 in the table specifically highlights “eccentric training.” As mentioned earlier, strains mostly occur during eccentric contractions, so rehabilitation must retrain the muscle’s ability to tolerate force while being lengthened. Otherwise, you’ve only rebuilt strength without addressing “the very link most prone to injury.” This is also the key reason many people “re-strain the same spot after returning”—they trained strength but skipped the progressive eccentric and speed work.
Using a hamstring strain as an example, the progressive eccentric strengthening might look like: light leg curls in a pain-free range → add resistance → a regressed version of the Nordic hamstring curl → gradually increase eccentric load and angle. Throughout, the baseline is “no increased pain the next day.”
How to Gauge Return Timing: A Practical Rule of Thumb
There’s a return-to-play guideline I find very useful: for roughly how many weeks you rested, use about half that time to gradually build your training load back up. In other words, if you completely stopped training for 4 weeks due to a strain, don’t plan to return to full volume on day one—give yourself about 2 weeks to progressively ramp intensity and volume back to full. This dramatically reduces the chance of “getting re-injured the moment you return.”
Let me emphasize again: timelines are for calibrating your feel, not deadlines. Your body’s response always takes priority over your calendar. If today’s plan says to advance, but the injured area is more swollen and painful the next day, step back to the previous stage—that’s not failure, that’s smart.
A Real Case: A-Kai’s Six Weeks
Back to A-Kai from the opening. That time, he suffered a Grade 2 hamstring strain while sprinting out of the saddle on a climb. The process I walked him through looked roughly like this (timeline is illustrative; adjusted based on his daily reports):
- Days 0–3: First, I had him visit a rehabilitation medicine clinic to rule out a severe tear (ultrasound showed no large-scale rupture). During these days: protect, compress, elevate, and ice briefly when painful. I specifically told him not to go buy a bunch of anti-inflammatories from the pharmacy and pop them. And of course, that weekend’s group ride was cancelled.
- Days 4–10: Swelling subsided, walking was pain-free. Started gentle pain-free movement and stationary bike warm-ups (very light resistance, just for circulation). Also did isometric hamstring contractions.
- Weeks 2–3: Progressed to progressive strength, adding a regressed eccentric version, gradually increasing angle and resistance. Stationary bike intensity increased slightly, but backed off whenever there was a “tight, about to pull” signal in the injured area.
- Weeks 4–5: Injured-side strength tested at roughly 80%+ of the healthy side. Started adding standing explosive preparation and light out-of-saddle surge simulation.
- Week 6 onward: Gradually returned to normal training, deliberately keeping the first two weeks at 60–80% of normal training volume, and only returning to full once completely pain-free and compensation-free.
He never re-strained the same spot afterward. The key wasn’t some miracle treatment—it was that he waited for his body’s approval at every step before advancing.
Specific Exercise Progression: A Six-Step Regression/Progression Table for the Hamstring
Many people ask me, “What exactly does ‘moving within a pain-free range’ mean?” Frameworks are easy to talk about, but without concrete exercises, people still don’t know where to start. Here, I’ve broken down the most common hamstring strain into a practical, actionable six-step progression so you have something to follow. Each step’s advancement condition is “no pain in the moment, no increased pain the next day”; if violated, step back one level.
| Step | Representative Exercise | Contraction Type | Execution Points and Volume Reference |
|---|---|---|---|
| 1 | Isometric bridge (double leg) | Isometric | Lie on back, knees bent, heels on floor, lift hips; hold 5–10 seconds × 8–10 reps, entirely pain-free |
| 2 | Isometric bridge (single leg) / seated isometric press into floor | Isometric | Increase load with single leg; only advance after the double-leg version is completely pain-free |
| 3 | Supine heel slide (slide board/towel) | Concentric-dominant, light eccentric | Slide heel slowly away then back; control speed, feel the hamstring working without pulling pain |
| 4 | Romanian deadlift (light load, partial range) | Eccentric-dominant | Start with very light weight and a smaller range of motion, emphasizing the “slow lowering” portion |
| 5 | Nordic hamstring curl (regressed eccentric version) | High-intensity eccentric | Use hand assistance and a reduced lowering range; only perform angles you can control, low reps but high quality |
| 6 | Progressive sprinting / sport-specific explosive work | Fast stretch-shortening cycle | Start with short distances at 60% intensity, gradually increase distance and intensity to full speed |
The spirit of this table isn’t “copy it exactly”—it’s to help you understand that rehabilitation has a gradient: from isometric (producing force without movement), to eccentric (slow lowering), to sport-specific explosive work (fast and powerful), each step progressively closer to the actual scenario in which you were injured. Skipping steps is sending yourself back down the road to injury. If you’re unsure which step you should be on or whether your form is correct, having a physical therapist do a hands-on assessment once will save you far more wasted time than guessing on your own.
Nutrition During the Repair Phase: Don’t Let Eating Wrong Slow You Down
Tissue repair is very “raw material”-intensive. I often tell my athletes: rehabilitation isn’t just training—it’s also eating and sleeping. Many people lose their rhythm after injury—because they can’t exercise, they drastically cut food intake (fearing weight gain), resulting in insufficient protein and calories and slower repair; or conversely, they binge-eat and wreck their sleep because they feel down.
Here’s a general, non-individualized nutrition reference for the repair phase. All values are given as ranges; adjust according to your body weight, activity level, and health status. Those with chronic conditions or special needs should consult a dietitian:
| Nutritional Focus | General Reference Range | Practical Suggestions for Taiwan |
|---|---|---|
| Protein | Approximately 1.4–2.0 g per kg body weight per day, distributed across meals | One palm-sized portion of beans/fish/eggs/meat per meal; don’t just have an egg crepe with milk tea for breakfast—add an egg or unsweetened soy milk |
| Total calories | Don’t drastically cut just because you’re not exercising; repair itself requires energy | Reduce intake with “maintenance” rather than “large deficit” as the principle, avoiding too-low calories during repair |
| Fruits and vegetables (vitamin C, antioxidants) | Multiple servings of varied colors daily | Add blanched vegetables to your bento, fruit as snacks, replacing sugary drinks |
| Fluids | Based on body weight and sweat loss; keep urine pale yellow | Taiwan’s humid heat promotes dehydration; carry a water bottle and don’t wait until thirsty |
| Sleep (not nutrition, but critical) | 7–9 hours nightly, consistent schedule | Repair mostly happens in deep sleep; don’t stay up scrolling on your phone because you’re upset about the injury |
Please note: the various “accelerated healing” supplements on the market are numerous, and their claims often exceed the evidence. Rather than spending money on questionable supplements, first nail down the three fundamentals—adequate protein, adequate calories, and adequate sleep—which will benefit you far more than any fancy product. If you’re considering any supplement, consult a physician or dietitian first, especially if you’re on medication.
Distinguishing: Delayed-Onset Muscle Soreness, Strain, and Danger Signs
During rehabilitation, you’ll inevitably encounter various kinds of “aches and pains,” and knowing how to distinguish them is important. Misjudging means resting when you should train, or not advancing when you should, both of which slow progress. This comparison table helps you calibrate:
| Type | Sensation Characteristics | Timing | What to Do |
|---|---|---|---|
| Delayed-onset muscle soreness (DOMS) | Broad, dull ache; generally sore when pressed | 24–72 hours after training; resolves on its own | Normal; light activity and stretching are fine; no need to stop training |
| Strain recurrence signal | Localized, sharp, triggered by specific movements | Pain at a certain angle or with certain effort | Step back one stage, reduce load, observe the next day |
| Danger signs (seek medical care) | Severe pain, rapid swelling, inability to bear weight, numbness/tingling | Sudden onset or continuous worsening | Stop, seek medical evaluation promptly |
A very practical self-test: for the exercises you did the day before advancing, if “the next morning, the injured area feels about the same or better than the day before,” the load is something your body can handle—maintain or advance slightly. If “the next day it’s clearly tighter, more painful, or more swollen,” the load was too much—step back. This “next-day response” rule is more honest than how you feel in the moment, because injured tissue responses often surface with a delay.
The Psychological Side: Don’t Underestimate the Power of “Being Afraid to Move”
The O (Optimism) in PEACE & LOVE isn’t just a slogan. I’ve coached many athletes whose bodies were essentially healed, but their minds were still stuck on “this is how I got injured last time,” so every time they approached that movement, they’d unconsciously hold back, flinch, or compensate. This fear of movement (kinesiophobia) makes you move with faulty movement patterns, creating new problems instead.
My approach is to use the four-stage and six-step tables above to let athletes prove to themselves, again and again in a controlled, low-risk environment, that “I can do this movement and it won’t hurt.” Confidence is built through repeated successful experiences, not by forcing it. When you can complete sport-specific movements at full speed and feel fine the next day, that grounded sense of “I’m back” is the true return.
If you find yourself persistently low in mood after an injury, completely unmotivated for the sport you love, or anxious to the point of affecting daily life, this goes beyond general rehabilitation—please seek professional help. Sports psychology or psychiatry can help. Physical and psychological recovery matter equally.
Common Mistakes and Corrections
These are the mistakes I’ve seen the most over the years, and the ones that are most regrettable. Check yourself—how many do you recognize?
Mistake 1: Completely lying still when it hurts
Problem: Complete immobility causes rapid muscle loss, disorganized scar tissue growth, and joint stiffness. Both research and clinical practice support “progressive loading” over “complete rest.”
Correction: After the acute phase, start moving within a pain-free range. Remember the first letter of LOVE is Load.
Mistake 2: Going straight back to hard training once it doesn’t hurt
Problem: No pain doesn’t mean tissue strength has returned. It may feel fine on the surface, but fibers and eccentric control haven’t been rebuilt, and one hard session re-tears it.
Correction: Use the four-stage advancement criteria as a gate, especially don’t skip the progressive eccentric and speed work. Use the “rested X weeks, take half that time to build back” rule for return.
Mistake 3: Loading up on anti-inflammatories and heavy icing in the acute phase
Problem: Excessively suppressing inflammation may affect long-term repair; excessive icing has no evidence for accelerating healing and can cause frostbite.
Correction: Leave anti-inflammatory decisions to your physician; use ice only briefly for pain relief when it’s very painful.
Mistake 4: Only training “the muscle that hurts,” ignoring the whole system
Problem: Many strains are rooted in systemic issues like “insufficient flexibility, weak core, left-right imbalance, inadequate warm-up.” Fixing only the local area leaves the root cause in place.
Correction: In the later stages of rehabilitation, incorporate core stability, unilateral balance, and mobility training, and review your warm-up and training programming.
Mistake 5: Ignoring fatigue, the big monster
Problem: Fatigue degrades eccentric control and is one of the primary causes of strains. Blowing it all out on the weekend, insufficient sleep, and staying up late working all multiply the risk.
Correction: Factor in “accumulated weekly fatigue” when planning training load; don’t schedule your most important high-intensity session on your most fatigued day.
Actionable Advice for Readers at Different Levels
If You’re a Beginner Just Starting Out
- Don’t skimp on warm-up: At least 10 minutes of progressive warm-up to get muscle temperature and neural coordination up before the main session. In Taiwan’s winter early rides and morning runs, extend your warm-up even more.
- Progress within your limits: The most common beginner strain comes from “adding too much at once.” Keep weekly training volume increases modest; don’t go all out on the weekend.
- Distinguish the nature of pain: Post-training soreness (DOMS) is different from a strain’s “sharp tearing pain.” For the latter, stop.
If You’re an Advanced, Experienced Athlete
- Build eccentric training into your daily prevention: Eccentric strengthening like the Nordic hamstring curl is widely considered to help reduce hamstring injury risk. Rather than playing catch-up after injury, train it regularly.
- Monitor fatigue: Use subjective feeling, sleep, and heart rate (e.g., morning heart rate or HRV trends) to watch for over-fatigue; lower intensity when tired.
- Don’t tough out small signals on willpower alone: Experienced athletes are most prone to “just push through this little pull,” which drags into a chronic issue. Handle small signals early—the cost is minimal.
If You Have a Chronic Condition or Are on Medication
I need to address this separately. If you have diabetes, hypertension, heart disease, or other chronic conditions, or are taking anticoagulants, steroids, or other medications, your post-injury management (including whether to use anti-inflammatories, how much exercise you can do, wound and circulation status) requires more individualized assessment. Diabetes can affect tissue repair and sensation; anticoagulants affect bleeding and bruising. These are not things a general article can cover. Please defer to your primary physician’s opinion and don’t apply general advice to yourself.
Practical Tips Specific to Taiwan
A few reminders close to our daily lives:
- Climate and hydration: Taiwan’s summers are hot and humid. Dehydration and electrolyte imbalance worsen fatigue and increase the risk of cramps and strains. Remember to hydrate and take in moderate electrolytes during prolonged exercise.
- Eating out and repair nutrition: Tissue repair requires adequate protein. Eating out in Taiwan is convenient but often “high in carbs, low in protein.” During the repair phase especially, make sure each meal has a clear protein source (beans/fish/eggs/meat). Also, don’t cut total calories too aggressively just because you’re injured and not moving—repair itself needs energy.
- Medical access is easy—don’t tough it out: NHI outpatient access is easy; rehabilitation medicine and orthopedics can both assess you. When you need a rehab program, physical therapists can give you a more precise progressive plan and manual therapy. If in doubt, go—don’t comfort yourself with “it’s probably fine.”
- Venue selection: For pain-free cardio in the mid-to-late rehab phase, stationary bikes and pools at sports centers are excellent choices; for speed recovery training, a track’s PU surface is friendlier than asphalt roads.
FAQ
Q: Can I massage or apply heat to a strain?
A: In the acute phase (first few days, still swollen, painful, and bleeding), vigorous massage or heat is not recommended—it may worsen bleeding. Once you enter the recovery phase and swelling and pain have subsided, moderate soft tissue work and heat can aid circulation, but it’s best done after assessment by a professional (physical therapist or qualified therapist).
Q: How long after a strain can I resume training?
A: It depends on the grade and the quality of rehabilitation. Mild cases may take one to two weeks, moderate cases often three to six weeks, and severe cases longer. But the real indicator isn’t “how many weeks”—it’s “whether you pass the four-stage advancement criteria.”
Q: Should I stay completely immobile during rehabilitation?
A: No, and you shouldn’t. After the acute phase, you should start moving within a pain-free range. Complete immobility actually slows recovery.
Q: How do I prevent re-straining?
A: Adequate warm-up, progressive loading, eccentric strengthening, fatigue management, sufficient protein, and most importantly—don’t rush the return.
Q: Can I still ride a stationary bike or swim after a strain?
A: This is exactly the spirit of “vascularisation” in LOVE. As long as it’s within a completely pain-free range and intensity, this kind of low-impact cardio isn’t just allowed—it helps maintain fitness and blood flow. The key is keeping resistance and intensity low, and backing off if it triggers pain in the injured area. Don’t secretly upgrade “pain-free cardio” into “training through pain.”
Q: Do kinesiology tape or compression tights help?
A: Compression helps control acute-phase swelling, and some people find compression tights comfortable and supportive during recovery. But these are “adjuncts,” not the main event—what actually makes you stronger and reduces recurrence is progressive loading and eccentric training. Don’t get it backwards, putting your money and expectations into gear while skipping the rehabilitation work you should be doing.
Q: How soon after injury should I schedule a follow-up?
A: If you saw a physician initially, they’ll typically give follow-up recommendations based on the grade. As a general rule, if you experience “pain that increases rather than decreases, persistent swelling, or getting stuck and unable to advance despite following the program,” you should return for reassessment rather than stewing in uncertainty. Medical access in Taiwan is convenient—use it.
Conclusion: Slow Is Fast
In fifteen years of coaching, my deepest takeaway about returning from a strain is these four words: slow is fast.
Those who rush back to hard training in three days often get re-injured in week two or three, and end up spending even more time overall. Meanwhile, those willing to dutifully complete all four stages, waiting for their body’s approval at every step, usually not only come back—they come back stronger than before the injury, because they’ve also filled in the gaps they were missing: eccentric strength, core stability, and overall balance.
A strain isn’t the end of the world. It’s more like your body handing you a “checklist of training gaps.” Understand it, follow this process, and you’ll find you’re not just “recovering”—you’re “upgrading.”
Next time you feel that tightness in the back of your thigh while sprinting out of the saddle on a climb, don’t panic. Protect first, don’t casually take medication, don’t ice excessively; a few days later, start moving progressively; then advance stage by stage, based on how your body responds. Go to the doctor when you should—don’t tough it out.
Wishing you a healthy return to the road you love, with a stronger self that better understands how to listen to your body, and keep riding, keep running.
This article is educational content and cannot replace individual diagnosis and treatment advice from a physician, physical therapist, or dietitian. If you have a chronic condition, are on medication, have severe pain, or cannot bear weight, seek medical attention promptly and follow the individualized advice of professionals.
References
- Dubois B, Esculier JF. Soft-tissue injuries simply need PEACE and LOVE. British Journal of Sports Medicine (original PEACE & LOVE viewpoint article PDF): https://nelsonbayphysiotherapy.com.au/wp-content/uploads/2020/11/2019-Dubois-SofttissueinjuriessimplyneedPEACEandLOVE.pdf
- Peace and Love Principle — Physiopedia: https://www.physio-pedia.com/Peace_and_Love_Principle
- Muscle Strains: Causes, Symptoms, Treatment & Recovery — Cleveland Clinic: https://my.clevelandclinic.org/health/diseases/22336-muscle-strains
Related Reading
- The 3-Grade Classification of Muscle Strains and the RICE Evolution POLICE Protocol: A 4-Week Rehabilitation Guide for Endurance Athletes
- Flexibility and Injury: Does Stretching Really Prevent Injury? A Coach’s 15 Years of Evidence and Practice with Athletes
- Hamstring Strain Grading and Return-to-Run Timeline: The Most Complete Recovery Map After Muscle Tears
- The Truth About Warm-Up and Injury Prevention: Debunking Myths and Protecting Your Body the Right Way
一日北高/長距離團騎 常見問題補充篇 / 組團或跟團的眉角 / 壯車友容易被瘦車友慢性拉爆 / 原來屁股痛可能是這個原因...? / 風場配速法 / 公路車 / CT Yeh
2 年前
Never Stop 西進武嶺 前後雙機 完整全程錄影 訓練台 實境
8 年前
CT 喇低賽) 武嶺牽車 才是王道 西進牽車四小時內秘訣 攝手位置 如何判斷 防抽筋小秘訣
7 年前
2016 彰化經典百K - 風景宜人精華版
10 年前
一個測試有沒有認真練車的方法😂 #公路車
10 個月前
西進武嶺 免費訓練分析服務 Intervals | 練不夠還是練過頭?你哪一種類型選手?AI模型告訴你! | 備戰神器 | 公路車 訓練 | CT Yeh
4 年前
昇陽SYB車隊 & Fuji 菁英選手們的趣味經驗分享,長知識了!市民車友必看~ 一路被拉爆後才給問 | 戀戀197 武嶺 凸台經驗分享 | 公路車 | CT Yeh
4 年前
滑雪新手們慘摔學習全紀錄(請開字幕),滑雪好好玩 | Snowboard + Ski | 岩原 スキー場 | 滑雪APP使用 | GoPro Max
6 年前