Mount Tsurugi Hill Climb Race Strategy: 15 km with Nearly 2,000 Meters of Climbing, a Complete Breakdown of Shikoku's Hardcore Sacred Mountain
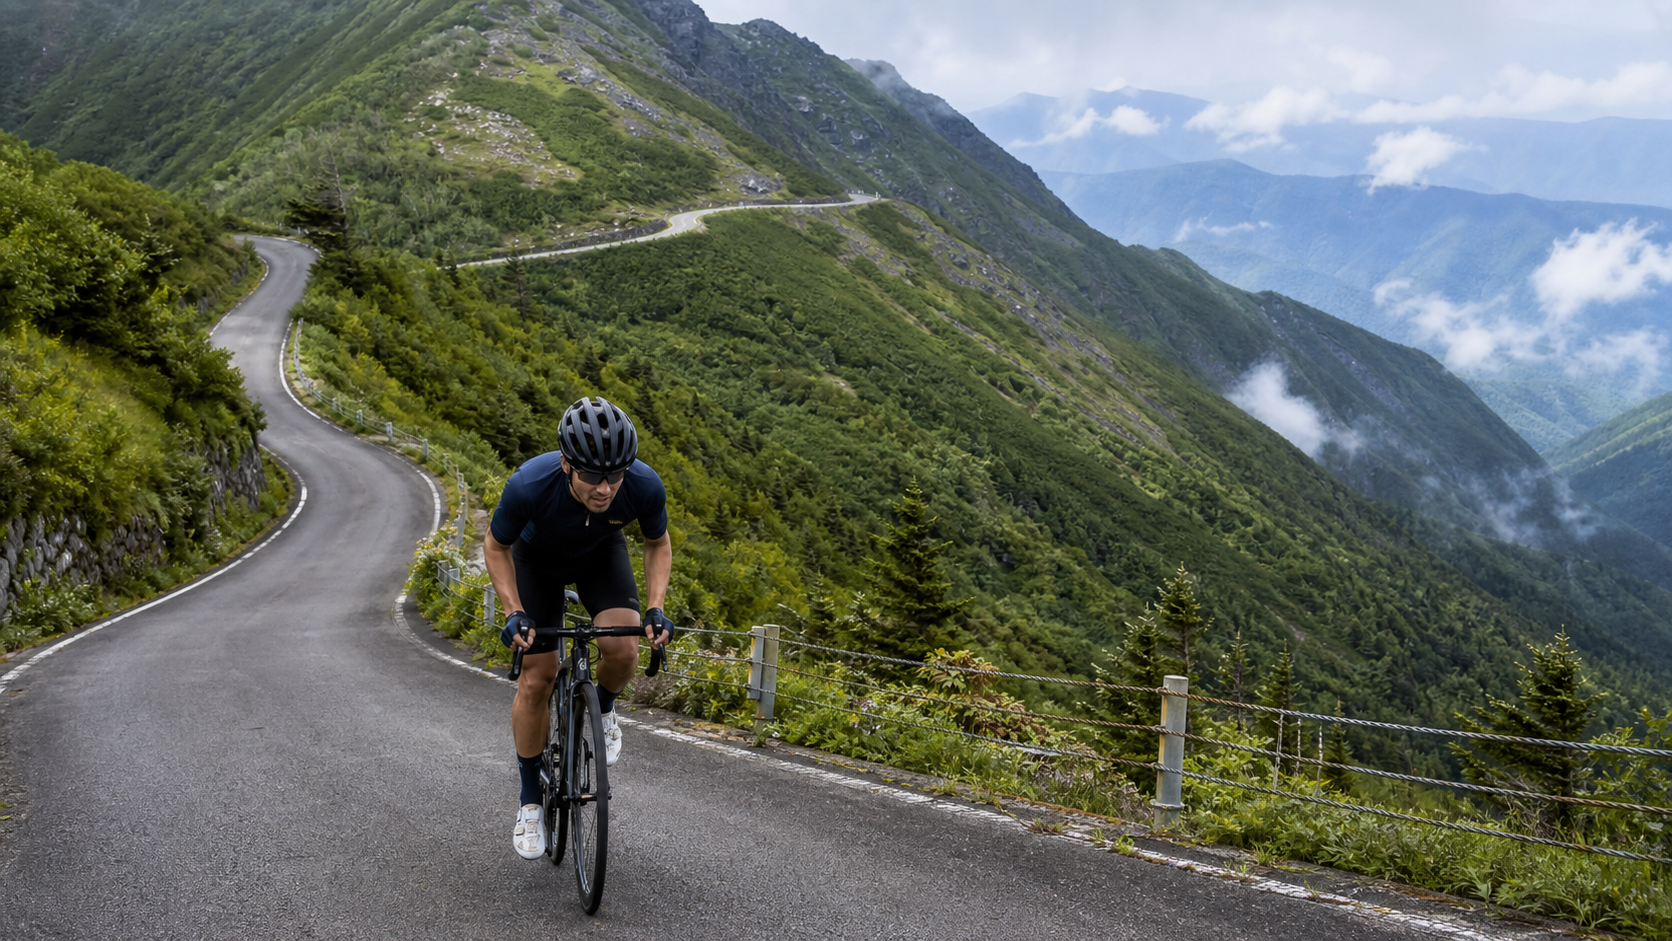
Mount Tsurugi (つるぎさん) is located in Mima District, Tokushima Prefecture, Japan. It is the highest peak in Tokushima Prefecture and is listed among the “100 Famous Japanese Mountains,” with its main peak standing at 1,955 meters. For road cyclists who love climbing, this is one of the most hardcore sacred places in the Shikoku region. The most representative climb segment data on Strava is as follows: segment distance approximately 15.02 km, total elevation gain approximately 1,945.3 meters, and average gradient approximately 6.5%.
Let’s break down the numbers first: 15.02 km translates to slightly more than 15,000 meters of horizontal distance, and within that distance you need to accumulate nearly 1,945 meters of vertical gain—this climbing density is astonishing. Converted to average gain per kilometer, that’s roughly 129 meters per kilometer, which already approaches the intensity level of many classic long climbs in Taiwan (such as some steep sections on the western approach to Wuling). An average gradient of 6.5% sounds “manageable,” but please note—this is an “average.” The actual road surface oscillates repeatedly between 4% and 10%, with several steep walls approaching or exceeding 10% interspersed throughout. For riders accustomed to the relatively consistent gradients of Taiwan’s Northern Cross-Island Highway or Fengguizui, the rhythm of Mount Tsurugi is closer to “continuous medium-to-high intensity intervals.”
To sum up Mount Tsurugi’s difficulty in one sentence: it’s not the kind of mountain you can “grind through” easily; it demands that you repeatedly digest one steep wall after another on a 6.5% average gradient, all while contending with the combined challenge of high altitude and ever-changing weather.
The endpoint for cyclists is typically set at the trailhead “Minokoshi” (見ノ越), at an elevation of approximately 1,400 meters. In other words, although Mount Tsurugi’s main peak reaches 1,955 meters, a rider’s two-wheeled journey ends at Minokoshi; the remaining 500-plus meters of vertical height must be covered on foot or by mountain cable car. This setup is actually quite rider-friendly: Minokoshi has a parking lot, a cable car station, restrooms, and supplies, making it a reasonable and safe turnaround or rest point.
Route Overview and Real Data Analysis
Mount Tsurugi’s most classic cycling climb route starts from the Sadamitsu area in western Tokushima Prefecture, ascending the northern slope along National Route 438. Using “Tsurugibashi” (剣橋) as the starting point, this climb spans approximately 15 km with an elevation difference of about 980 meters and an average gradient of about 6.5%. In addition to this main northern route, there is another route that cuts in from the coritori (Mizukoshi–Kiyabira direction) side, approximately 12 km with about 700 meters of climbing and an average gradient of about 5.8%. It’s slightly less intense and serves well as a second attempt or an alternative when weather conditions are poor.
Let’s organize the data for both routes into a table for easy comparison:
| Route | Distance | Elevation Gain | Average Gradient | Characteristics |
|---|---|---|---|---|
| Sadamitsu・National Route 438 North Side (Main Route) | Approx. 15 km | Approx. 980 m | Approx. 6.5% | Many steep walls, high rhythm variation, open scenery |
| Coritori Side (Southern Alternative) | Approx. 12 km | Approx. 700 m | Approx. 5.8% | Gentler gradients, more tree cover, less traffic |
| Strava Full Timed Segment | Approx. 15.02 km | Approx. 1,945.3 m | Approx. 6.5% | Covers a longer continuous climbing section |
It’s important to note that the “total elevation gain of approximately 1,945.3 meters” on Strava covers a more complete and longer continuous climbing section, which may include accumulated gain from connector and extension segments. That’s why the figure is higher than the “980-meter net elevation difference from Tsurugibashi to Minokoshi.” This is a common phenomenon when using GPS track data: net elevation gain and total ascent are two different concepts. Net elevation gain looks at the altitude difference between start and finish, while total ascent sums up all the upward elevation changes along the way. As long as the route has undulations (up, then down, then up again), total ascent will be significantly greater than net elevation gain.
The practical implication for riders is: the actual work your legs must do is closer to the total ascent figure, not the net elevation gain. So don’t be fooled by the relatively mild-sounding “980-meter elevation difference”—when you actually start pedaling, your body will honestly tell you that this mountain is far harder than it looks on paper.
Why the Average Gradient Can Be “Deceiving”
Many beginners see the 6.5% average gradient and compare it to some 6.5% mountain road they’ve climbed before, then conclude “I should be able to handle this.” But the average gradient is a highly condensed statistic that smooths over all the details. In reality, the gradient distribution on Mount Tsurugi’s northern route looks roughly like this:
- Starting section (first 3 km): Relatively gentle gradients, around 4% to 6%. This is the critical zone for warming up and establishing your rhythm.
- Middle section (3 to 10 km): Gradients begin to ramp up, with 7% to 9% sections appearing repeatedly, interspersed with several steep walls approaching 10%.
- Final section (after 10 km to Minokoshi): Altitude is already high, making the effort feel heavier; some inside sections of hairpin turns can spike to over 10%.
In other words, what truly determines the success or failure of your ride isn’t that 6.5% average—it’s whether you can maintain a non-collapsing pedal stroke on those 9% and 10% steep walls in the middle and later sections.
Stage-by-Stage Guide from Start to Finish
Below, I’ve broken down the main northern route along Sadamitsu・National Route 438 into five stages for detailed analysis. Treat this as a battle map, not a continuous straight line.
Stage 1: Sadamitsu Town to Tsurugibashi (Warm-Up and Foundation Zone)
Starting from Sadamitsu town, follow National Route 438 and gradually advance toward the mountain area. The gradient here is relatively gentle—it’s the only section where you can “pedal comfortably.” Be sure to use it for the following three things: first, bring your heart rate into a steady aerobic zone, but absolutely do not get excited and push hard; second, confirm that your drivetrain, brakes, and tire pressure are all normal; third, do a final supply check to ensure your water bottles are full and your nutrition is within easy reach.
For pacing, I recommend keeping your power or heart rate at an intensity where “you could carry on a conversation.” Many riders unconsciously push the intensity higher here because their legs feel fresh and the road isn’t steep, burning through the capital they need for the next 10 kilometers. Mount Tsurugi is not a short climb; it’s a long-term battle that requires careful energy allocation.
Stage 2: Tsurugibashi to the Midpoint (Officially Entering the Climb)
Past Tsurugibashi, the real climb begins. The gradient gradually rises from here into a regular 6% to 7% range, and the road starts showing continuous ascending sections. The focus of this stage is to “find and lock in your rhythm”—a cadence and intensity you can sustain for over 40 minutes without letting your heart rate spike into the anaerobic zone.
For gear usage, this is where you should start making good use of your climbing gears. I recommend maintaining a cadence of 70 to 80 rpm. If you find your cadence dropping below 60 rpm and you’re forced to “stomp” every pedal stroke, that means your gear is too heavy, or your intensity is already too high—both are precursors to cramping or blowing up later.
Stage 3: Mid-Section Continuous Steep Walls (The Decisive Zone)
This is the most critical and mentally crushing section of the entire Mount Tsurugi climb. Gradients here repeatedly hit 8% to 10% steep walls, and they often come “one after another,” rarely giving you a breather. Psychologically, the most torturous part is this: you think that once you crest this wall, it’ll ease up, but around the next bend there’s an even steeper one waiting.
The strategy is “segment digestion”: don’t think about how many kilometers remain; instead, focus on “climbing the one steep wall right in front of you.” When you hit a steep wall, decisively shift to your easiest gear and use cadence to dissolve the gradient, spreading the load across more pedal strokes evenly rather than using brute force against gravity on every stroke. The brief respites between steep walls are your golden opportunities for “active recovery”: shift to a slightly harder gear, relax your upper body, take deep breaths, and flush out some lactate to store energy for the next wall.
The mid-section steep wall zone of Mount Tsurugi is the mirror that reveals which riders have “trained” and which haven’t. There are no shortcuts here—only solid climbing fundamentals and disciplined pacing can get you through.
Stage 4: High-Altitude Extension Section (A Dual Test of Will and Environment)
After conquering the mid-section steep walls, you’re already at considerable altitude. The gradient here isn’t necessarily the steepest of the entire route, but you’ll encounter two new enemies: first, the accumulation of perceived fatigue—your legs have been working for over an hour; second, the thin-air sensation of high altitude—although Minokoshi’s elevation of about 1,400 meters isn’t enough to cause severe altitude sickness, the reduced oxygen content compared to sea level will make your breathing more labored and your heart rate harder to keep down.
The pacing philosophy for this section is “conservative, then more conservative.” Better to go slower and steadier than to impulsively accelerate just because the finish line is in sight. Many DNFs (did not finish) or cramping collapses happen precisely at those “victory in sight but energy depleted” moments.
Stage 5: Minokoshi Trailhead (Final Sprint and Wrap-Up)
When you see the buildings of the Minokoshi trailhead, the cable car station, and the parking lot, your two-wheeled journey is nearly complete. If you still have energy left in this final stretch, you can slightly increase the intensity and enjoy the satisfaction of crossing the line. But if you’re already on the edge of survival, make “arriving safely” your top priority—don’t risk cramping or crashing for the sake of a few seconds on the clock.
After arriving at Minokoshi, the first thing to do is stay warm. During the climb, your body generated massive heat and your clothing is soaked with sweat. Once you stop, the high altitude combined with mountain winds will cause your body temperature to drop rapidly, and the risk of hypothermia is not to be underestimated. Immediately put on the windbreaker or shell jacket you brought up.
Gear Ratio and Equipment Recommendations
Facing a mountain with such extreme climbing density as Mount Tsurugi, gear ratio selection is almost the decisive variable in whether you “can finish.” Here are gear ratio recommendations for riders of different levels for reference:
| Rider Level | Recommended Chainring | Recommended Cassette | Notes |
|---|---|---|---|
| Advanced/Strong | 50-34 (Compact) | 11-32 or 11-34 | Those with solid climbing fundamentals should still bring a large gear range |
| General Enthusiast | 50-34 (Compact) | 11-34 | This is the most mainstream and safe configuration |
| Conservative/Beginner | Sub-compact 48-32 or GRX | 11-36 or even larger | Better to have gears too light than to get stuck on a steep wall |
A very important concept: on a mountain like Mount Tsurugi, “gears too light” is almost never a problem, but “gears too heavy” can cause you to collapse on the spot. When you’re on a 10% steep wall, your cadence drops to 50 rpm, and you’re pushing every stroke with your knees, you’ll deeply regret not bringing one more large cog. Knees are a rider’s most precious asset; forcing heavy gears up steep climbs with brute strength is the number one cause of knee injury.
Other equipment priorities:
- Wheels: Climbing comes first—the lighter, the better. Low-profile rims are the top choice; Mount Tsurugi’s mountain winds are unpredictable, and overly deep rims add handling burden in crosswind sections.
- Tire Pressure: Mountain roads aren’t always smooth. You don’t need to pump tires to the maximum; slightly reducing pressure improves grip and comfort.
- Clothing: This is the most underestimated aspect of Mount Tsurugi. Be sure to carry a packable windbreaker. Temperature differences between the base and the summit, and between climbing and descending, can exceed 10 degrees Celsius.
- Lighting: Some sections of the mountain may have tunnels or dense fog. Front and rear lights are a must—bring them and confirm battery levels.
Nutrition and Hydration Strategy
Supply points in the Mount Tsurugi area are extremely scarce, and this must be planned before you set out. You can’t expect convenience stores every few kilometers like in the urban suburbs. Be sure to fill your water bottles and stock up on supplies in the Sadamitsu area at the base.
Recommended nutrition rhythm:
- Hydration: For a 15 km hard climb, prepare at least two water bottles (consider a hydration pack if the weather is hot). Take small sips every 10 to 15 minutes while climbing—don’t wait until you’re thirsty to drink, because by the time you feel thirst, your body is already mildly dehydrated.
- Energy: During prolonged high-intensity climbing, glycogen depletes rapidly. I recommend supplementing with energy gels, energy bars, or bananas—easily digestible carbohydrates—every 30 to 40 minutes.
- Electrolytes: Prolonged sweating causes significant sodium loss. Replacing only water without electrolytes can actually lead to hyponatremia and worsen cramping. Electrolyte tablets or sports drinks are essential.
The Minokoshi trailhead is one of the few spots in the mountains with supplies and restrooms, making it a good node to refuel and rest briefly.
Weather and Seasonal Considerations
Mount Tsurugi is located in a high-altitude mountain area with extremely changeable weather—this is one of its risk aspects that must be taken most seriously. It can be clear and sunny at the base while dense fog, rain, or even a sudden temperature drop hits the summit. Here are seasonal observations and recommendations:
- Spring (April to May): Residual cold lingers in the mountains; high elevations may still have low temperatures, so proper insulation is needed.
- Summer (June to August): This is the most popular challenge season, but beware of afternoon thunderstorms and slippery roads; be sure to start early to avoid unstable afternoon weather.
- Autumn (September to November): Weather is relatively stable with good visibility—a great time to enjoy mountain scenery, but temperature differences between day and night are extreme.
- Winter: The mountains may have snow and ice, making it unsuitable for general riders to challenge. It’s not recommended to go rashly.
Regardless of the season, always check the local real-time weather forecast before departing and maintain the flexibility to turn back at any time. The mountain will always be there; getting home safely is the true finish line of every challenge.
Common Mistakes and DNF Risks
Based on the general patterns of long climbs, here are the most common mistakes riders make on Mount Tsurugi, along with the corresponding DNF (did not finish) risks:
- Pacing too fast in the early section: This is the most common and most fatal mistake. The gentle 3 km at the start lulls you into complacency, and by the time you hit the mid-section steep walls, you discover your energy is already depleted.
- Gear ratio too heavy: Underestimating the steep walls behind that 6.5% average gradient, you bring gears that aren’t light enough and are forced to grind at low cadence on the steep walls, accelerating cramping.
- Insufficient supplies: Mistakenly thinking 15 km “isn’t that long,” you don’t bring enough water and energy, leading to an energy crash in the later stages.
- Neglecting to stay warm: Failing to warm up promptly after reaching Minokoshi, you get chilled in the mountains, which can even affect your handling on the descent.
- Taking the weather lightly: Not checking the forecast, not bringing rain gear or a windbreaker, you find yourself in danger when the mountain weather suddenly turns.
Avoid these five mistakes, and you’ll already be ahead of most first-time challengers.
Target Time Table for Riders of Different Levels
Finally, here’s a reference table of target completion times for riders of different levels. Please note that these are rough reference ranges only; actual times will vary greatly depending on individual fitness, weather, road conditions, and rest frequency. Don’t compare yourself rigidly with others:
| Rider Level | 15 km Climb Target Time | Positioning |
|---|---|---|
| Elite Competitive | Within 60 minutes | Requires extremely high power-to-weight ratio and solid climbing training |
| Advanced Enthusiast | 70 to 85 minutes | Has regular training and rich climbing experience |
| General Enthusiast | 90 to 110 minutes | Goal is steady completion and enjoying the process |
| Conservative Finisher | Over 110 minutes | Safe arrival at Minokoshi is the only goal |
For the vast majority of riders, the meaning of Mount Tsurugi is never about competing with the numbers on the bike computer, but about standing at the Minokoshi trailhead, looking back at the nearly 2,000 meters of climbing you just conquered with your own legs, and feeling that pure sense of accomplishment. Pace yourself well, stock up on supplies, bring the right gear, and read the weather clearly—Mount Tsurugi will reward every bit of your preparation and sweat with its magnificent high-mountain scenery.
Mount Tsurugi is not a mountain for you to “conquer,” but one worthy of your “respect.” Set out with thorough preparation and a humble mindset, and you’ll find that those 1,945 meters of climbing ultimately settle not into pain, but into an unforgettable riding memory for a lifetime.
Deep Dive: Why Climbing Density Is the Soul of Mount Tsurugi
If there’s one core concept for understanding Mount Tsurugi’s difficulty, it’s “climbing density.” Climbing density refers to the accumulated vertical gain per unit of distance. As mentioned earlier, the Strava timed segment averages about 129 meters of gain per kilometer—a figure that ranks as quite hardcore on the world climbing map. By comparison, many so-called “classic climbs” average between 60 and 90 meters per kilometer, while Mount Tsurugi pushes that number up by a significant margin.
High climbing density means your power output has almost no “rest window.” On routes with lower climbing density, gradients alternate noticeably between hard and easy, allowing you to actively recover on gentler sections. But Mount Tsurugi’s problem is that its gentler sections are too few and too short—your legs remain under sustained high load for extended periods. This is a dual, severe test of both “muscular endurance” and “aerobic endurance.”
This is also why training for Mount Tsurugi can’t just focus on “short-duration high power”; you must also train “long-duration steady output.” A person who can sustain high power for 30 minutes on flat ground won’t necessarily finish Mount Tsurugi. Conversely, riders who have accumulated long aerobic mileage over time and excel at “grinding mountains with endurance” are often the ones who complete the challenge more comfortably.
Power-to-Weight Ratio: The Most Honest Climbing Metric
In the world of climbing, the most honest metric is always “power-to-weight ratio” (W/kg)—the watts you can sustain divided by your body weight (including bike and gear). Mount Tsurugi’s nearly 2,000 meters of climbing will lay every rider’s power-to-weight ratio bare in the sunlight.
Here’s a simple concept: on the same gradient, the lighter you are and the higher your sustainable power, the easier and faster you climb. This is why professional climbing specialists tend to be lean. For general enthusiasts, rather than obsessing over buying more expensive lightweight components to save a few hundred grams, it’s better to first make your body leaner and raise your sustainable power output—that’s the “upgrade” with the highest return on investment.
Descent Safety: A Severely Underestimated Hidden Risk
The vast majority of articles about challenging Mount Tsurugi focus on “how to climb up,” yet few seriously discuss “how to ride down safely.” But in fact, the descent is often the period with the highest accident rate, for three reasons:
First, your energy is depleted and your focus has dropped. You’ve poured all your strength into the climb; after reaching the summit, you’re physically and mentally exhausted—and it’s precisely this state that leads to judgment errors on the descent.
Second, mountain roads and corners are complex. Mount Tsurugi’s northern side has numerous hairpin turns and consecutive bends, plus the mountains may have fallen leaves, gravel, and slippery surfaces. If you don’t control your cornering speed, you can easily lose control.
Third, high-speed descending causes a rapid drop in body temperature. You’re drenched in sweat from climbing; once you transition to a fast descent, the strong relative wind will rapidly chill your soaked body. Frozen fingers directly affect your ability to operate the brakes.
The safety rules for descending are therefore very clear: be sure to put on a windbreaker after reaching the summit to stay warm; reduce speed on the descent and leave ample braking distance; brake early before corners and use the “outside-inside-outside” safe line; keep both hands on the brake levers at all times and brake intermittently with a “pulse” technique to avoid prolonged dragging that overheats rims or rotors.
Remember an old saying: climbing relies on the legs, descending relies on the brain. The complete challenge of Mount Tsurugi only truly ends when you’re “safely back at the bottom,” not at the moment you reach the summit.
Training Recommendations: How to Prepare for Mount Tsurugi
If you’ve set Mount Tsurugi as a goal, here are preparation directions spanning several weeks to several months, for serious riders to consider:
- Accumulate long aerobic mileage: Schedule one long-distance, steady-intensity ride per week to train your body’s ability to sustain energy output over time. This is the most fundamental capital for finishing Mount Tsurugi.
- Targeted climbing training: Find climbs with 6% to 10% gradients near your home and do “climbing intervals” to simulate the rhythm of Mount Tsurugi’s consecutive steep walls.
- Strengthen muscular endurance: Moderate low-cadence climbing (heavy gear, low rpm) builds the muscular strength needed for climbing, but progress gradually and watch your knee load.
- Simulate long climbs: If you have access to a sufficiently long continuous climb, arrange an “uninterrupted long climb” simulation to test your pacing, nutrition, and mental tolerance.
- Weight management: Within healthy limits, pushing your power-to-weight ratio higher is one of the most effective ways to improve climbing performance.
Thorough preparation isn’t just about “riding faster”; it’s about “riding safer and enjoying it more.” A well-prepared rider can still maintain the leisure to appreciate the high-mountain scenery between each steep wall on Mount Tsurugi, while an under-prepared rider can only struggle in pain or even be forced to abandon midway. The difference between the two often comes down to the dedication in the weeks before departure.
May every rider who challenges Mount Tsurugi, armed with thorough preparation, calm pacing, and a humble heart, safely stand at Minokoshi—and safely return to the base. These 15 kilometers and nearly 2,000 meters of climbing will become a shining memory in your cycling career.
Practical Reminders for Transportation and Itinerary Planning
For Taiwanese riders, challenging Mount Tsurugi is usually a journey that requires advance planning. Mount Tsurugi is located in the mountains of Tokushima Prefecture, Shikoku, not adjacent to a major city. Whether you’re driving with your bike, renting a car, or combining public transportation transfers, you need to do your homework in advance. I recommend treating “getting to the starting point in the Sadamitsu area” as part of your itinerary planning, leaving ample buffer time to avoid traffic delays compressing the safe time window for climbing and descending.
In terms of itinerary rhythm, I strongly recommend “starting early.” Afternoon weather in the Shikoku mountains tends to become unstable; the earlier you start climbing, the greater your chance of completing the summit and descent before the weather turns. Scheduling the entire challenge in the morning hours is the safest approach. Also, be sure to inform riding companions or family of your route and estimated time. Mountain signals may be unreliable, so establishing a basic safety communication mechanism is very important.
Additionally, Mount Tsurugi’s Minokoshi has a mountain cable car. If you have the energy and time, after securing your bike, taking the cable car or hiking to the summit to enjoy Mount Tsurugi’s main peak and the famous high-altitude susuki grass fields will be an extra reward for this journey. After all, you’ve already climbed to 1,400 meters on your own legs—the scenery of the remaining 500 meters is worth seeing with your own eyes.
Once transportation, itinerary, weather, and safety communication are all properly planned, your Mount Tsurugi challenge is truly “ready.” The rest is up to your solid legs and calm mind.
Related Reading
- Riding into a Thousand-Year Legend: The Heike Tragedy, Lost Ark, and Sky-High Susuki Fields of the Tsurugisan Hill Climb
- Shikoku Karst Sky Road Race Guide: 13.6 km of Scenic Highland, Medium Difficulty for Top-Tier Views
- Kirishima Ebino Highland Climb Race Guide: Full Data Analysis of a 12 km, 861 m Climb on a Volcanic Highland
- Shibutoge Race Guide: 26.97 km Climbing to Japan’s Highest National Highway Point at 2,172 m in Nagano’s Sacred Domain
台北闊瀨陡坡 騎旅 / 日本單車雜誌編輯車友臨時加入!/ 髮香才是最強的 / feat. 北迴歸線小隊 / 公路車 CT Yeh
6 個月前
2025 乘鞍岳登山賽 比賽全紀錄篇 / 完整路線攻略介紹 / 日本版武嶺 公路最高點 / 高山空拍絕景 / 明年會開團! / 公路車 / CT Yeh
10 個月前
大武山後門26%歡樂陡坡!JJSC南台灣單車行Day2 / 被颱風追著跑 / 公路車 / CT Yeh
2 年前
2025 乘鞍 KOM 登山賽挑戰實錄 / 日本公路最高 ! 賽前探路篇 / 比富士山厲害,無敵絕景!/ 40週年 / 中文YT首發 / 公路車 / CT Yeh #乘鞍ヒルクライム
11 個月前
富士山KOM 賽事篇 VLOG!/ 小野田出沒!/ 完整路段分析 / 武嶺要騎多快才能拿環?/ 台灣選手 第20回Mt.富士ヒルクライム 参加!/ 公路車 / CT Yeh
2 年前
萬年峽谷! 30% 超激陡坡 里佳部落DAY2 還是很硬! | 公路車 | CT Yeh
3 年前
團練) 4K NEKO 雙崎部落 間歇 狂拉 爽飛天 19/05/11
7 年前
騎單車去大屯山賞雪! 助航台滑冰 全記錄 | 台北R友大集合 | 下雪打雪仗囉 | 4K超高畫質
5 年前